Page 91 of 4133

41 Seats
Te ch n ica l
data Instruments
and controlsOperationDrivingInstrument
cluster displayPractical hints Car care Index Only minor personal adjustments, as described below,
should then be required.
For exterior rear view mirrors, see page 73;
inside rear view mirror, see page 71;
steering wheel adjustment, see page 70.
Note:
See page 42 for instructions on storing and recalling the
seat position.Head restraint
Raising:
Pull up on head restraint.
Lowering:
Push button, located at top of seat back, and push down
on head restraint, see also page 43.
Adjust head restraint to support the back of the head
approximately at ear level. The head restraint angle can
also be adjusted manually.
See page 43 for removing head restraints.
Wa r n i n g !
When leaving the vehicle always remove the key
from the steering lock, and lock your vehicle.The power seats can also be operated with the
driver’s or passenger door open. Do not leave
children unattended in the vehicle or with access
to an unlocked vehicle. Unsupervised use of vehicle
equipment may cause serious personal injury.
Page 100 of 4133

50 Restraint systems
Te ch n ica l
data Instruments
and controlsOperationDrivingInstrument
cluster displayPractical hints Car care Index
Operation
The inertia reel stops the belt from unwinding during
sudden vehicle stops or when quickly pulling on the
belt. The locking function of the reel may be checked by
quickly pulling out the belt.
Unfastening of seat belts
Push the release button (3) in the belt buckle (2).
Allow the retractor to completely rewind the seat belt by
guiding the latch plate (1).
Wa r n i n g !
USE SEAT BELTS PROPERLY.• Seat belts can only work when used properly.
Never wear seat belts in any other way than as
described in this section, as that could result
in serious injuries in case of an accident.• Each occupant should wear their seat belt at all
times, because seat belts help reduce the
likelihood of and potential severity of injuries
in accidents, including rollovers. The
integrated restraint system includes “SRS”
(driver airbag, front passenger airbag, front
and rear door mounted side impact airbags),
“ETR” (seat belt emergency tensioning
retractors for the outboard passenger seats
[except in the optional 3rd row seats]), and
front seat knee bolsters. The system is
designed to enhance the protection offered to
properly belted occupants in certain frontal
(front airbags) and side (side impact airbags)
impacts which exceed preset deployment
thresholds.
Page 103 of 4133

53 Restraint systems
Te ch n ica l
data Instruments
and controlsOperationDrivingInstrument
cluster displayPractical hints Car care Index BabySmart
TM airbag deactivation system
Special BabySmart
TM compatible child seats, designed
for use with the Mercedes-Benz system and available at
any authorized Mercedes-Benz Center are required for
use with the BabySmart
TM airbag deactivation system.
With the special child seat properly installed, the
passenger front airbag will not deploy. The 7
indicator lamp located in the instrument cluster will be
illuminated, except with key removed or in steering lock
position 0. The system does not deactivate the door
mounted side impact airbag.
Self-test BabySmart
TM
without special child seat installed
After turning key in steering lock to position 1 or 2, the
7 indicator lamp located in the instrument cluster
comes on for approximately 6 seconds, extinguishes,
then blinks once.
If the indicator lamp should not come on or is
continuously lit, the system is not functioning. You must
see an authorized Mercedes-Benz Center before seating
any child on the front passenger seat.
BabySmart
TM is a trademark of Siemens Automotive Corp.
Wa r n i n g !
The BabySmart
TM Airbag Deactivation System will
ONLY work with a special child seat designed to
operate with it. It will not work with child seats
which are not BabySmart
TM compatible.
Never place anything between seat cushion and
child seat (e.g. pillow), since it reduces the
effectiveness of the deactivation system.Follow the manufacturer’s instructions for
installation of special child seats.
The passenger side front airbag will not deploy
only if the 7 indicator lamp remains
illuminated.Please be sure to check the indicator every time
you use the special system child seat.Should the light go out while the restraint is
installed, please check installation. If the light
remains out, do not use the BabySmart
TM restraint
to transport children on the front passenger seat
until the system has been repaired.
Page 107 of 4133
57 Restraint systems
Te ch n ica l
data Instruments
and controlsOperationDrivingInstrument
cluster displayPractical hints Car care Index 3Side impact airbag, front
The side impact airbags are located in the front and rear
doors.
In conjunction with wearing the seat belts, the driver
and front passenger airbags can provide increased
protection for the driver and front passenger in certain
frontal impacts exceeding preset thresholds.4Side impact airbag, rear
Door mounted side impact airbags can provide
increased protection to belted outboard occupants on
the impacted side of the vehicle in side impacts
exceeding its preset threshold.
Important!
The operational readiness of the airbag system is
verified by the indicator lamp “SRS” in the instrument
cluster when turning the key in steering lock to
position 1 or 2. If no fault is detected, the lamp will go
3
Page 123 of 4133
73 Rear view mirrors
Te ch n ica l
data Instruments
and controlsOperationDrivingInstrument
cluster displayPractical hints Car care Index Exterior rear view mirrors
The switch is located on the center console.
Turn key in steering lock to position 1 or 2.First select the mirror to be adjusted – turn switch:
1Left mirror
2Right mirror
To adjust, toggle the switch forward, backward or to
either side.
Note:
After turning off the engine the exterior rear view
mirrors can be operated with a front door opened or
with key in steering lock position 1 for approximately
30 minutes.
P82.00-2044-26
Wa r n i n g !
Exercise care when using the passenger-side
mirror. The passenger-side exterior mirror is
convex (outwardly curved surface for a wider field
of view). Objects in mirror are closer than they
appear. Check your inside rear view mirror or
glance over your shoulder before changing lanes.
Page 125 of 4133

75 Rear view mirrors
Te ch n ica l
data Instruments
and controlsOperationDrivingInstrument
cluster displayPractical hints Car care Index Exterior rear view mirror, electrically folding
(optional on ML 320 and ML 430)
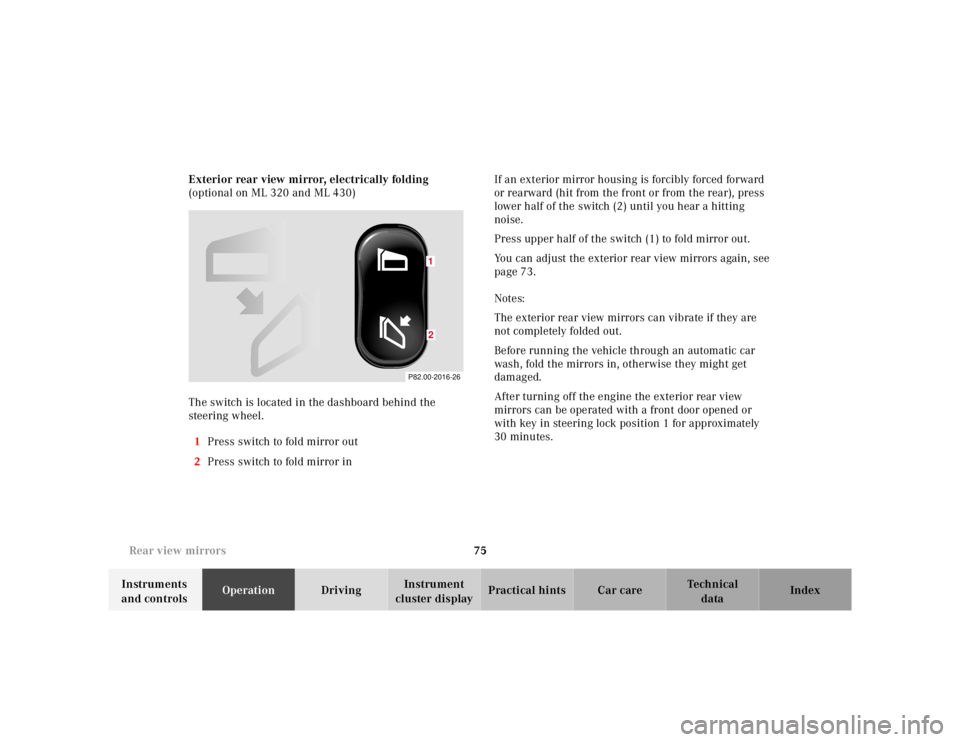
The switch is located in the dashboard behind the
steering wheel.
1Press switch to fold mirror out
2Press switch to fold mirror inIf an exterior mirror housing is forcibly forced forward
or rearward (hit from the front or from the rear), press
lower half of the switch (2) until you hear a hitting
noise.
Press upper half of the switch (1) to fold mirror out.
You can adjust the exterior rear view mirrors again, see
page 73.
Notes:
The exterior rear view mirrors can vibrate if they are
not completely folded out.
Before running the vehicle through an automatic car
wash, fold the mirrors in, otherwise they might get
damaged.
After turning off the engine the exterior rear view
mirrors can be operated with a front door opened or
with key in steering lock position 1 for approximately
30 minutes.
P82.00-2016-26
12
Page 130 of 4133

80 Instrument cluster
Te ch n ica l
data Instruments
and controlsOperationDrivingInstrument
cluster displayPractical hints Car care Index
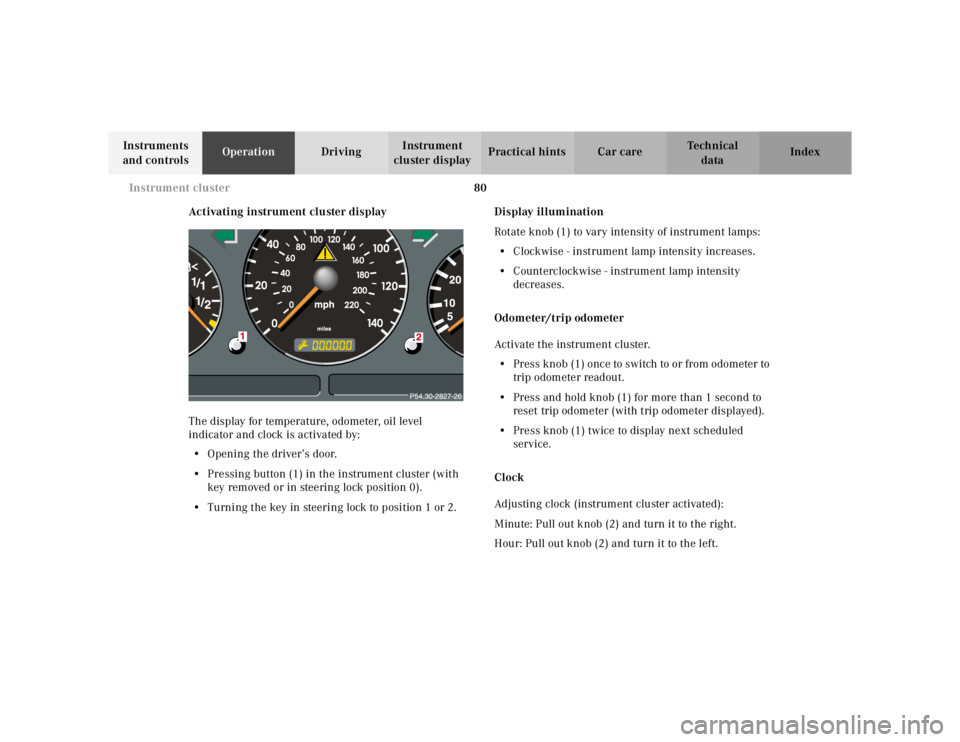
Activating instrument cluster display
The display for temperature, odometer, oil level
indicator and clock is activated by:
•Opening the driver’s door.
•Pressing button (1) in the instrument cluster (with
key removed or in steering lock position 0).
•Turning the key in steering lock to position 1 or 2.Display illumination
Rotate knob (1) to vary intensity of instrument lamps:
•Clockwise - instrument lamp intensity increases.
•Counterclockwise - instrument lamp intensity
decreases.
Odometer/trip odometer
Activate the instrument cluster.
•Press knob (1) once to switch to or from odometer to
trip odometer readout.
•Press and hold knob (1) for more than 1 second to
reset trip odometer (with trip odometer displayed).
•Press knob (1) twice to display next scheduled
service.
Clock
Adjusting clock (instrument cluster activated):
Minute: Pull out knob (2) and turn it to the right.
Hour: Pull out knob (2) and turn it to the left.
Page 141 of 4133

91 Exterior lamp switch
Te ch n ica l
data Instruments
and controlsOperationDrivingInstrument
cluster displayPractical hints Car care Index Turn signal failure
If one of the turn signals fails, the turn signal indicator
system f lashes and sounds at a faster than normal rate.
Standing lamps
When the vehicle is parked on the street the standing
lamps (right or left side parking lamps) can be turned
on, making the vehicle more visible to passing vehicles.
The standing lamps cannot be operated with the key in
steering lock position 1 or 2.
Note:
With the key removed and a front door open, a warning
sounds if the vehicle’s exterior lamps (except standing
lamps) are not switched off.Daytime running lamps (Canada only)
When the engine is running and the selector lever is in
a driving position, the low beam headlamps (includes
parking lamps, side marker lamps, taillamps and
license plate lamps) are automatically switched on.
When shifting from a driving position to position “N”
or “P”, the low beam switches off (2 seconds delay).
For nighttime driving the exterior lamp switch should
be turned to position õ to permit activation of the
high beam headlamps.