Page 890 of 4133
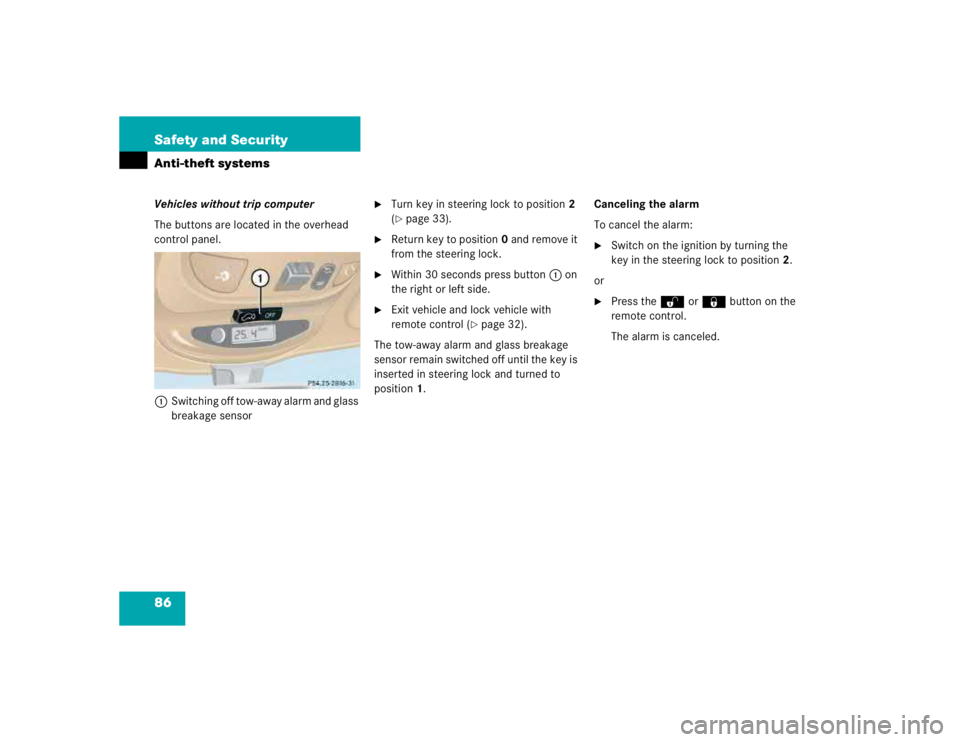
86 Safety and SecurityAnti-theft systemsVehicles without trip computer
The buttons are located in the overhead
control panel.
1Switching off tow-away alarm and glass
breakage sensor
�
Turn key in steering lock to position2
(�page 33).
�
Return key to position0 and remove it
from the steering lock.
�
Within 30 seconds press button1 on
the right or left side.
�
Exit vehicle and lock vehicle with
remote control (
�page 32).
The tow-away alarm and glass breakage
sensor remain switched off until the key is
inserted in steering lock and turned to
position1.Canceling the alarm
To cancel the alarm:
�
Switch on the ignition by turning the
key in the steering lock to position2.
or
�
Press theŒ or ‹button on the
remote control.
The alarm is canceled.
Page 892 of 4133

88 Controls in detailLocking and unlocking
�In the “Controls in detail” section you will
find detailed information on how to ope-
rate the equipment installed in your vehi-
cle. If you are already familiar with the ba-
sic functions of your vehicle, this section
will be of particular interest to you.
To quickly familiarize yourself with the ba-
sic functions of the vehicle, refer to the
“Getting started” section of this manual.
The corresponding page numbers are
given at the beginning of each segment.
Locking and unlocking
Remote control with folding key
Your vehicle comes supplied with two
remote controls with folding key.
The remote control provides an extended
operating range. To prevent theft,
however, it is advisable to only unlock the
vehicle when you are in close proximity to
it.
The key centrally locks and unlocks:�
the doors
�
the liftgate
�
the fuel filler flap1ÂPanic button (
�page 75)
2ŒUnlock button
3‹Lock button
4Release button for key
5ŠUnlock button for liftgate
iIf the key is inserted in the steering
lock, the vehicle cannot be locked or
unlocked with the remote control.
!To prevent possible malfunction, avoid
exposing the remote control to high
levels of electromagnetic radiation.
Page 893 of 4133

89 Controls in detail
Locking and unlocking
Unlocking
Unlocking the driver’s door and fuel
filler flap�
Press buttonΠonce.
All turn signal lamps flash once to indi-
cate that the driver’s door and the fuel
filler flap are unlocked.Global unlocking
�
Press buttonΠtwice.
All turn signal lamps flash once to indi-
cate that all doors, fuel filler flap and
liftgate are unlocked.
Unlocking the liftgate
�
Press buttonŠ.
Only the liftgate unlocks.
Locking
�
Press button‹ once.
All turn signal lamps flash three times
to indicate that all doors, the liftgate
and the fuel filler flap are locked.
iUnlocking the vehicle with the remote
control deactivates the anti-theft
alarm.
The vehicle will lock again automatical-
ly and reactivate the anti-theft system
within approximately 40 seconds of un-
locking if neither door nor liftgate is
opened.
iLocking the vehicle with the remote
control activates the anti-theft alarm.
iIf the turn signal lamps do not flash
three times, one of the following ele-
ments may not be properly closed:�
a door
�
the liftgate
�
the hood
Close the respective element and lock
the vehicle again.
Warning!
G
When leaving the vehicle, always remove the
key from the steering lock, and lock your ve-
hicle. Do not leave children unattended in
the vehicle, or with access to an unlocked
vehicle. Unsupervised use of vehicle equip-
ment may cause an accident and / or seri-
ous personal injury.
Page 895 of 4133
91 Controls in detail
Locking and unlocking
Opening the liftgate
Opening the liftgate from outside
A minimum height clearance of 7 ft
(2.15 m) is required to open the liftgate.
The handle is located above the rear
license plate recess.
1Grip molding
2Handle�
Pull on handle2.
�
Swing the liftgate upward by using the
grip molding.Opening the liftgate from inside
A minimum height clearance of 7 ft
(2.15 m) is required to open the liftgate.
The release lever is located on the inside of
the liftgate.
1Handle
2Catch
iIf the vehicle has previously been
locked from the outside with the re-
mote control, opening a door from the
inside will trigger the alarm.
To cancel the alarm, do one of the
following:
Switch on the ignition by turning the
key in the steering lock to position2.
or
Press the‹ or Œbutton on the
remote control.
The alarm is cancelled.
!Always make sure that there is suffi-
cient overhead clearance.iThe vehicle must be unlocked.
Page 896 of 4133

92 Controls in detailLocking and unlocking�
To unlock the liftgate, move the
catch2 to the right.
�
Pull handle1 down and swing liftgate
upward.
Closing the liftgate
1Recessed grip
2Grip molding�
Pull down on recessed grip1.
�
Close liftgate by using grip molding2.
!Always make sure that there is suffi-
cient overhead clearance.iTo lock the liftgate, move the catch2
to the left.Warning!
G
When leaving the vehicle, always remove the
key from the steering lock and lock the vehi-
cle. Do not leave children unattended in the
vehicle. Children could open the liftgate
from inside, which could result in an acci-
dent and / or serious personal injury.
Warning!
G
To prevent possible personal injury, always
keep hands and fingers away from the liftga-
te opening when closing the liftgate. Be es-
pecially careful when small children are
around.
Do not close the liftgate from the inside by
pulling on the handle.Warning!
G
Only drive with the liftgate closed as exhaust
fumes may enter the vehicle interior.iTo prevent an inadvertent lockout, do
not place the key in the cargo compart-
ment.
Page 898 of 4133

94 Controls in detailLocking and unlockingLocking and unlocking from the inside
You can lock or unlock the doors and the
tailgate from inside using the central lock-
ing switch. This can be useful, for example,
if you want to lock the vehicle before start-
ing to drive.Locking
�
Press upper part1 of central locking
button (
�page 93).
If all the doors are closed, the vehicle
locks.
Unlocking
�
Press lower part2 of central locking
button (
�page 93).
The vehicle unlocks.
Warning!
G
When leaving the vehicle, always remove the
key from the steering lock and lock the vehi-
cle. Do not leave children unattended in the
vehicle, or with access to an unlocked vehi-
cle. Unsupervised use of vehicle equipment
may cause an accident and / or serious per-
sonal injury.
iYou can open a locked door from the
inside. Open door only when conditions
are safe to do so.
If the vehicle was previously centrally
locked using the remote control, it will
not unlock using the central locking
switch.
Page 909 of 4133

105 Controls in detail
Memory function*
�Memory function*
With the memory button you can store up
to three different settings for the driver-
and passenger seat.
Together with the driver’s seat you can
store the exterior rear view mirrors.
For the front passenger seat you can store
the seat position.
Storing exterior rear view mirror parking position
For easier parking, you can adjust the pas-
senger-side exterior rear view mirror so
that you can see the right rear wheel as
soon as you engage reverse gearR.For information on activating the parking
position feature, see “Activating exterior
rear view mirror parking position”
(
�page 127).
1Position buttons
2Memory button
!Prior to operating the vehicle the driver
should check and adjust the seat
height, seat position fore and aft, and
seat backrest angle if necessary, to en-
sure adequate control, reach and com-
fort. The head restraint should also be
adjusted for proper height. See also the
section on airbags (
�page 59) for
proper seat positioning.
In addition, adjust the steering wheel to
ensure adequate control, reach, opera-
tion and comfort. Both the inside and
outside rear view mirrors should be ad-
justed for adequate rear vision.
Fasten seat belts. Infants and small
children should be seated in a properly
secured restraint system that complies
with U.S. Federal Motor Vehicle Safety
Standard 213 and 225 and Canadian
Motor Vehicle Safety Standard 213 and
210.2.
Warning!
G
Do not activate the memory function while
driving. Activating the memory function
while driving could cause the driver to lose
control of the vehicle.
Page 911 of 4133
107 Controls in detail
Lighting
�Lighting
For notes on how to switch on the head-
lamps (
�page 48) and use the turn signals
(
�page 49), see the “Getting started” sec-
tion.
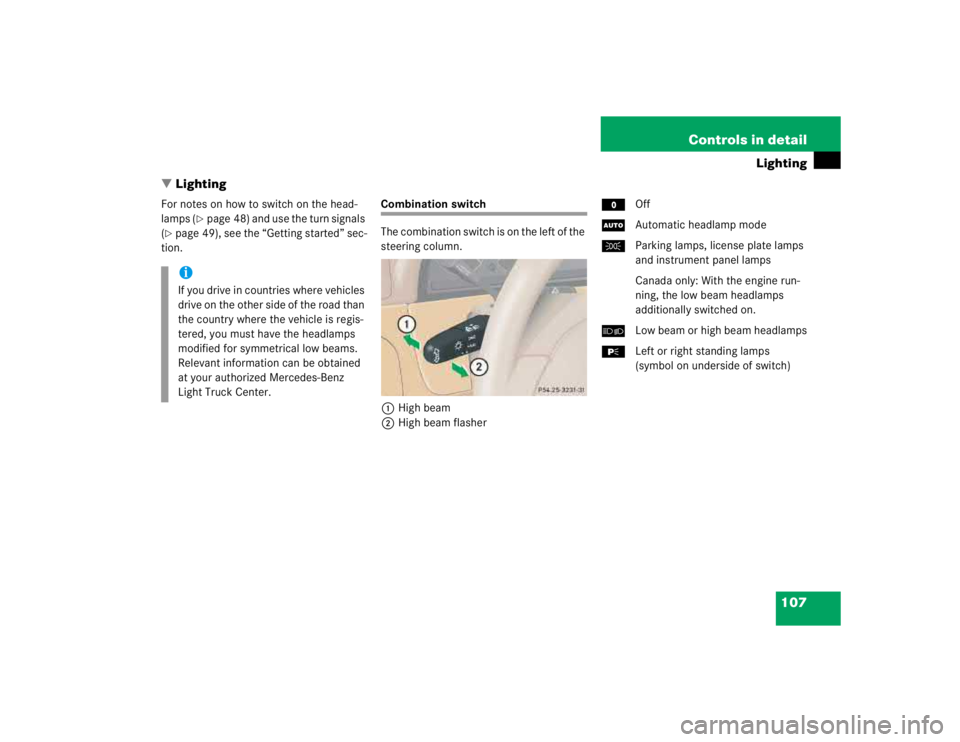
Combination switch
The combination switch is on the left of the
steering column.
1High beam
2High beam flasherMOff
UAutomatic headlamp mode
CParking lamps, license plate lamps
and instrument panel lamps
Canada only: With the engine run-
ning, the low beam headlamps
additionally switched on.
õLow beam or high beam headlamps
ƒLeft or right standing lamps
(symbol on underside of switch)
iIf you drive in countries where vehicles
drive on the other side of the road than
the country where the vehicle is regis-
tered, you must have the headlamps
modified for symmetrical low beams.
Relevant information can be obtained
at your authorized Mercedes-Benz
Light Truck Center.
 is required to open the liftgate.
The handle is located")