Page 555 of 4133
88
Flexible service system
Te ch n ica l
data
Instruments
and controls Operation
Driving Instrument
cluster display Practical hints Car care Index
Important!
The FSS indicator is not an engine oil level indicator.
See page 89 for engine oil level indicator.
Notes:
When disconnecting vehicle battery for one or more
days at a time, such days will not be counted. Any such
days not counted by the FSS can be added by your
Mercedes-Benz Light Truck Center.
The interval between services is determined by the type
of driving for which the vehicle is used. For example,
driving at extreme speeds, and cold starts combined
with short distance driving in which the engine does not
reach normal operating temperature, reduce the interval
between services.
Following a completed A or B service the Mercedes-
Benz Light Truck Center sets the counter mileage to
10 000 miles (Canada: 15 000 km) and 365 days.
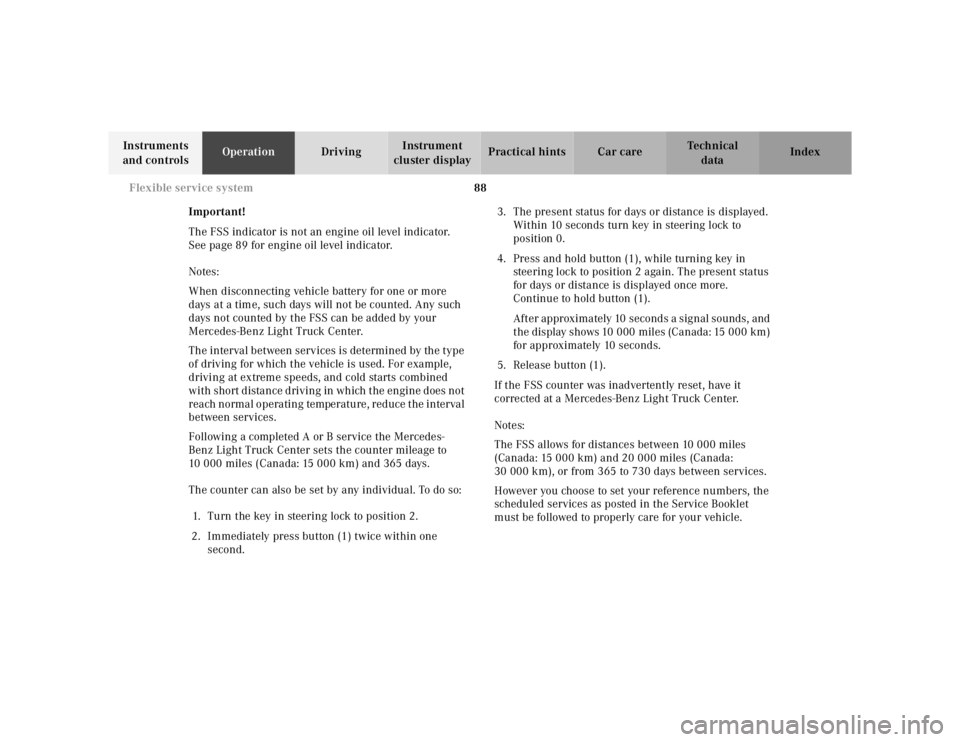
The counter can also be set by any individual. To do so: 1. Turn the key in steering lock to position 2.
2. Immediately press button (1) twice within one second. 3. The present status for days or distance is displayed.
Within 10 seconds turn key in steering lock to
position 0.
4. Press and hold button (1), while turning key in steering lock to position 2 again. The present status
for days or distance is displayed once more.
Continue to hold button (1).
After approximately 10 seconds a signal sounds, and
the display shows 10 000 miles (Canada: 15 000 km)
for approximately 10 seconds.
5. Release button (1).
If the FSS counter was inadvertently reset, have it
corrected at a Mercedes-Benz Light Truck Center.
Notes:
The FSS allows for distances between 10 000 miles
(Canada: 15 000 km) and 20 000 miles (Canada:
30 000 km), or from 365 to 730 days between services.
However you choose to set your reference numbers, the
scheduled services as posted in the Service Booklet
must be followed to properly care for your vehicle.
Page 556 of 4133
89
Engine oil level indicator
Te ch n ica l
data
Instruments
and controls Operation
Driving Instrument
cluster display Practical hints Car care Index
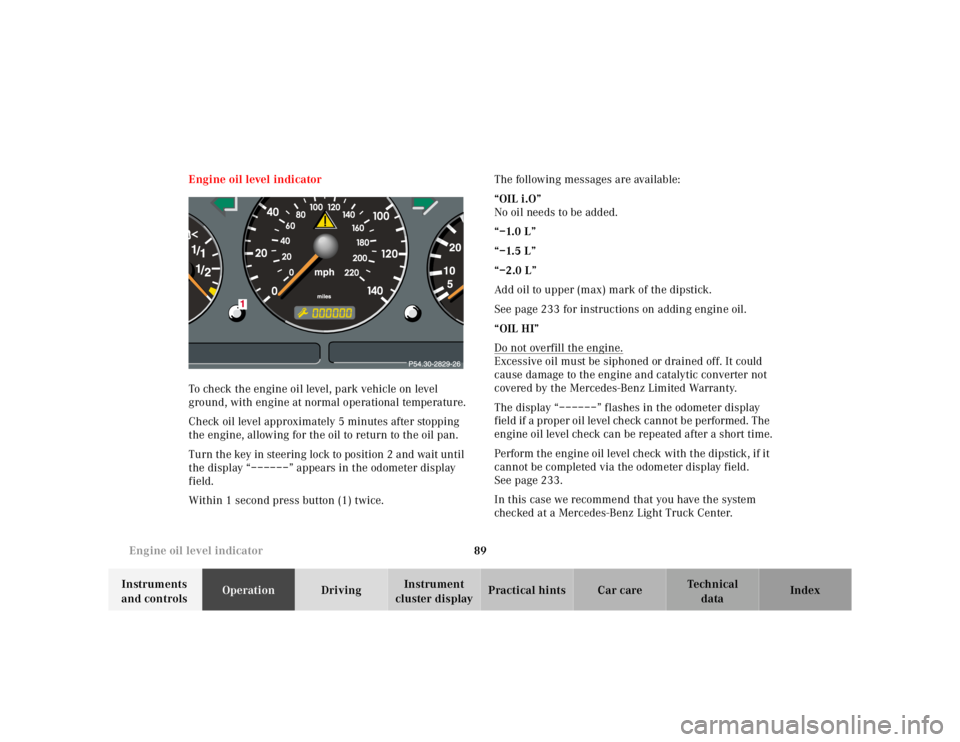
Engine oil level indicator
To check the engine oil level, park vehicle on level
ground, with engine at normal operational temperature.
Check oil level approximately 5 minutes after stopping
the engine, allowing for the oil to return to the oil pan.
Turn the key in steering lock to position 2 and wait until
the display “––––––” appears in the odometer display
field.
Within 1 second press button (1) twice. The following messages are available:
“OIL i.O”
No oil needs to be added.
“–1.0 L”
“–1.5 L”
“–2.0 L”
Add oil to upper (max) mark of the dipstick.
See page 233 for instructions on adding engine oil.
“OIL HI”
Do not overfill the engine.
Excessive oil must be siphoned or drained off. It could
cause damage to the engine and catalytic converter not
covered by the Mercedes-Benz Limited Warranty.
The display “––––––” flashes in the odometer display
field if a proper oil level check cannot be performed. The
engine oil level check can be repeated after a short time.
Perform the engine oil level check with the dipstick, if it
cannot be completed via the odometer display field.
See page 233.
In this case we recommend that you have the system
checked at a Mercedes-Benz Light Truck Center.
Page 557 of 4133
90
Exterior lamp switch
Te ch n ica l
data
Instruments
and controls Operation
Driving Instrument
cluster display Practical hints Car care Index
Exterior lamp switch
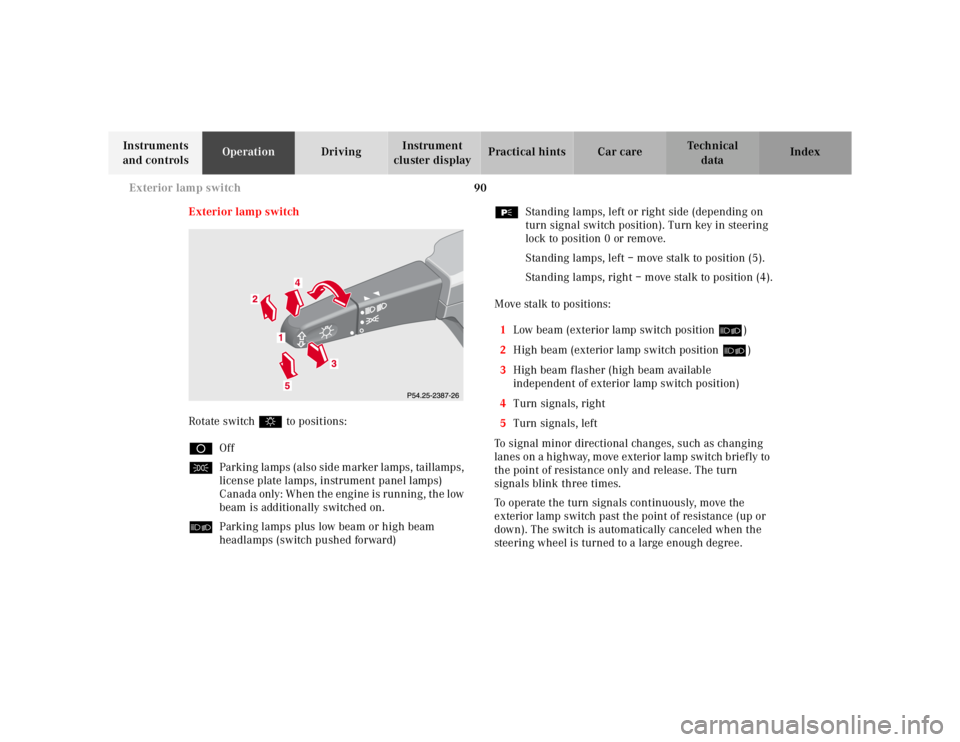
Rotate switch $ to positions:
D Off
C Parking lamps (also side marker lamps, taillamps,
license plate lamps, instrument panel lamps)
Canada only: When the engine is running, the low
beam is additionally switched on.
õ Parking lamps plus low beam or high beam
headlamps (switch pushed forward) ƒ
Standing lamps, left or right side (depending on
turn signal switch position). Turn key in steering
lock to position 0 or remove.
Standing lamps, left – move stalk to position (5).
Standing lamps, right – move stalk to position (4).
Move stalk to positions: 1 Low beam (exterior lamp switch position õ)
2 High beam (exterior lamp switch position õ)
3 High beam flasher (high beam available
independent of exterior lamp switch position)
4 Turn signals, right
5 Turn signals, left
To signal minor directional changes, such as changing
lanes on a h ig hway, m ove exterior la mp sw itch b rief ly to
the point of resistance only and release. The turn
signals blink three times.
To operate the turn signals continuously, move the
exterior lamp switch past the point of resistance (up or
down). The switch is automatically canceled when the
steering wheel is turned to a large enough degree.
Page 558 of 4133
91
Exterior lamp switch
Te ch n ica l
data
Instruments
and controls Operation
Driving Instrument
cluster display Practical hints Car care Index
Turn signal failure
If one of the turn signals fails, the turn signal indicator
system f lashes and sounds at a faster than normal rate.
Standing lamps
When the vehicle is parked on the street the standing
lamps (right or left side parking lamps) can be turned
on, making the vehicle more visible to passing vehicles.
The standing lamps cannot be operated with the key in
steering lock position 1 or 2.
Note:
With the key removed and a front door open, a warning
sounds if the vehicle’s exterior lamps (except standing
lamps) are not switched off. Daytime running lamps
(Canada only)
When the engine is running and the selector lever is in
a driving position, the low beam headlamps (includes
parking lamps, side marker lamps, taillamps and
license plate lamps) are automatically switched on.
When shifting from a driving position to position “N”
or “P”, the low beam switches off (2 seconds delay).
For nighttime driving the exterior lamp switch should
be turned to position õ to permit activation of the
high beam headlamps.
Page 566 of 4133
99
Climate control
Te ch n ica l
data
Instruments
and controls Operation
Driving Instrument
cluster display Practical hints Car care Index
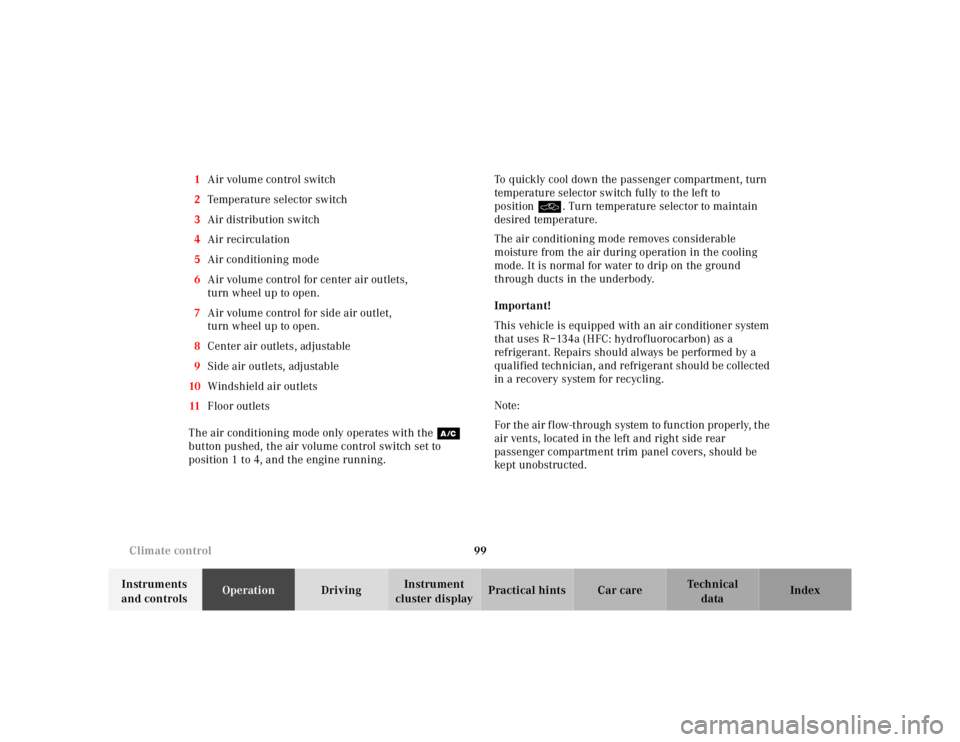
1
Air volume control switch
2 Temperature selector switch
3 Air distribution switch
4 Air recirculation
5 Air conditioning mode
6 Air volume control for center air outlets,
turn wheel up to open.
7 Air volume control for side air outlet,
turn wheel up to open.
8 Center air outlets, adjustable
9 Side air outlets, adjustable
10 Windshield air outlets
11 Floor outlets
The air conditioning mode only operates with the œ
button pushed, the air volume control switch set to
position 1 to 4, and the engine running. To quickly cool down the passenger compartment, turn
temperature selector switch fully to the left to
position O. Turn temperature selector to maintain
desired temperature.
The air conditioning mode removes considerable
moisture from the air during operation in the cooling
mode. It is normal for water to drip on the ground
through ducts in the underbody.
Important!
This vehicle is equipped with an air conditioner system
that uses R–134a (HFC: hydrof luorocarbon) as a
refrigerant. Repairs should always be performed by a
qualified technician, and refrigerant should be collected
in a recovery system for recycling.
Note:
For the air flow-through system to function properly, the
air vents, located in the left and right side rear
passenger compartment trim panel covers, should be
ke pt un obst ru cte d .
Page 570 of 4133
103
Climate control
Te ch n ica l
data
Instruments
and controls Operation
Driving Instrument
cluster display Practical hints Car care Index
Rear window defroster
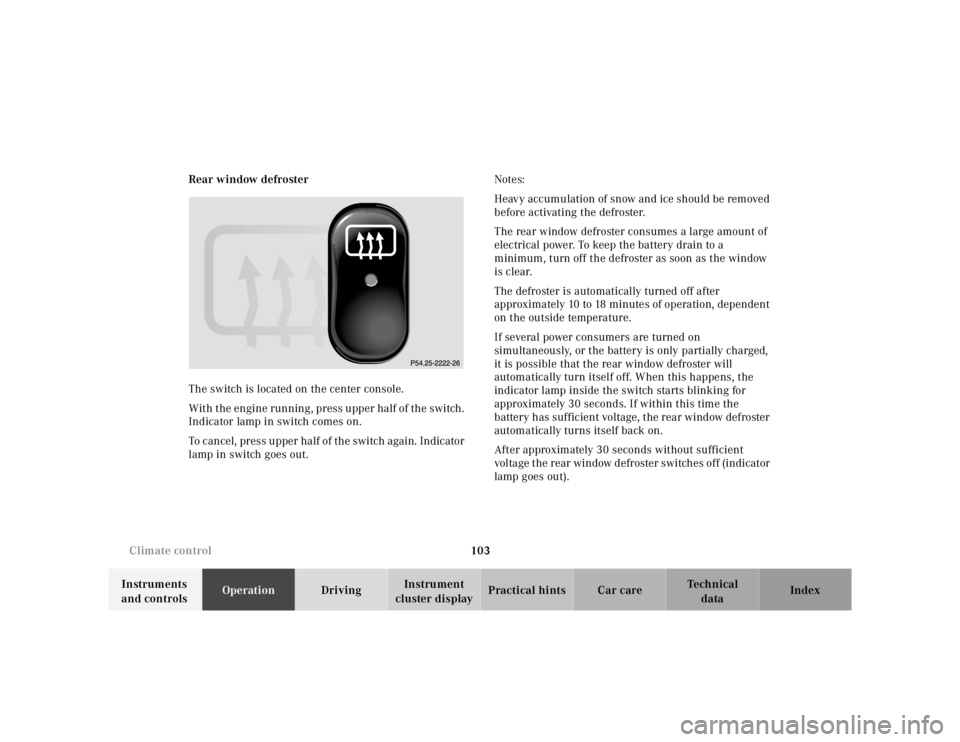
The switch is located on the center console.
With the engine running, press upper half of the switch.
Indicator lamp in switch comes on.
To cancel, press upper half of the switch again. Indicator
lamp in switch goes out. Notes:
Heavy accumulation of snow and ice should be removed
before activating the defroster.
The rear window defroster consumes a large amount of
electrical power. To keep the battery drain to a
minimum, turn off the defroster as soon as the window
is clear.
The defroster is automatically turned off after
approximately 10 to 18 minutes of operation, dependent
on the outside temperature.
If several power consumers are turned on
simultaneously, or the battery is only partially charged,
it is possible that the rear window defroster will
automatically turn itself off. When this happens, the
indicator lamp inside the switch starts blinking for
approximately 30 seconds. If within this time the
battery has sufficient voltage, the rear window defroster
automatically turns itself back on.
After approximately 30 seconds without sufficient
voltage the rear window defroster switches off (indicator
lamp goes out).
Page 572 of 4133
105
Interior equipment
Te ch n ica l
data
Instruments
and controls Operation
Driving Instrument
cluster display Practical hints Car care Index
The windows can be operated with key in steering lock
position 1 or 2.
Operation:
Press switch in to resistance point to open.
Lift switch to close.
Release switch when window is in desired position. Express opening of front door windows
Press switch past resistance point and release – window
lowers to fully open position. To interrupt procedure,
brief ly pull switch.
Blocking of rear door window operation
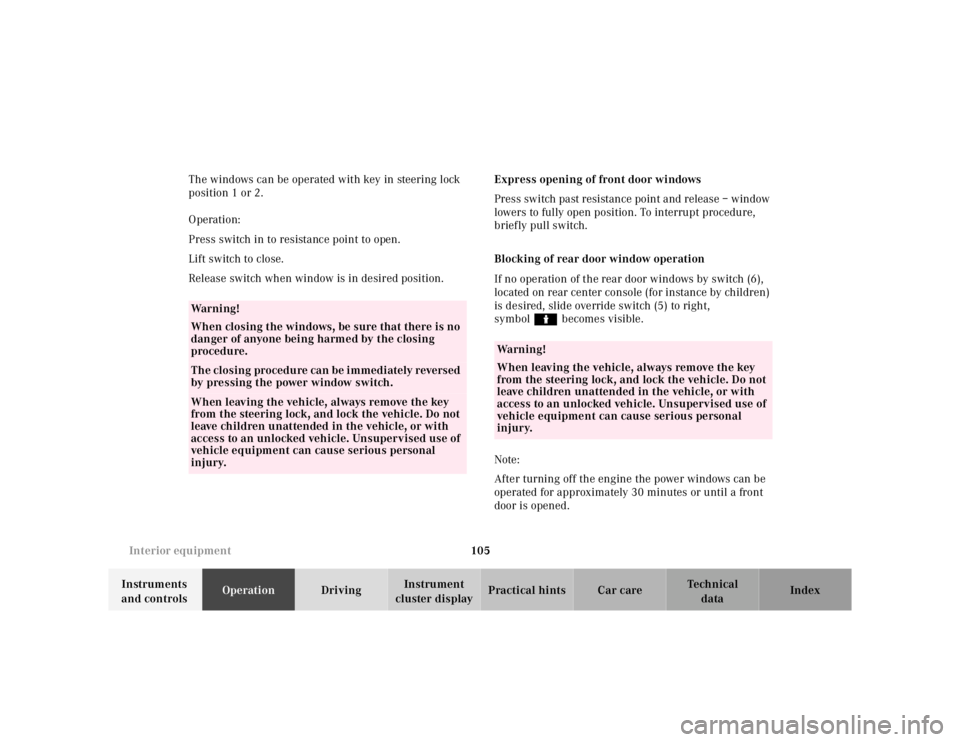
If no operation of the rear door windows by switch (6),
located on rear center console (for instance by children)
is desired, slide override switch (5) to right,
symbol N becomes visible.
Note:
After turning off the engine the power windows can be
operated for approximately 30 minutes or until a front
door is opened.
Wa r n i n g !
When closing the windows, be sure that there is no
danger of anyone being harmed by the closing
procedure.The closing procedure can be immediately reversed
by pressing the power window switch.When leaving the vehicle, always remove the key
from the steering lock, and lock the vehicle. Do not
leave children unattended in the vehicle, or with
access to an unlocked vehicle. Unsupervised use of
vehicle equipment can cause serious personal
injury.
Wa r n i n g !
When leaving the vehicle, always remove the key
from the steering lock, and lock the vehicle. Do not
leave children unattended in the vehicle, or with
access to an unlocked vehicle. Unsupervised use of
vehicle equipment can cause serious personal
injury.
Page 573 of 4133
106
Interior equipment
Te ch n ica l
data
Instruments
and controls Operation
Driving Instrument
cluster display Practical hints Car care Index
Rear quarter windows (optional on ML 320 and 430)
Switches located on front center console
The rear quarter windows can be operated with key in
steering lock position 1 or 2.
1 Push to open.
2 Push to close. Note:
After turning off the engine the rear quarter windows
can be operated for approximately 30 minutes or until a
front door is opened.
12
Wa r n i n g !
When closing the windows, be sure that there is no
danger of anyone being harmed by the closing
procedure.When leaving the vehicle, always remove the key
from the steering lock, and lock the vehicle. Do not
leave children unattended in the vehicle, or with
access to an unlocked vehicle. Unsupervised use of
vehicle equipment can cause serious personal
injury.