Page 24 of 305

19
Compass Display (If Equipped)The Compass can display direction indicated by N,
S, E, W, NE, NW, SE and SW. The sensor for the
compass display is located on the back side of the
rear view mirror. The Compass can be set to one of
15 geographic zones.
To set the ZONE, first locate the compass module
on the center rear view mirror post. Press and hold
the reset button located on top of the compass
module until the display in the message center
changes to show the current zone setting (1-15).
Release the reset button and press it agian
repeatedly until the current zone is displayed (see
zone map). After 10 seconds the display will return
to normal. Your zone will then be updated.The Compass is continually self-calibrating and
should not require calibration, however a
manual-calibrating mode can be initiated.
NOTE:Compass calibration requires that the
vehicle be driven 2-3 mph (3-5 km/h) in at least
two 360 degree circles. A safe location free of
vehicle and pedestrian traffic will be required. To
manually calibrate the compass, locate the reset
button on the top side of the compass module.
Press and hold the reset button until the Compass
display indicates ªCIRCLE SLOWLYº. Once the
button has been released, slowly drive the vehicle
in circles until the ªCIRCLE SLOWLYº indicator
disappears. This may require several complete
circles.
File:03fnist.ex
Update:Mon Jun 17 13:46:47 1996
Page 25 of 305
20Zone map
Factors Affecting Compass AccuracyThe compass reading can be affected when you
drive near a number of things Ð such as large
buildings, bridges, power lines, and powerful
antennas.
Your compass can also be affected by magnetic or
metallic objects placed in or on the compass sensor
(the sensor is loacated on the inside rearview mirror
bracket). If the compass is giving inaccurate
readings, perform the calibration procedure.SpeedometerThe speedometer tells you how many miles
(kilometers) per hour your vehicle is moving. It
indicates the speed up to 120 mph or up to
199 km/h.
You can press the E/M (English/Metric) button
located just below the message center display to
show the speed you are going in either miles per
hour or kilometers per hour.
File:03fnist.ex
Update:Mon Jun 17 13:46:47 1996
Page 94 of 305

90There are two light sensors (photocells) in this
mirror. The sensor that detects rear glare is located
inside a window in the center of the mirror. The
second light sensor which determines outside light
level is located on the backside of the mirror case.
The driver's side mirror is activated by these sensors
to prevent glare when traffic is behind or around
the vehicle.
NOTE:Do not block the sensor on the backside of
the mirror (i.e., with a parking tag, car deodorizer,
etc.) since this may impair proper mirror
performance.
One important safety feature is that the mirror
automatically returns to the normal position
whenever the vehicle is placed in R (Reverse)
(when the mirror is in the ON position). This
feature ensures a bright clear view in the mirror
when backing up.
Do not clean the housing or glass of any mirror
with harsh abrasives, fuel or other petroleum-based
cleaning products.
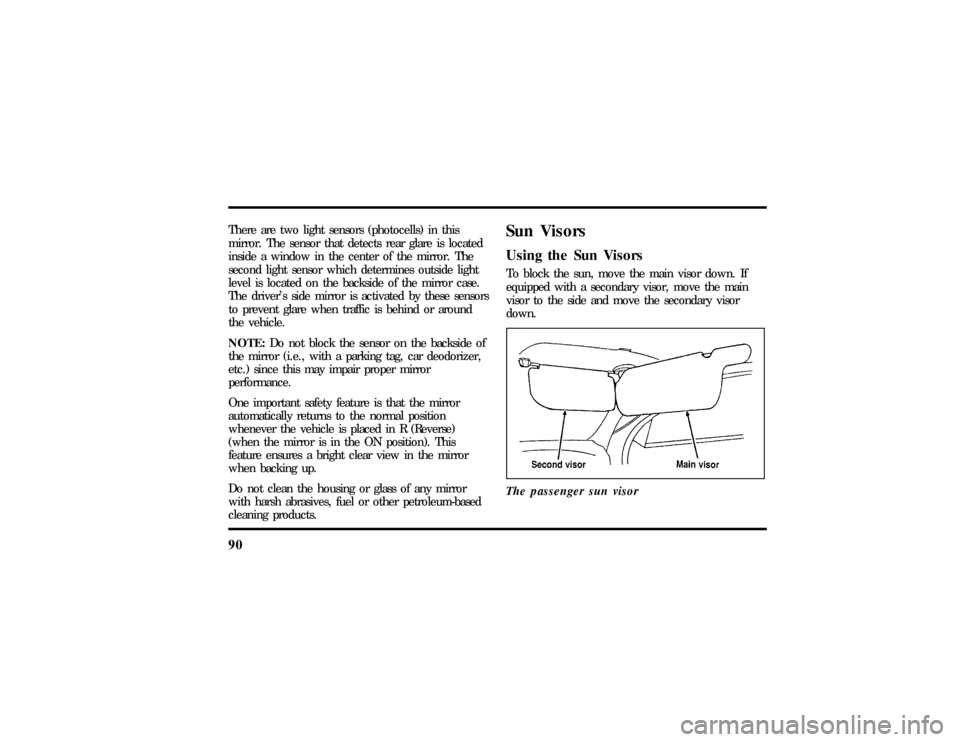
Sun VisorsUsing the Sun VisorsTo block the sun, move the main visor down. If
equipped with a secondary visor, move the main
visor to the side and move the secondary visor
down.
The passenger sun visor
File:05fncft.ex
Update:Mon Jun 17 13:49:49 1996
Page 143 of 305

139
The Air Bag Supplemental Restraint System consists
of:q
driver and passenger air bag modules (which
include the inflators and air bags),
q
one or more impact and safing sensors,
q
a system diagnostic module,
q
a readiness light and tone,
q
and the electrical wiring which connects the
components.
The diagnostic module monitors its own circuits,
the air bag electrical system, the air bag readiness
light, the air bag power, and the air bag inflators.
Determining if System Is OperationalThe Air Bag Supplemental Restraint System uses a
readiness light and a tone to indicate the condition
of the system. The readiness light is in the
instrument cluster. When you turn the ignition key
to ON, this light will illuminate for approximatelysix (6) seconds and then turn off. This indicates
that the system is operating normally. NOTE:
Routine maintenance of the air bag system is not
required.
A problem with the system is indicated by one or
more of the following:
q
the readiness light will either flash or stay lit,
q
the readiness light will not light immediately
after ignition is turned on,
q
a group of five beeps will be heard. The tone
pattern will repeat periodically until the problem
and light are repaired.
If any of these things happen, even intermittently,
have the Air Bag Supplemental Restraint System
serviced at your Ford or Lincoln-Mercury dealer
immediately. Unless serviced, the system may not
function properly in the event of a collision.
File:06fnsst.ex
Update:Fri Jun 21 08:57:53 1996