1997 LINCOLN MARK VIII ECO mode
[x] Cancel search: ECO modePage 45 of 315

40Factors Affecting Compass AccuracyMagnetic mounted devices (antennas, racks, etc.)
should not be located on the front third of the
vehicle roof. Placement of these devices near the
compass will cause the compass to be inaccurate. If
these devices are used, for improved accuracy,
recalibrate the compass with the device(s) installed.
Driving near power lines or large iron or steel
structures can temporarily change the compass
heading. Demagnetize the vehicle and recalibrate
the compass if it remains inaccurate after driving
near such objects.Compass AdjustmentsPress and hold the COMPASS control, then press
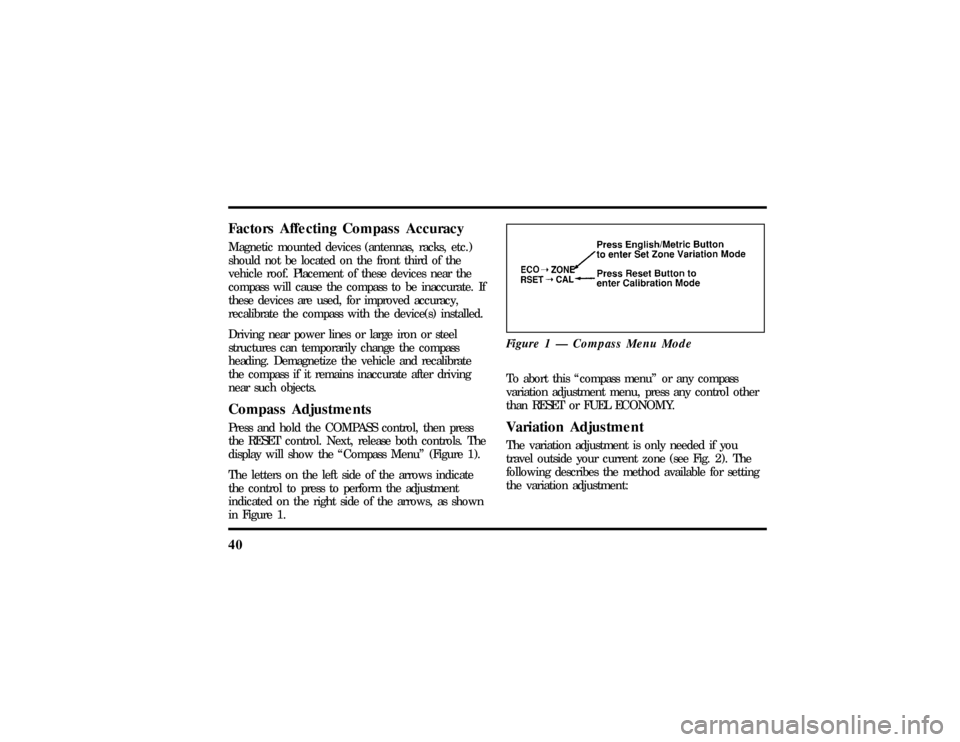
the RESET control. Next, release both controls. The
display will show the ªCompass Menuº (Figure 1).
The letters on the left side of the arrows indicate
the control to press to perform the adjustment
indicated on the right side of the arrows, as shown
in Figure 1.Figure 1 Ð Compass Menu Mode
To abort this ªcompass menuº or any compass
variation adjustment menu, press any control other
than RESET or FUEL ECONOMY.Variation AdjustmentThe variation adjustment is only needed if you
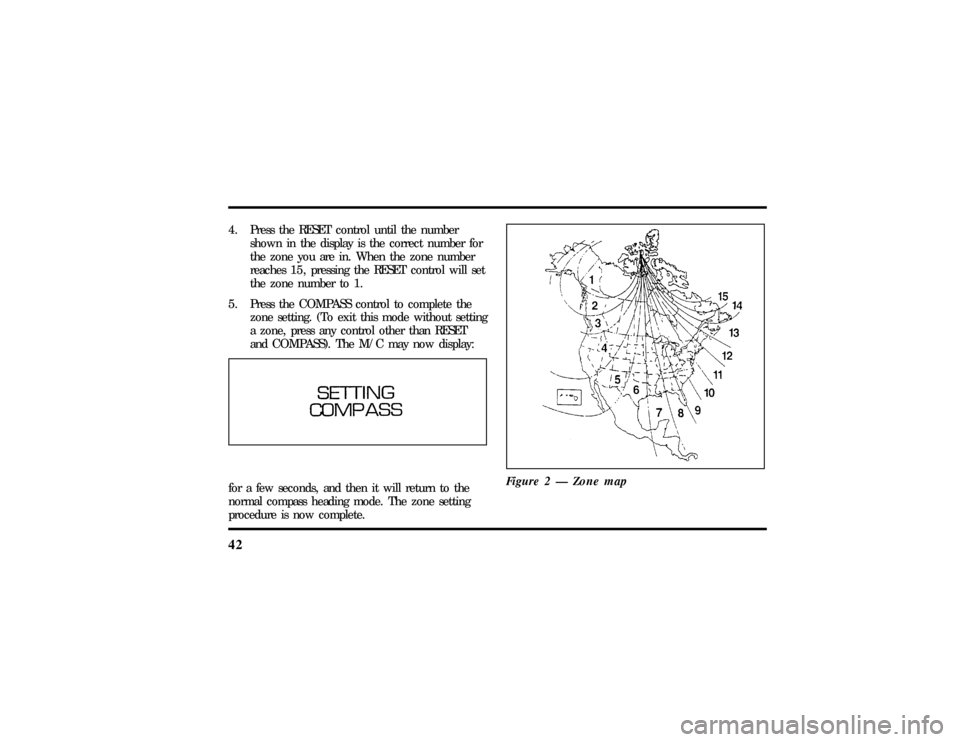
travel outside your current zone (see Fig. 2). The
following describes the method available for setting
the variation adjustment:
File:03fnis8.ex
Update:Thu Jun 27 10:00:37 1996
Page 47 of 315

424. Press the RESET control until the number
shown in the display is the correct number for
the zone you are in. When the zone number
reaches 15, pressing the RESET control will set
the zone number to 1.
5. Press the COMPASS control to complete the
zone setting. (To exit this mode without setting
a zone, press any control other than RESET
and COMPASS). The M/C may now display:for a few seconds, and then it will return to the
normal compass heading mode. The zone setting
procedure is now complete.Figure 2 Ð Zone map
File:03fnis8.ex
Update:Thu Jun 27 10:00:37 1996
Page 48 of 315

43
Calibration Procedure1. Find an open, level area free from steel
structures and high voltage lines. An empty,
level parking lot is recommended.
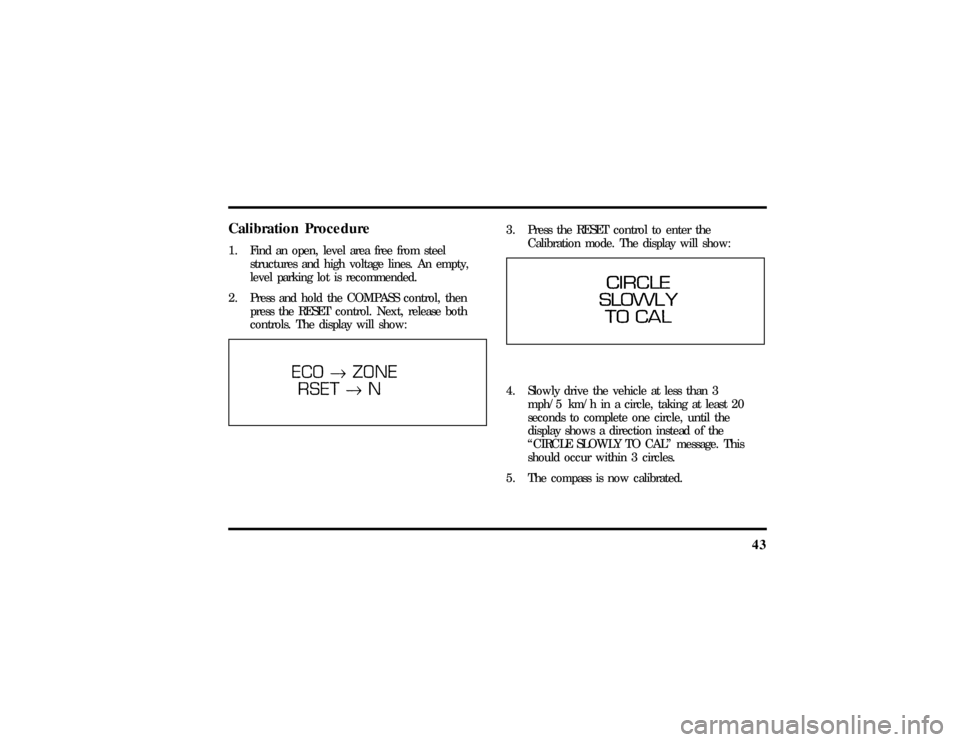
2. Press and hold the COMPASS control, then
press the RESET control. Next, release both
controls. The display will show:
3. Press the RESET control to enter the
Calibration mode. The display will show:4. Slowly drive the vehicle at less than 3
mph/5 km/h in a circle, taking at least 20
seconds to complete one circle, until the
display shows a direction instead of the
ªCIRCLE SLOWLY TO CALº message. This
should occur within 3 circles.
5. The compass is now calibrated.
File:03fnis8.ex
Update:Thu Jun 27 10:00:37 1996
Page 57 of 315

52can set to any desired frequency. These four
methods are described below.q
Using the ªTUNEº function
You can change the frequency up or down one
increment at a time by pressing and releasing either
the left
bor right
aside of the ªTUNEº button.
To change frequencies quickly, press and hold down
either the right or left side of the button.
Manual tuning adjusts your radio to any allowable
broadcast frequency, whether or not a station is
present on that frequency. (SeeAll About Radio
Frequenciesin this section.)
q
Using the ªSEEKº function
Press the right (
a) side of the ªSEEKº button to
select the next listenable station up the frequency
band. Press the left (
b) side of the button to select
the next listenable station down the frequency
band. By pressing and holding the button, listenablestations can be passed over to reach the desired
station.
q
Using the ªSCANº function
Pressing the ªSCANº or ªSCNº button will begin
the scan mode up the frequency band, stopping on
each listenable station for approximately five
seconds.
To stop the scan mode on the presently sampled
station, press the ªSCANº or ªSCNº button again.
q
Setting the station MEMORY PRESET buttons
Your radio is equipped with 6 station memory
buttons. These buttons can be used to select up
to 6 preset AM stations and 12 FM stations (6
in FM1 and 6 in FM2)
File:04fnas8.ex
Update:Wed Jun 19 10:43:44 1996
Page 60 of 315

55
NOTE:A cassette tape can be loaded with the
ignition on whether or not the radio power is on.
However, with radio power off, the cassette tape is
loaded and stored.
NOTE:Noise reduction system manufactured under
license from Dolby Labs Licensing Corporation.
ªDolbyº and double-D symbol are trademarks of
Dolby Laboratories Licensing Corporation.How to locate a desired track on the tapeThere are four ways to quickly locate a desired
selection on the tape. You can use the fast forward,
rewind, ªSEEKº or ªSCANº function. Following are
brief descriptions of each.q
Fast forwarding the tape
To fast forward the tape, press the ªFFº button.
The radio will begin playing until fast forward is
manually stopped (by pushing the ªTAPEº button)
or the end of the tape is reached.At the end of the tape, the direction automatically
reverses and plays the other side of the tape.
q
Rewinding the tape
To rewind the tape, press the ªREWº button. The
radio will begin playing until rewind is manually
stopped (by pushing the ªTAPEº button) or the
beginning of the tape is reached.
q
Using the ªSEEKº function with your cassette
tape player
While in the tape mode, push the right
aside of
the ªSEEKº button to seek forward to the next
selection on the tape. Push the left
bside to seek
the previous tape selection.
q
Using the ªSCANº function with your cassette
tape player
Press the ªSCANº button to begin the forward scan
mode on the tape currently playing, stopping on
each tape selection for approximately an
eight-second sampling (display indicates ªSCº).
File:04fnas8.ex
Update:Wed Jun 19 10:43:44 1996
Page 61 of 315

56To stop the scan mode on the presently sampled
tape selection, press ªSCANº a second time.q
How to change the side of the tape being
played
The alternate side of the tape can be selected by
pressing the ªSIDE 1-2º button.
How to eject the tapeTo stop the tape and eject the cassette, press the
ªEJº button. The radio will resume playing if the
radio power is on. The tape cartridge can be ejected
with radio power (and/or ignition) on or off.How to store the tapePress the ªAM/FMº button to stop the tape player
and resume radio play.Using the DolbyHB noise reduction
featurePush thekbutton to activate Dolby B Noise
Reduction. Press again to deactivate.
Automatic tape tighteningYour audio system cassette tape player automatically
goes into momentary fast rewind (approximately 1
second) when a tape is first inserted to tighten any
loose tape in the cartridge.Tips on Caring for the Cassette Player
and TapesIn order to keep your cassette tape player
performing the way it was meant to, read and
follow these simple precautions:q
Using a Ford or equivalent cassette cleaning
cartridge to clean the tape player head after
10-12 hours of play will help maintain the best
playback sound and proper tape operation.
q
Only cassettes that are 90 minutes long or less
should be used. Tapes longer than 90 minutes
are thinner and subject to breakage or may jam
the tape player mechanism.
File:04fnas8.ex
Update:Wed Jun 19 10:43:44 1996
Page 62 of 315

57
q
Protect cassettes from exposure to direct
sunlight, high humidity and extreme heat or
cold. If they are exposed to extreme conditions,
allow them to reach a moderate temperature
before playing.
q
If a tape is loose inside the cassette, tighten it
before playing by putting your finger or a pencil
into one of the holes and turning the hub until
the tape is tight.
q
Loose labels on cassette tapes can become
lodged in the mechanism. Remove any loose
label material before inserting cassette.
q
Do not leave a tape in the cassette tape player.
High heat in the vehicle can cause the cassette
to warp.
Using the Controls of Your Compact
Disc Player (If equipped)NOTE:Radio power must be on to use the CD
player.
How to insert a CDYour CD player is equipped with power loading.
Once you insert a CD and push slightly, the loading
mechanism draws the CD the rest of the way in
and play will begin after a momentary pause.
Display indicates ªTR-__º (track number) while CD
is playing.
NOTE:A CD can be loaded with the ignition on
whether or not the radio power is on. However,
with radio power off, the CD is loaded and stored.Operating the ªSCANº functionPress the ªSCNº button to enter the scan mode.
The CD player will begin scanning the disc,
stopping on each listenable track for approximately
an eight second sampling. This continues until you
press the ªSCNº button a second time.How to stop CD playWhile in the CD mode, press the ªAM/FMº button
to stop CD play and resume radio play.
File:04fnas8.ex
Update:Wed Jun 19 10:43:44 1996
Page 67 of 315

62If the CD Changer is empty, ªNO CDº will flash in
the display and radio play will continue.
If your vehicle is not equipped with the Ford
10-CD system and the ªCDº button is pushed, ªNO
DJº will flalsh and radio play will continue.How to change the disc being playedWhen in the CD mode, you can change discs by
pressing the right (
a) side of the ªTUNE DISCSº
button (to select the next disc) or the left (
b) side
of the ªTUNE DISCSº button (to select the previous
disc). Play will begin on the first track of the
selected disc.
When either side of the button is pressed and held,
the CD changer will continue fast-forwarding or
reversing through the discs in the disc magazine.
During these functions, the display will indicate the
disc number.
How to change the track being playedPress the right (
a) side of the ªSEEKº button to
seek forward to the next track of current disc. After
the last track has been completed, the CD player
automatically wraps back to the first track of the
current disc.
Press the left (
b) side of the SEEK button to seek
in reverse to the previous track on the current disc.
If a selection has been playing for three seconds or
more and you press the left (
b) side of the SEEK
button, the CD Changer will replay that selection
from the beginning.Operating the CD Compression featureThe compression feature will bring soft and loud
passages closer together for a more consistent
listening level.
To turn the compression on, press the
ªCOMPRESSº/#5 button. When the compression
feature is activated, the display will indicate ªCº.
File:04fnas8.ex
Update:Wed Jun 19 10:43:44 1996