Page 35 of 241
Indicator Lights
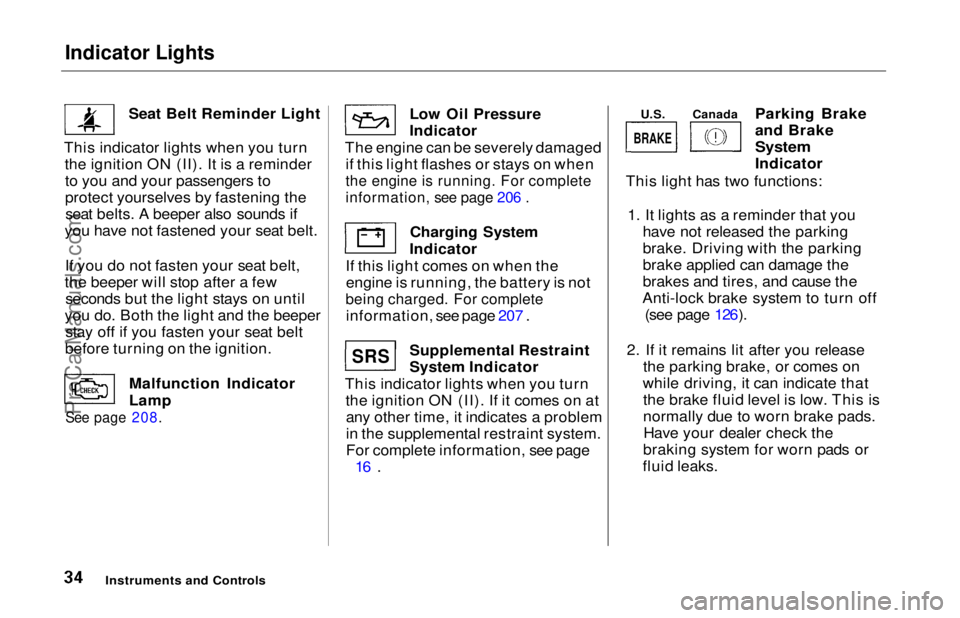
Seat Belt Reminder Light
This indicator lights when you turn the ignition ON (II). It is a reminderto you and your passengers to
protect yourselves by fastening theseat belts. A beeper also sounds if
you have not fastened your seat belt.
If you do not fasten your seat belt,
the beeper will stop after a few seconds but the light stays on until
you do. Both the light and the beeper stay off if you fasten your seat belt
before turning on the ignition.
Malfunction Indicator
Lamp
See page 208.
Low Oil Pressure
Indicator
The engine can be severely damaged if this light flashes or stays on when
the engine is running. For complete
information, see page 206 .
Charging System
Indicator
If this light comes on when the engine is running, the battery is not
being charged. For complete
information, see page 207 .
Supplemental Restraint
System Indicator
This indicator lights when you turn the ignition ON (II). If it comes on atany other time, it indicates a problem
in the supplemental restraint system.
For complete information, see page 16 . Parking Brake
and Brake
System
Indicator
This light has two functions:
1. It lights as a reminder that you have not released the parking
brake. Driving with the parking
brake applied can damage the
brakes and tires, and cause the
Anti-lock brake system to turn off (see page 126).
2. If it remains lit after you release the parking brake, or comes on
while driving, it can indicate that the brake fluid level is low. This is
normally due to worn brake pads.Have your dealer check the
braking system for worn pads or
fluid leaks.
Instruments and Controls
U.S.
Canada
SRS
BRAKE
ProCarManuals.comMain Menu Table of Contents s t
Page 36 of 241
Indicator Lights
U.S.
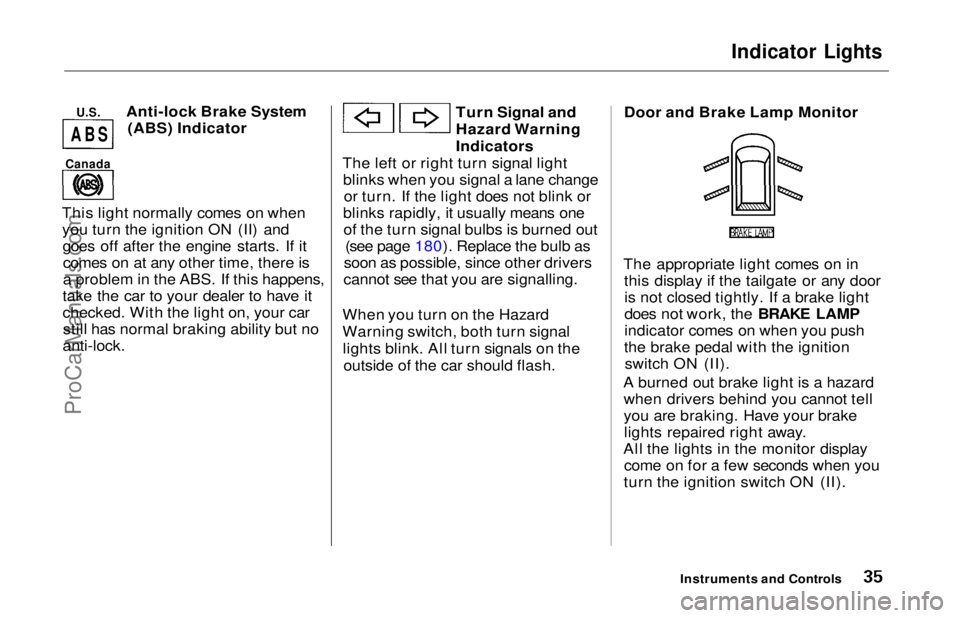
Anti-lock Brake System
(ABS) Indicator
This light normally comes on when you turn the ignition ON (II) andgoes off after the engine starts. If itcomes on at any other time, there is
a problem in the ABS. If this happens,
take the car to your dealer to have it
checked. With the light on, your car still has normal braking ability but no
anti-lock.
Turn Signal and
Hazard Warning
Indicators
The left or right turn signal light blinks when you signal a lane changeor turn. If the light does not blink or
blinks rapidly, it usually means one of the turn signal bulbs is burned out (see page 180). Replace the bulb as
soon as possible, since other drivers
cannot see that you are signalling.
When you turn on the Hazard
Warning switch, both turn signal lights blink. All turn signals on the outside of the car should flash. Door and Brake Lamp Monitor
The appropriate light comes on in this display if the tailgate or any dooris not closed tightly. If a brake light
does not work, the BRAKE LAMP
indicator comes on when you push
the brake pedal with the ignition switch ON (II).
A burned out brake light is a hazard when drivers behind you cannot tell
you are braking. Have your brakelights repaired right away.
All the lights in the monitor display come on for a few seconds when you
turn the ignition switch ON (II).
Instruments and Controls
Canada
A
B SProCarManuals.comMain Menu Table of Contents s t
Page 37 of 241
Indicator Lights
"Daytime Running
Lights" Indicator
Canadian models only
This indicator lights when you turn the ignition to ON (II) with the
headlight switch off and the parking
brake set. It should go off if you turnon the headlights or release the
parking brake. If it comes on at any other time, it means there is a
problem with the DRL. There may
also be a problem with the high
beam headlights. High Beam Indicator
This light comes on with the high beam headlights. See page 40 for
information on the headlightcontrols.
On Canadian models, this indicator
comes on with reduced brightness
when the Daytime Running Lights (DRL) are on (see page 40).
Cruise Control Indicator
This lights when you set the cruise control. See page 46 for information
on operating the cruise control.
Low Fuel Indicator
This light comes on as a reminder that you must refuel soon.
Instruments and Controls
DRL
CRUISE
CONTROL
ProCarManuals.comMain Menu Table of Contents s t
Page 39 of 241
Gauges
Temperature Gauge
This shows the temperature of the engine's coolant. During normal
operation, the pointer should rise
from the bottom white mark to about the middle white mark. In severedriving conditions, such as very hot
weather or a long period of uphill driving, the pointer may rise to the
upper white mark. If it reaches the
red (Hot) mark, pull safely to the side of the road. Turn to page 204 for
instructions and precautions on checking the engine's cooling
system.
Fuel Gauge
This shows how much fuel you have. It is most accurate when the car is on
level ground. It may show slightly
more or less than the actual amount
when you are driving on curvy or hilly roads. The gauge stays at the same fuel
level reading after you turn off the
ignition. When you add fuel, the
gauge slowly changes to the new
reading after you turn the ignition
back ON (II).
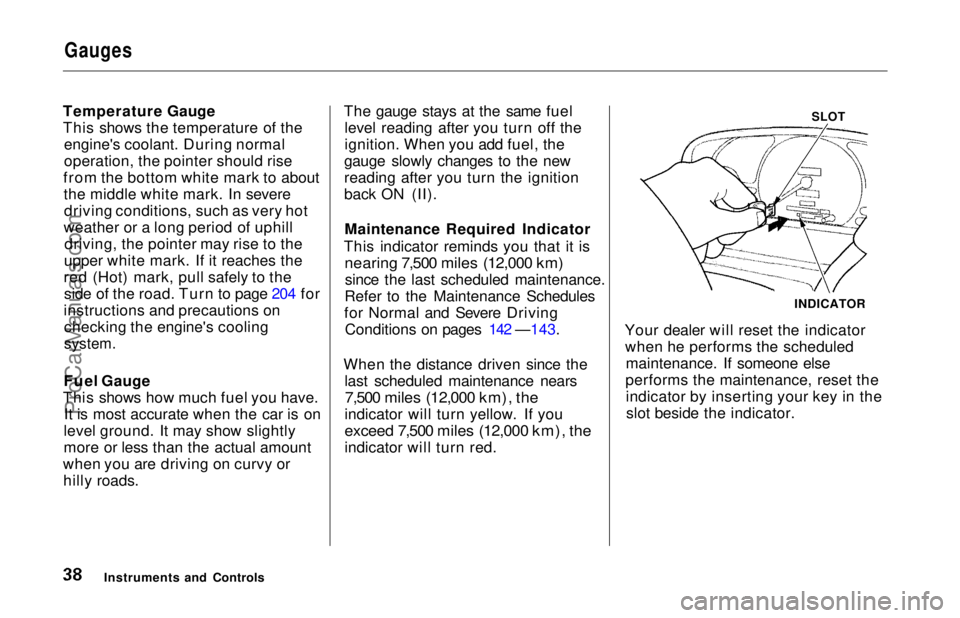
Maintenance Required Indicator
This indicator reminds you that it is
nearing 7,500 miles (12,000 km)
since the last scheduled maintenance.
Refer to the Maintenance Schedules
for Normal and Severe Driving Conditions on pages 142 —143.
When the distance driven since the last scheduled maintenance nears
7,500 miles (12,000 km), the
indicator will turn yellow. If you
exceed 7,500 miles (12,000 km), the
indicator will turn red.
SLOT
Your dealer will reset the indicator when he performs the scheduled maintenance. If someone else
performs the maintenance, reset the indicator by inserting your key in theslot beside the indicator.
Instruments and Controls INDICATORProCarManuals.comMain Menu Table of Contents s t
Page 40 of 241
Controls Near the Steering Wheel
The two levers on the steering column contain controls for driving
features you use most often. The left
lever controls the turn signals,
headlights, and high beams. The right lever controls the windshield
washers and wipers.
The rear window defogger switch and hazard warning switch are on
the dashboard under the center air
vent.
The controls near the left air vent are for the sunroof, cruise control
and instrument panel brightness.
The tilt adjustment lever on the underside of the steering columnallows you to tilt the steering wheel. HAZARD WARNING LIGHT
REAR WINDOW
DEFOGGER
SUNROOF
SWITCH
CRUISE
CONTROL HORN
BUTTONS
INSTRUMENT
BRIGHTNESS
HEADLIGHTS/
TURN SIGNALS
TILT
ADJUSTMENT
WINDSHIELD
WIPERS/WASHERS
Instruments and Controls
SHIFT LEVERProCarManuals.comMain Menu Table of Contents s t
Page 41 of 241
Controls Near the Steering Wheel
Headlights
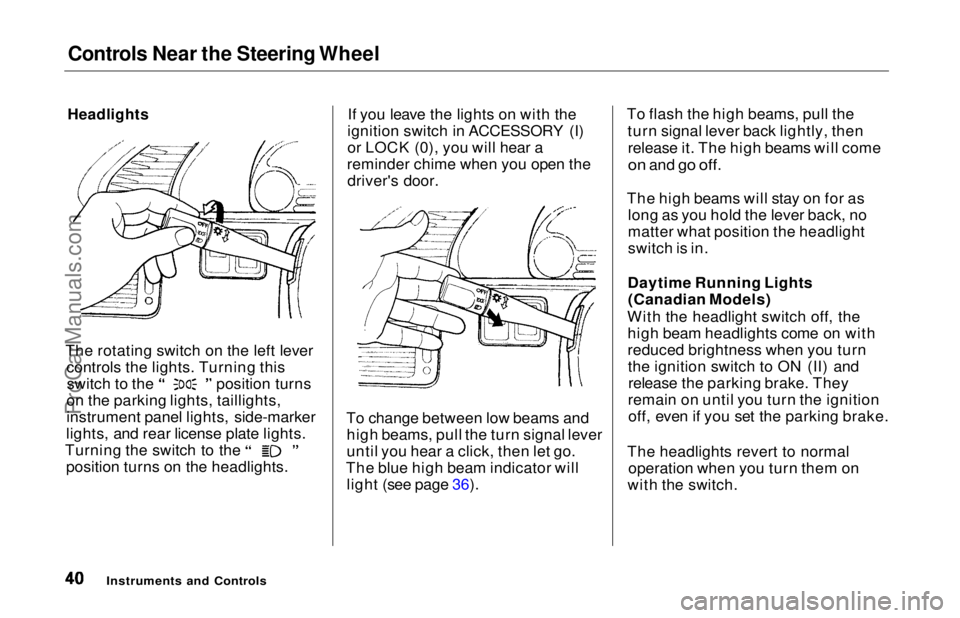
The rotating switch on the left lever controls the lights. Turning this switch to the position turns
on the parking lights, taillights,
instrument panel lights, side-marker
lights, and rear license plate lights. Turning the switch to the
position turns on the headlights. If you leave the lights on with the
ignition switch in ACCESSORY (I)
or LOCK (0), you will hear a
reminder chime when you open the driver's door.
To change between low beams and high beams, pull the turn signal lever
until you hear a click, then let go.
The blue high beam indicator will light (see page 36). To flash the high beams, pull the
turn signal lever back lightly, thenrelease it. The high beams will come
on
and
go off.
The high beams will stay on for as long as you hold the lever back, no
matter what position the headlight
switch is in.
Daytime Running Lights (Canadian Models)
With the headlight switch off, the high beam headlights come on with
reduced brightness when you turnthe ignition switch to ON (II) andrelease the parking brake. They
remain on until you turn the ignition off, even if you set the parking brake.
The headlights revert to normal operation when you turn them on
with the switch.
Instruments and ControlsProCarManuals.comMain Menu Table of Contents s t
Page 42 of 241
Controls Near the Steering Wheel
Instrument Panel Brightness
The knob on the dashboard to the left of the steering column controls
the brightness of the instrument
panel lights. Push the knob to get it
to pop out. Turn the knob to adjust
the brightness. Push the knob back
in to lock your adjustment. Turn Signals
Signal a turn or lane change with this
lever. Push down on the lever tosignal a left turn, and up to signal a
right turn. If you push it up or down
all the way, the turn signal continues
to blink even when you release the
lever. It shuts off automatically as
you complete the turn. To signal a lane change, push lightly
on the turn signal lever in the proper
direction and hold it. The lever will
return to the center position as soon as you release it.
Instruments and Controls
TURN SIGNAL LEVERProCarManuals.comMain Menu Table of Contents s t
Page 44 of 241
Controls Near the Steering Wheel
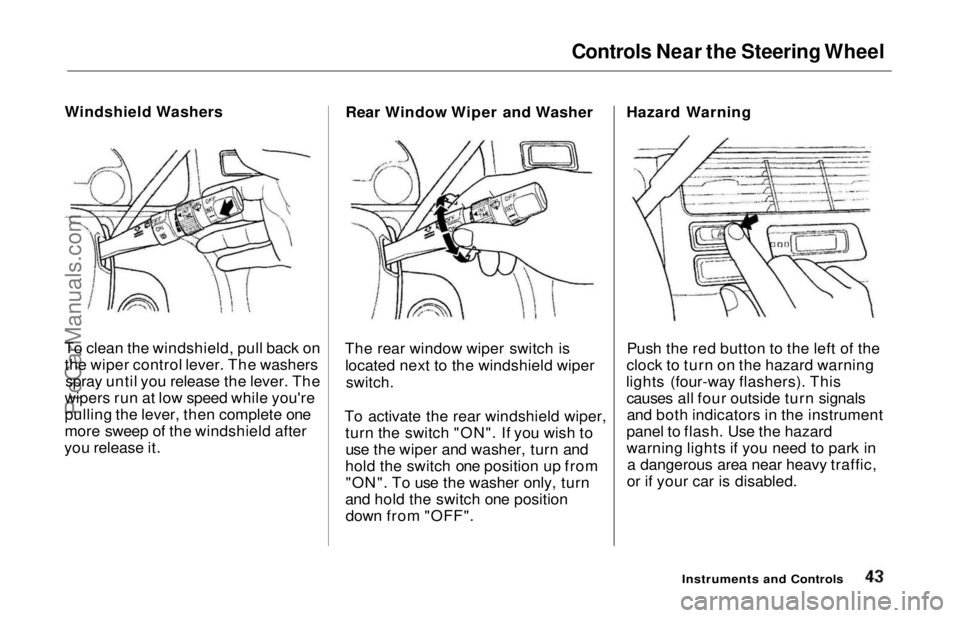
Windshield Washers
To clean the windshield, pull back on the wiper control lever. The washers spray until you release the lever. The
wipers run at low speed while you're
pulling the lever, then complete one
more sweep of the windshield after
you release it. Rear Window Wiper and Washer
The rear window wiper switch is located next to the windshield wiper
switch.
To activate the rear windshield wiper, turn the switch "ON". If you wish touse the wiper and washer, turn and
hold the switch one position up from "ON". To use the washer only, turn
and hold the switch one position down from "OFF". Hazard Warning
Push the red button to the left of the
clock to turn on the hazard warning
lights (four-way flashers). This causes all four outside turn signalsand both indicators in the instrument
panel to flash. Use the hazard
warning lights if you need to park in a dangerous area near heavy traffic,
or if your car is disabled.
Instruments and ControlsProCarManuals.comMain Menu Table of Contents s t