Page 2 of 167

ICONS
Indicates a warning.
Read the following
section onWarnings
for a full explanation of them.
Indicates that vehicle
information related to
recycling and other
environmental
concerns will follow.
We must all play our part in protecting the
environment. Correct vehicle usage and the
authorized disposal of waste cleaning and lubrication
materials are significant steps towards this aim.
WARNINGS
How can you reduce the risk of personal injury and
prevent possible damage to others, your vehicle and
its equipment?
In this owner's guide, answers to such questions are
contained in comments highlighted by the warning
triangle symbol.
BREAKING-IN YOUR VEHICLE
There are no particular breaking-in rules for your
vehicle. Simply avoid driving too briskly during the
first 1,600 km (1,000 miles) of driving. Vary speeds
frequently. This is necessary to give the moving
parts a chance to break in.
If possible, you should avoid full use of the brakes
for the first 1,600 km (1,000 miles).
From 1,600 km (1,000 miles) onwards you can
gradually increase the performance of your vehicle
up to the permitted maximum speeds.
INFORMATION ABOUT THIS GUIDE
The information found in this guide was in effect at
the time of printing. Ford may change the contents
without notice and without incurring obligation.
Introduction
2
ProCarManuals.com
Page 26 of 167
Flash-to-pass
Pull the control toward
you to activate the
flash-to-pass function.
WINDSHIELD WIPERS AND WASHER
Push the control on
the end of the turn
signal control to
activate washer. Push
the control once for a single wipe. Push and hold for
a longer wash cycle.
Turn the dial at end of
the turn signal control
to adjust wiper interval
and speed.
HAZARD FLASHER
Push the control
located on top of the
steering column to
activate four-way
flashers. Push control
again to turn flashers
off.
LO
F
OFFS
HI
LO
F
OFFS
HI
Controls and features
27
ProCarManuals.com
Page 27 of 167
TILT STEERING
Pull the tilt steering
control toward you to
move the steering
wheel up or down.
Hold the control while
adjusting the wheel to
the desired position,
then release the
control.
Never adjust the steering wheel when the
vehicle is moving.
MOON ROOF (IF EQUIPPED)
Press SLIDE to open
and close moon roof.
Press AUTO and
release to open
completely with one
touch.
Press UP or DN on the
TILT control to tilt
moon roof when closed.
Sliding shade
The moon roof has a sliding shade that you can
open or close when the moon roof is closed.
DOME LAMPS AND MAP LAMPS
The front dome lamp is located overhead between
the driver and passenger seats. If the vehicle is
equipped with a moon roof, the dome lamp is
located behind the moon roof.
TILT
UP
LIGHTLIGHT
AUTO
DNSLIDE
Controls and features
28
ProCarManuals.com
Page 30 of 167
Central locking/Two step unlocking
When unlocking the driver or front passenger door
with the key, turn it once toward the front of the
vehicle to unlock that door only. Turn the key a
second time to unlock all doors. When locking, turn
the key toward the back of the vehicle to lock all
doors.
Liftgate (wagon only)
The power liftgate lock
is located on the right
inside trim panel in the
cargo area. When this
lock is pressed, all
doors and the liftgate
will lock.
POWER SIDE VIEW MIRRORS
To change mirror
position, first select a
mirror by moving the
selector control left
(
) or right (),
then moving the
control to set the
desired position.
Power heated side view mirrors (if equipped)
The heated mirrors will melt frost, thin ice or
remove fog when the rear window defroster is
activated.
Controls and features
31
ProCarManuals.com
Page 33 of 167
If your vehicle is
equipped with a
cellular phone, press
the latch release
located on the driver's
side edge of the
console lid to access
the phone.
If your vehicle is
equipped with the
column shift, it has a
center console in the
center front seating
position.
The center console has the same features as the full
console. To open the storage compartment, raise the
armrest and pull the strap on the seat up and
toward the front of the vehicle. The cupholders in
the center console can be removed for cleaning.
Cellular phone
Refer to the cellular phone user's manual for
instruction on operation.
Controls and features
34
ProCarManuals.com
Page 35 of 167
²ashtray (push to
open)
The release for the utility compartment is on the
front of the console, just below the armrest. Press
and release at the ridges to open.
If your vehicle is
equipped with the
column shift, it has a
center console in the
center front seating
position.
The center console has the same features as the full
console. To open the storage compartment, raise the
armrest and pull the strap on the seat up and
toward the front of the vehicle. The cupholders in
the center console can be removed for cleaning.
POSITIVE RETENTION FLOOR MAT
(IF EQUIPPED)
Position the floor mat so that the eyelet is over the
pointed end of the retention post and rotate forward
to lock in. Make sure the mat does not interfere with
the operation of the accelerator and brake pedal. To
remove the floor mat, reverse the installation
procedure.
Seating and safety restraints
36
ProCarManuals.com
Page 38 of 167

1. Remove the shade from the mounting brackets by
detaching the safety clip and pressure fit plastic
knobs from either side of the shade.
2.Wrap the vinyl around the tube twice by twisting
the tube away from you. Tuck the edged of the vinyl
end cap with each wrap.
3. Fold the vinyl toward the center, making sure the
edges clear the end cap slots. Use tape or a rubber
band to hold the vinyl on the left side of the tube..
4. Push in the right end cap (marked R) about 6 mm
(1/4 inch) to disengage the clutch and hold in while
turning the tube toward you fourteen times.
5. Let go of the right end cap and unfold the vinyl.
Place the vinyl into the end cap slots.
6. Place the shade back into the vehicle.
The cover may cause injury in a sudden stop
or accident if it is not securely installed.
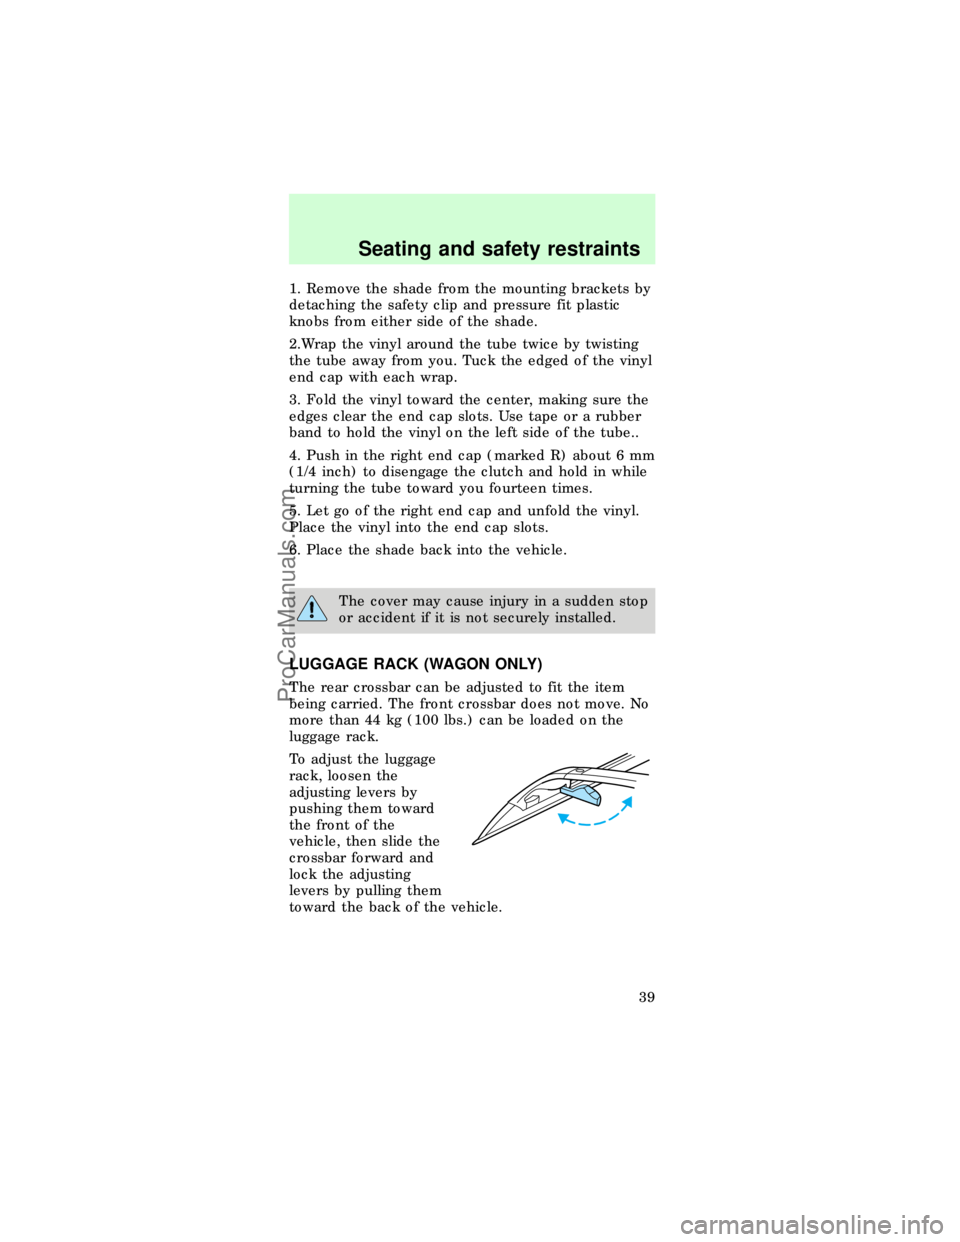
LUGGAGE RACK (WAGON ONLY)
The rear crossbar can be adjusted to fit the item
being carried. The front crossbar does not move. No
more than 44 kg (100 lbs.) can be loaded on the
luggage rack.
To adjust the luggage
rack, loosen the
adjusting levers by
pushing them toward
the front of the
vehicle, then slide the
crossbar forward and
lock the adjusting
levers by pulling them
toward the back of the vehicle.
Seating and safety restraints
39
ProCarManuals.com
Page 47 of 167
Once the doors and
liftgate (wagon) are
closed, the system will
arm in 30 seconds.
When the system is armed the THEFT indicator will
flash.
When you press the
LOCK button twice
within 5 seconds on
your remote entry
transmitter, the horn
will chirp once to let
you know that the
system is armed.
If the doors or liftgate (wagon) are not closed and
you press the remote entry transmitter twice to
confirm the doors are locked, the horn will chirp
twice to warn you that the system is not arming.
Disarming the system
You can disarm the system by any of the following
actions:
²Unlock the doors by
using your remote
entry transmitter.
²Unlock the doors by
using your keyless
entry pad.
²Unlock the doors or liftgate with a key. Turn the
key full travel (toward the front of the vehicle) to
make sure the alarm disarms.
²Turn ignition to ACC or ON.THEFT
LOCKUN
LOCK
PANIC
TRUNK
LOCKUN
LOCK
PANIC
TRUNK
1
23
45678
90
Seating and safety restraints
48
ProCarManuals.com