1997 CADILLAC ELDORADO horn
[x] Cancel search: hornPage 18 of 361
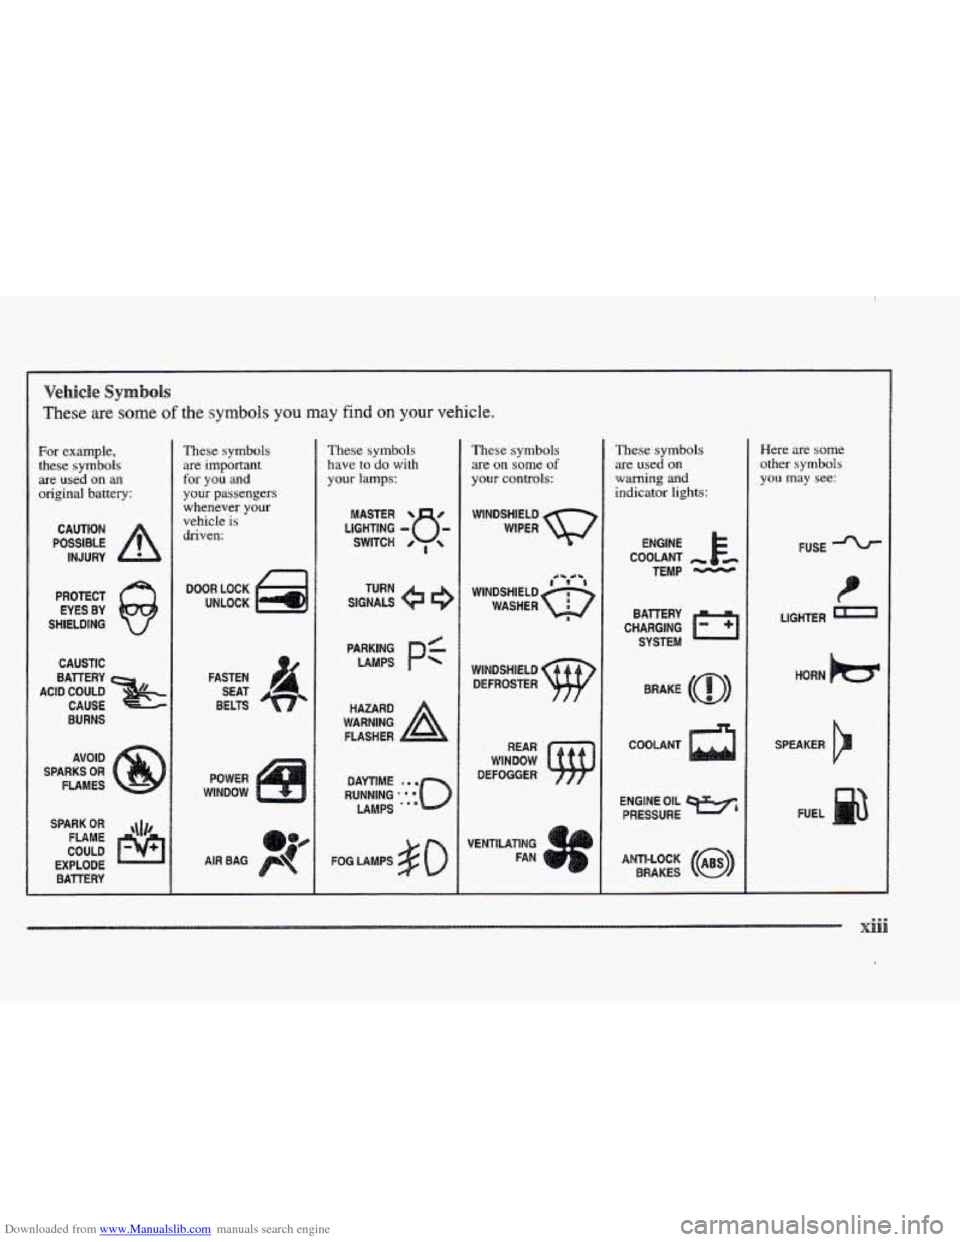
Downloaded from www.Manualslib.com manuals search engine Vehicle Symbo1s
These are some of the symbols you may find on your vehicle.
For example,
these symbols are used on
an
original battery:
CAUTION
POSSIBLE
INJURY
PROTECT EYES BY
SHIELDING
CAUSTIC
BAllERY
ACID COULD CAUSE
BURNS
AVOID
SPARKS OR
FLAMES
SPARK
OR
FLAME
COULD
EXPLODE BATTERY
These symbols
are important
for you and
your passengers
whenever your
vehicle is
driven:
DOOR LOCK
UNLOCK
FASTEN SEAT
BELTS
POWER
WINDOW
These symbols
have to do with
your
lamps:
TURN
SIGNALS
PARKING
/
LAMPS
-
HAZARD
WARNING
FLASHER
DAYTIME . .
RUNNING * *
LAMPS .OB
FOG LAMPS
These symbols
are
on some of
your controls:
WINDSHIELD
WIPER
45 c5
WINDSHIELD
WASHER tea
WINDSHIELD DEFROSTER
REAR
WINDOW
DEFOGGER
VENTILATING
I
FAN W
These symbols
are used on
warning and
indicator lights:
ENGINE
COOLANT
-
TEMP
BAlTERY
CHARGING SYSTEM
BRAKE
COOLANT
ENGINE OIL
PRESSURE
ANTI-LOCK BRAKES
a
Here are some
other symbols
you may
see:
FUSE *
LIGHTER n
HORN
SPEAKER
FUEL
xiii
Page 79 of 361

Downloaded from www.Manualslib.com manuals search engine e Lock the glove box.
Lock all the doors except the driver’s.
@ Then take the door key and remote keyless entry
transmitter with
you.
SECURITY
If the ignition is off and
either door is open, the
SECURITY light will flash,
reminding
you to activate
the system (the light will
also flash
if the battery
has been disconnected and reconnected)
.
To arm the system, do the following:
1. Open the door.
2. Lock the door using the power door lock or the RKE
system. The SECURITY light should come on and
stay on.
3. Close both doors. The SECURITY light should go
off within approximately 30 seconds.
The horn will sound and the lamps will flash for about
30 seconds when the door or trunk is opened without the
key or RKE system. The horn also sounds if the locks
are damaged.
Remember, the theft-deterrent system won’t activate
if
you lock the doors with a key or use the manual door
lock. It activates only if you use a power door lock
switch
or the RKE system.
To avoid activating the alarm by accident:
8 The vehicle should be locked with the door key or
the manual door lock switch after the doors are
closed if you don’t want to activate the
theft-deterrent system.
Always unlock
a door with a key or use the RKE
system. (Pressing the unlock button on the RKE
transmitter disables the theft-deterrent system.)
Unlocking a door any other way will activate the
alarm. Turning the ignition key to
RUN without
disarming the theft-deterrent system will also
activate the alarm.
If you activate the alarm by accident, unlock either door
with your key. You can also turn off the alarm by using
the unlock button
of the RKE system. The alarm won’t
stop if you
try to unlock a door any other way.
2-
Page 80 of 361
Downloaded from www.Manualslib.com manuals search engine 1. From inside the vehcie, roll down the window, then
b Get out of the vehicle, keeping the door open.
2. From outside of the vehicle, with the door open, lock
the vehicle using the power
door lock or the RKE
system and close the door. Wait 30 seconds until the
SECURITY lamp goes off.
3. Reach in and unlock the door using the manual lock
and open the door. The horn will sound and the
headlamps will flash.
If the alarm does not sound when it should, check to
see
if the horn works. The horn fuse may be blown. TO
replace the fuse, see “Fuses and Circuit Breakers” in the
Index.
If the fuse does not need to be replaced, YOU may
need to have your Cadillac serviced.
To reduce the possibility of theft, always activate the
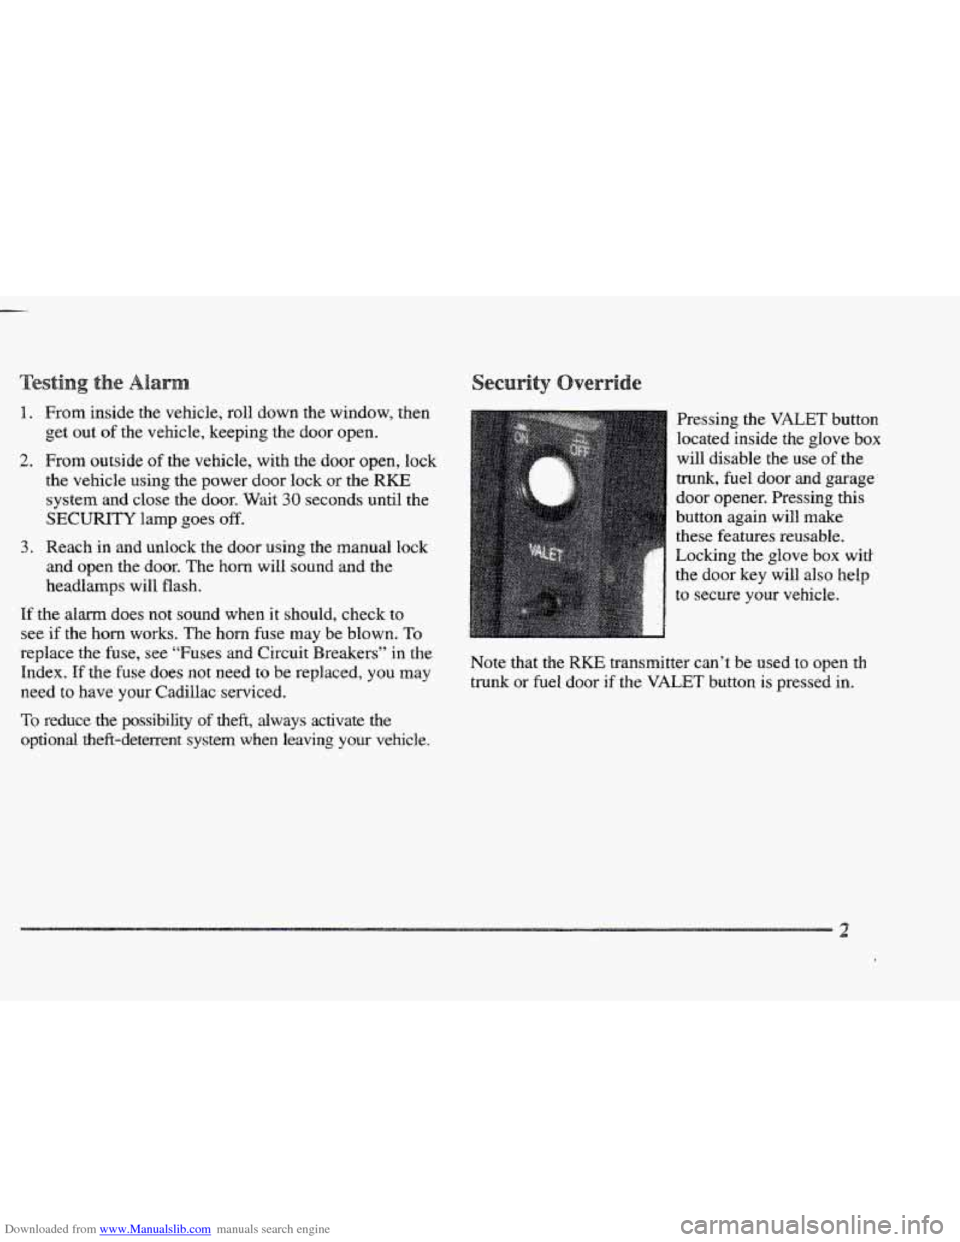
optional theft-deterrent system when leaving your vehicle. Pressing
the VALET button
located inside the glove
box
will disable the use of. the
trunk, fuel door and garage’
~ door opener. Pressing this
button again will make
these features reusable.
’ ’ Locking the glove box witk
the door key
will also help
to secure your vehicle.
Note
that the RKE transmitter can’t be used to open th
trunk or fuel door if the VALET button is pressed in.
2
Page 97 of 361
Downloaded from www.Manualslib.com manuals search engine EX~ESS-DOWR Whdow
This feature is present on the driver’s power window.
Pressing the control rearward into the second
position
then releasing it will lower the window completely.
If you want to stop the window as it is lowering, press
the control forward. Press the control, .. forward to raise
the window.
Note that
the first position on the control operates the
driver’s power window in the non-express mode.
The
horn can be sounded by pressing on the center of
the steering wheel pad.
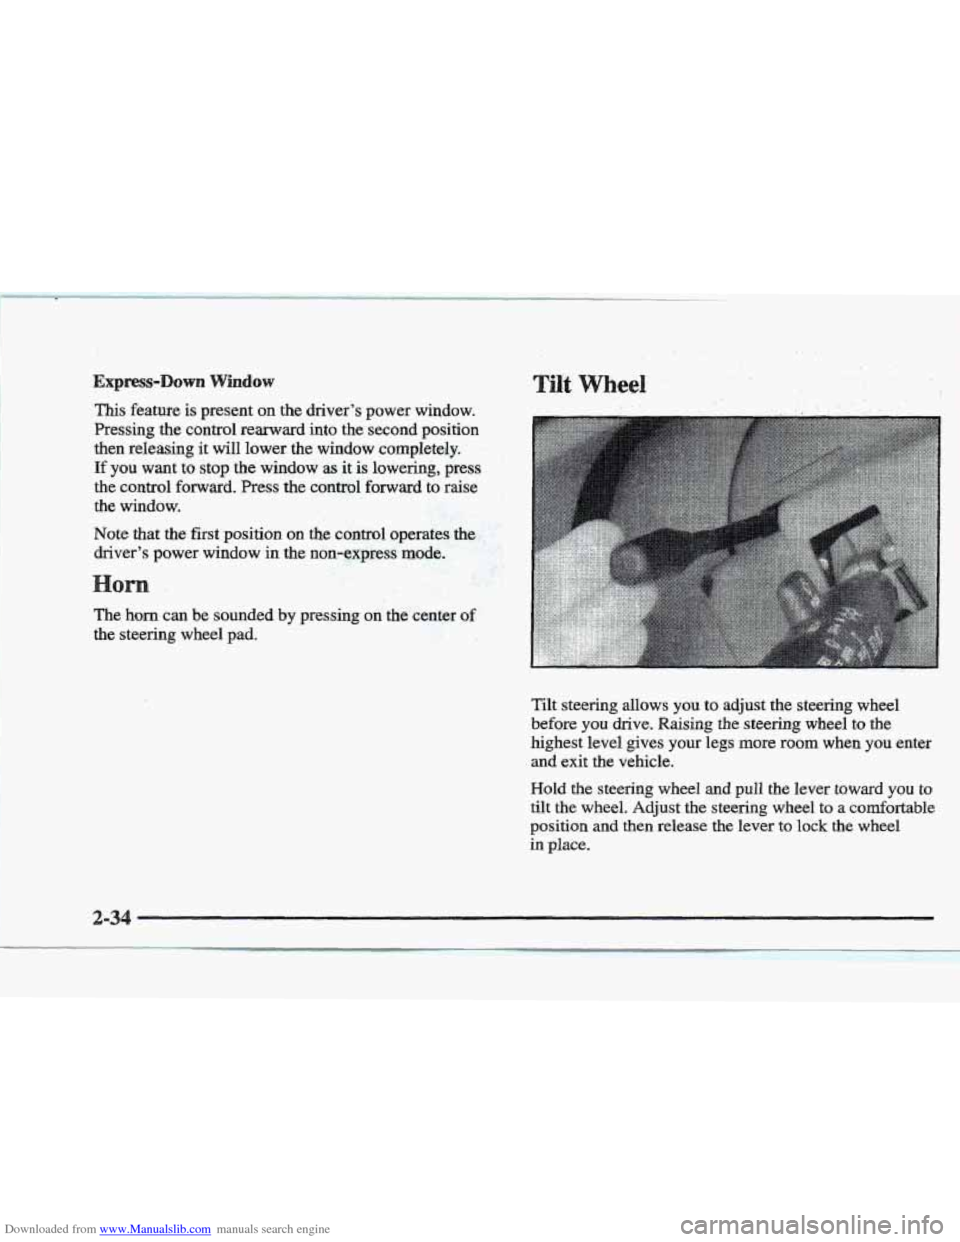
Tilt steering allows you to adjust the steering wheel
before
you drive. Raising the steering wheel to the
highest level gives your legs more room when you enter
and exit the vehicle.
Hold the steering wheel and pull the lever toward you to
tilt the wheel. Adjust the steering wheel to a comfortable
position
and then release the lever to lock the wheel
in place.
2-34
I
Page 128 of 361
Downloaded from www.Manualslib.com manuals search engine The insbrument.pane1 is designed to let you know at a glance how your Cadillac is running. You’ll, know how fast
you’re going, how
much fuel you’re using and many of the other things you’ll need to know to drive safely and
economically. The main components of the instrument panel are:
1.
2.
3.
4.
5.
6.
7.
8.
9.
Air Outlets
Turn SignaVMultifbnction Lever.
Driver Information Center Control Buttons
Driver’s Side
Air Bag
Cluster Steering Columi Shift Lever
Electronic Climate Controls
Radio
Passenger’s Side
Air Bag
10. Lamp Controls
11. WAC Steering Wheel Controls (or Cellular
Telephone Controls,
If Equipped)
12. Hood Release
13. Horn
.#k. 14. Audio Steering Wheel Controls
F. , LI
- , .r 15. Ashtray and Cigarette Lighter I !i&&
16. Glove Box
Page 320 of 361
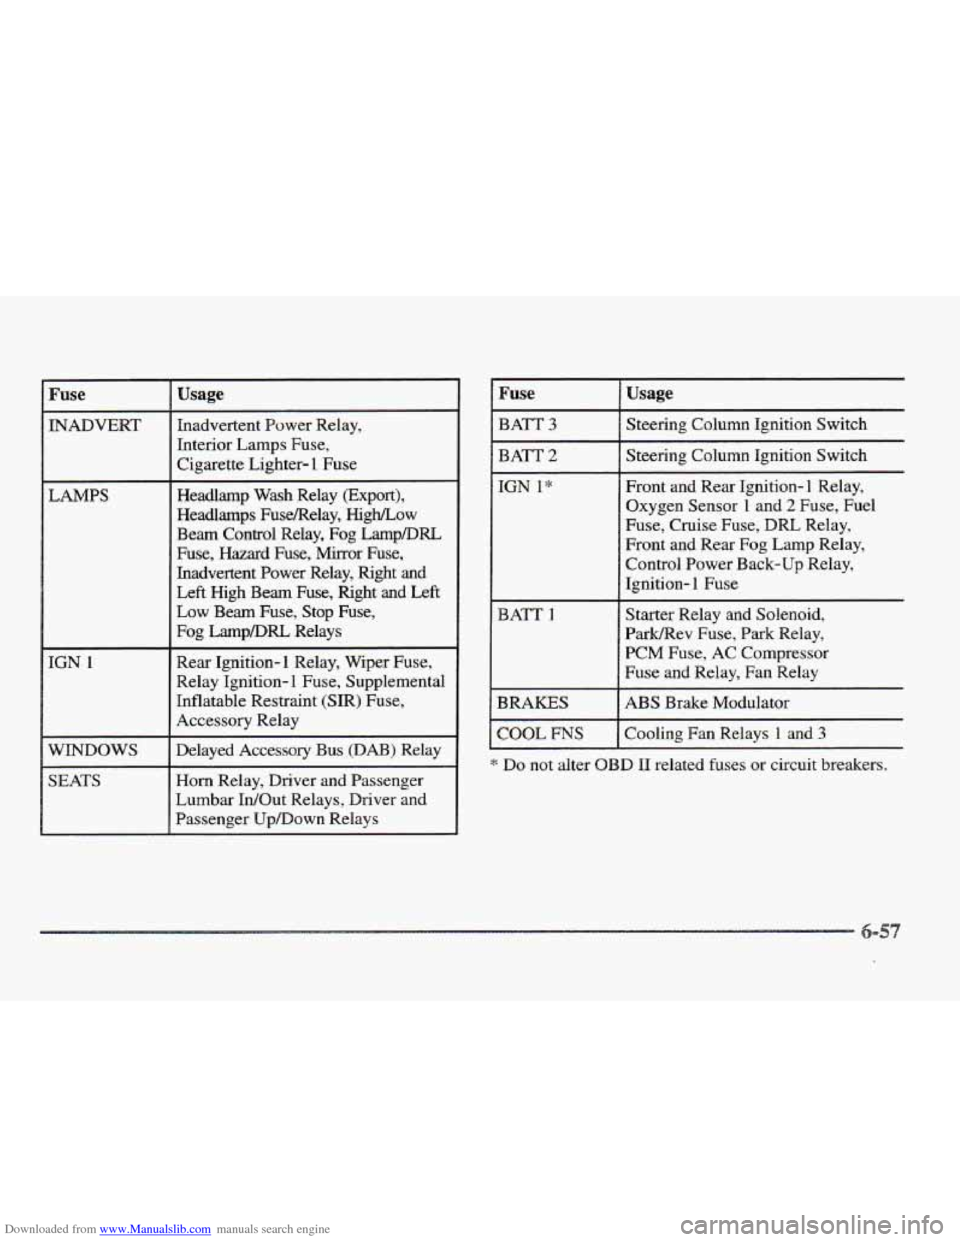
Downloaded from www.Manualslib.com manuals search engine Fuse
INADVERT
LAMPS
____~
IGN 1
WINDOWS
SEATS
Usage
Inadvertent Power Relay,
Interior Lamps
Fuse,
Cigarette Lighter- 1 Fuse
Headlamp Wash Relay (Export),
Headlamps FuseRelay,
High/Low
Beam Control Relay, Fog LampDRL
Fuse, Hazard Fuse, Mirror Fuse,
Inadvertent Power Relay, Right
and
Left High Beam Fuse, Right and Left
Low Beam Fuse, Stop Fuse,
Fog LampDRL Relays
Rear Ignition-1 Relay, Wiper Fuse,
Relay Ignition-
1 Fuse, Supplemental
Inflatable Restraint (SIR) Fuse,
Accessory Relay
Delayed Accessory Bus
(DAB) Relay
Horn Relay, Driver and Passenger
Lumbar IdOut Relays, Driver and
Passenger Up/Down Relays
I Fuse
I BATT 3
I BATT 2
I COOL ms
Usage
Steering Column Ignition Switch
Steering Column Ignition Switch
Front and Rear Ignition- 1 Relay,
Oxygen Sensor
1 and 2 Fuse, Fuel
Fuse, Cruise
Fuse, DRL Relay,
Front and
Rear Fog Lamp Relay,
Control Power Back-up Relay,
Ignition-
1 Fuse
Starter Relay and Solenoid,
Park/Rev Fuse,
Park Relay,
PCM Fuse,
AC Compressor
Fuse and Relay, Fan Relay
ABS Brake Modulator
Cooling Fan Relays
1 and 3
* Do not alter OBD I1 related fuses or circuit breakers.
Page 350 of 361
Downloaded from www.Manualslib.com manuals search engine Flash-To-Pass Feature ........................... 2-36
Flashers. Hazard Warning
......................... 5-2
Flat Tire. Changing
............................. 5-26
Floor Mats
.................................... 2-58
Fluid Capacities
................................ 6-65
Foreign Countries. Fuel ........................... 6-4
French Language Manual
11
Front Towing ............................. 5- 10. 5- 12
Front Turn Signal Lamps. Bulb Replacement ......... 6-34
Fuel
.......................................... 6-3
Datapanel
.................................. 2-80
Door Lock Release
............................. 6-5
Filling Your Tank .............................. 6-5
Gage ....................................... 2-79
In Foreign Countries ........................... 6-4
Level Low Message
........................... 2-87
Fuses and Cirrxit Breakers
....................... 6-58
FogLamps
.................................... 2-44
.. ...........................
ages
Engine Coolant Temperature
.................... 2-75
Fuel
....................................... 2-79
Tachometer
.................................. 2-69
GarmentHooks
................................ 2-58
GAWR ....................................... 4-31
Gear Positions. Automatic Transaxle
................ 2-23
GloveBox
.................................... 2-55
Cold Key Courtesy Transportation
.................. 7-8
Gross Axle Weight Rating ........................ 4-3 1
Gross Vehicle Weight Rating
...................... 4-3 1
Guide en Frangais 11 .. .................................
CVWR ....................................... 4-31 alogenBulbs
................................ 6-31 Y
Handles.
Assist ................................. 2-5E
Hazard Warning Flashers
.......................... 5-2
Head Restraints ................................. 1-7
Headlamps .................................... 2-42
Bulb Replacement ............................ 6-31
HigNLow Beam Changer ...................... 2-35
On Reminder ................................ 2-43
Suggested Message
...................... 2.44. 2.45
Wiper Activated
.............................. 2-43
Wiring
..................................... 6-55
Hearing Impaired. Customer Assistance .............. 7-4
Heated Seats .................................... 1-4
Heating ........................................ 3-6
High-Beam Headlamps
.......................... 2-35
Highway Hypnosis
.............................. 4-24
Hill and Mountain Roads
......................... 4-24
Hitches. Trailer
................................. 4-35
Hood Checking Things Under
......................... 6-7
Release
...................................... 6-8
Hooks. Garment ................................ 2-58
Horn ......................................... 2-34
How to Reset the
Oil Life Indicator ................. 6-14
WAC Steering Wheel Controls .................... 3-9
Hydraulic Brake Warning Lights
................... 2-72
Hydroplaning
.................................. 4-20
ce Possible Message
........................... 2-87
Ignition Positions
............................... 2-19
Illuminated Entry ............................... 2-47
Illuminated Visor Vanity Mirror
.................... 2-58
Inflation, Tire .................................. 6-39
8-