1997 BUICK REGAL instrument panel
[x] Cancel search: instrument panelPage 154 of 422
Control Buttons
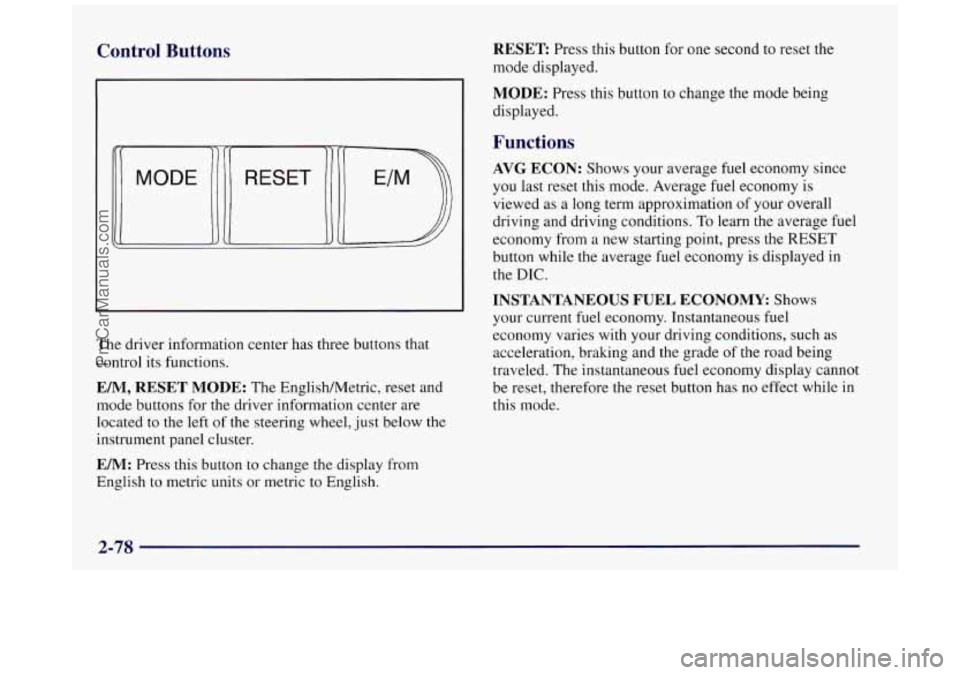
The driver information center has three buttons that
control its functions.
EM, RESET MODE: The EnglishMetric, reset and
mode buttons for
the driver information center are
located to the left
of the steering wheel, just below the
instrument panel cluster.
EM: Press this button to change the display from
English to metric units or metric
to English.
RESET Press this button for one second to reset the
mode displayed.
MODE: Press this button to change the mode being
displayed.
Functions
AVG ECON: Shows your average fuel economy since
you last reset this mode. Average fuel economy is
viewed
as a long term approximation of your overall
driving and driving conditions.
To learn the average fuel
economy from a new starting point, press the RESET
button while the average fuel economy is displayed
in
the DIC.
INSTANTANEOUS FUEL ECONOMY Shows
your current
fuel economy. Instantaneous fuel
economy varies with your driving conditions, such
as
acceleration, braking and the grade of the road being
traveled.
The instantaneous fuel economy display cannot
be reset, therefore the reset button has no effect while in
this mode.
2-78
ProCarManuals.com
Page 158 of 422

Comfort Controls
Manual Single Zone Climate Control
COMFORT CONTROL II
With this system, you can control the heating, cooling
and ventilation in your vehicle, The system works best if
you keep your windows closed while using it.
Fan Knob
The left knob selects the amount of air you want. To turn
the fan off, turn the knob to
OFF.
If the airflow seems very low when the fan knob is turned
to
the highest setting, regardless of the mode setting, your
passenger compartment air filter may need to be replaced. See “Maintenance Schedule”
in the Index.
Temperature Knob
The center knob changes the temperature of the air
coming through the system. Turn this knob toward red
(clockwise) for warmer air. Turn it toward blue
(counterclockwise) for cooler air.
Mode Knob
The right knob has several settings to control the
direction of airflow:
MAX: This setting recirculates much of the air inside
your vehicle and sends it through the instrument panel
outlets. The air conditioning compressor will run
automatically
in this setting unless the outside
temperature is below
40°F (4°C). (Even when the
compressor is running,
you can control the temperature.)
NORM: This setting brings in outside air and sends
it through the instrument panel outlets. The air
conditioning compressor will run automatically in
this setting unless the outside temperature
is below
40°F (4°C). (Even when the compressor is running,
you can control the temperature.)
3-2
ProCarManuals.com
Page 159 of 422
BI-LEV This setting brings in outside air and directs
it two ways. Half of the air is directed through the
instrument panel outlets. Most of the remaining air
is
directed through the floor ducts and a little to the defrost
and side window vents. The air conditioning compressor
will run automatically in this setting unless the outside
temperature is below
40°F (4°C).
VENT This setting brings in outside air and directs it
through the instrument panel outlets.
HTR: This setting sends most of the air through the
ducts near
the floor. The rest comes out of the defroster
and side window vents.
BLEND: This setting allows half of the air to go to the
floor ducts and half to the defroster and side window
vents. The air conditioning compressor will run
automatically in this setting unless the outside
temperature is below
40 OF (4 O C) .
FRONT This setting directs most of the air
through
the defroster and side window vents. Some of
the air also goes to the floor ducts. The air conditioning
compressor will run automatically
in this setting unless
the outside temperature is below
40°F (4°C).
Air Conditioning
On very hot days, open the windows long enough to let
hot, inside air escape. This reduces the time for the
vehicle to cool down.
For a quick cool-down on very hot days, use
MAX with
the temperature knob all the way in the blue area. If this
setting is used for long periods of time, the air
in your
vehicle may become too dry.
For normal cooling on hot days, use NORM with the
temperature knob in the blue area. The system will bring
in outside air and cool it.
On cool, but sunny days, the sun may warm your upper
body, but your lower body may not be warm enough.
You can use
BI-LEV and set the temperature knob to a
comfortable setting. The system will bring in outside air
and direct it
to your upper body, while sending slightly
warmed air to your lower body.
You may notice this
temperature difference more at some times than others.
3-3
ProCarManuals.com
Page 161 of 422
Passenger's Temperature Lever
The bottom lever adjusts the air temperature on the
passenger's side independent of the temperature set by
the driver. Slide the lever toward the right
to raise the
temperature. Slide the lever toward the left to lower
the temperature.
Mode Knob
The right knob has several settings to control the
direction of airflow.
To access the various modes
available, turn the mode button to the desired mode.
MAX: This setting recirculates much of the air inside
your vehicle and sends it through the instrument panel
outlets. The air conditioning compressor will run
automatically
in this setting unless the outside
temperature
is below 40" F (4°C). (Even when the
compressor is running, you can control the temperature.)
NORM: This setting brings in outside air and sends
it through the instrument panel outlets. The air
conditioning compressor will run automatically in
this setting unless the outside temperature is below
40°F (4°C). (Even when the compressor is running,
you can control the temperature.)
BI-LEV: This setting brings in outside air and directs
it two ways. Half of the air is directed through the
instrument panel outlets. Most of the remaining air is
directed through the floor ducts and a little to the defrost
and side window vents. The air conditioning compressor
will run automatically in this setting unless the outside
temperature is below
40°F (4°C). (Even when the
compressor is running, you can control the temperature.)
VENT This setting brings in outside air and directs it
through the instrument panel outlets.
HTR: This setting sends most of the air through the
ducts near the floor. The rest comes out of the defroster
and side window vents.
BLEND: This setting allows half of the air to go to the
floor ducts and half
to the defroster and side window
vents. The air conditioning compressor will run
automatically in this setting unless the outside
temperature is below
40°F (4°C). (Even when the
compressor is running, you can control the temperature.)
9 FRONT This setting directs most of the air
through the defroster and side window vents. Some
of
the air goes to the floor ducts and the side window vents.
The air conditioning compressor will run automatically
in this setting unless the outside temperature is below
40°F (4°C). (Even when the compressor is running, you
can control
the temperature.)
3-5
ProCarManuals.com
Page 164 of 422
Passenger’s Temperature Control
The PASSENGER CONTROL buttons with the arrows
adjust the temperature
on the passenger’s side so it is
warmer or cooler than the temperature set by the driver.
Push the
DUAL button so the indicator light on it is lil.
Press the right arrow button to raise the temperature.
Press the left arrow button to lower the temperature. The
display
will not show the passenger’s side temperature,
only that
of the driver. Tndicators in the passenger
control section will show passenger temperature relative
to the driver’s set temperature.
0 The amber light indicates the same temperature as
set for the driver.
The red lights indicate a warmer temperature than
that of the driver.
The blue lights indicate a cooler temDerature than
that of the driver.
Manual Control
If you prefer to manually control the heating, cooling
and ventilation in your vehicle, you can select airflow
direction,
fan speed, outside or recirculated air and air
compressor operation with the following buttons:
AIR FLOW: This control has several settings to
control the direction
of airflow when the system is not
in AUTO.
To access the various modes available, continue to press
the following four
ATR FLOW up and down arrows
until the desired mode appears in the display:
0
0
0
WINDSHIELD/FLOOR: This setting directs half
of the air to the floor ducts and half to the defroster
and side window vents.
MID/FLOOR: This setting directs half of the air
through the instrument panel outlets. Most
of the
remaining air is directed through the floor ducts and
a little to the defroster and side window vents.
MID: This setting directs air through
the instrument
panel outlets.
ProCarManuals.com
Page 235 of 422
Turn Signals When Towing a Trailer
When you tow a trailer, your vehicle may need a
different turn signal flasher and/or extra wiring. Check
with your Buick dealer. The green arrows on your
instrument panel will flash whenever
you signal a turn
or lane change. Properly hooked up, the trailer lamps
will also flash, telling other drivers you’re about
to turn,
change lanes or stop.
When towing a trailer, the green arrows on your
instrument panel will flash for turns even
if the bulbs on
the trailer are burned out. Thus,
you may think drivers
behind
you are seeing your signal when they are not.
It’s important to check occasionally to be sure the trailer
bulbs are still working.
Driving On Grades
Reduce speed and shift to a lower gear before you start
down a long or steep downgrade. If you don’t shift
down, you might have
to use your brakes so much that
they would get hot and
no longer work well.
On a long uphill grade, shift down and reduce your
speed to around
45 mph (70 kmh) to reduce the
possibility
of engine and transaxle overheating.
Parking on Hills
You really should not park your vehicle, with a trailer
attached, on a hill. If something goes wrong, your rig
could start to move. People can be injured, and both
your vehicle and the trailer can be damaged.
But if you ever have to park your rig on a hill, here’s
how to
do it:
1. Apply your regular brakes, but don’t shift into
PARK (P)
yet.
2. Have someone place chocks under the
trailer’s wheels.
3. When the wheel chocks are in place, release the
regular brakes until the chocks absorb the load.
4. Reapply the regular brakes. Then apply your parking
brake, and shift to PARK
(P).
5. Release the regular brakes.
4-39
ProCarManuals.com
Page 251 of 422
Engine Overheating
You will find a coolant temperature gage and a hot
engine warning light on your instrument panel. See
“Engine Coolant Temperature Gage” and “Engine
Coolant Temperature Warning Light” in the Index.
You
also have a low coolant light on your instrument panel.
See “Low Coolant Light” in the Index.
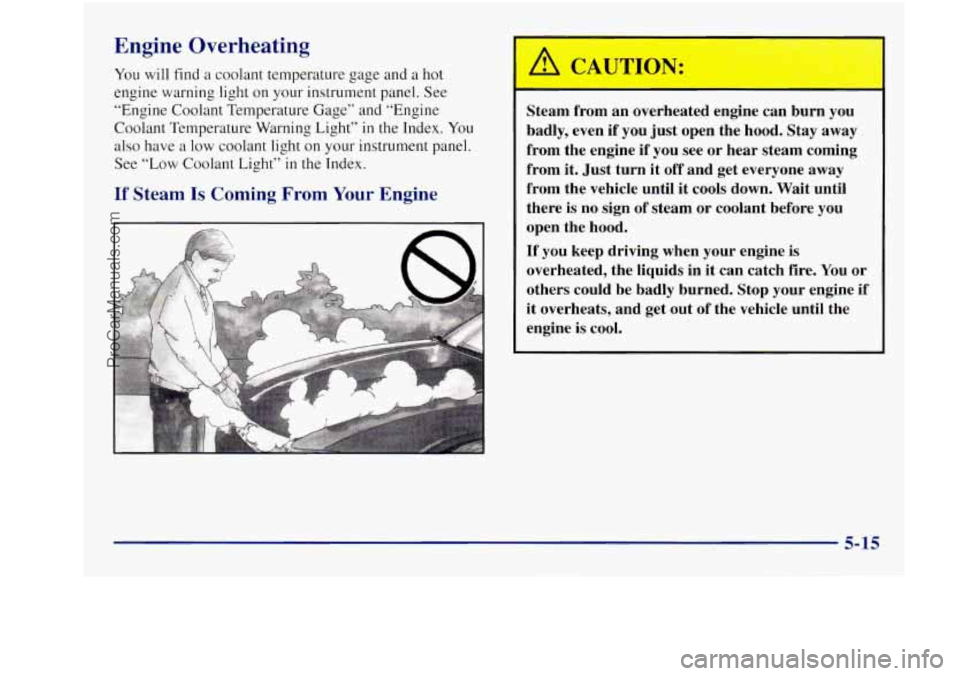
If Steam Is Coming From Your Engine
L
Steam from an overheated engine can burn you
badly, even if you just open the hood. Stay away
from the engine if you see or hear steam coming
from it. Just turn it off and get everyone away
from the vehicle until it cools down. Wait until
there
is no sign of steam or coolant before you
open the hood.
If you keep driving when your engine
is
overheated, the liquids in it can catch fire. You or
others could be badly burned. Stop your engine if
it overheats, and get out of the vehicle until the
engine is cool.
ProCarManuals.com
Page 279 of 422
Adding Equipment to the Outside of
Your Vehicle
Things you might add to the outside of your vehicle can
affect the airflow around it. This may cause wind noise
and affect windshield washer performance. Check with
your Buick dealer before adding equipment
to the
outside
of your vehicle.
Fuel
The 8th digit of your vehicle identification number
(VIN) shows the code letter for your engine. You will
find the VIN at the top left of your instrument panel.
(See “Vehicle Identification Number” in the Index.)
If you have the
3800 engine (VIN Code K), use
regular unleaded gasoline rated at 87 octane or higher.
If you’re using fuel rated at the recommended octane
or higher and you hear heavy knocking, your
engine
needs service. But don’t worry if you hear a
little pinging noise when you’re accelerating or driving
up a hill. That’s normal, and you don’t have to buy a
higher octane fuel to get rid
of pinging. It’s the heavy,
constant knock that means you have a problem.
If you have the 3800 Supercharged engine (VIN
Code l), use premium unleaded gasoline rated at
91 octane or higher. With the 3800 Supercharged
engine, in an emergency,
you may be able to use a
lower octane -- as low as 87 -- if heavy knocking
does not occur.
If you are using 91 or higher octane
unleaded gasoline and you hear heavy knocking, your
engine needs service.
At
a minimum, the gasoline you use should meet
specifications ASTM D48
I4 in the United States
and CGSB
3.5-M93 in Canada. Improved gasoline
specifications have been developed by the American
Automobile Manufacturers Association (AAMA) for
better vehicle performance and engine protection.
Gasolines meeting
the AAMA specification could
provide improved driveability and emission control
system protection compared to other gasolines.
Be sure the posted octane for premium is at least
91
(at least 89 for middle grade and 87 for regular). If the
octane is less than 87, you may get
a heavy knocking
noise when you drive. If it’s bad enough, it can damage
your engine.
ProCarManuals.com