1997 BUICK PARK AVENUE buttons
[x] Cancel search: buttonsPage 15 of 420

0 Move the seat forward or back by pushing the
horizontal control to the front or back.
0 Tilt the seatback by pushing the vertical control
forward or rearward.
0 Raise or lower the shoulder belt and head rest by
pushing the vertical control to the top or bottom.
Memory Seat and Mirrors (Option)
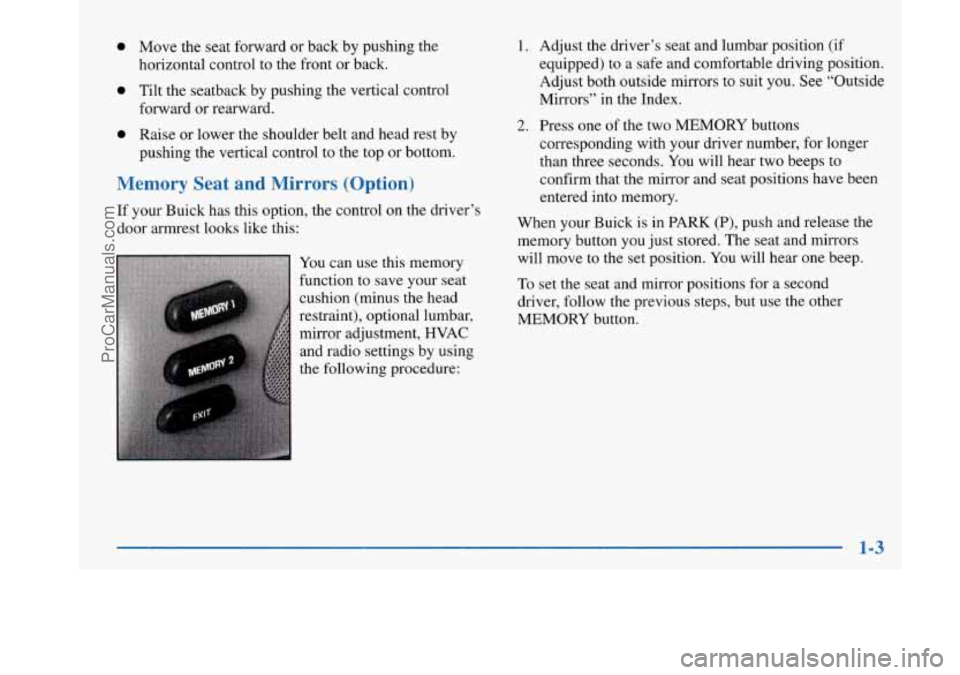
If your Buick has this option, the control on the driver’s
door armrest looks like this:
You can use this memory
function to save your seat
cushion (minus the head
restraint), optional lumbar,
mirror adjustment, HVAC
and radio settings by using
the following procedure:
1. Adjust the driver’s seat and lumbar position (if
equipped) to a safe and comfortable driving position.
Adjust both outside mirrors to suit you. See “Outside
Mirrors” in the Index.
2. Press one of the two MEMORY buttons
corresponding with your driver number, for longer
than three seconds. You will hear two beeps to
confirm that the mirror and seat positions have been
entered into memory.
When your Buick is in PARK (P), push and release the
memory button you just stored. The seat and mirrors
will move to the set position. You will hear one beep.
To set the seat and mirror positions for a second
driver, follow the previous steps, but use the other
MEMORY button.
ProCarManuals.com
Page 70 of 420

Synchronization
If only the instant alarm button works, the transmitter
needs to be resynchronized to the receiver. Do this by
pressing and holding both the LOCK and
UNLOCK
buttons on the transmitter for about eight seconds; you
must be within range of the vehicle.
Once the transmitter has been resynchronized, the horn
will chirp and the exterior lamps will flash once. The
system should now operate properly.
Theft-Deterrent System
The remote keyless entry transmitter will arm the
theft-deterrent system whenever the doors are
closed and you push the
LOCK button when the
ignition is
OFF. It will disarm the system when you
push UNLOCK.
Personal Choice Features (If Equipped)
-Each remote keyless entry transmitter can be
programmed to the driver’s preference for memory door locks, security feedback, delayed locking and perimeter
lighting. See each feature in the Index. You can also
personalize your comfort control temperature, mode and
fan settings. See “Comfort Controls Personal Choice” in
the Index.
If your vehicle is equipped with the Driver Information
Center (DIC), you can also program these features
through the DIC. See “Driver Information Center” in
the Index.
2-10
ProCarManuals.com
Page 73 of 420

Battery Replacement
Under normal use, the battery in your remote keyless
entry transmitter should last about four years.
You can tell the battery is weak
if the transmitter won’t
work at the normal range in any location.
If you have to
get close to your vehicle before the transmitter works,
it’s probably time to change the battery.
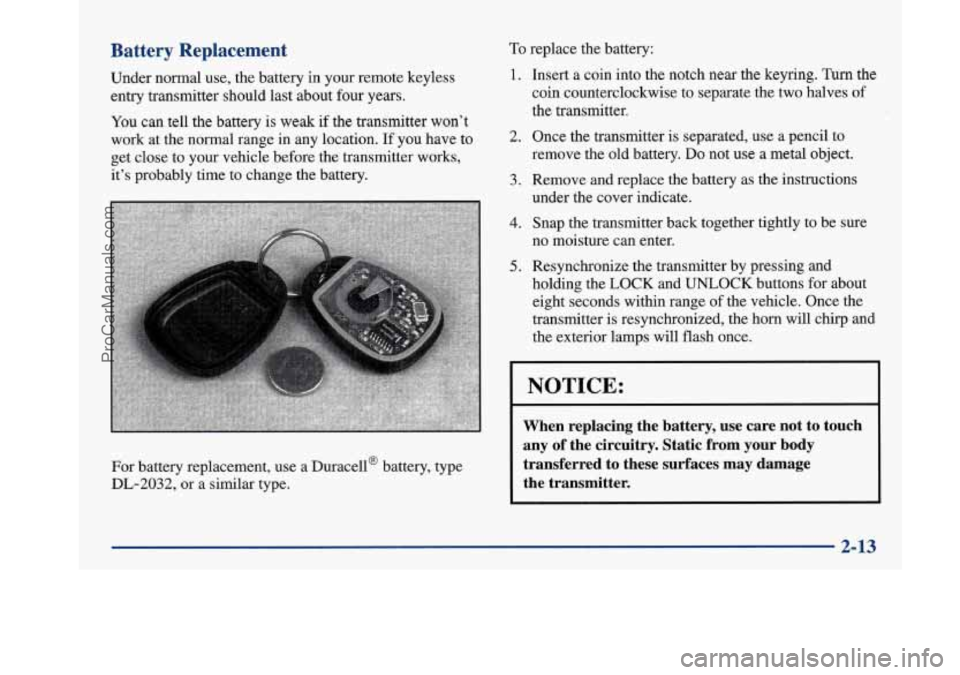
For battery replacement, use a Duracella battery, type
DL-2032, or a similar type.
To replace the battery:
1.
2.
3.
4.
5.
Insert a coin into the notch near the keyring. Turn the
coin counterclockwise to separate the two halves of
the transmitter.
Once the transmitter
is separated, use a pencil to
remove the
old battery. Do not use a metal object.
Remove and replace the battery as the instructions
under the cover indicate.
Snap the transmitter back together tightly to be sure
no moisture can enter.
Resynchronize the transmitter by pressing and
holding the
LOCK and UNLOCK buttons for about
eight seconds within range
of the vehicle. Once the
transmitter is resynchronized, the horn will chq
and
the exterior lamps will flash once.
NOTICE:
When replacing the battery, use care not to touch
any of the circuitry. Static from your body
transferred to these surfaces may damage
the transmitter.
2-13
ProCarManuals.com
Page 125 of 420

It will operate garage doors and gates, or other devices
controlled by radio frequency such as home/office
lighting systems.
The transmitter will learn and transmit the frequencies
of most current transmitters and is powered by your
vehicle’s battery and charging system.
This device complies with Part
15 of the FCC Rules.
Operation is subject to the following two conditions:
(1) This device may not cause harmful interference,
and
(2) This device must accept any interference
received, including interference that may cause
undesired operation.
Programming the Transmitter
Do not use the universal transmitter with any garage
door opener that does not have the “stop and reverse”
safety feature. This includes any garage door opener
model manufactured before April 1, 1982.
Be sure that people and objects are clear of the garage
door
you are programming!
Your vehicle’s engine should be turned off while
programming your transmitter. Follow these steps to
program up to three channels:
1.
2.
3.
4.
If you have previously programmed a universal
transmitter channel, proceed to Step
2. Otherwise,
hold down the two outside buttons on the universal
transmitter until the amber light begins to flash
rapidly (approximately
20 seconds). Then release the
buttons. This procedure initializes the memory and
erases any previous settings for all three channels.
Hold the end of your hand-held transmitter against
the bottom surface of the universal transmitter
so
that you can still see the amber light.
Decide which one of the three channels you want to
program. Using both hands, press the hand-held
transmitter button and the desired button on the
universal transmitter. Continue to hold both buttons
through Step
4.
Hold down both buttons until you see the amber light
on the universal transmitter first flash slowly, then
rapidly. The rapid flashing, which could take up to
90 seconds, indicates that the universal transmitter
has been programmed. Release both buttons once the
light starts
to flash rapidly.
2-65
ProCarManuals.com
Page 126 of 420

If you have trouble programming the universal
transmitter, make sure that you have followed the
directions exactly as described and that the batteries in
the hand-held transmitter are not dead. If you still
cannot program it, rotate your hand-held transmitter end
over end and
try again. The universal transmitter may
not be compatible with a limited number of older
installations due to legislated changes in transmission
frequencies. If you cannot program the transmitter after
repeated attempts, consult your Buick dealer.
Be sure to keep your original hand-held transmitter
in case you need to erase and reprogram the
universal transmitter.
Note to Canadian Owners: During programming, your
hand-held transmitter may stop transmitting after one or
two seconds. If you
are programming from one of these
transmitters, you should press and re-press the button on
the hand-held transmitter every two seconds without
ever releasing the button on the universal transmitter.
Release both buttons when the amber light on the
universal transmitter begins to flash rapidly.
Operating the Transmitter
Press and hold the appropriate button on the universal
transmitter. The amber light comes on while the signal
is
being transmitted.
Note that the effective transmission range of the
universal transmitter may differ from your hand-held
transmitter and from one channel to another.
Training a Garage Door Opener Equipped
with “Rolling Codes”
If you programmed the universal transmitter, but the
garage door will not open, and if your garage door opener was manufactured after
1995, your garage door may have
a security feature that changes the “code”
of your garage
door opener every time
it is opened or closed.
To determine if your garage door opener has this rolling
code feature, press the appropriate button on the
universal transmitter that was programmed. If the amber
light flashes rapidly for one to two seconds, then turns
solid, your garage door opener has this feature.
2-66
ProCarManuals.com
Page 127 of 420

To program a garage door opener with the rolling code
feature, do the following:
1.
2.
3.
4.
5.
6.
Program your hand-held transmitter to the universal
transmitter by following the steps provided under
“Programming the Transmitter” earlier.
Remove the cover panel from the garage
door
opener receiver. It is located near the garage door
opener motor.
Locate the training button on the garage door opener
receiver. The exact location and color will vary
among brands.
Press the training button on the garage door opener
receiver for one to two seconds.
Return to your vehicle and press the programmed
button on the universal transmitter until the amber
light flashes rapidly (about two seconds).
Release the button, then press it again to confirm it
was programmed to the garage door opener receiver. You
may now use either the universal transmitter or the
hand-held transmitter to open your garage door.
If you
still have difficulty in programming and require
assistance, please call your Buick dealer.
Erasing Channels
To erase all three programmed channels, hold down the
two outside buttons until the amber light begins to flash.
Individual channels cannot be erased, but can be
reprogrammed using the procedure for programming the
transmitter explained earlier.
Accessories
Accessories for your universal transmitter are available
from the manufacturer of the unit. If you would like
additional information, please call 1-800-355-3515.
2-67
ProCarManuals.com
Page 144 of 420

To clean the HUD lens, spray household glass cleaner
on a soft, clean cloth. Gently wipe
and dry the HUD
lens. Do not spray cleaner directly on the lens to avoid
cleaner leaking inside the unit.
If the ignition is on and you can’t see the HUD image,
check to see
if
The headlamps are on.
Something is covering the HUD unit.
The HUD dimmer control is adjusted properly.
The HUD image is adjusted to the proper height.
A fuse is blown. See “Fuses and Circuit Breakers” in
the Index.
Keep in mind that your windshield is part of the HUD
system. If you ever have to have your windshield
replaced, be sure to get one that is designed for HUD or
your HUD image may look blurred or out of focus.
Driver Information Center (DIC)
(If Equipped)
Your Park Avenue may be equipped with a Driver
Information Center (DIC). The DIC will display
information about how your vehicle is functioning,
as well as warning messages if a system problem
is detected. The
following buttons
are
on the DIC control panel
which
is located to the left
of the steering column:
ODOKRIP: Use this button to display your total and
trip miles.
FUEL INFO: Press this button to display fuel
information such as, fuel used, fuel range and fuel
economy.
GAGE INFO: Use this button to display oil pressure,
oil life, coolant temperature, tire pressure and battery
information.
RESET: This button, used along with other buttons,
will reset system functions.
ENGMET: Use this button to change the display
between English and metric units.
ProCarManuals.com
Page 145 of 420

Personal Choice DIC Display
This feature allows two different drivers to store and
recall their own preferred display mode. The Personal
Choice settings displayed on the DIC
are determined by
the transmitter used to enter the vehicle. After the
UNLOCK button of a remote keyless entry transmitter
is pressed and the ignition is in RUN, the DIC will
display the last settings of the identified driver. The
settings can also be changed by briefly pressing one of
the MEMORY buttons located on the driver’s door.
The DIC can also be used to program personal choice
features available with your vehicle, such as, memory
seats, memory door locks, security feedback, delayed
locking and perimeter lighting.
See “Personal Choice
Features” in the Index and “DIC Personal Choice
Programming” later
in this part. The DIC is used to
program information for DRIVER
#1 and DRIVER #2.
The DIC will identify a person as UNKNOWN
DRIVER
if they are neither DRIVER #1 nor DRIVER
#2.
Driver Information Center Controls
and Displays
There are two lines in the DIC display. The bottom line
of the display area is left blank. You can have your
dealer program your name to appear on this display line.
See your dealer for more information.
When you turn the ignition on, the DIC will display
your DRIVER NUMBER. The system will then perform
a status check and display any messages if a problem
is detected.
If there are
no problems detected, the display will return
to the mode selected by that driver the last time the
ignition was turned
off.
If a problem is detected, a diagnostic message will
appear in the display. The following pages will show the
messages you may see on the DIC display.
The message center is continuously updated with the
vehicle’s performance status.
ProCarManuals.com