Page 9 of 22
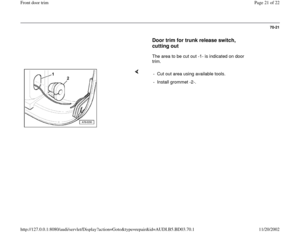
70-9
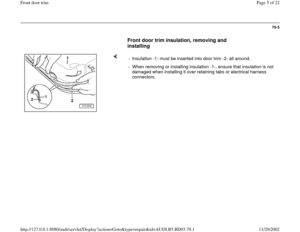
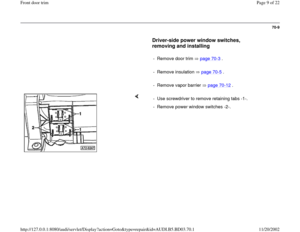
Driver-side power window switches,
removing and installing
- Remove door trim page 70
-3 .
- Remove insulation page 70
-5 .
- Remove vapor barrier page 70
-12
.
- Use screwdriver to remove retaining tabs -1-.
- Remove power window switches -2-.
Pa
ge 9 of 22 Front door tri
m
11/20/2002 htt
p://127.0.0.1:8080/audi/servlet/Dis
play?action=Goto&t
yp
e=re
pair&id=AUDI.B5.BD03.70.1
Page 10 of 22
70-10
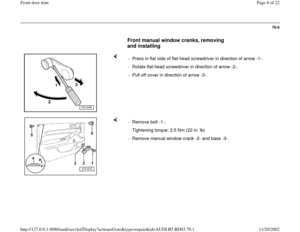
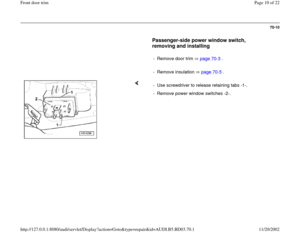
Passenger-side power window switch,
removing and installing
- Remove door trim page 70
-3 .
- Remove insulation page 70
-5 .
- Use screwdriver to release retaining tabs -1-.
- Remove power window switches -2-.
Pa
ge 10 of 22 Front door tri
m
11/20/2002 htt
p://127.0.0.1:8080/audi/servlet/Dis
play?action=Goto&t
yp
e=re
pair&id=AUDI.B5.BD03.70.1
Page 11 of 22
70-11
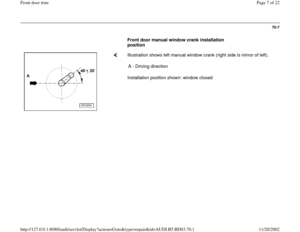
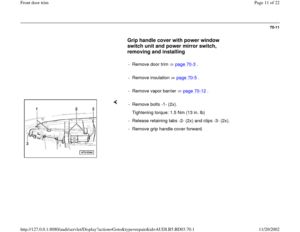
Grip handle cover with power window
switch unit and power mirror switch,
removing and installing
- Remove door trim page 70
-3 .
- Remove insulation page 70
-5 .
- Remove vapor barrier page 70
-12
.
- Remove bolts -1- (2x).
Tightening torque: 1.5 Nm (13 in. lb)
- Release retaining tabs -2- (2x) and clips -3- (2x).
- Remove grip handle cover forward.
Pa
ge 11 of 22 Front door tri
m
11/20/2002 htt
p://127.0.0.1:8080/audi/servlet/Dis
play?action=Goto&t
yp
e=re
pair&id=AUDI.B5.BD03.70.1
Page 12 of 22
70-12
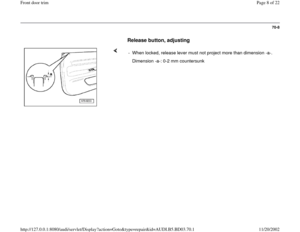
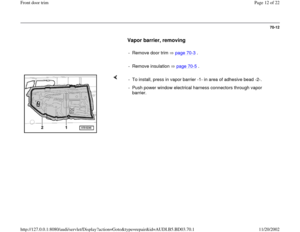
Vapor barrier, removing
- Remove door trim page 70
-3 .
- Remove insulation page 70
-5 .
- To install, press in vapor barrier -1- in area of adhesive bead -2-.
- Push power window electrical harness connectors through vapor
barrier.
Pa
ge 12 of 22 Front door tri
m
11/20/2002 htt
p://127.0.0.1:8080/audi/servlet/Dis
play?action=Goto&t
yp
e=re
pair&id=AUDI.B5.BD03.70.1
Page 13 of 22
70-13
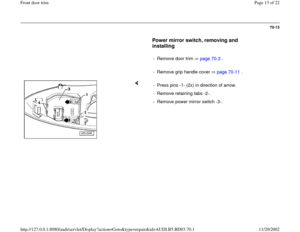
Power mirror switch, removing and
installing
- Remove door trim page 70
-3 .
- Remove grip handle cover page 70
-11
.
- Press pins -1- (2x) in direction of arrow.
- Remove retaining tabs -2-.
- Remove power mirror switch -3-.
Pa
ge 13 of 22 Front door tri
m
11/20/2002 htt
p://127.0.0.1:8080/audi/servlet/Dis
play?action=Goto&t
yp
e=re
pair&id=AUDI.B5.BD03.70.1
Page 14 of 22
70-14
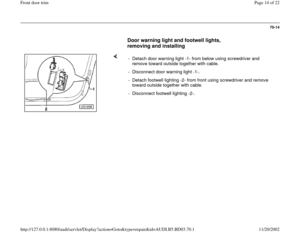
Door warning light and footwell lights,
removing and installing
- Detach door warning light -1- from below using screwdriver and
remove toward outside together with cable.
- Disconnect door warning light -1-.
- Detach footwell lighting -2- from front using screwdriver and remove
toward outside together with cable.
- Disconnect footwell lighting -2-.
Pa
ge 14 of 22 Front door tri
m
11/20/2002 htt
p://127.0.0.1:8080/audi/servlet/Dis
play?action=Goto&t
yp
e=re
pair&id=AUDI.B5.BD03.70.1
Page 15 of 22
70-15
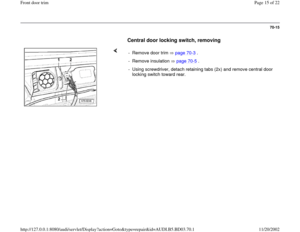
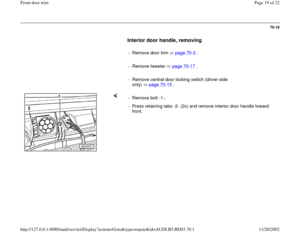
Central door locking switch, removing
- Remove door trim page 70
-3 .
- Remove insulation page 70
-5 .
- Using screwdriver, detach retaining tabs (2x) and remove central door
locking switch toward rear.
Pa
ge 15 of 22 Front door tri
m
11/20/2002 htt
p://127.0.0.1:8080/audi/servlet/Dis
play?action=Goto&t
yp
e=re
pair&id=AUDI.B5.BD03.70.1
Page 16 of 22
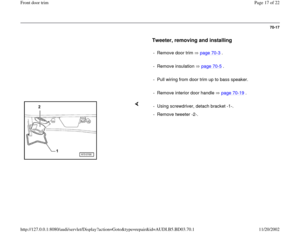
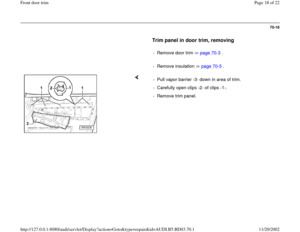
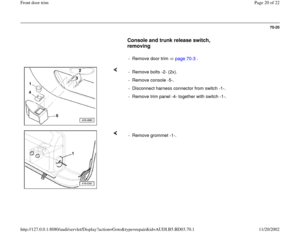
70-16
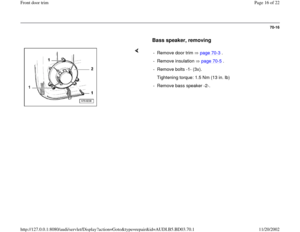
Bass speaker, removing
- Remove door trim page 70
-3 .
- Remove insulation page 70
-5 .
- Remove bolts -1- (3x).
Tightening torque: 1.5 Nm (13 in. lb)
- Remove bass speaker -2-.
Pa
ge 16 of 22 Front door tri
m
11/20/2002 htt
p://127.0.0.1:8080/audi/servlet/Dis
play?action=Goto&t
yp
e=re
pair&id=AUDI.B5.BD03.70.1


 in direction of arr")

 and remove central door")
.
Tightening torque: 1.5 Nm (13 in. lb)
- Remove bass speak")