Page 1 of 22
70-1
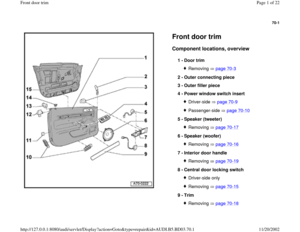
Front door trim Component locations, overview
1 -
Door trim
Removing page 70
-3
2 -
Outer connecting piece
3 -
Outer filler piece
4 -
Power window switch insert
Driver-side page 70
-9
Passenger-side page 70
-10
5 -
Speaker (tweeter)
Removing page 70
-17
6 -
Speaker (woofer)
Removing page 70
-16
7 -
Interior door handle
Removing page 70
-19
8 -
Central door locking switch
Driver-side onlyRemoving page 70
-15
9 -
Trim
Removing page 70
-18
Pa
ge 1 of 22 Front door tri
m
11/20/2002 htt
p://127.0.0.1:8080/audi/servlet/Dis
play?action=Goto&t
yp
e=re
pair&id=AUDI.B5.BD03.70.1
Page 2 of 22
70-2
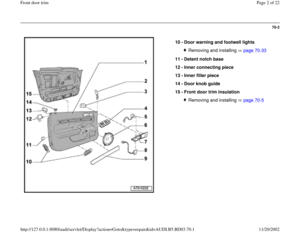
10 -
Door warning and footwell lights
Removing and installing page 70
-33
11 -
Detent notch base
12 -
Inner connecting piece
13 -
Inner filler piece
14 -
Door knob guide
15 -
Front door trim insulation
Removing and installing page 70
-5
Pa
ge 2 of 22 Front door tri
m
11/20/2002 htt
p://127.0.0.1:8080/audi/servlet/Dis
play?action=Goto&t
yp
e=re
pair&id=AUDI.B5.BD03.70.1
Page 3 of 22
70-3
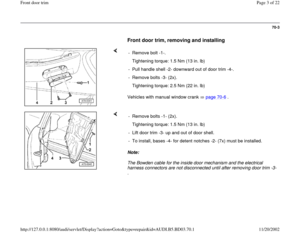
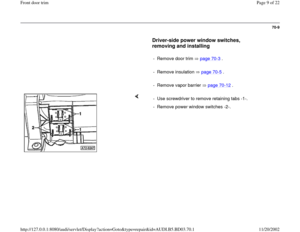
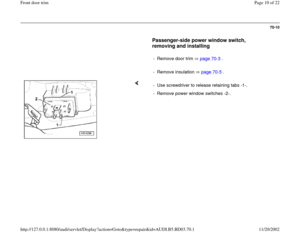
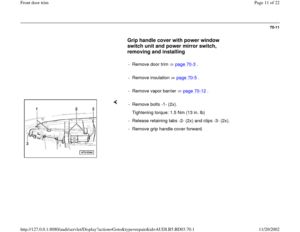
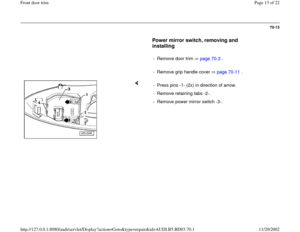
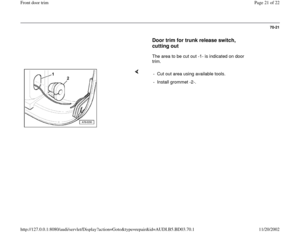
Front door trim, removing and installing
Vehicles with manual window crank page 70
-6 . - Remove bolt -1-.
Tightening torque: 1.5 Nm (13 in. lb)
- Pull handle shell -2- downward out of door trim -4-.
- Remove bolts -3- (2x).
Tightening torque: 2.5 Nm (22 in. lb)
Note:
The Bowden cable for the inside door mechanism and the electrical
harness connectors are not disconnected until after removing door trim -3-
. - Remove bolts -1- (2x).
Tightening torque: 1.5 Nm (13 in. lb)
- Lift door trim -3- up and out of door shell.
- To install, bases -4- for detent notches -2- (7x) must be installed.
Pa
ge 3 of 22 Front door tri
m
11/20/2002 htt
p://127.0.0.1:8080/audi/servlet/Dis
play?action=Goto&t
yp
e=re
pair&id=AUDI.B5.BD03.70.1
Page 4 of 22
70-4
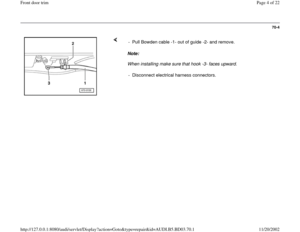
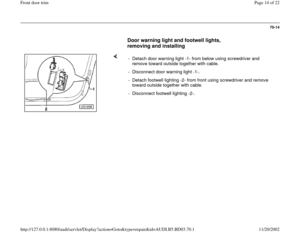
Note:
When installing make sure that hook -3- faces upward. - Pull Bowden cable -1- out of guide -2- and remove.
- Disconnect electrical harness connectors.
Pa
ge 4 of 22 Front door tri
m
11/20/2002 htt
p://127.0.0.1:8080/audi/servlet/Dis
play?action=Goto&t
yp
e=re
pair&id=AUDI.B5.BD03.70.1
Page 5 of 22
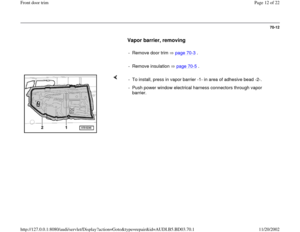
70-5
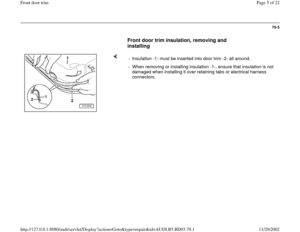
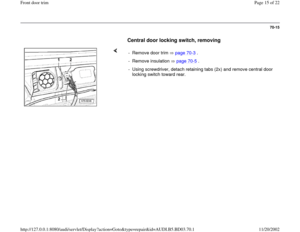
Front door trim insulation, removing and
installing
- Insulation -1- must be inserted into door trim -2- all around.
- When removing or installing insulation -1-, ensure that insulation is not
damaged when installing it over retaining tabs or electrical harness
connectors.
Pa
ge 5 of 22 Front door tri
m
11/20/2002 htt
p://127.0.0.1:8080/audi/servlet/Dis
play?action=Goto&t
yp
e=re
pair&id=AUDI.B5.BD03.70.1
Page 6 of 22
70-6
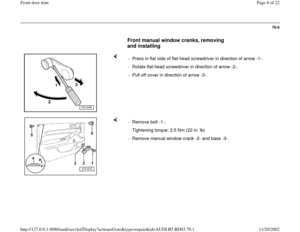
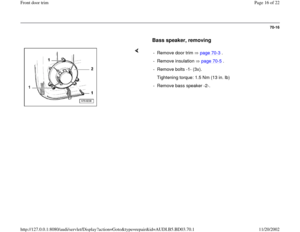
Front manual window cranks, removing
and installing
- Press in flat side of flat-head screwdriver in direction of arrow -1-.
- Rotate flat-head screwdriver in direction of arrow -2-.
- Pull off cover in direction of arrow -3-.
- Remove bolt -1-.
Tightening torque: 2.5 Nm (22 in. lb)
- Remove manual window crank -2- and base -3-.
Pa
ge 6 of 22 Front door tri
m
11/20/2002 htt
p://127.0.0.1:8080/audi/servlet/Dis
play?action=Goto&t
yp
e=re
pair&id=AUDI.B5.BD03.70.1
Page 7 of 22
70-7
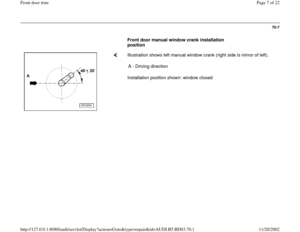
Front door manual window crank installation
position
Illustration shows left manual window crank (right side is mirror of left).
Installation position shown: window closed A - Driving direction
Pa
ge 7 of 22 Front door tri
m
11/20/2002 htt
p://127.0.0.1:8080/audi/servlet/Dis
play?action=Goto&t
yp
e=re
pair&id=AUDI.B5.BD03.70.1
Page 8 of 22
70-8
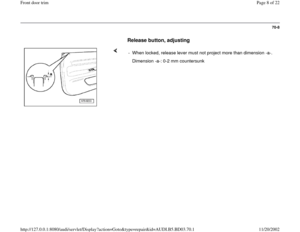
Release button, adjusting
- When locked, release lever must not project more than dimension -a-.
Dimension -a-: 0-2 mm countersunk
Pa
ge 8 of 22 Front door tri
m
11/20/2002 htt
p://127.0.0.1:8080/audi/servlet/Dis
play?action=Goto&t
yp
e=re
pair&id=AUDI.B5.BD03.70.1


- Pull handle shell -2- down")


.
Installation position shown: window closed A - D")
