Page 9 of 12
13-75
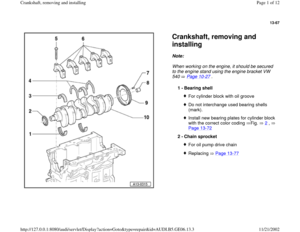
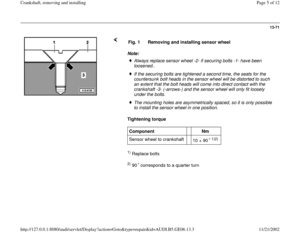
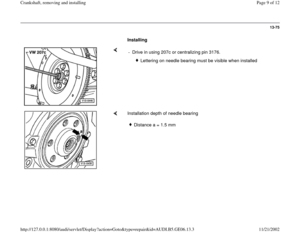
Installing
- Drive in using 207c or centralizing pin 3176.
Lettering on needle bearing must be visible when installed
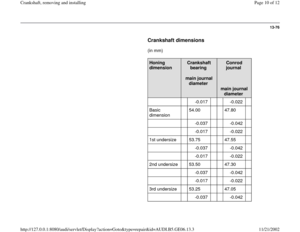
Installation depth of needle bearing
Distance a = 1.5 mm
Pa
ge 9 of 12 Crankshaft, removin
g and installin
g
11/21/2002 htt
p://127.0.0.1:8080/audi/servlet/Dis
play?action=Goto&t
yp
e=re
pair&id=AUDI.B5.GE06.13.3
Page 10 of 12
13-76
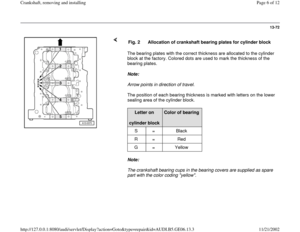
Crankshaft dimensions
(in mm)
Honing
dimension
Crankshaft
bearing
main journal
diameter
Conrod
journal
main journal
diameter
-0.017 -0.022
Basic
dimension 54.00 47.80
-0.037 -0.042
-0.017 -0.022
1st undersize 53.75 47.55
-0.037 -0.042
-0.017 -0.022
2nd undersize 53.50 47.30
-0.037 -0.042
-0.017 -0.022
3rd undersize 53.25 47.05
-0.037 -0.042
Pa
ge 10 of 12 Crankshaft, removin
g and installin
g
11/21/2002 htt
p://127.0.0.1:8080/audi/servlet/Dis
play?action=Goto&t
yp
e=re
pair&id=AUDI.B5.GE06.13.3
Page 11 of 12
13-77
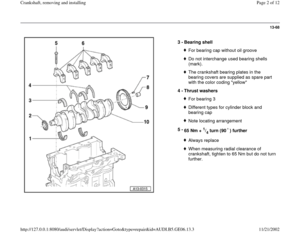
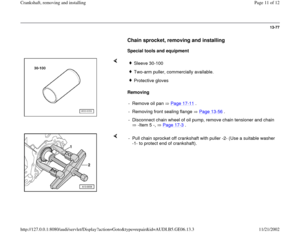
Chain sprocket, removing and installing
Special tools and equipment
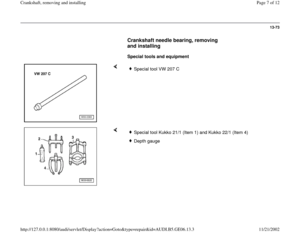
Removing
Sleeve 30-100Two-arm puller, commercially available.Protective gloves
- Remove oil pan Page 17
-11
.
- Removing front sealing flange Page 13
-56
.
- Disconnect chain wheel of oil pump, remove chain tensioner and chain
-Item 5 -, Page 17
-3 .
- Pull chain sprocket off crankshaft with puller -2- (Use a suitable washer
-1- to protect end of crankshaft).
Pa
ge 11 of 12 Crankshaft, removin
g and installin
g
11/21/2002 htt
p://127.0.0.1:8080/audi/servlet/Dis
play?action=Goto&t
yp
e=re
pair&id=AUDI.B5.GE06.13.3
Page 12 of 12
13-78
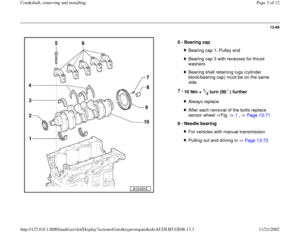
Installing
Installation is carried out in the reverse order of
removal; note the following:
WARNING!
Wear protective gloves!
- Heat chain sprocket in heating appliance for
approx. 15 minutes to 220 C.
Note:
Installation position: wide collar on sprocket
facing toward engine
- Install chain sprocket on end of crankshaft using pliers and push onto
seat on crankshaft with drift sleeve 30-100.
Pa
ge 12 of 12 Crankshaft, removin
g and installin
g
11/21/2002 htt
p://127.0.0.1:8080/audi/servlet/Dis
play?action=Goto&t
yp
e=re
pair&id=AUDI.B5.GE06.13.3


Honing
dimension
Crankshaft
bearing
main journal
diameter
Conrod
journal
main journal
diameter
-0.017 -0.022")

