Page 9 of 62
15-8
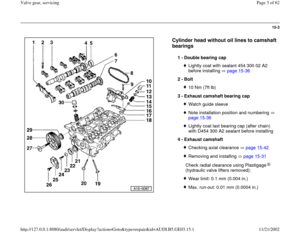
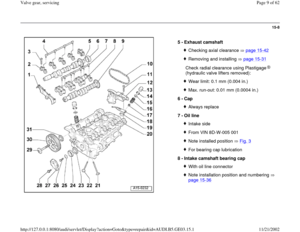
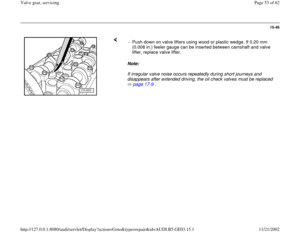
5 -
Exhaust camshaft
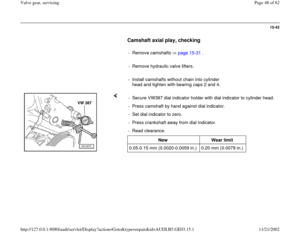
Checking axial clearance page 15
-42
Removing and installing page 15
-31
Check radial clearance using Plastigage
(hydraulic valve lifters removed):
Wear limit: 0.1 mm (0.004 in.)Max. run-out: 0.01 mm (0.0004 in.)
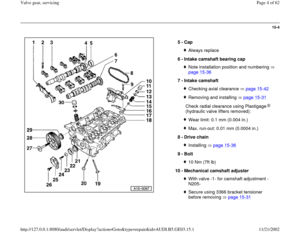
6 -
Cap Always replace
7 -
Oil line Intake sideFrom VIN 8D-W-005 001Note installed position Fig. 3For bearing cap lubrication
8 -
Intake camshaft bearing cap With oil line connectorNote installation position and numbering
page 15
-36
Pa
ge 9 of 62 Valve
gear, servicin
g
11/21/2002 htt
p://127.0.0.1:8080/audi/servlet/Dis
play?action=Goto&t
yp
e=re
pair&id=AUDI.B5.GE03.15.1
Page 10 of 62
15-9
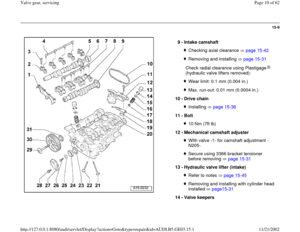
9 -
Intake camshaft
Checking axial clearance page 15
-42
Removing and installing page 15
-31
Check radial clearance using Plastigage
(hydraulic valve lifters removed):
Wear limit: 0.1 mm (0.004 in.)Max. run-out: 0.01 mm (0.0004 in.)
10 -
Drive chain Installing page 15
-36
11 -
Bolt
10 Nm (7ft lb)
12 -
Mechanical camshaft adjuster With valve -1- for camshaft adjustment -
N205- Secure using 3366 bracket tensioner
before removing page 15
-31
13 -
Hydraulic valve lifter (intake)
Refer to notes page 15
-45
Removing and installing with cylinder head
installed page15
-31
14 -
Valve keepers
Pa
ge 10 of 62 Valve
gear, servicin
g
11/21/2002 htt
p://127.0.0.1:8080/audi/servlet/Dis
play?action=Goto&t
yp
e=re
pair&id=AUDI.B5.GE03.15.1
Page 11 of 62
15-10
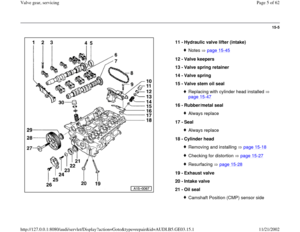
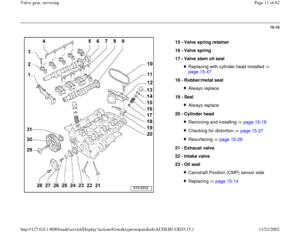
15 -
Valve spring retainer
16 -
Valve spring
17 -
Valve stem oil seal
Replacing with cylinder head installed
page 15
-47
18 -
Rubber/metal seal
Always replace
19 -
Seal Always replace
20 -
Cylinder head Removing and installing page 15
-18
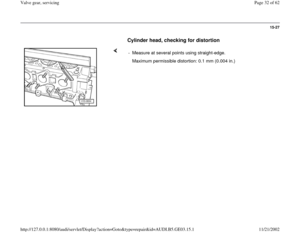
Checking for distortion page 15
-27
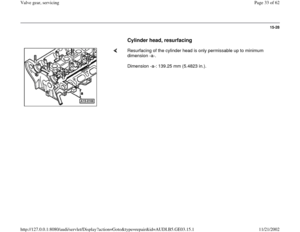
Resurfacing page 15
-28
21 -
Exhaust valve
22 -
Intake valve
23 -
Oil seal
Camshaft Position (CMP) sensor sideReplacing page 15
-14
Pa
ge 11 of 62 Valve
gear, servicin
g
11/21/2002 htt
p://127.0.0.1:8080/audi/servlet/Dis
play?action=Goto&t
yp
e=re
pair&id=AUDI.B5.GE03.15.1
Page 12 of 62
15-11
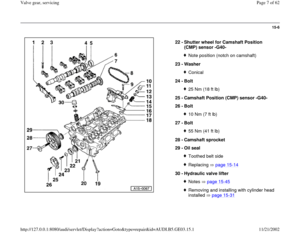
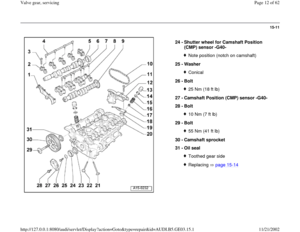
24 -
Shutter wheel for Camshaft Position
(CMP) sensor -G40-
Note position (notch on camshaft)
25 -
Washer Conical
26 -
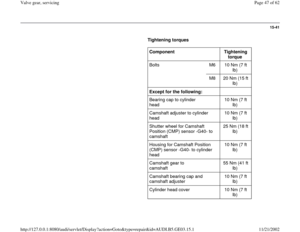
Bolt 25 Nm (18 ft lb)
27 -
Camshaft Position (CMP) sensor -G40-
28 -
Bolt 10 Nm (7 ft lb)
29 -
Bolt 55 Nm (41 ft lb)
30 -
Camshaft sprocket
31 -
Oil seal Toothed gear sideReplacing page 15
-14
Pa
ge 12 of 62 Valve
gear, servicin
g
11/21/2002 htt
p://127.0.0.1:8080/audi/servlet/Dis
play?action=Goto&t
yp
e=re
pair&id=AUDI.B5.GE03.15.1
Page 13 of 62
15-12
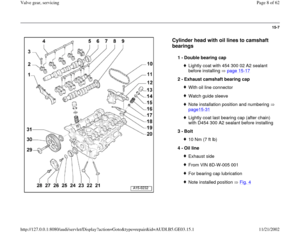
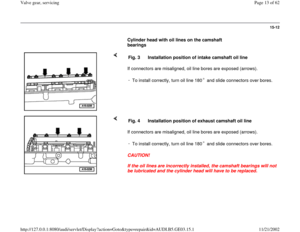
Cylinder head with oil lines on the camshaft
bearings
If connectors are misaligned, oil line bores are exposed (arrows). Fig. 3 Installation position of intake camshaft oil line
-
To install correctly, turn oil line 180 and slide connectors over bores.
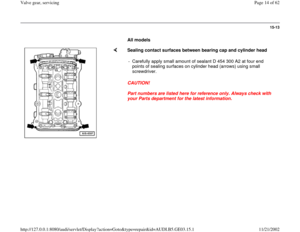
If connectors are misaligned, oil line bores are exposed (arrows).
CAUTION!
If the oil lines are incorrectly installed, the camshaft bearings will not
be lubricated and the cylinder head will have to be replaced. Fig. 4 Installation position of exhaust camshaft oil line
-
To install correctly, turn oil line 180 and slide connectors over bores.
Pa
ge 13 of 62 Valve
gear, servicin
g
11/21/2002 htt
p://127.0.0.1:8080/audi/servlet/Dis
play?action=Goto&t
yp
e=re
pair&id=AUDI.B5.GE03.15.1
Page 14 of 62
15-13
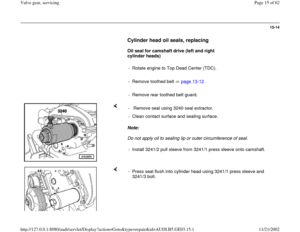
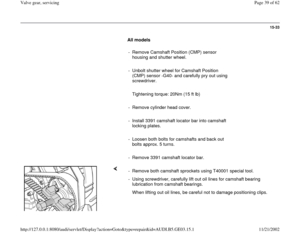
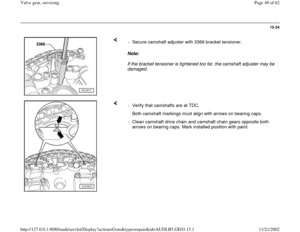
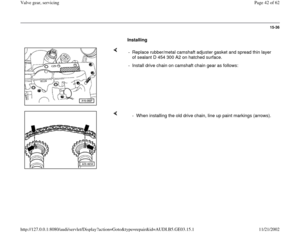
All models
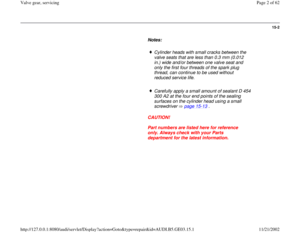
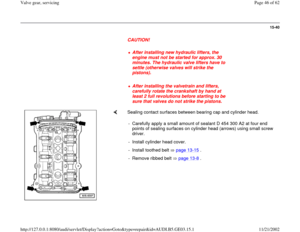
Sealing contact surfaces between bearing cap and cylinder head
CAUTION!
Part numbers are listed here for reference only. Always check with
your Parts department for the latest information. - Carefully apply small amount of sealant D 454 300 A2 at four end
points of sealing surfaces on cylinder head (arrows) using small
screwdriver.
Pa
ge 14 of 62 Valve
gear, servicin
g
11/21/2002 htt
p://127.0.0.1:8080/audi/servlet/Dis
play?action=Goto&t
yp
e=re
pair&id=AUDI.B5.GE03.15.1
Page 15 of 62
15-14
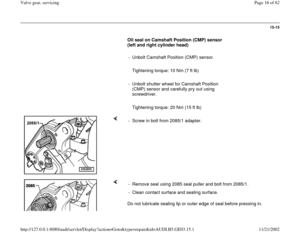
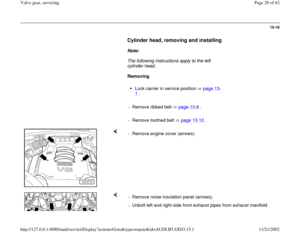
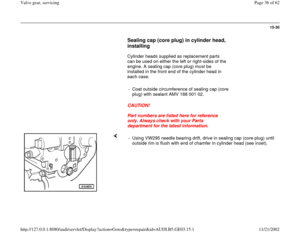
Cylinder head oil seals, replacing
Oil seal for camshaft drive (left and right
cylinder heads)
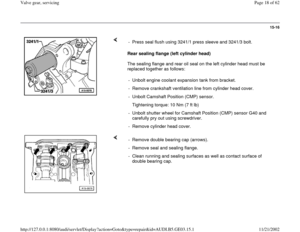
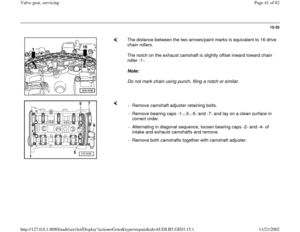
- Rotate engine to Top Dead Center (TDC).
- Remove toothed belt page 13
-12
.
- Remove rear toothed belt guard.
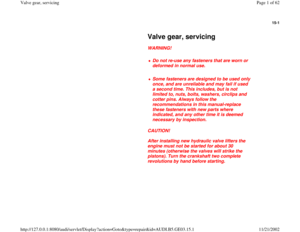
Note:
Do not apply oil to sealing lip or outer circumference of seal. - Remove seal using 3240 seal extractor.
- Clean contact surface and sealing surface.
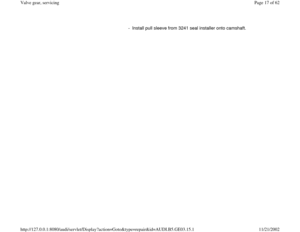
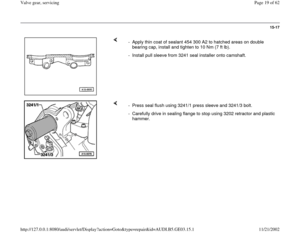
- Install 3241/2 pull sleeve from 3241/1 press sleeve onto camshaft.
- Press seal flush into cylinder head using 3241/1 press sleeve and
3241/3 bolt.
Pa
ge 15 of 62 Valve
gear, servicin
g
11/21/2002 htt
p://127.0.0.1:8080/audi/servlet/Dis
play?action=Goto&t
yp
e=re
pair&id=AUDI.B5.GE03.15.1
Page 16 of 62
15-15
Oil seal on Camshaft Position (CMP) sensor
(left and right cylinder head)
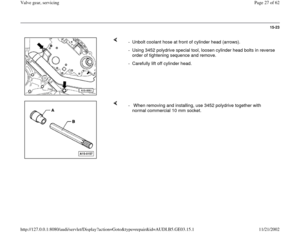
- Unbolt Camshaft Position (CMP) sensor.
Tightening torque: 10 Nm (7 ft lb)
- Unbolt shutter wheel for Camshaft Position
(CMP) sensor and carefully pry out using
screwdriver.
Tightening torque: 20 Nm (15 ft lb)
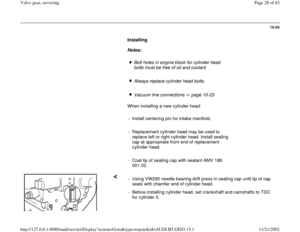
- Screw in bolt from 2085/1 adapter.
Do not lubricate sealing lip or outer edge of seal before pressing in. - Remove seal using 2085 seal puller and bolt from 2085/1.
- Clean contact surface and sealing surface.
Pa
ge 16 of 62 Valve
gear, servicin
g
11/21/2002 htt
p://127.0.0.1:8080/audi/servlet/Dis
play?action=Goto&t
yp
e=re
pair&id=AUDI.B5.GE03.15.1


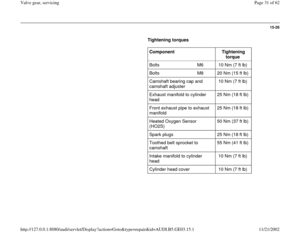

:
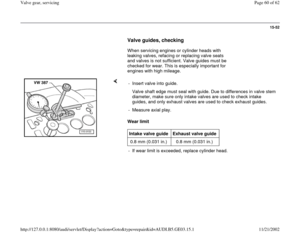
Wear limi")
:
Wear limit")

 sensor -G40-
Note position (notch on camshaft)
25 -
Washer Conical
26 -
Bolt 25 Nm (18 ft lb)
27 -
Camshaft Position (CMP) sensor -G40-")
. Fig. 3 Installation position of intake camshaft oil line")


- Rotate engine to Top Dead Center (TDC).
- Remove toothed belt p")
 sensor
(left and right cylinder head)
- Unbolt Camshaft Position (CMP) sensor.
Tightening torque: 10 Nm (7 ft lb)
- Unbolt sh")