Page 69 of 1202
PP196-04
PP-22
- PREPARATIONLUBRICATION
1996 TERCEL (RM440U)
LUBRICANT
ItemCapacityClassification
Engine oil
Drain and refill w/o Oil filter change
w/ Oil filter change
Dry fill
2.6 liters (2.7 US qts, 2.3 lmp. qts)
2.8 liters (3.0 US qts, 2.5 lmp. qts)
3.7 liters (3.9 US qts, 3.3 lmp. qts)
API grade SH, Energy-Conserving II multigrade
engine oil or ILSAC multigrade engine oil and
recommended viscosity oil
Page 617 of 1202

LU08A-06
LU1169
Oil Pressure Gauge
Oil Pressure Switch
LU1107
Adhesive
- LUBRICATIONOIL AND FILTER
LU-1
616 Author�: Date�:
1996 TERCEL (RM440U)
OIL AND FILTER
INSPECTION
1. CHECK ENGINE OIL QUALITY
Check the oil for deterioration, entry of water, discoloring or thin-
ning.
If the oil quality is visibly poor, replace it.
Oil grade:
API grade or SH Energy-Conserving II or ILSAC multi-
grade engine oil. Recommended viscosity is as
shown in the illustration, with SAE 5W-30 being the
prefferred engine oil.
2. CHECK ENGINE OIL LEVEL
The oil level should be between the ºLº and ºFº marks on the dip-
stick.
If low, check for leakage and add oil up to the ºFº mark.
3. REMOVE OIL PRESSURE SWITCH AND INSTALL OIL
PRESSURE GAUGE
(a) Remove the bolt and air intake connector.
(b) M/T only
Remove the 3 bolts, release cylinder and tube from the
transaxle.
(c) Remove the oil pressure switch.
(d) Install the oil pressure gauge.
4. WARM UP ENGINE
Allow the engine to warm up to normal operating temperature.
5. CHECK OIL PRESSURE
Oil pressure:
At idle speed
29 kPa (0.3 kgf/cm
2, 4.3 psi) or more
At 3,000 rpm
245 - 490 kPa (2.5 - 5.0 kgf/cm
2, 36 - 71 psi)
6. REMOVE OIL PRESSURE GAUGE AND REINSTALL
OIL PRESSURE SWITCH
(a) Remove the oil pressure gauge.
(b) Apply adhesive to 2 or 3 threads of the oil pressure switch.
Adhesive:
Part No. 08833-00080, THREE BOND 1344,
LOCTITE 242 or eqivalent
(c) Reinstall the oil pressure switch.
Page 717 of 1202

MX07F-04
Q06439
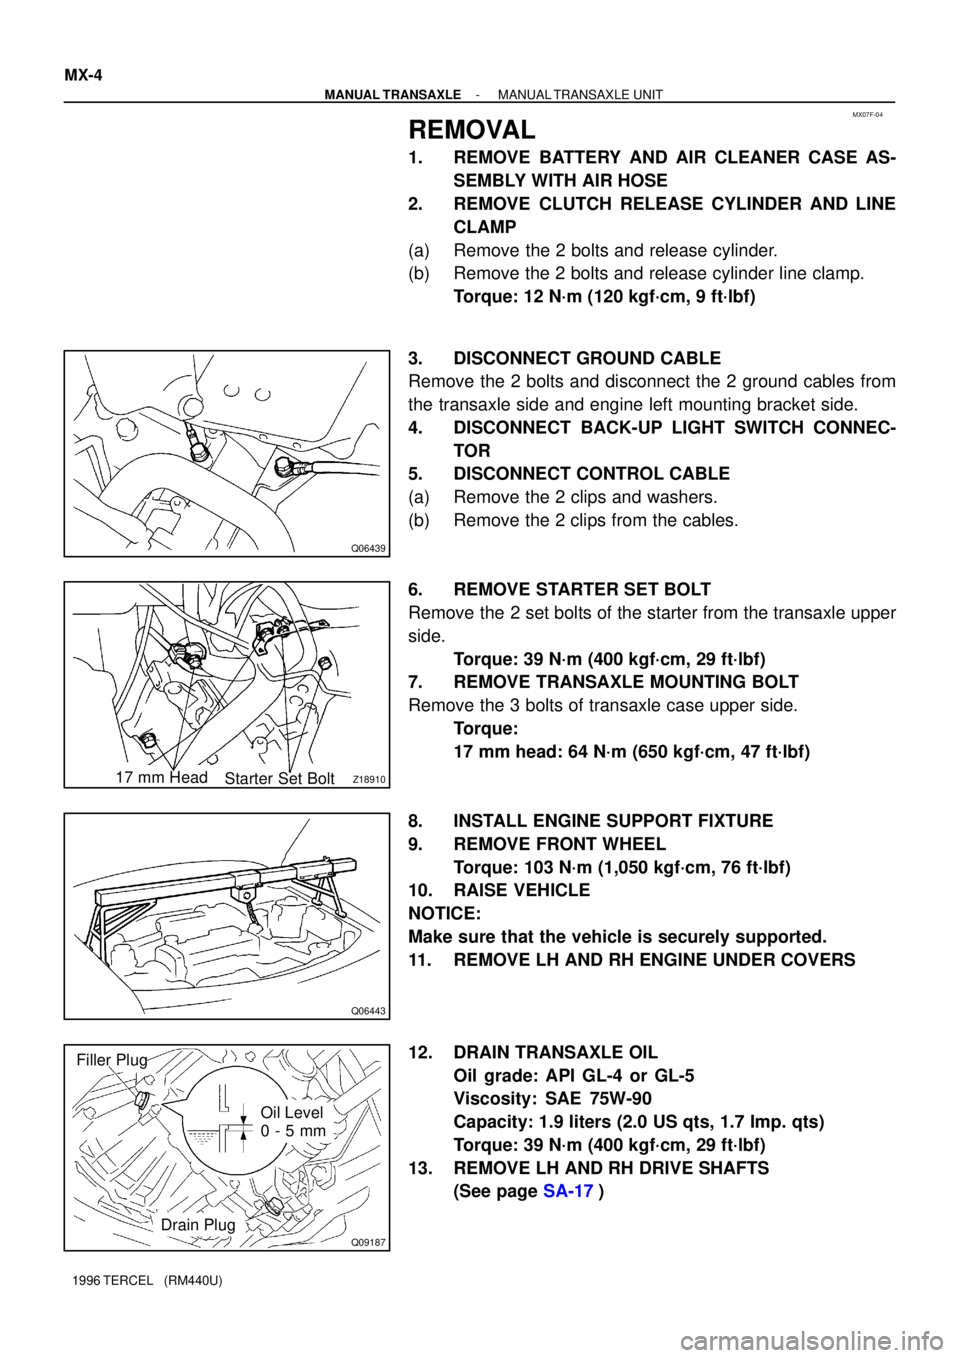
Z1891017 mm Head
Starter Set Bolt
Q06443
Q09187
Filler Plug
Oil Level
0 - 5 mm
Drain Plug MX-4
- MANUAL TRANSAXLEMANUAL TRANSAXLE UNIT
1996 TERCEL (RM440U)
REMOVAL
1. REMOVE BATTERY AND AIR CLEANER CASE AS-
SEMBLY WITH AIR HOSE
2. REMOVE CLUTCH RELEASE CYLINDER AND LINE
CLAMP
(a) Remove the 2 bolts and release cylinder.
(b) Remove the 2 bolts and release cylinder line clamp.
Torque: 12 N´m (120 kgf´cm, 9 ft´lbf)
3. DISCONNECT GROUND CABLE
Remove the 2 bolts and disconnect the 2 ground cables from
the transaxle side and engine left mounting bracket side.
4. DISCONNECT BACK-UP LIGHT SWITCH CONNEC-
TOR
5. DISCONNECT CONTROL CABLE
(a) Remove the 2 clips and washers.
(b) Remove the 2 clips from the cables.
6. REMOVE STARTER SET BOLT
Remove the 2 set bolts of the starter from the transaxle upper
side.
Torque: 39 N´m (400 kgf´cm, 29 ft´lbf)
7. REMOVE TRANSAXLE MOUNTING BOLT
Remove the 3 bolts of transaxle case upper side.
Torque:
17 mm head: 64 N´m (650 kgf´cm, 47 ft´lbf)
8. INSTALL ENGINE SUPPORT FIXTURE
9. REMOVE FRONT WHEEL
Torque: 103 N´m (1,050 kgf´cm, 76 ft´lbf)
10. RAISE VEHICLE
NOTICE:
Make sure that the vehicle is securely supported.
11. REMOVE LH AND RH ENGINE UNDER COVERS
12. DRAIN TRANSAXLE OIL
Oil grade: API GL-4 or GL-5
Viscosity: SAE 75W-90
Capacity: 1.9 liters (2.0 US qts, 1.7 Imp. qts)
Torque: 39 N´m (400 kgf´cm, 29 ft´lbf)
13. REMOVE LH AND RH DRIVE SHAFTS
(See page SA-17)