Page 1098 of 2062
Downloaded from www.Manualslib.com manuals search engine CO18O−01
P14852
P14853
P20975
− COOLING (3RZ−FE)RADIATOR
CO−15
1996 TOYOTA T100 (RM449U)
REMOVAL
1. DRAIN ENGINE COOLANT
2. REMOVE BATTERY
3. REMOVE RADIATOR GRILLE
(a) Remove the 4 screws, and clearance lights.
(b) Remove the 4 screws, 11 clips and radiator grille.
4. DISCONNECT RADIATOR INLET HOSE
5. DISCONNECT RADIATOR RESERVOIR HOSE
6. REMOVE PS DRIVE BELT
Loosen the lock bolt and adjusting bolt, and remove the drive
belt.
7. w/ A/C:
REMOVE A/C DRIVE BELT
Loosen the idler pulley nut and adjusting bolt, and remove the
drive belt.
8. REMOVE DRIVE BELT, FAN WITH FLUID COUPLING,
WATER PUMP PULLEY AND FAN SHROUD (See page
CO−4)
9. A/T:
DISCONNECT OIL COOLER HOSES
10. DISCONNECT RADIATOR OUTLET HOSE
11. REMOVE RADIATOR
Remove the 4 bolts and radiator.
12. REMOVE RADIATOR SUPPORTS
�M/T:
Remove the 4 bolts and 2 radiator supports.
�A/T:
Remove the 8 bolts and 2 radiator supports.
Page 1103 of 2062

Downloaded from www.Manualslib.com manuals search engine P14853
CO18P−01
P20975
P14852
CO−20
− COOLING (3RZ−FE)RADIATOR
1996 TOYOTA T100 (RM449U)
INSTALLATION
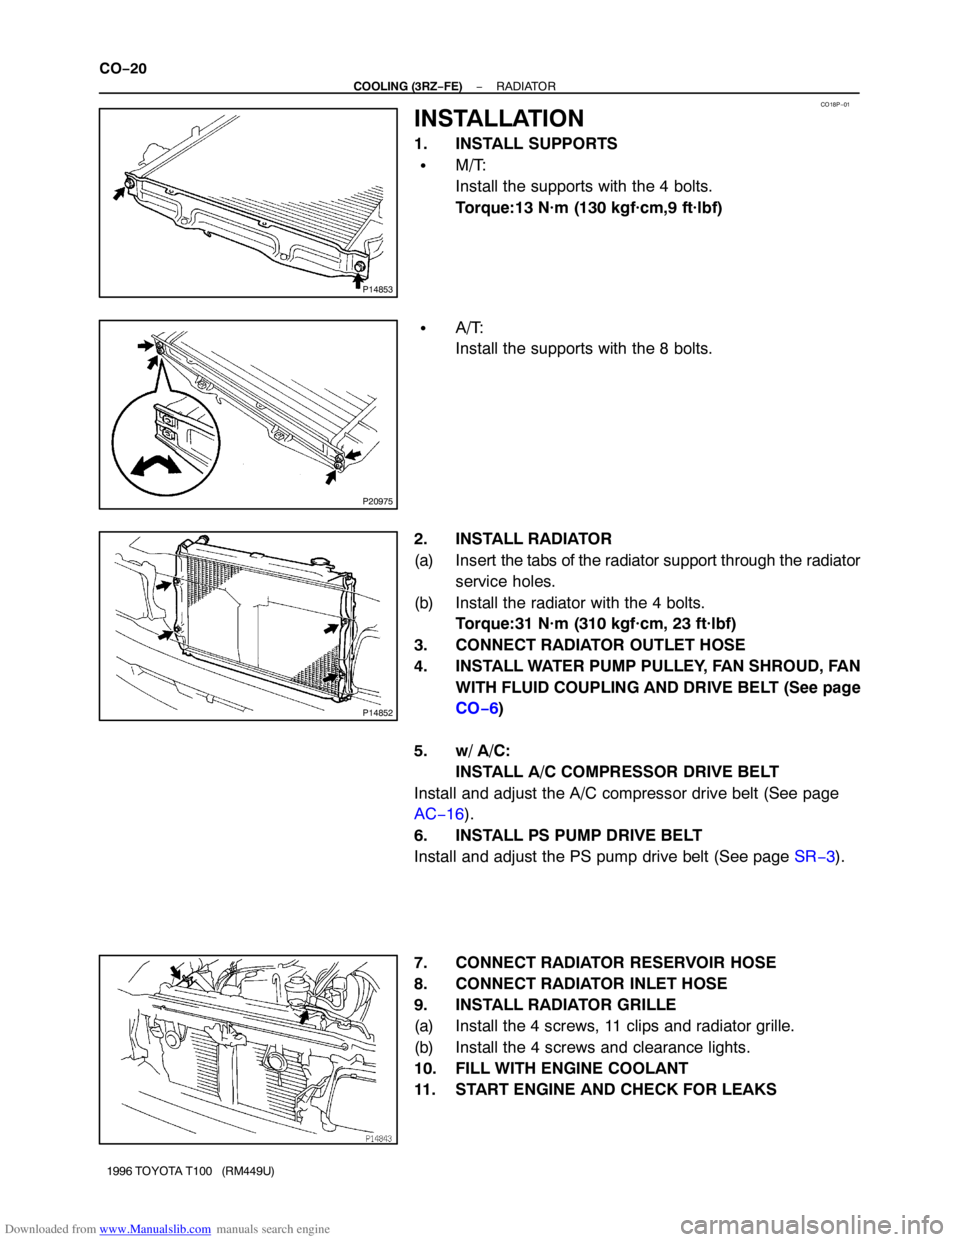
1. INSTALL SUPPORTS
�M/T:
Install the supports with the 4 bolts.
Torque:13 N·m (130 kgf·cm,9 ft·lbf)
�A/T:
Install the supports with the 8 bolts.
2. INSTALL RADIATOR
(a) Insert the tabs of the radiator support through the radiator
service holes.
(b) Install the radiator with the 4 bolts.
Torque:31 N·m (310 kgf·cm, 23 ft·lbf)
3. CONNECT RADIATOR OUTLET HOSE
4. INSTALL WATER PUMP PULLEY, FAN SHROUD, FAN
WITH FLUID COUPLING AND DRIVE BELT (See page
CO−6)
5. w/ A/C:
INSTALL A/C COMPRESSOR DRIVE BELT
Install and adjust the A/C compressor drive belt (See page
AC−16).
6. INSTALL PS PUMP DRIVE BELT
Install and adjust the PS pump drive belt (See page SR−3).
7. CONNECT RADIATOR RESERVOIR HOSE
8. CONNECT RADIATOR INLET HOSE
9. INSTALL RADIATOR GRILLE
(a) Install the 4 screws, 11 clips and radiator grille.
(b) Install the 4 screws and clearance lights.
10. FILL WITH ENGINE COOLANT
11. START ENGINE AND CHECK FOR LEAKS
Page 1104 of 2062
Downloaded from www.Manualslib.com manuals search engine CO – COOLING (5VZ-FE)
COOLANT CO-1
WATER PUMP CO-3
THERMOSTAT CO-8
RADIATOR CO-12
Page 1107 of 2062
Downloaded from www.Manualslib.com manuals search engine CO05Q−02
P20840
− COOLING (5VZ−FE)WATER PUMP
CO−3
1092 Author�: Date�:
1996 TOYOTA T100 (RM449U)
WATER PUMP
COMPONENTS
Page 1108 of 2062
Downloaded from www.Manualslib.com manuals search engine Z15614
CO−4
− COOLING (5VZ−FE)WATER PUMP
1093 Author�: Date�:
1996 TOYOTA T100 (RM449U)
Page 1109 of 2062
Downloaded from www.Manualslib.com manuals search engine CO05R−03
− COOLING (5VZ−FE)WATER PUMP
CO−5
1996 TOYOTA T100 (RM449U)
REMOVAL
1. REMOVE TIMING BELT
(See page EM−13)
2. REMOVE WATER INLET AND THERMOSTAT
3. w/ Oil Cooler:
DISCONNECT NO.2 OIL COOLER HOSE FROM WA-
TER PUMP
4. REMOVE WATER PUMP
Remove the 7 bolts and water pump.
Page 1110 of 2062
Downloaded from www.Manualslib.com manuals search engine CO05S−01
P20920
P21660
P21515
CO−6
− COOLING (5VZ−FE)WATER PUMP
1996 TOYOTA T100 (RM449U)
INSPECTION
1. INSPECT WATER PUMP
(a) Visually check the air hole and water hole for coolant leak-
age.
If leakage is found, replace the water pump.
If engine coolant has leaked onto the timing belt, replace the
timing belt.
(b) Turn the pulley, and check that the water pump bearing
moves smoothly and quietly.
If necessary, replace the water pump.
2. INSPECT FLUID COUPLING
(a) Remove the 4 nuts and fan from the fluid coupling.
(b) Check that the fluid coupling is not damaged and that no
silicon oil leaks.
If necessary, replace the fluid coupling.
3. INSPECT FAN PULLEY BRACKET
(a) Check the turning smoothness of the fan pulley.
If necessary, replace the pulley bracket.
(b) Reinstall the fan to the fluid coupling with the 4 nuts.
Torque:5.4 N·m (75 kgf·cm, 48 in.·lbf)
4. INSPECT TIMING BELT
(See page EM−17)
Page 1111 of 2062

Downloaded from www.Manualslib.com manuals search engine CO05T−02
P20922
Seal Packing
− COOLING (5VZ−FE)WATER PUMP
CO−7
1996 TOYOTA T100 (RM449U)
INSTALLATION
1. INSTALL WATER PUMP
(a) Remove any old packing (FIPG) material and be careful
not to drop any oil on the contact surfaces of the water
pump and cylinder block.
�Using a razor blade and gasket scraper, remove all
the old packing (FIPG) material from the gasket sur-
faces and sealing groove.
�Thoroughly clean all components to remove all the
loose material.
�Using a non−residue solvent, clean both sealing
surfaces.
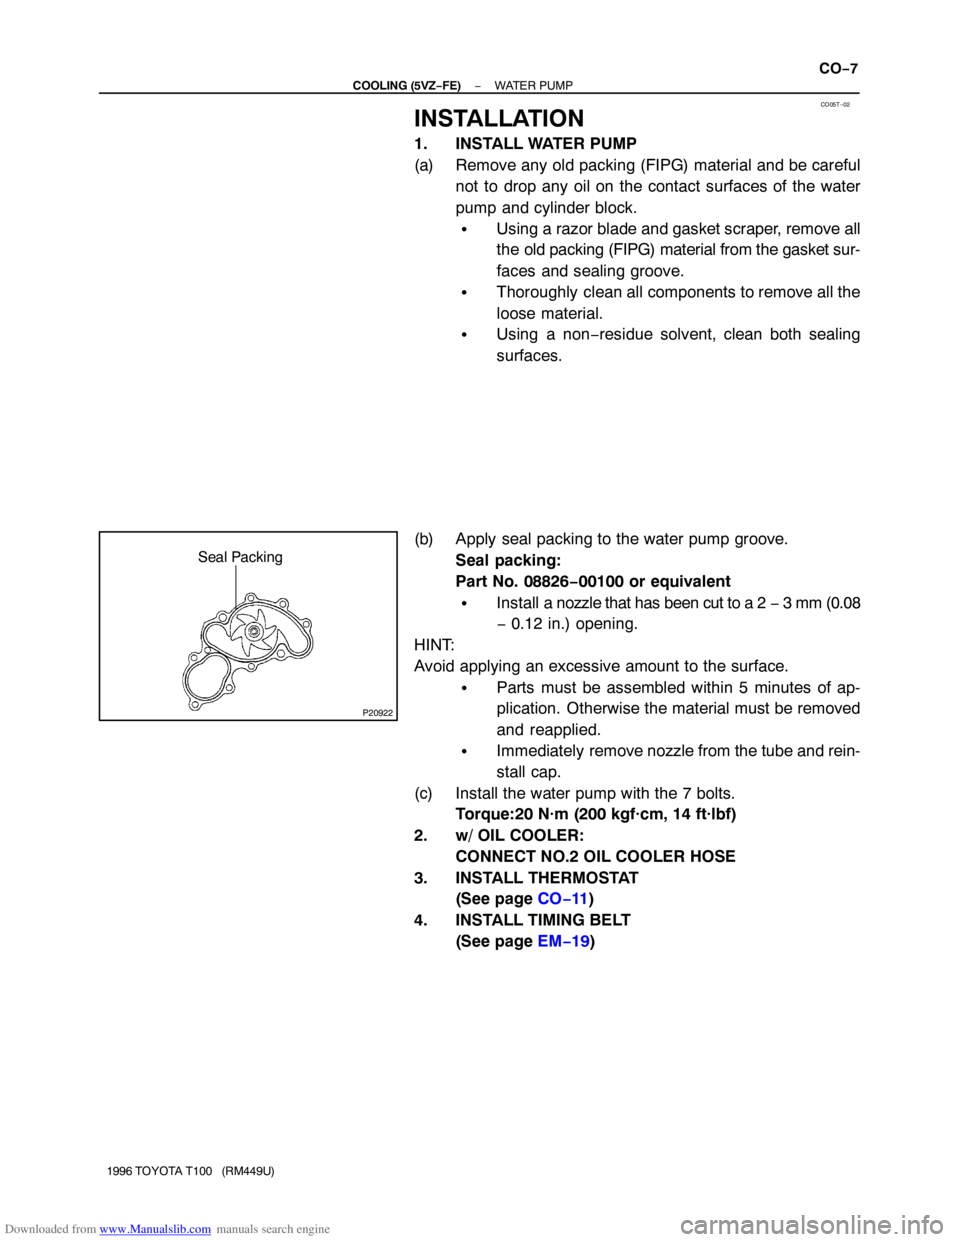
(b) Apply seal packing to the water pump groove.
Seal packing:
Part No. 08826−00100 or equivalent
�Install a nozzle that has been cut to a 2 − 3 mm (0.08
− 0.12 in.) opening.
HINT:
Avoid applying an excessive amount to the surface.
�Parts must be assembled within 5 minutes of ap-
plication. Otherwise the material must be removed
and reapplied.
�Immediately remove nozzle from the tube and rein-
stall cap.
(c) Install the water pump with the 7 bolts.
Torque:20 N·m (200 kgf·cm, 14 ft·lbf)
2. w/ OIL COOLER:
CONNECT NO.2 OIL COOLER HOSE
3. INSTALL THERMOSTAT
(See page CO−11)
4. INSTALL TIMING BELT
(See page EM−19)