Page 8 of 203
3
1. Headlight and turn signal switch
2. Wiper and washer switches
3. Emergency flasher switch
4. Clock
5. Center vents
6. Car audio
7. Air conditioning controls
8. Rear window defoggers switch
9. Coupe and liftbackÐPower rear view mirror control
switch (without power windows)
ConvertibleÐ
Convertible top control switch and
quarter window control switches
10. Cigarette lighter
11. Ignition switch
12. Cruise control switch
13. Tilt steering lock release lever
14. Instrument panel light control knob
ProCarManuals.com
Page 16 of 203
11
The windows can be operated with
switches on the center console.
The windows move as long as you hold
the switch.
To open: Push on the lower side of the
switch.
To close: Push on the upper side of the
switch.To open the trunk lid or back door from
the outside, insert the master key and
turn it clockwise.
See Luggage stowage precautionsº in
Part 2 for precautions to observe in load-
ing luggage.
To close the trunk lid or back door, lower
it and press down on it. After closing the
trunk lid or back door, try pulling it up to
make sure it is securely closed.
Keep the trunk lid or back door closed
while driving. This not only keeps the
luggage from being thrown out but
also prevents exhaust gases from en-
tering the vehicle.
CAUTION!
To open the trunk lid or back door
from the driver's seat, pull up on the
lock release lever.
ÐLock release lever
ÐQuarter windows
(convertible) Trunk lid (c
oupe and convertible)/
Back door (liftback)Ð
ProCarManuals.com
Page 17 of 203
12
This system deactivates the lock re-
lease lever so that things locked in the
trunk or luggage compartment can be
protected.
1. (Except convertible) Push down the
security lock levers to lock the rear
seatbacks.
After locking the rear seatbacks, try fold-
ing them down to make sure they are se-
curely lockedÐotherwise, someone
could get into the trunk or luggage
compartment by folding down a rear seat.2. After closing the trunk lid or back
door, insert the master key and turn it
counterclockwise to deactivate the
lock release lever.
After closing the trunk lid or back door, try
pulling it up to make sure it is securely
locked.To open the hood, do the following.
1. Pull the hood lock release lever.
The hood will spring up slightly.
ÐLuggage security system Hood
ProCarManuals.com
Page 19 of 203

14
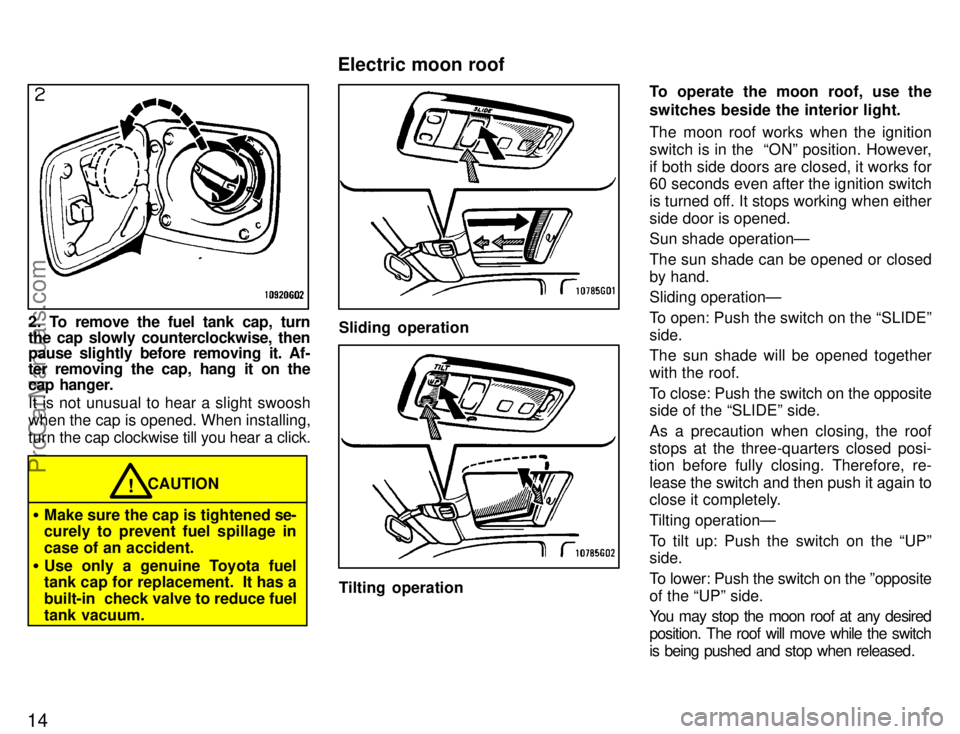
2. To remove the fuel tank cap, turn
the cap slowly counterclockwise, then
pause slightly before removing it. Af-
ter removing the cap, hang it on the
cap hanger.
It is not unusual to hear a slight swoosh
when the cap is opened. When installing,
turn the cap clockwise till you hear a click.
�Make sure the cap is tightened se-
curely to prevent fuel spillage in
case of an accident.
� Use only a genuine Toyota fuel
tank cap for replacement. It has a
built-in check valve to reduce fuel
tank vacuum.
CAUTION!
Sliding operation
Tilting operation To operate the moon roof, use the
switches beside the interior light.
The moon roof works when the ignition
switch is in the ONº position. However,
if both side doors are closed, it works for
60 seconds even after the ignition switch
is turned off. It stops working when either
side door is opened.
Sun shade operationÐ
The sun shade can be opened or closed
by hand.
Sliding operationÐ
To open: Push the switch on the SLIDEº
side.
The sun shade will be opened together
with the roof.
To close: Push the switch on the opposite
side of the SLIDEº side.
As a precaution when closing, the roof
stops at the three-quarters closed posi-
tion before fully closing. Therefore, re-
lease the switch and then push it again to
close it completely.
Tilting operationÐ
To tilt up: Push the switch on the UPº
side.
To lower: Push the switch on the ºopposite
of the UPº side.
You may stop the moon roof at any desired
position. The roof will move while the switch
is being pushed and stop when released .
Electric moon roof
ProCarManuals.com
Page 106 of 203
Part 1Clock99
OPERATION OF
INSTRUMENTS
AND CONTROLSÐ
Chapter 1-8
Other equipment
�Clock
� Cigarette lighter and ashtray
� Glovebox
� Cup holder
� Luggage cover
� Floor mat
The digital clock indicates the time.
The key must be in the ``ACCº or ``ON''
position.
To reset the hour: Push the Hº button.
To reset the minutes: Push the Mº button.
If quick adjustment to a full hour is de-
sired, push the :00º button.
For example, if the :00º button is de-
pressed when the time is between
1:01Ð1:29, the time will change to 1:00.
If the time is between 1:30Ð1:59, the time
will change to 2:00. Once the electrical power source has
been disconnected from the clock, the
time is automatically set to 1:00 (one
o'clock).
When the instrument panel lights are
turned on, the brightness of the time indi-
cation will be reduced.
ProCarManuals.com
Page 107 of 203

100
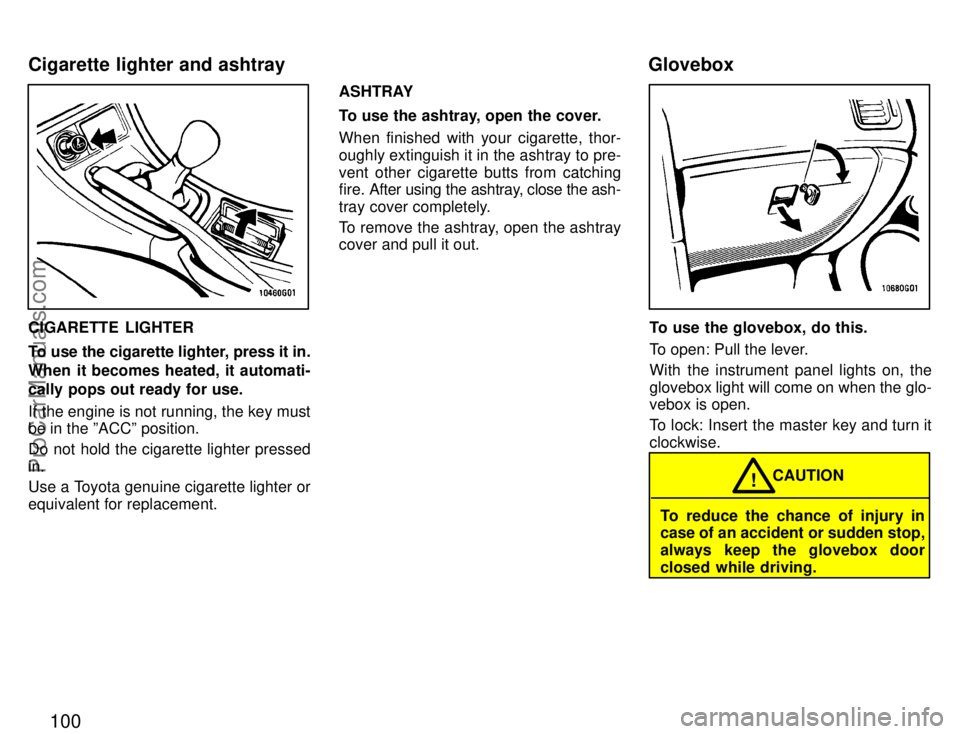
CIGARETTE LIGHTER
To use the cigarette lighter, press it in.
When it becomes heated, it automati-
cally pops out ready for use.
If the engine is not running, the key must
be in the ºACCº position.
Do not hold the cigarette lighter pressed
in.
Use a Toyota genuine cigarette lighter or
equivalent for replacement.ASHTRAY
To use the ashtray, open the cover.
When finished with your cigarette, thor-
oughly extinguish it in the ashtray to pre-
vent other cigarette butts from catching
fire. After using the ashtray, close the ash-
tray cover completely.
To remove the ashtray, open the ashtray
cover and pull it out.To use the glovebox, do this.
To open: Pull the lever.
With the instrument panel lights on, the
glovebox light will come on when the glo-
vebox is open.
To lock: Insert the master key and turn it
clockwise.
To reduce the chance of injury in
case of an accident or sudden stop,
always keep the glovebox door
closed while driving.
CAUTION
!
Cigarette lighter and ashtray Glovebox
ProCarManuals.com
Page 138 of 203
131
3. Remove the wheel ornament.
Pry off the wheel ornament, using the bev-
eled end of the wheel nut wrench as
shown.
Do not try to pull the ornament by
hand. Take due care in handling the
ornament to avoid unexpected per-
sonal injury.CAUTION
!
4. Loosen all the wheel nuts.
Always l
oosen the wheel nuts before rais-
ing the vehicle.
The nuts turn counterclockwise to loosen.
To get maximum leverage, fit the wrench
to the nut so that the handle is on the right
side, as shown above. Grab the wrench
near the end of the handle and pull up on
the handle. Be careful that the wrench
does not slip off the nut.
Do not remove the nuts yetÐjust unscrew
them about one-half turn.5. Position the jack at the correct jack
points as shown.
Make sure the jack is positioned on a l evel
and solid place.
ÐRemoving wheel ornament
(steel wheels only) ÐLoosening wheel nuts ÐPositioning the jack
ProCarManuals.com
Page 139 of 203

132
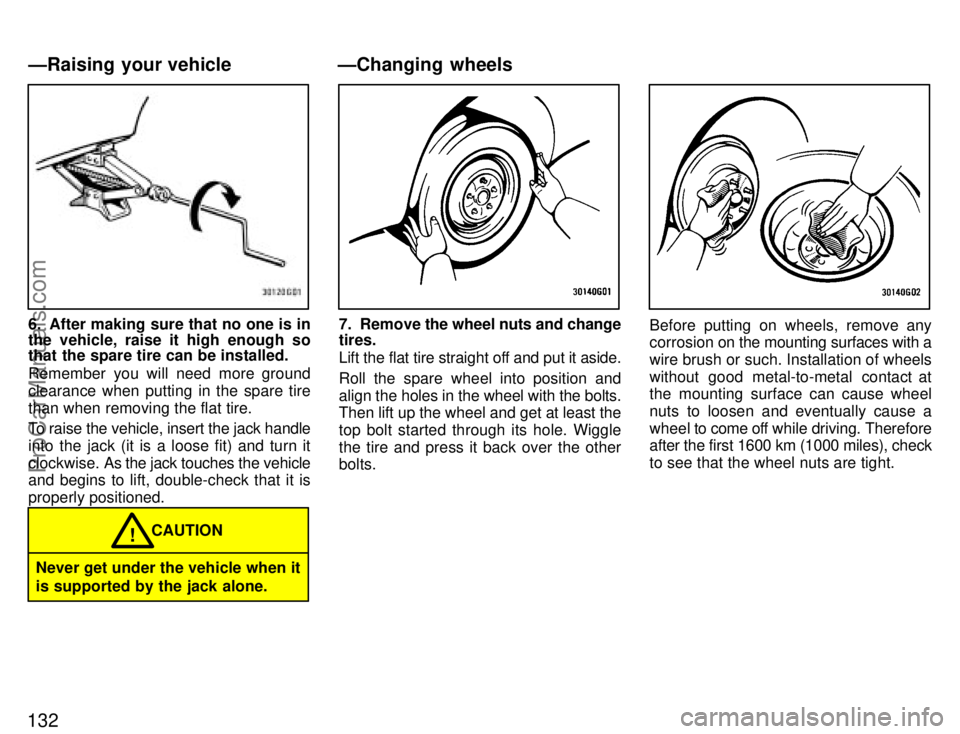
6. After making sure that no one is in
the vehicle, raise it high enough so
that the spare tire can be installed.
Remember you will need more ground
clearance when putting in the spare tire
than when removing the flat tire.
To raise the vehicle, insert the jack handle
into the jack (it is a loose fit) and turn it
clockwise. As the jack touches the vehicle
and begins to lift, double-check that it is
properly positioned.
Never get under the vehicle when it
is supported by the jack alone. CAUTION
!
7. Remove the wheel nuts and change
tires.
Lift the flat tire straight off and put it aside.
Roll the spare wheel into position and
align the holes in the
wheel with the bolts.
Then lift up the wheel and get at least the
top bolt started through its hole. Wiggle
the tire and press it back over the other
bolts.Before putting on wheels, remove any
corrosion on the mounting surfaces with a
wire brush or such. Installation of wheels
without good metal-to-metal contact at
the mounting surface can cause wheel
nuts to loosen and eventually cause a
wheel to come off while driving. Therefore
after the first 1600 km (1000 miles), check
to see that the wheel nuts are tight.
ÐRaising your vehicle ÐChanging wheels
ProCarManuals.com