Page 212 of 2890
~
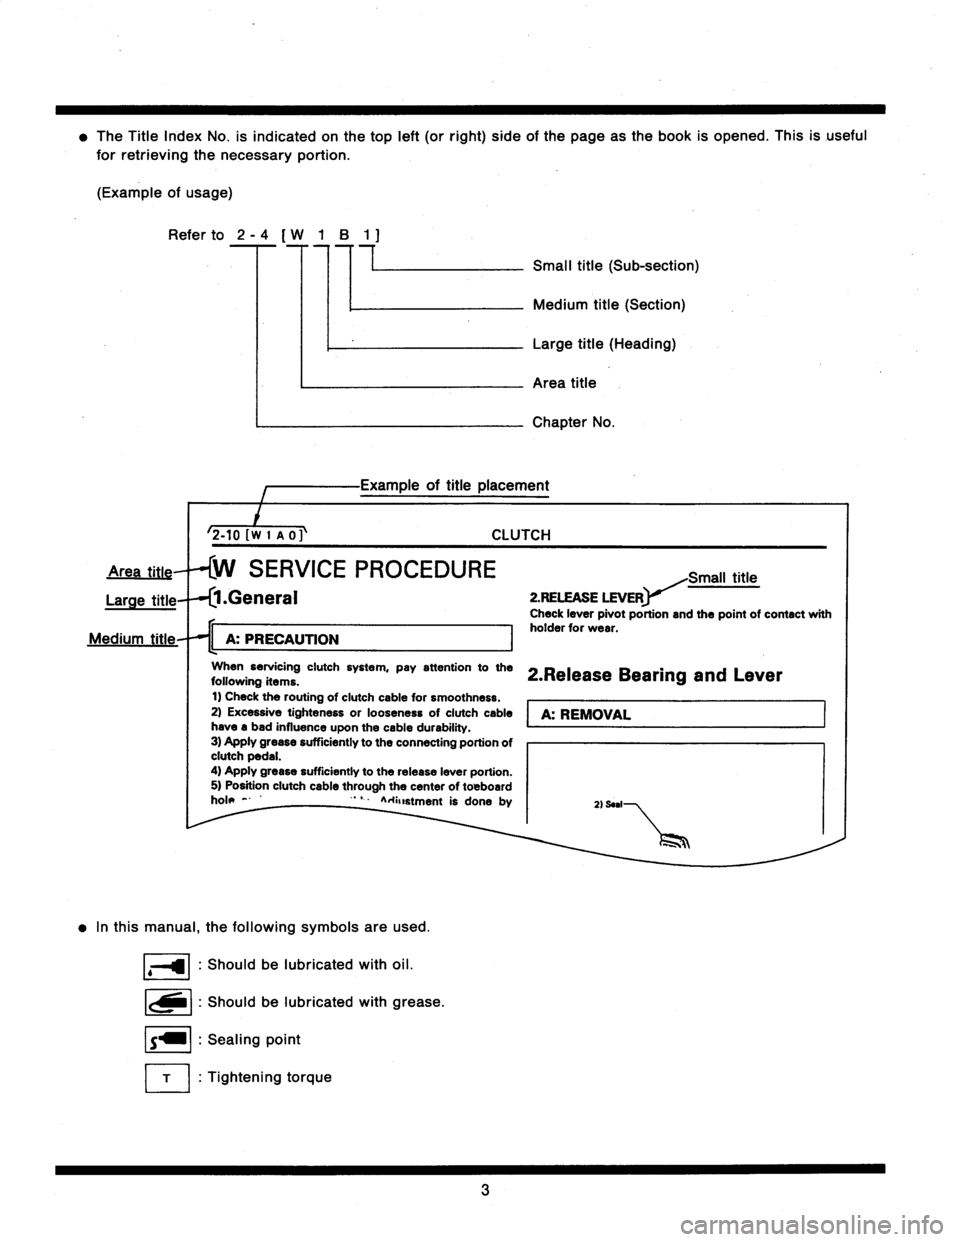
The
Title
Index
No
.
is
indicated
on
thetop
left
(or
right)
side
of
the
page
asthe
book
is
opened
.
This
is
useful
for
retrieving
the
necessary
portion
.
(Example
of
usage)
Refer
to
2
-
4
[
W
1
B
1
7
77
Small
title
(Sub-section)
2-tOfwI
no
Medium
title
(Section)
Large
title
(Heading)
Area
title
Chapter
Na
of
title
placement
CLUTCH
SERVICE
PROCEDURE
Large
title
.General
11
A
:
PRECAUTION
I
When
servicing
clutch
system,
pay
attention
tothe
following
items
.
t)
Check
the
routing
ofclutch
cable
for
smoothness
.
2)
Excessive
tighteness
or
looseness
of
clutch
cable
have
a
bad
influence
upon
the
cable
durability
.
3)
Apply
grease
sufficiently
to
the
connecting
portion
ofclutch
pedal
.
4)
Apply
grease
sufficiently
to
the
release
leverportion
.
5)
Position
clutch
cable
through
the
center
of
toBboard
hole
-
'
`
A
.+anstment
is
done
by
In
this
manual,
thefollowing
symbols
are
used
.
Shouldbe
lubricated
with
oil
.
Shouldbe
lubricated
with
grease
.
Sealing
point
Tightening
torque
Small
title
2
.RELEASE
LEVER
Check
leverpivot
portion
and
the
point
of
contact
with
holder
for
wear
.
2
.Release
Bearing
and
Lever
A
:
REMOVAL
2)
Seal
3
Page 309 of 2890
G2M0093
4) Connect oil pressure gauge hose to cylinder block.
5) Start the engine, and measure oil pressure.
Oil pressure:
98 kPa (1.0 kg/cm
2,14 psi) or more at 800 rpm
294 kPa (3.0 kg/cm2, 43 psi) or more at 5,000 rpm
CAUTION:
�If oil pressure is out of specification, check oil
pump, oil filter and lubrication line.
�If oil pressure warning light is turned ON and oil
pressure is in specification, replace oil pressure
switch.
NOTE:
The specified data is based on an engine oil temperature
of 80°C (176°F).
6) After measuring oil pressure, install oil pressure switch.
Tightening torque:
25±3 N⋅m (2.5±0.3 kg-m, 18.1±2.2 ft-lb)
7) Install generator and V-belt in the reverse order of
removal, and adjust the V-belt deflection.
8
2-2
6. Engine Oil Pressure
Page 319 of 2890
G2M0106
1. General Precautions
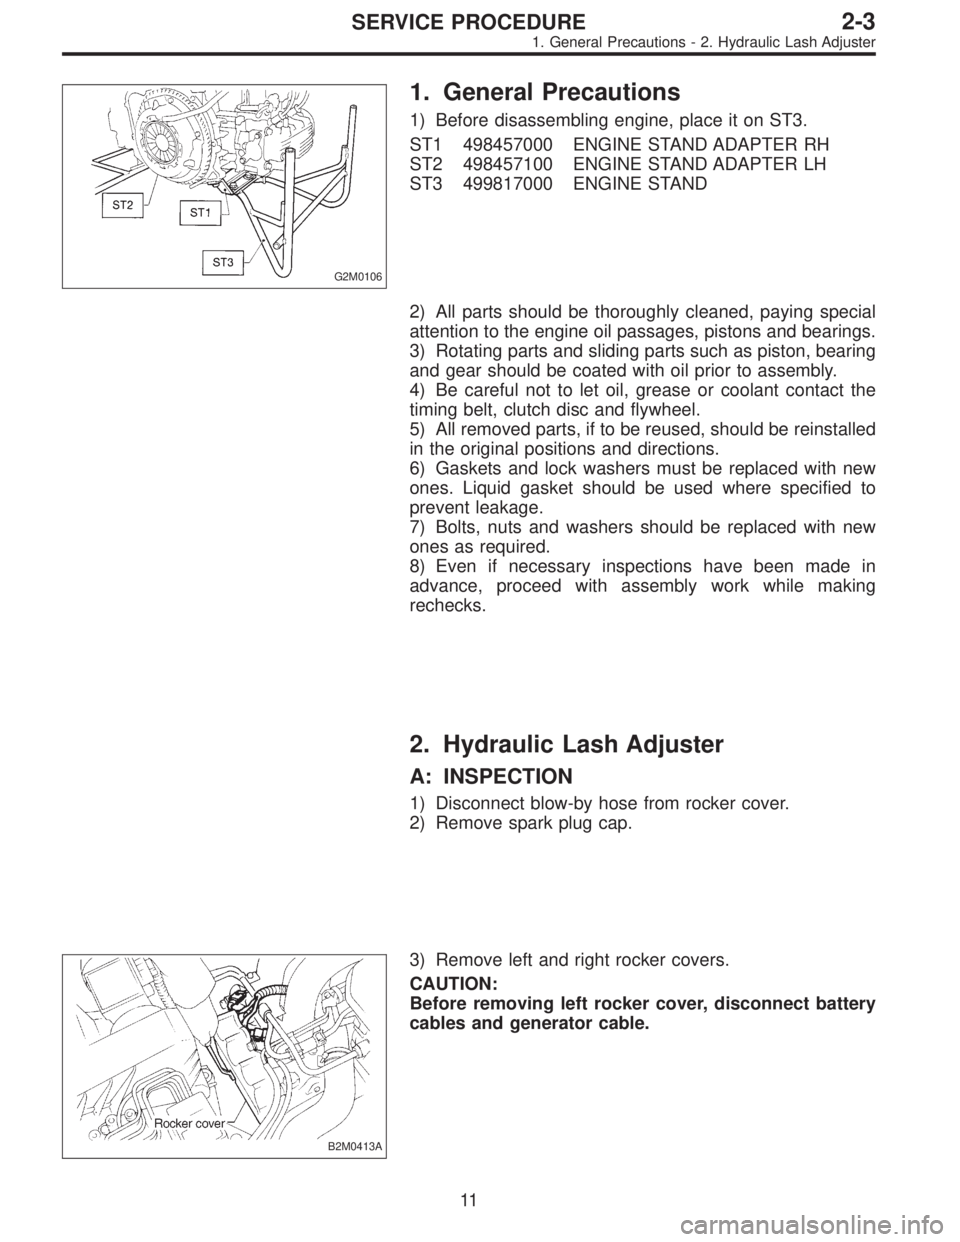
1) Before disassembling engine, place it on ST3.
ST1 498457000 ENGINE STAND ADAPTER RH
ST2 498457100 ENGINE STAND ADAPTER LH
ST3 499817000 ENGINE STAND
2) All parts should be thoroughly cleaned, paying special
attention to the engine oil passages, pistons and bearings.
3) Rotating parts and sliding parts such as piston, bearing
and gear should be coated with oil prior to assembly.
4) Be careful not to let oil, grease or coolant contact the
timing belt, clutch disc and flywheel.
5) All removed parts, if to be reused, should be reinstalled
in the original positions and directions.
6) Gaskets and lock washers must be replaced with new
ones. Liquid gasket should be used where specified to
prevent leakage.
7) Bolts, nuts and washers should be replaced with new
ones as required.
8) Even if necessary inspections have been made in
advance, proceed with assembly work while making
rechecks.
2. Hydraulic Lash Adjuster
A: INSPECTION
1) Disconnect blow-by hose from rocker cover.
2) Remove spark plug cap.
B2M0413A
3) Remove left and right rocker covers.
CAUTION:
Before removing left rocker cover, disconnect battery
cables and generator cable.
11
2-3SERVICE PROCEDURE
1. General Precautions - 2. Hydraulic Lash Adjuster
Page 320 of 2890
G2M0106
1. General Precautions
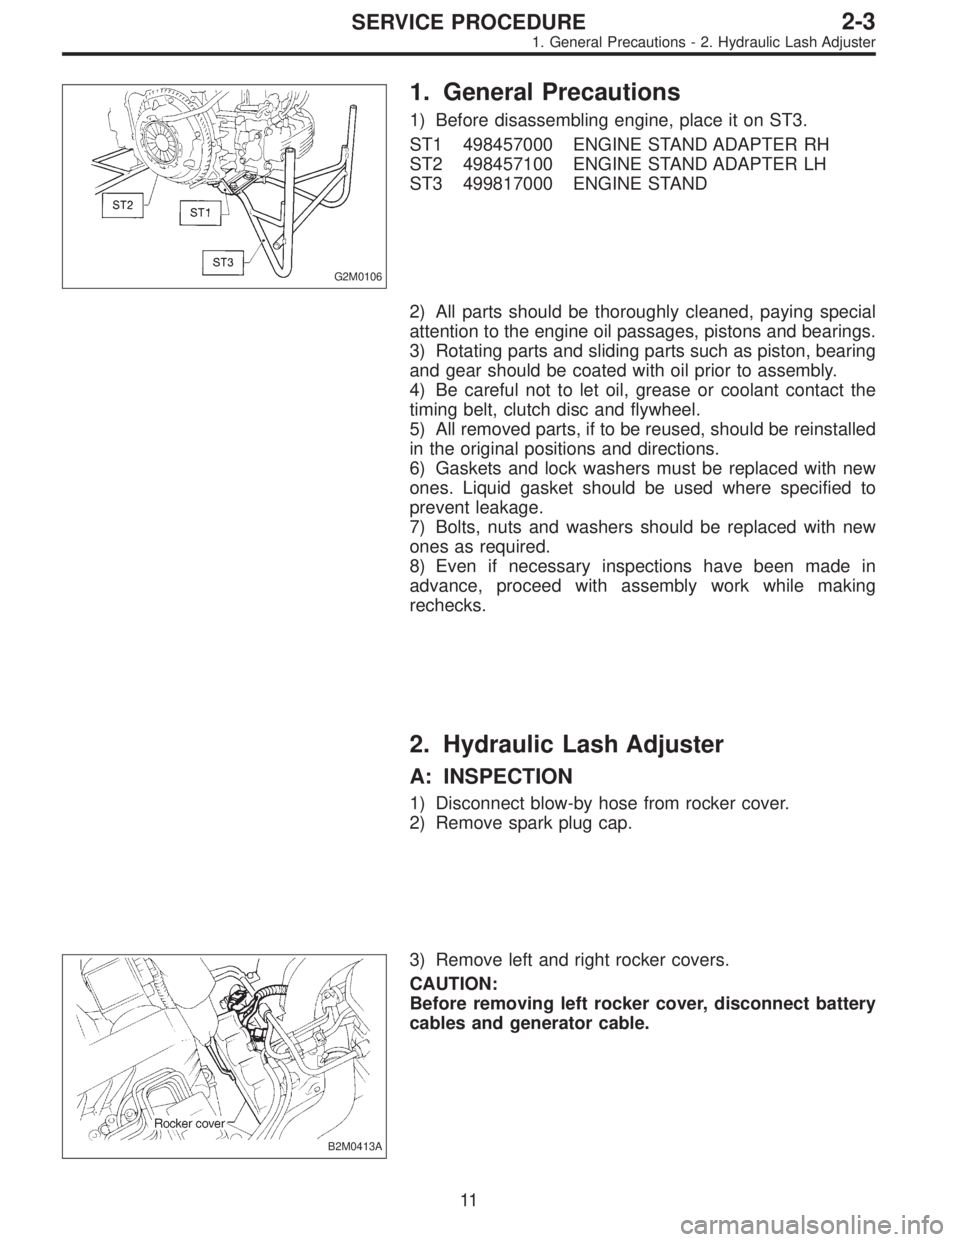
1) Before disassembling engine, place it on ST3.
ST1 498457000 ENGINE STAND ADAPTER RH
ST2 498457100 ENGINE STAND ADAPTER LH
ST3 499817000 ENGINE STAND
2) All parts should be thoroughly cleaned, paying special
attention to the engine oil passages, pistons and bearings.
3) Rotating parts and sliding parts such as piston, bearing
and gear should be coated with oil prior to assembly.
4) Be careful not to let oil, grease or coolant contact the
timing belt, clutch disc and flywheel.
5) All removed parts, if to be reused, should be reinstalled
in the original positions and directions.
6) Gaskets and lock washers must be replaced with new
ones. Liquid gasket should be used where specified to
prevent leakage.
7) Bolts, nuts and washers should be replaced with new
ones as required.
8) Even if necessary inspections have been made in
advance, proceed with assembly work while making
rechecks.
2. Hydraulic Lash Adjuster
A: INSPECTION
1) Disconnect blow-by hose from rocker cover.
2) Remove spark plug cap.
B2M0413A
3) Remove left and right rocker covers.
CAUTION:
Before removing left rocker cover, disconnect battery
cables and generator cable.
11
2-3SERVICE PROCEDURE
1. General Precautions - 2. Hydraulic Lash Adjuster
Page 322 of 2890
G2M0131
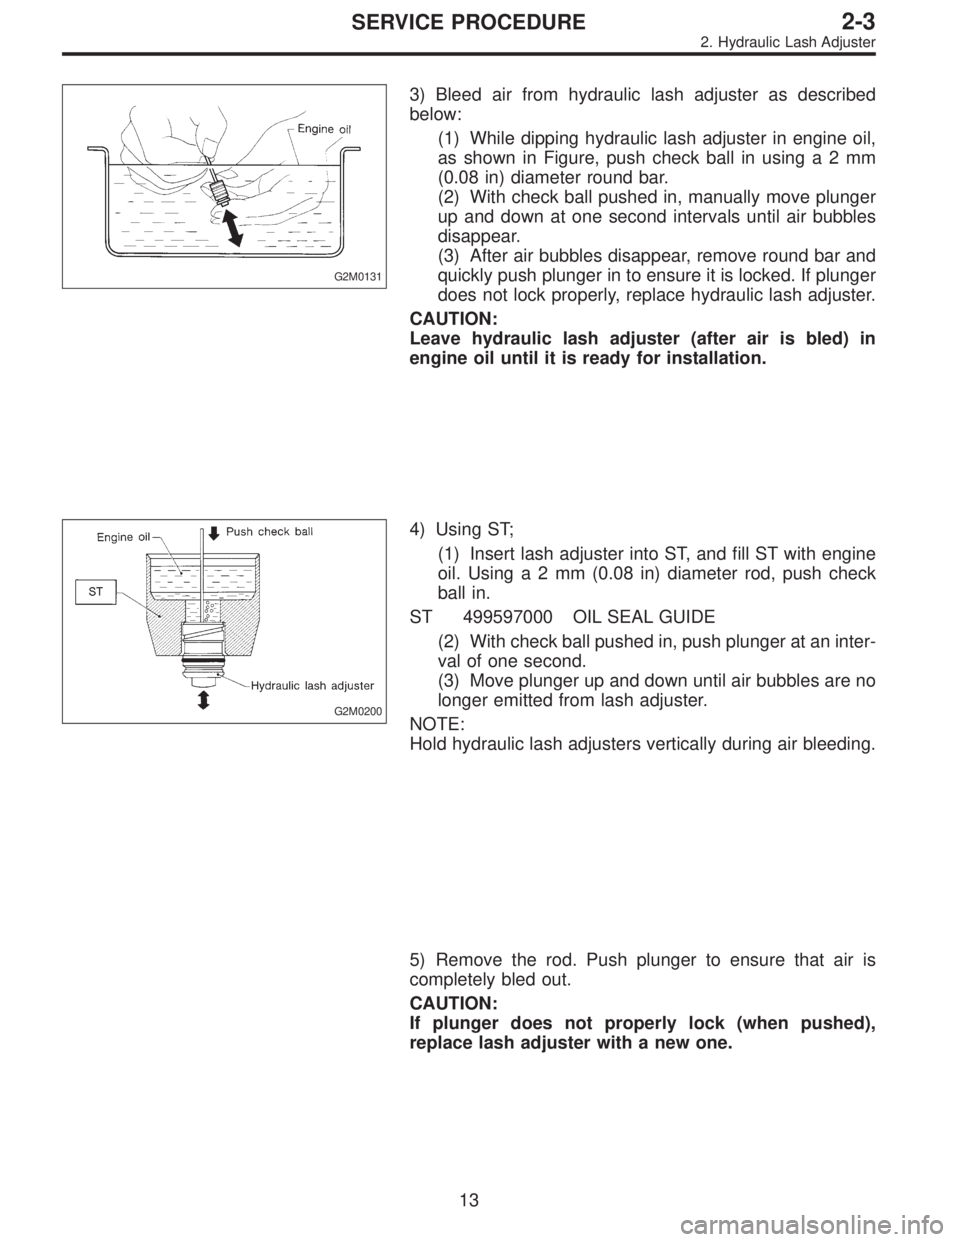
3) Bleed air from hydraulic lash adjuster as described
below:
(1) While dipping hydraulic lash adjuster in engine oil,
as shown in Figure, push check ball in usinga2mm
(0.08 in) diameter round bar.
(2) With check ball pushed in, manually move plunger
up and down at one second intervals until air bubbles
disappear.
(3) After air bubbles disappear, remove round bar and
quickly push plunger in to ensure it is locked. If plunger
does not lock properly, replace hydraulic lash adjuster.
CAUTION:
Leave hydraulic lash adjuster (after air is bled) in
engine oil until it is ready for installation.
G2M0200
4) Using ST;
(1) Insert lash adjuster into ST, and fill ST with engine
oil. Usinga2mm(0.08 in) diameter rod, push check
ball in.
ST 499597000 OIL SEAL GUIDE
(2) With check ball pushed in, push plunger at an inter-
val of one second.
(3) Move plunger up and down until air bubbles are no
longer emitted from lash adjuster.
NOTE:
Hold hydraulic lash adjusters vertically during air bleeding.
5) Remove the rod. Push plunger to ensure that air is
completely bled out.
CAUTION:
If plunger does not properly lock (when pushed),
replace lash adjuster with a new one.
13
2-3SERVICE PROCEDURE
2. Hydraulic Lash Adjuster
Page 329 of 2890
B: INSPECTION
1. TIMING BELT
1) Check timing belt teeth for breaks, cracks, and wear. If
any fault is found, replace belt.
2) Check the condition of back side of belt; if any crack is
found, replace belt.
CAUTION:
�Be careful not to let oil, grease or coolant contact
the belt. Remove quickly and thoroughly if this hap-
pens.
G2M0115
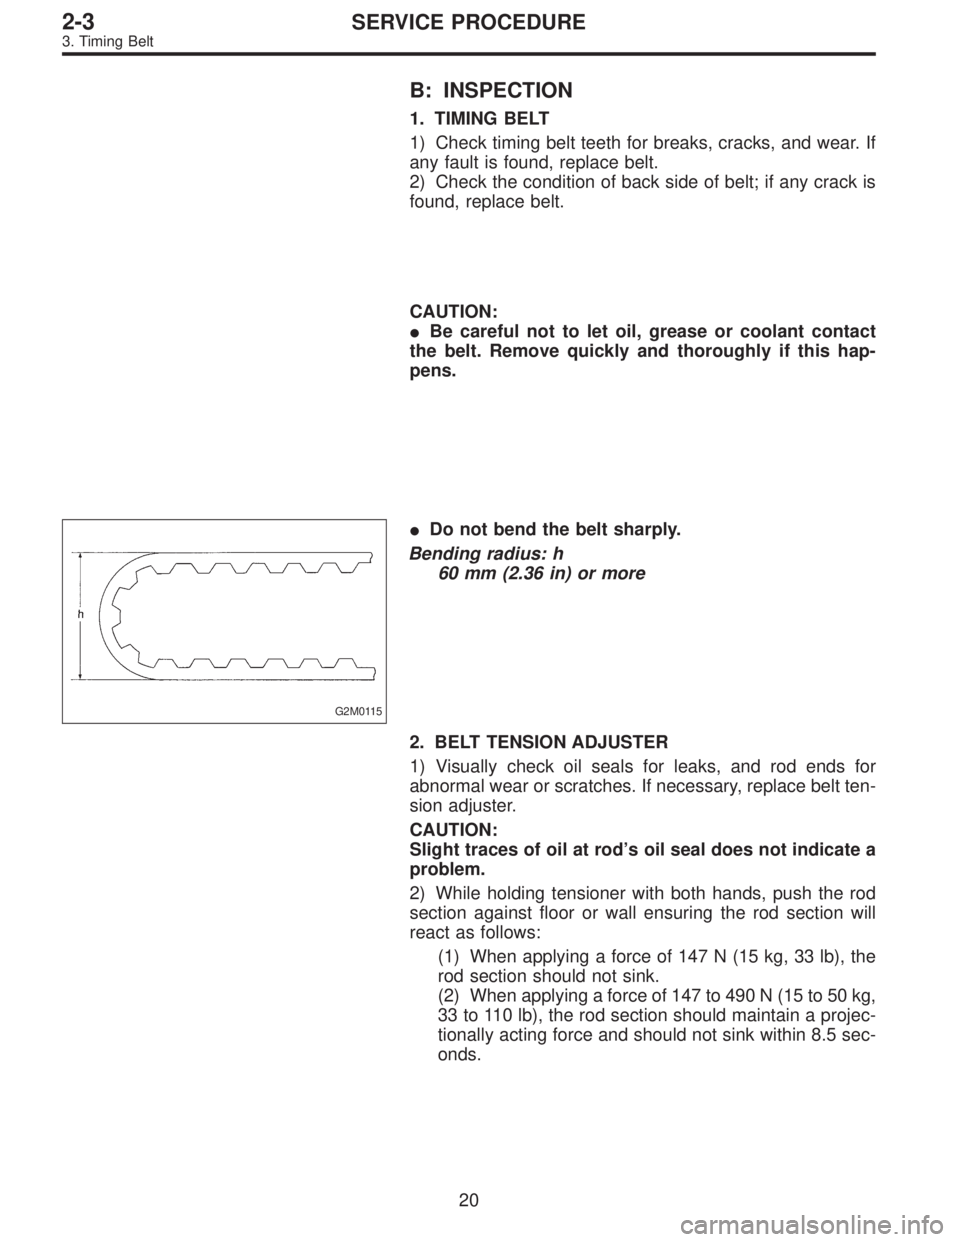
�Do not bend the belt sharply.
Bending radius: h
60 mm (2.36 in) or more
2. BELT TENSION ADJUSTER
1) Visually check oil seals for leaks, and rod ends for
abnormal wear or scratches. If necessary, replace belt ten-
sion adjuster.
CAUTION:
Slight traces of oil at rod’s oil seal does not indicate a
problem.
2) While holding tensioner with both hands, push the rod
section against floor or wall ensuring the rod section will
react as follows:
(1) When applying a force of 147 N (15 kg, 33 lb), the
rod section should not sink.
(2) When applying a force of 147 to 490 N (15 to 50 kg,
33 to 110 lb), the rod section should maintain a projec-
tionally acting force and should not sink within 8.5 sec-
onds.
20
2-3SERVICE PROCEDURE
3. Timing Belt
Page 338 of 2890
G2M0131
C: INSPECTION
1. HYDRAULIC LASH ADJUSTER
1) Bleed air from hydraulic lash adjuster as described
below:
(1) While dipping hydraulic lash adjuster in engine oil,
as shown in Figure, push check ball in usinga2mm
(0.08 in) diameter round bar.
(2) With check ball pushed in, manually move plunger
up and down at one second intervals until air bubbles
disappear.
(3) After air bubbles disappear, remove round bar and
quickly push plunger in to ensure it is locked. If plunger
does not lock properly, replace hydraulic lash adjuster.
CAUTION:
Leave hydraulic lash adjuster (after air is bled) in
engine oil until it is ready for installation.
2) Replace hydraulic lash adjuster with a new one if valve
contact surface is scratched.
29
2-3SERVICE PROCEDURE
4. Valve Rocker Assembly
Page 339 of 2890
B2M0072
B2M0073
2. VALVE ROCKER ARM
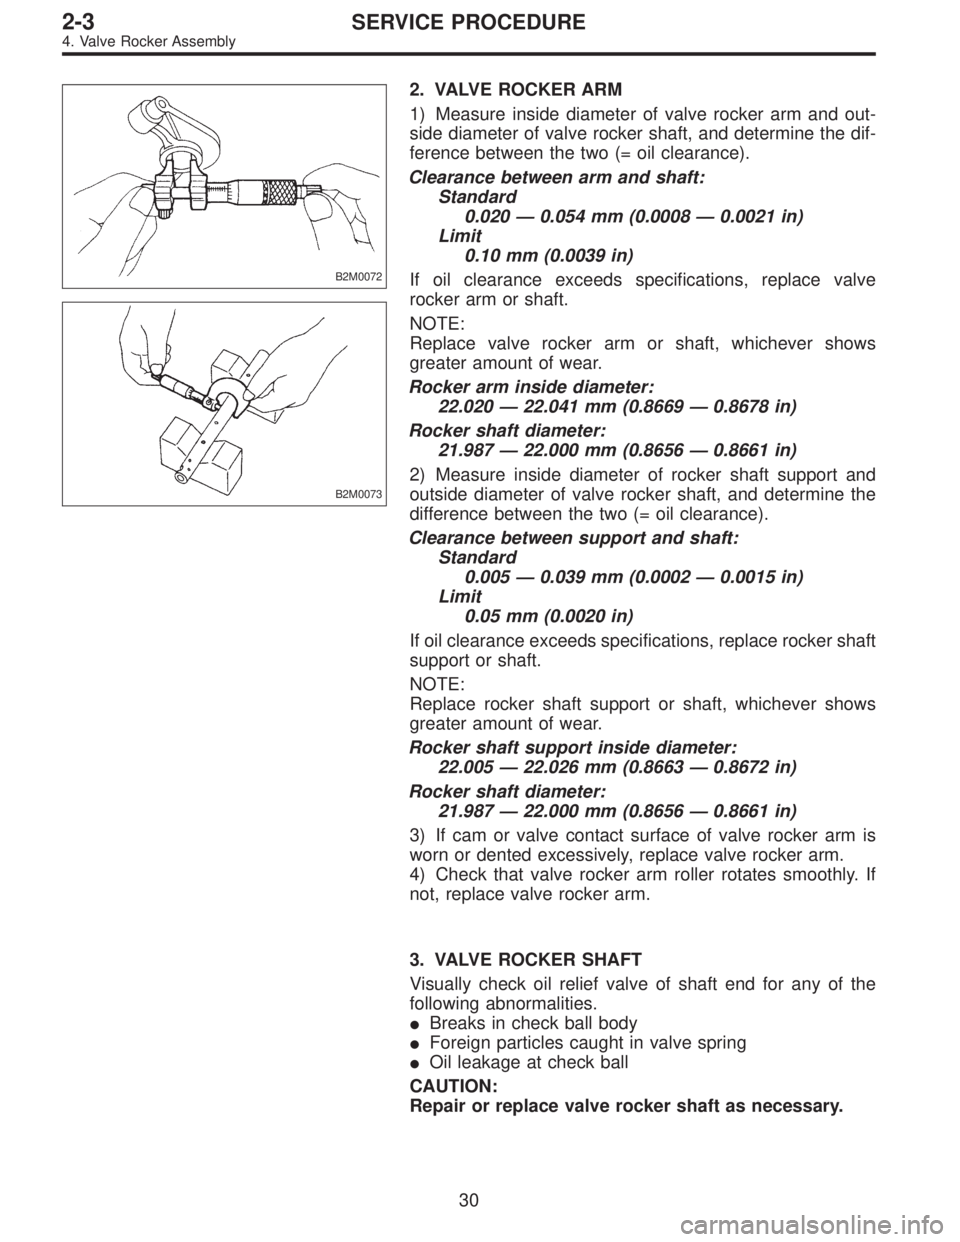
1) Measure inside diameter of valve rocker arm and out-
side diameter of valve rocker shaft, and determine the dif-
ference between the two (= oil clearance).
Clearance between arm and shaft:
Standard
0.020—0.054 mm (0.0008—0.0021 in)
Limit
0.10 mm (0.0039 in)
If oil clearance exceeds specifications, replace valve
rocker arm or shaft.
NOTE:
Replace valve rocker arm or shaft, whichever shows
greater amount of wear.
Rocker arm inside diameter:
22.020—22.041 mm (0.8669—0.8678 in)
Rocker shaft diameter:
21.987—22.000 mm (0.8656—0.8661 in)
2) Measure inside diameter of rocker shaft support and
outside diameter of valve rocker shaft, and determine the
difference between the two (= oil clearance).
Clearance between support and shaft:
Standard
0.005—0.039 mm (0.0002—0.0015 in)
Limit
0.05 mm (0.0020 in)
If oil clearance exceeds specifications, replace rocker shaft
support or shaft.
NOTE:
Replace rocker shaft support or shaft, whichever shows
greater amount of wear.
Rocker shaft support inside diameter:
22.005—22.026 mm (0.8663—0.8672 in)
Rocker shaft diameter:
21.987—22.000 mm (0.8656—0.8661 in)
3) If cam or valve contact surface of valve rocker arm is
worn or dented excessively, replace valve rocker arm.
4) Check that valve rocker arm roller rotates smoothly. If
not, replace valve rocker arm.
3. VALVE ROCKER SHAFT
Visually check oil relief valve of shaft end for any of the
following abnormalities.
�Breaks in check ball body
�Foreign particles caught in valve spring
�Oil leakage at check ball
CAUTION:
Repair or replace valve rocker shaft as necessary.
30
2-3SERVICE PROCEDURE
4. Valve Rocker Assembly