1996 PONTIAC BONNEVILLE display
[x] Cancel search: displayPage 68 of 387
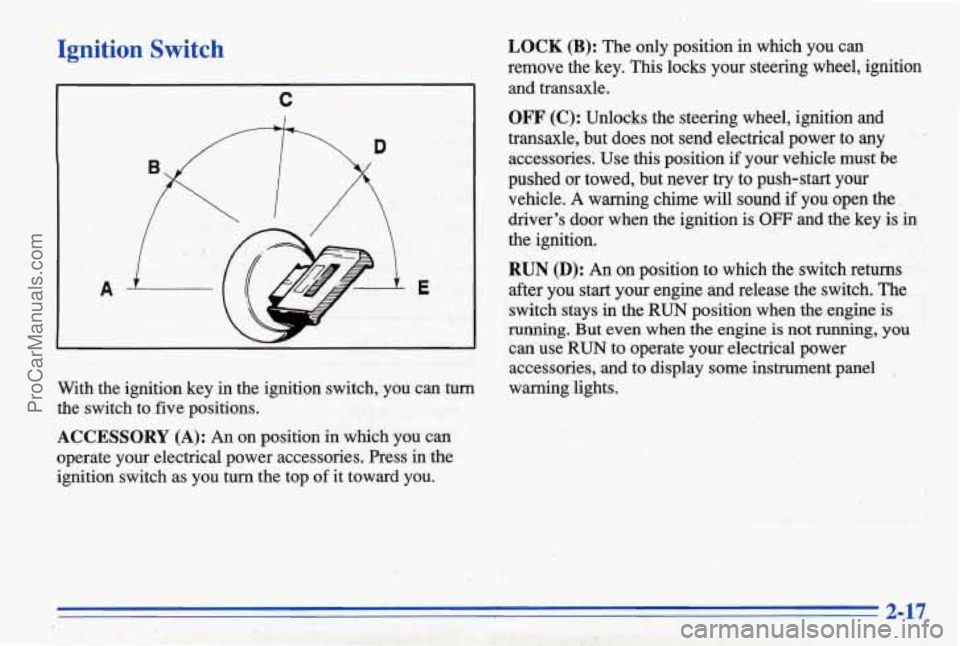
Ignition Switch
C
With the ignition key in the ignition switch, you can turn
the switch to five positions.
ACCESSORY (A): An on position in which you can
operate your electrical power accessories. Press in the
ignition switch
as you turn the top of it toward you.
LOCK (B): The only position in which you can
remove the key. This locks your steering wheel, ignition
and transaxle.
OFF (C): Unlocks the steering wheel, ignition and
transaxle, but does not send electrical power to any
accessories.
Use this position if yoUr vehicle must be
pushed or towed, but never try to push-start your
vehicle.
A warning chime will sound if you open the,.
driver's door when the ignition is
OFF and the key is in
the ignition.
RUN (D): An on position to which the switch returns
after you start your engine and release the switch. The
switch stays
in the 'RUN position when the engine is
running. But even when the engine is not running, you
can use RUN to operate your electrical power
accessories,
and to display some instrument panel
warning lights.
2-17
ProCarManuals.com
Page 95 of 387
To operate twilight sentinel, turn the control to MAX for
the three minute delay.
Turn it the other way to reduce
the delay. Turn the control to MIN to turn twilight
sentinel
off.
,. Also, it's possible that your headlamps my go out if
': ,_ .:'. * , . :' you drive from a dark area into a bright area like a
' lighted parking lot. If this happens, turn on your
headlamps with the regular headlamp switch.
Interior Lamps
Instrument Panel .Intensity/Brightness
Control
You can brighten or dim your instrument cluster lights
by
turning the headlamp switch. Turn the switch
clockwise to brighten the instrument cluster lights
and
displays. Turn the switch clockwise all the way t'o turn
on the interior courtesy lamps. Turn the switch
counterclockwise to dim the instrument cluster lights
and displays and to turn off the courtesy lamps.
Delayed Illumination
When you open the door, the interior lamps will come
on. When you
close the door with the ignition off, the
interior lamps will stay on
for 25 seconds or until the
ignition
is turned to an on position. Please note that locking the doors
will override the delayed illumination
feature and the lamps will
turn off right away.
Theater Dimming
This feature allows for a thee to five-second fade out of
the courtesy lamps instead of immediate turn off.
Exit Lighting
With this feature, the interior lamps will come on for
25 seconds after you remove the key from the ignition.
This will give you time to fhd the door pull handle or
lock switches.
Illuminated Entry (Option)
When you lift the handle of either front door, a Imp
will glow around the door lock. This will help you insert
the door key at night.
The lamps inside your vehicle will also go on. These
lamps will
go off after about 25 seconds, or when you
start
your engine. These lamps will also go on when
you press any button on the optional Remote Keyless
Entry transmitter.
If a door is left ajar, your interior lamps will turn off
after 10 minutes to save your battery.
ProCarManuals.com
Page 112 of 387
Speedometer and Odometer
Your speedometer lets you see your speed in both miles
per
hour (mph) and kilometers per hour (km/h). Your
odometer shows how
far your vehicle has been driven,
in either miles (used in the United States) or kilometers
(used in Canada).
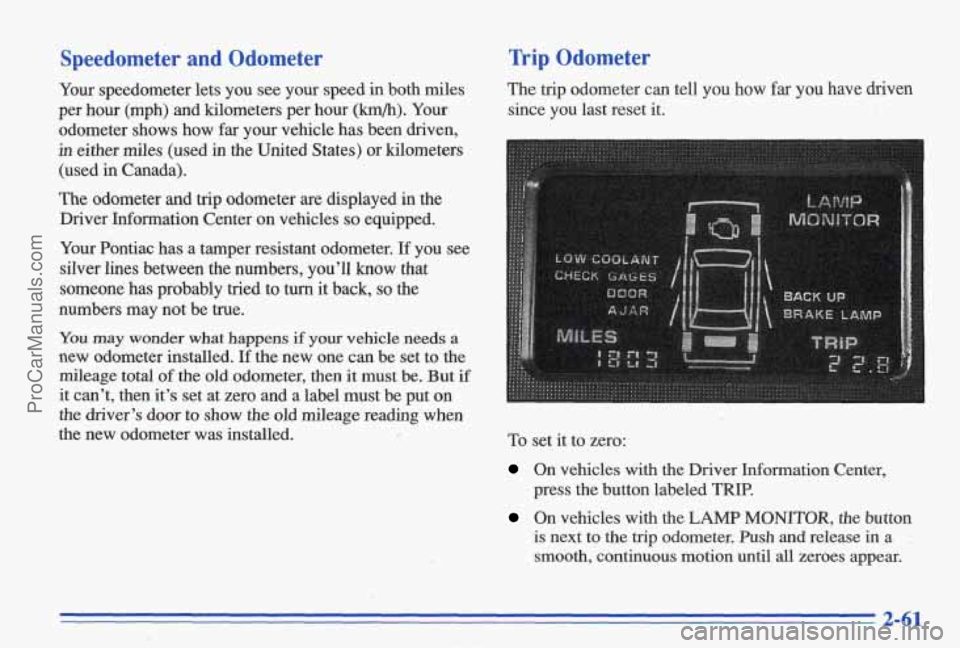
The odometer and trip odometer are displayed in the
Driver Information Center on vehicles
so equipped.
Your Pontiac has a tamper resistant odometer.
If you see
silver lines between the numbers, you’ll know that
someone has probably tried
to turn it back, so the
numbers may not be true.
Trip Odometer
The trip odometer can tell you how far you have driven
since you last reset it.
You may wonder what happens if your vehicle needs a
new odometer installed. If the new one can be set to the
mileage total
of the old odometer, then it must be. But if
it can’t, then it’s set at zero and a label must be put on
the driver’s door to show the old mileage reading when
the new odometer was installed. To set it to zero:
On vehicles with the Driver Information Center,
press the button labeled
TRIP.
On vehicles with the LAMP MONITOR, the button
is next to the trip odometer. Push and release in a .
smooth, continuous motion until all zeroes appear.
2-61
ProCarManuals.com
Page 126 of 387
Fuel Gage
Your fuel gage tells you about how much fuel you have
left, when the ignition is on. When the gage reads in the
yellow band, a warning chime will sound and the
CHECK GAGES warning light will go on, if you have
this option.
Here
are some things that some owners ask about. None
of these show a problem with your fuel gage:
At the service station, the gas pump shuts off before
It takes a little more or less fuel to fill up than the
the
gage reads
FULL (F).
gage indicated. For example, the gage may have
indicated the tank was half full, but it actually took a
little more or less than half the tank's capacity to fill
the tank.
0 The gage moves a little when you turn a corner,
The gage doesn't go back to EMPTY (E) when you
If you have the large span (220") gage, the needle
speed up, or make a hard stop.
turn off the ignition.
moves more
for a given amount of fuel. This does not
indicate excessive
fuel consumption, and is normal.
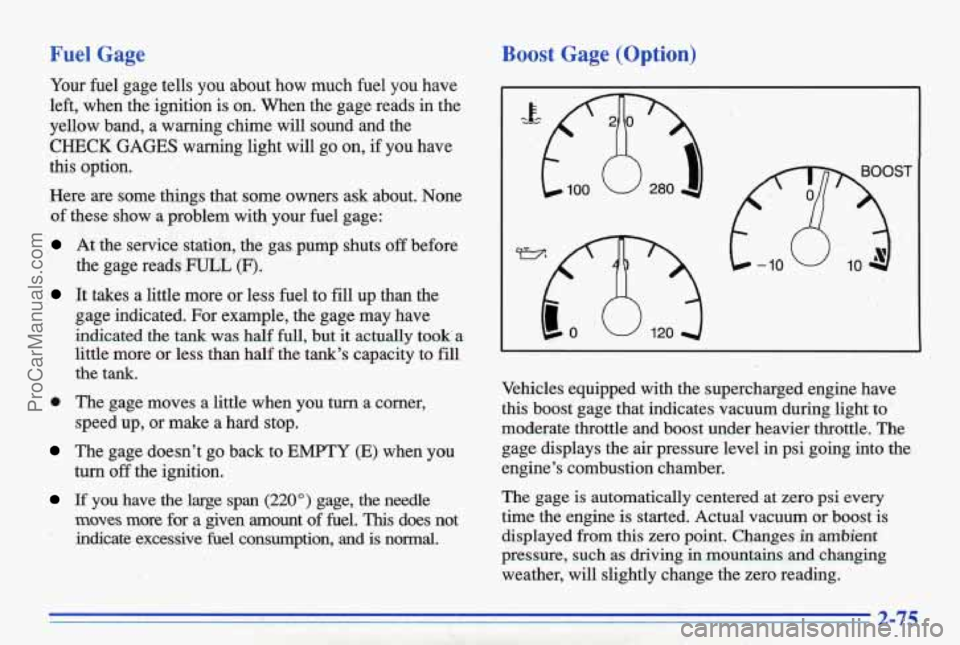
Boost Gage (Option)
OST
Vehicles equipped with the supercharged engine have
this boost gage that indicates vacuum during light to.
moderate throttle and boost under heavier throttle. The
gage displays the air pressure level in psi going into the
engine's combustion chamber.
The gage
is automatically centered at zero psi every
time the engine is started. Actual vacuum or boost is
displayed from this zero point. Changes
in ambient
pressure, such as driving in mountains and changing
weather, will slightly change the zero reading.
ProCarManuals.com
Page 127 of 387
Head-Up. Display (Opth)
If the HUD image is too bright, or too high in
.your field
of view, it may take you more time to
see things
you need to see when it's dark outside.
Be sure to keep
the HUD image dim and placed
low
in your field of view.
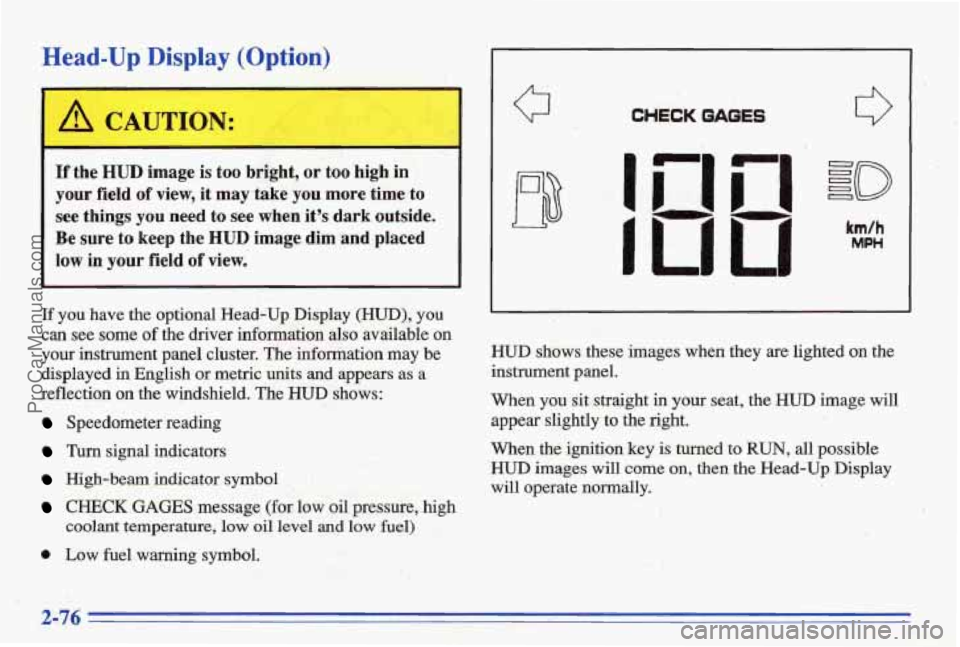
If you have the optional Head-Up Display (HUD), you
can see some
of the driver information also mailable on
your instrument panel cluster. The infomation may be
displayed in English or metric units and appears
as a
reflection on the wjndshield. The
HUD shows:
Speedometer reading
Turn signal indicators
High-beam indicator symbol
CHECK GAGES message (for law oil pressure, high
coolant temperature,
low oil level and low fuel)
0 Low fuel warning symbol.
Q CHECK GAGES
I
I
km/h
MPH
HWD shows these images when they are lighted on the
instrument
panel.
When you sit straight in your seat, the HUD image will
appear slightly to the right.
When
the ignition key is turned to RUN, all possible
HUD images will come on, then the Head-Up Display
will operate
normally,,
2-76
ProCarManuals.com
Page 128 of 387
If you never look at your instrument panel, you may not
see something important, such as
a warning light. So
be sure to scan your displays and controls and the
driving environment just as you would
in a vehicle
without
HUD.
NOTICE:
Although the HUD image appears to be near the
front
of the vehicle, do not use it as a parking aid. ’
The HUD was not designed for that purpose. If you
try to use it that way, such as in a parking lot, you
may misjudge distance and run into something.
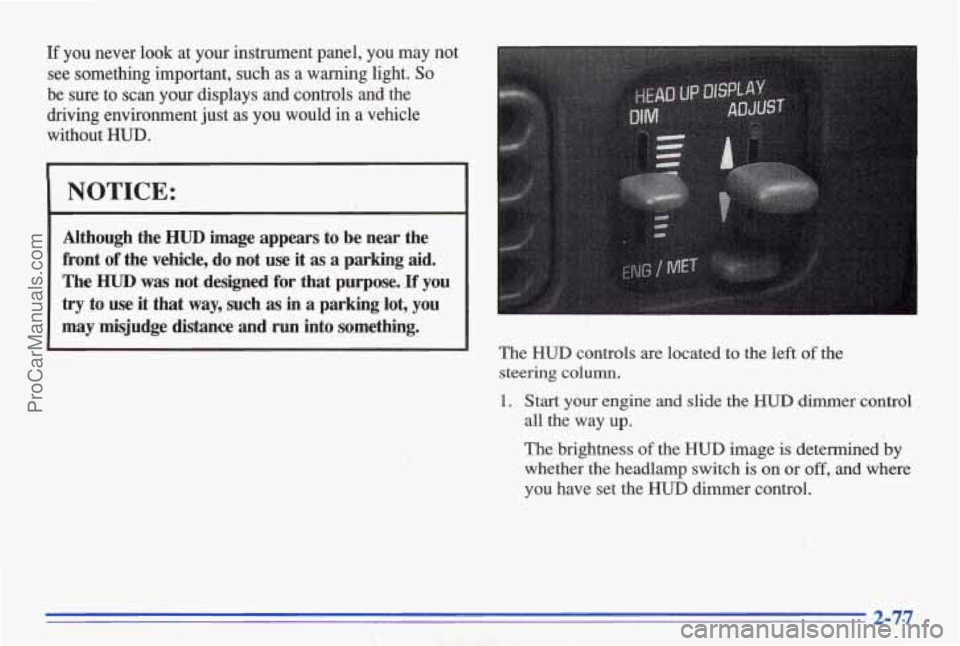
The HUD controls are located to the left of the
steering
column.
1. Start your engine and slide the HUD dimmer control
all the way
up.
The brightness of the HUD image is determined by
whether the headlamp switch is on or off, and where
you have set the HUD dimmer control.
2-77
ProCarManuals.com
Page 134 of 387
Calibrating the Compass
/CALIBRATE T
L NL .
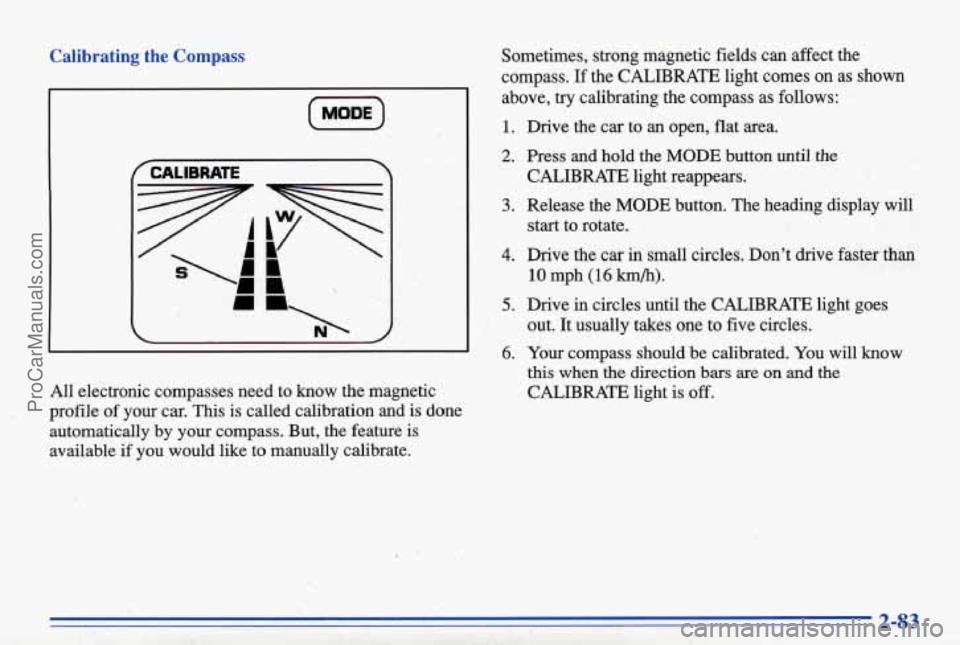
All electronic compasses need to know the magnetic
profile of your car.
This is called calibration and is done
automatically by your compass. But, the feature
is
available if you would like to manually calibrate. Sometimes, strong magnetic fields can affect the
compass.
If the CALIBRATE light comes on as shown
above, try calibrating the compass
as follows:
1. Drive the car to an open, flat area.
CALIBRATE light reappears.
start to rotate.
' 2. Press and hold the MODE button until the
3. Release the MODE button. The heading display will
4. Drive the car in small circles. Don't drive faster than
10 mph (16 km/h).
out. It usually takes one to five circles.
this when the direction bars are on and the
CALIBRATE light is off.
5. Drive in circles until the CALIBRATE light goes
6. Your compass should be calibrated. You will know
2-83
ProCarManuals.com
Page 141 of 387
Pressing the AUTO button will display the requested
temperature, fan speed'and
air delivery mode for five
seconds, then change to display the outside air
temperature. Be careful not to put anything over the
sensor located in the middle
of the instrument panel near
the windshield, or over the sensor
in the gnlle above the
radio. These sensors are used by the automatic system to
regulate temperature.
The exterior temperature display sensor is in front
of the
car, near the radiator. This displayed temperature is most
accurate when the vehicle
is moving. During stops, or
while idling, the display shows the previous driving
temperature for best system control.
To avoid blowing cold air in cold weather, the system
will delay turning
on the fan until warm air is available.
The length
of delay depends on outside air temperature,
engine coolant temperature, and time since the engine
was last started. Pushing the
fan button will override this
delay and change the fan to a selected single speed.
If you leave your vehicle, the system will remember the
control setting the next time you start your engine.
Manual Operation
You may also manually adjust the delivery mode or
fan speed.
'!! HEAT: Manually selecting HEAT by cycling
through the
MODE settings will deliver air to the floor
outlets.
+# DEFOG: Manually selecting DEFOG by cycling
through the
MODE settings will deliver air to the floor
and windshield outlets.
12 BI-LEVEL: Manually selecting BI-LEVEL by
cycling through the MODE setting will deliver warm air
to the floor and cooler air to the middle instrument panel outlets.
OFF: Press this button to turn the system off. Fresh air
will continue to flow through the vehicle, and the
system
will try to maintain the previously set
temperature. The outside temperature will show in the
display when the system
is OFF.
w.
ProCarManuals.com