1996 NISSAN SENTRA light
[x] Cancel search: lightPage 92 of 191
To reset at a slower cruising speed,use
one of the following three methods:
a) Lightly tap the brake pedal. When the
vehicle attains the desired speed, push
the COAST/SET switch and release it.
b) Push and hold the COAST/SET switch.
Release the switch when the vehicle
slows down to the desired speed.
c) Push, then quickly release the
COAST/SET switch. Each time you do
this, the set speed decreases by about 1
MPH (1.6 km/h).
To resume the preset speed,push and
release the RESUME switch. The vehicle
returns to the last set cruising speed when
the vehicle speed is over 30 MPH (48 km/h).
Precautions
cIf the cruise control system malfunctions,
it cancels automatically. The cruise indi-
cator light in the instrument panel then
blinks to warn the driver.
cWhen the cruise indicator light blinks,
turn the cruise control main switch off
and have the system checked by your
NISSAN dealer.cThe cruise indicator light may blink when
the cruise control main switch is turned
ON while pushing the RES/ACCEL,
COAST/SET, or CANCEL switch (lo-
cated on the steering wheel). To properly
set the cruise control system perform the
steps above in the order indicated.
Avoid using the cruise control when
driving under the following conditions:
cwhen it is not possible to keep the vehicle
at a set speed.
cin heavy traffic or in traffic that varies in
speed.
con winding roads, or hilly roads.
con slippery roads (rain, snow, ice, etc.).
cin very windy areas.
CAUTION
On manual transmission models, do
not shift into neutral without depress-
ing the clutch pedal when the cruise
control is on. Should this occur, de-
press the clutch pedal and turn the
main switch off immediately. Failure to
do so may cause engine damage.During the first 1,000 miles (1,600 km),
follow these recommendations for the future
reliability and economy of your new vehicle.
Failure to follow these recommendations
may result in vehicle damage or shortened
engine life.
cDo not drive over 55 MPH (90 km/h) and
do not run the engine over 4,000 rpm.
Avoid driving for long periods at constant
speed, either fast or slow.
cDo not accelerate at full throttle in any
gear.
cAvoid quick starts.
cAvoid hard braking as much as possible.
cDo not tow a trailer for the first 500 miles
(800 km).
BREAK-IN SCHEDULE
4-13
ZX
Page 95 of 191

cDriving with vacuum assisted brakes:
The brake booster aids braking by using
engine vacuum. If the engine stops, you
can stop the vehicle by depressing the
brake pedal. However, greater foot pres-
sure on the brake pedal will be required
to stop the vehicle and the stopping
distance will be longer.
cDriving with the power assisted steer-
ing:
The power assisted steering is designed
to use a hydraulic pump, driven by the
engine, to assist steering.
If the engine stops or the drive belt
breaks, you will still have control of the
vehicle. However, much greater steering
effort is needed, especially in sharp turns
or at low speeds.
cWet brakes:
When the vehicle is washed or driven
through water, the brakes may get wet.
As a result, your braking distance will be
longer and the vehicle may pull to one
side during braking.
To dry brakes, drive the vehicle at a safe
speed while lightly pressing the brakepedal to heat-up the brakes. Do this until
the brakes return to normal. Avoid driving
the vehicle at high speeds until the
brakes function correctly.
cAvoid resting your foot on the brake
pedal while driving. This will overheat the
brakes, wear out the brake linings and
pads faster and reduce gas mileage.
cTo help save the brakes and to prevent
the brakes from overheating, reduce
speed and downshift to a lower gear
before going down a slope or long grade.
Overheated brakes may reduce braking
performance and could result in loss of
vehicle control.
cWhile driving on a slippery surface, be
careful when braking, accelerating or
downshifting. Abrupt braking actions or
sudden acceleration could cause the
wheels to skid.The anti-lock brake system controls the
brakes at each wheel so the wheels do not
lock when braking abruptly or when braking
on slippery surfaces. The system detects
the rotation speed at each wheel and varies
the brake fluid pressure to prevent each
wheel from locking and sliding. By prevent-
ing wheel lockup, the system helps the
driver maintain steering control and helps to
minimize swerving and spinning on slippery
surfaces.
Using the system
Depress the brake pedal and hold it down.
It is not necessary to pump the brake
pedal.
Doing so may result in increased stopping
distances.
Normal operation
The anti-lock brake system does not oper-
ate at speeds below 3 to 6 MPH (5 to 10
km/h) to completely stop the vehicle. (The
speeds vary according to road conditions.)
When the anti-lock system senses that one
or more wheels are close to locking up, the
actuator (under the hood) rapidly applies
and releases hydraulic pressure (like pump-
ing the brakes very quickly). While the ac-
PRECAUTIONS WHEN
DRIVINGANTI-LOCK BRAKE SYSTEM
(ABS) (If so equipped)
4-16
ZX
Page 96 of 191
tuator is working, you may feel a pulsation in
the brake pedal and hear a noise or vibra-
tion from the actuator under the hood. This
is normal and indicates that the anti-lock
system is working properly. However, the
pulsation may indicate that road conditions
are hazardous and extra care is required
while driving.
Self-test feature
The anti-lock brake system consists of elec-
tronic sensors, electric pumps, and hydrau-
lic solenoids controlled by a computer. The
computer has a built-in diagnostic feature
that tests the system each time you start the
engine and move the vehicle at a low speed
in forward or reverse. When the ``self-test''
occurs, you may hear a ``clunk'' noise and/
or feel a ``pulsation'' in the brake pedal. This
is normal and is not an indication of any
malfunction. If the computer senses any
malfunction, it switches the anti-lock brake
system OFF and turns on the ABS brake
warning light in the dashboard. The brake
system then operates normally, but without
anti-lock assistance.
If the light comes on during the self check,
or while driving, take your vehicle to your
NISSAN dealer for repair at your earliest
convenience.
WARNING
The anti-lock brake system is a sophis-
ticated device, but it cannot prevent
accidents resulting from careless or
dangerous driving techniques. It can
help maintain vehicle control during
braking on slippery surfaces, but re-
member that the stopping distance on
slippery surfaces will be longer than on
normal surfaces, even with the anti-
lock system. Stopping distances may
also be longer on rough, gravel or
snow covered roads, or if you are using
tire chains. Always maintain a safe dis-
tance from the vehicle in front of you.
Ultimately, the responsibility for safety
of self and others rests in the hands of
the driver.
Tire type and condition may also affect
braking effectiveness.
cWhen replacing tires, install the
specified size of tires on all 4 wheels.
c
When installing a spare tire, make sure
it is the proper size and type as speci-
fied on the tire placard. For tire placard
location information, refer to ``Tire
placard'' in the Owner's Manual index.Refer to ``Wheels and tires'' in the ``Do-
it-yourself operations'' section of this
manual.
4-17
ZX
Page 106 of 191
tire placard affixed to the driver side
center pillar.
cRetighten the wheel nuts when the
vehicle has been run for 600 miles
(1,000 km).
5. Securely store the spare tire and jacking
equipment in the vehicle.
WARNING
cAlways make sure that the spare tire
and jacking equipment are properly
secured after use. The jack rod may
be used to securely tighten the hold-
down bolts. Such items can become
dangerous projectiles in an accident
or sudden stop.
cThe T-type spare tire and small size
spare tire are designed for emer-
gency use. See specific instructions
under the heading ``Wheels and
tires'' in the ``Do-it-yourself opera-
tions'' section.To start your engine with a booster battery,
the instructions and precautions below must
be followed.
CAUTION
cIf done incorrectly, jump starting can
be hazardous.
cExplosive hydrogen gas is always
present in the vicinity of the battery.
Keep all sparks and flames away
from the battery.
c
Do not allow battery fluid to come into
contact with eyes, skin, cloth or painted
surfaces. Battery fluid is a corrosive
sulfuric acid solution which can cause
severe burns. If the fluid should come
into contact with anything, immediately
flush the contacted area with water.
cA battery rated at above 12 volts
should not be used for a booster.
cWhenever working on or near a bat-
tery, always wear suitable eye protec-
tors (e.g., goggles or industrial safety
spectacles) and remove rings, metal
bands, or any other metal jewelry.
c
Keep battery out of the reach of chil-
dren.
Always follow the instructions below.
Failure to do so could result in damage
to the charging system and cause per-
sonal injury.
1.
If the booster battery is in another vehicle,
position the two vehicles to bring their
batteries into close proximity to each other.
Do not allow the two vehicles to touch.
2. Apply the parking brake. Move the shift
lever to Neutral (On automatic transmis-
sion models, move the lever to P). Switch
off all unnecessary electrical systems
(lights, heater, air conditioner, etc.).
3. Remove vent caps on the battery (if so
equipped). Cover the battery with an old
cloth to reduce explosion hazard.
4. Connect jumper cables in the sequence
as illustrated.
CAUTION
cAlways connect positive (+) to posi-
tive (+) and negative (þ) to body
ground (e.g., strut mounting bolt, etc.
Ðnot to the battery).
JUMP STARTING
5-7
ZX
Page 114 of 191
Machine compounding or aggressive pol-
ishing on a base coat/clear coat paint finish
may dull the finish or leave swirl marks.
Only use black wax or black shoe polish on
black urethane or polypropylene bumpers.
Removing spots
Remove tar and oil spots, industrial dust,
insects, and tree sap as quickly as possible
from the surface of the paint to avoid lasting
damage or staining. Special cleaning prod-
ucts are available at your NISSAN dealer or
any automotive accessory store.
Underbody
In areas where road salt is used in winter,
the underbody must be cleaned regularly.
This prevents dirt and salt from building up
and causing underbody and suspension
corrosion. Before winter and again in the
spring, the underseal must be checked and,
if necessary, re-treated.
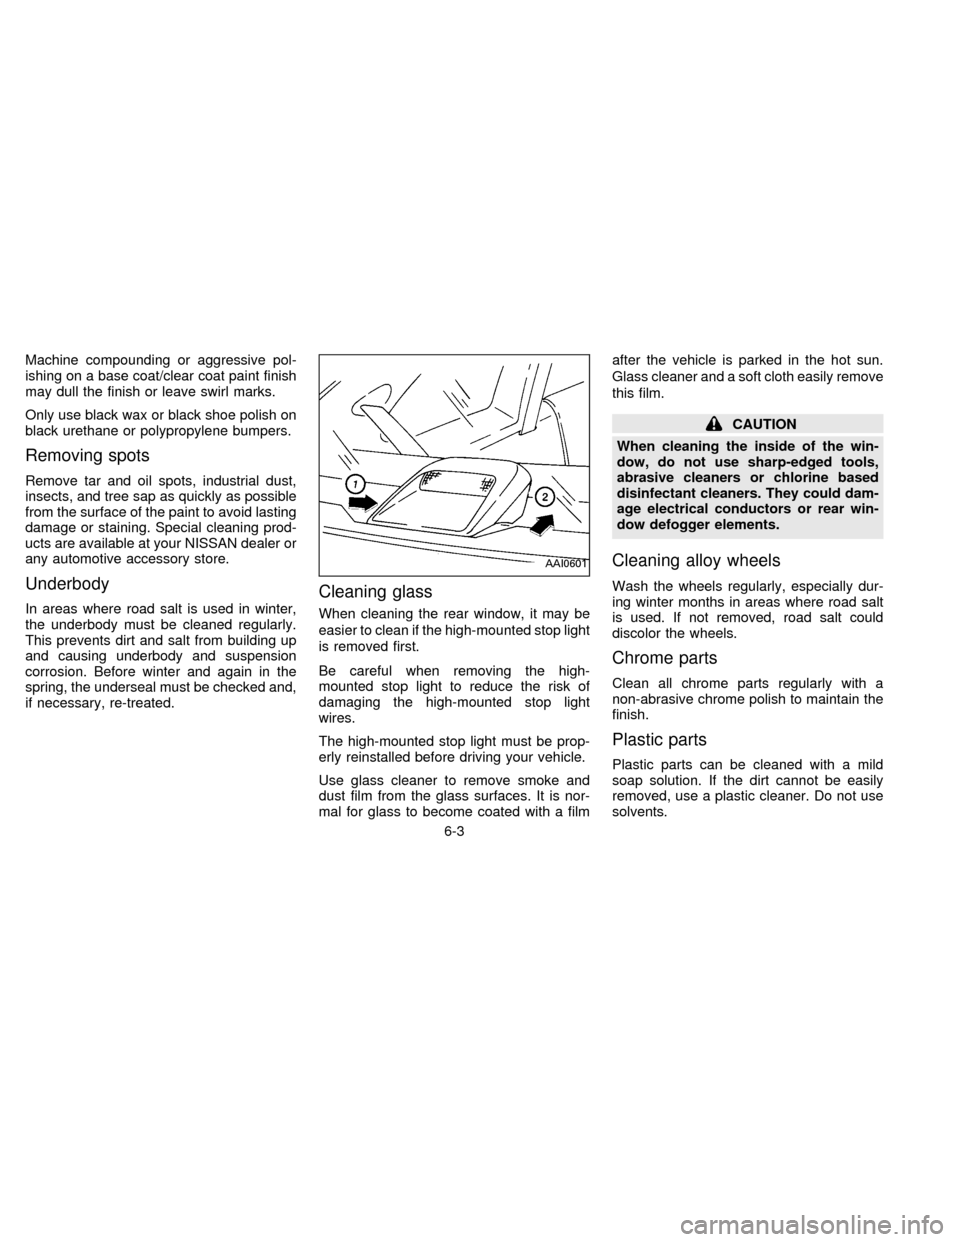
Cleaning glass
When cleaning the rear window, it may be
easier to clean if the high-mounted stop light
is removed first.
Be careful when removing the high-
mounted stop light to reduce the risk of
damaging the high-mounted stop light
wires.
The high-mounted stop light must be prop-
erly reinstalled before driving your vehicle.
Use glass cleaner to remove smoke and
dust film from the glass surfaces. It is nor-
mal for glass to become coated with a filmafter the vehicle is parked in the hot sun.
Glass cleaner and a soft cloth easily remove
this film.
CAUTION
When cleaning the inside of the win-
dow, do not use sharp-edged tools,
abrasive cleaners or chlorine based
disinfectant cleaners. They could dam-
age electrical conductors or rear win-
dow defogger elements.
Cleaning alloy wheels
Wash the wheels regularly, especially dur-
ing winter months in areas where road salt
is used. If not removed, road salt could
discolor the wheels.
Chrome parts
Clean all chrome parts regularly with a
non-abrasive chrome polish to maintain the
finish.
Plastic parts
Plastic parts can be cleaned with a mild
soap solution. If the dirt cannot be easily
removed, use a plastic cleaner. Do not use
solvents.
AAI0601
6-3
ZX
Page 118 of 191

7 Do-it-yourself operations
Maintenance precautions ..................................... 7-2
Engine compartment check locations .................. 7-3
Engine cooling system ......................................... 7-5
Engine oil ............................................................ 7-8
Automatic transmission fluid .............................. 7-11
Power steering fluid............................................ 7-13
Brake fluid .......................................................... 7-13
Window washer fluid .......................................... 7-14
Battery ................................................................ 7-15
Drive belts .......................................................... 7-17
Spark plug replacement ..................................... 7-18
Air cleaner housing filter .................................... 7-19Wiper blades ...................................................... 7-20
Parking brake check........................................... 7-21
Brake pedal ........................................................ 7-21
Brake booster ..................................................... 7-22
Clutch pedal ....................................................... 7-23
Fuses .................................................................. 7-23
Light bulbs .......................................................... 7-25
Headlight aiming adjustment .............................. 7-26
Bulb replacement ............................................... 7-26
Wheels and tires ................................................ 7-32
ZX
Page 128 of 191
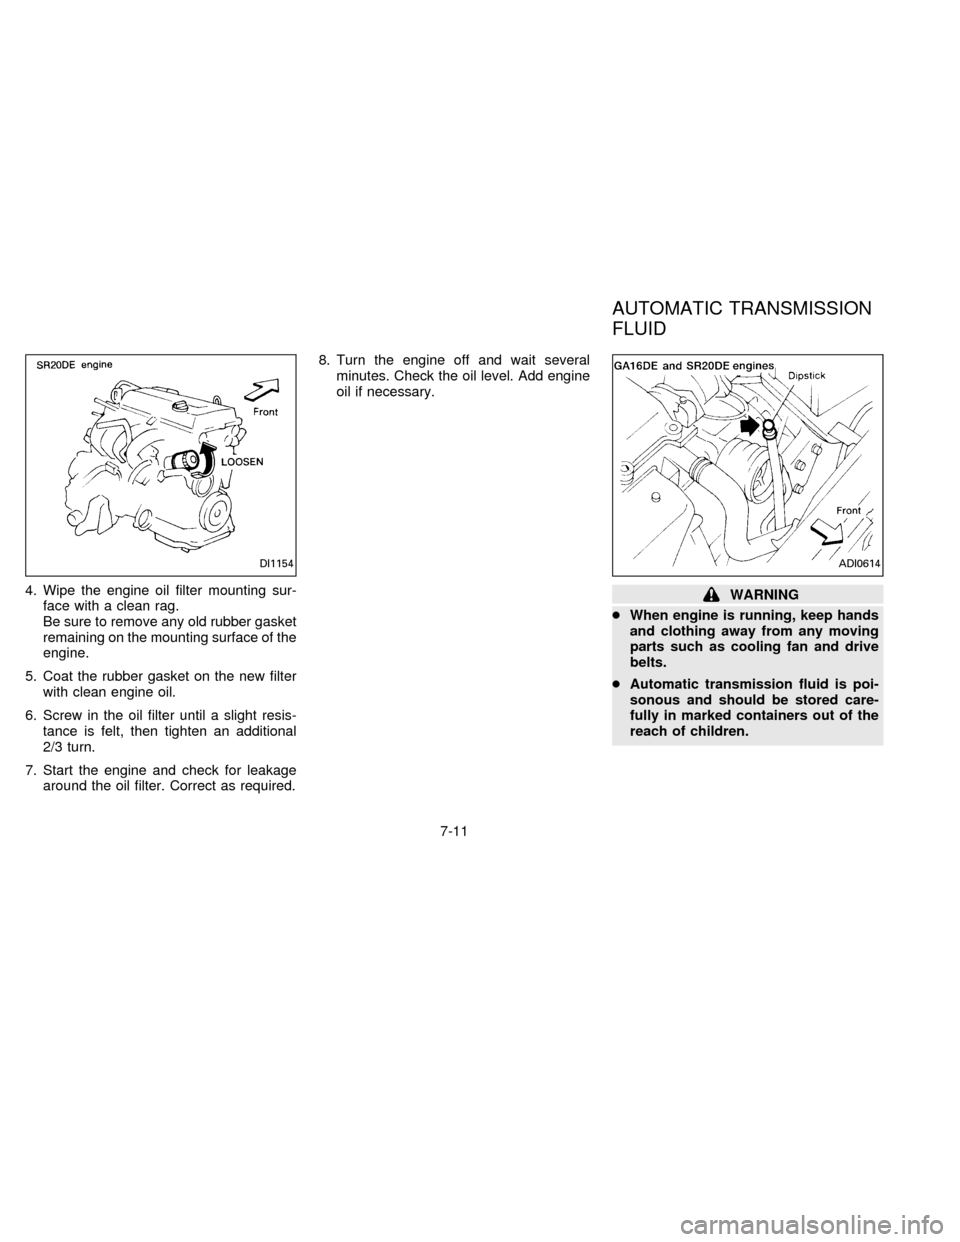
4. Wipe the engine oil filter mounting sur-
face with a clean rag.
Be sure to remove any old rubber gasket
remaining on the mounting surface of the
engine.
5. Coat the rubber gasket on the new filter
with clean engine oil.
6. Screw in the oil filter until a slight resis-
tance is felt, then tighten an additional
2/3 turn.
7. Start the engine and check for leakage
around the oil filter. Correct as required.8. Turn the engine off and wait several
minutes. Check the oil level. Add engine
oil if necessary.WARNING
cWhen engine is running, keep hands
and clothing away from any moving
parts such as cooling fan and drive
belts.
cAutomatic transmission fluid is poi-
sonous and should be stored care-
fully in marked containers out of the
reach of children.
DI1154ADI0614
AUTOMATIC TRANSMISSION
FLUID
7-11
ZX
Page 130 of 191
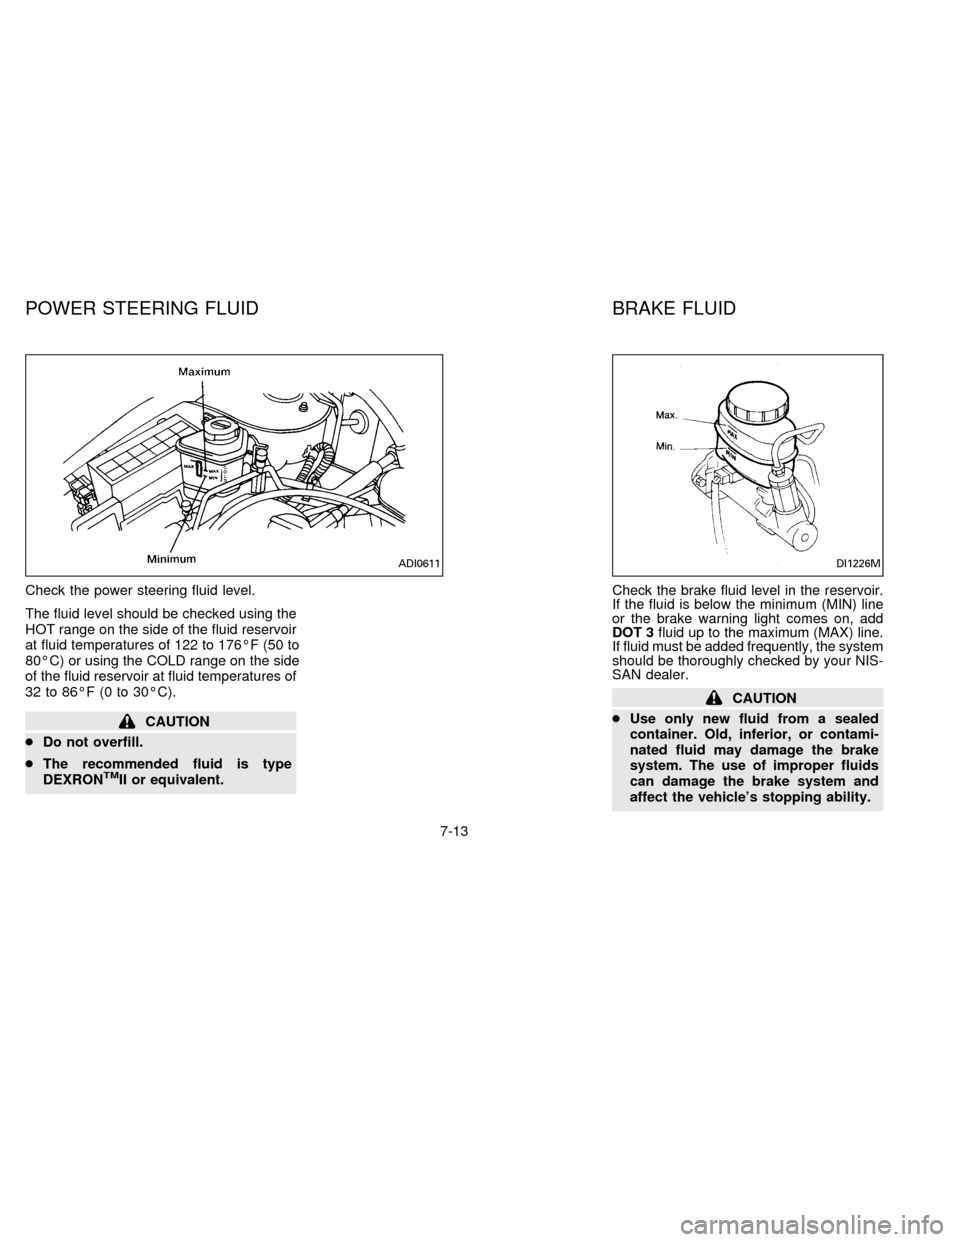
Check the power steering fluid level.
The fluid level should be checked using the
HOT range on the side of the fluid reservoir
at fluid temperatures of 122 to 176ÉF (50 to
80ÉC) or using the COLD range on the side
of the fluid reservoir at fluid temperatures of
32 to 86ÉF (0 to 30ÉC).
CAUTION
cDo not overfill.
cThe recommended fluid is type
DEXRON
TMII or equivalent.Check the brake fluid level in the reservoir.
If the fluid is below the minimum (MIN) line
or the brake warning light comes on, add
DOT 3fluid up to the maximum (MAX) line.
If fluid must be added frequently, the system
should be thoroughly checked by your NIS-
SAN dealer.
CAUTION
cUse only new fluid from a sealed
container. Old, inferior, or contami-
nated fluid may damage the brake
system. The use of improper fluids
can damage the brake system and
affect the vehicle's stopping ability.
ADI0611DI1226M
POWER STEERING FLUID BRAKE FLUID
7-13
ZX