Page 12 of 198

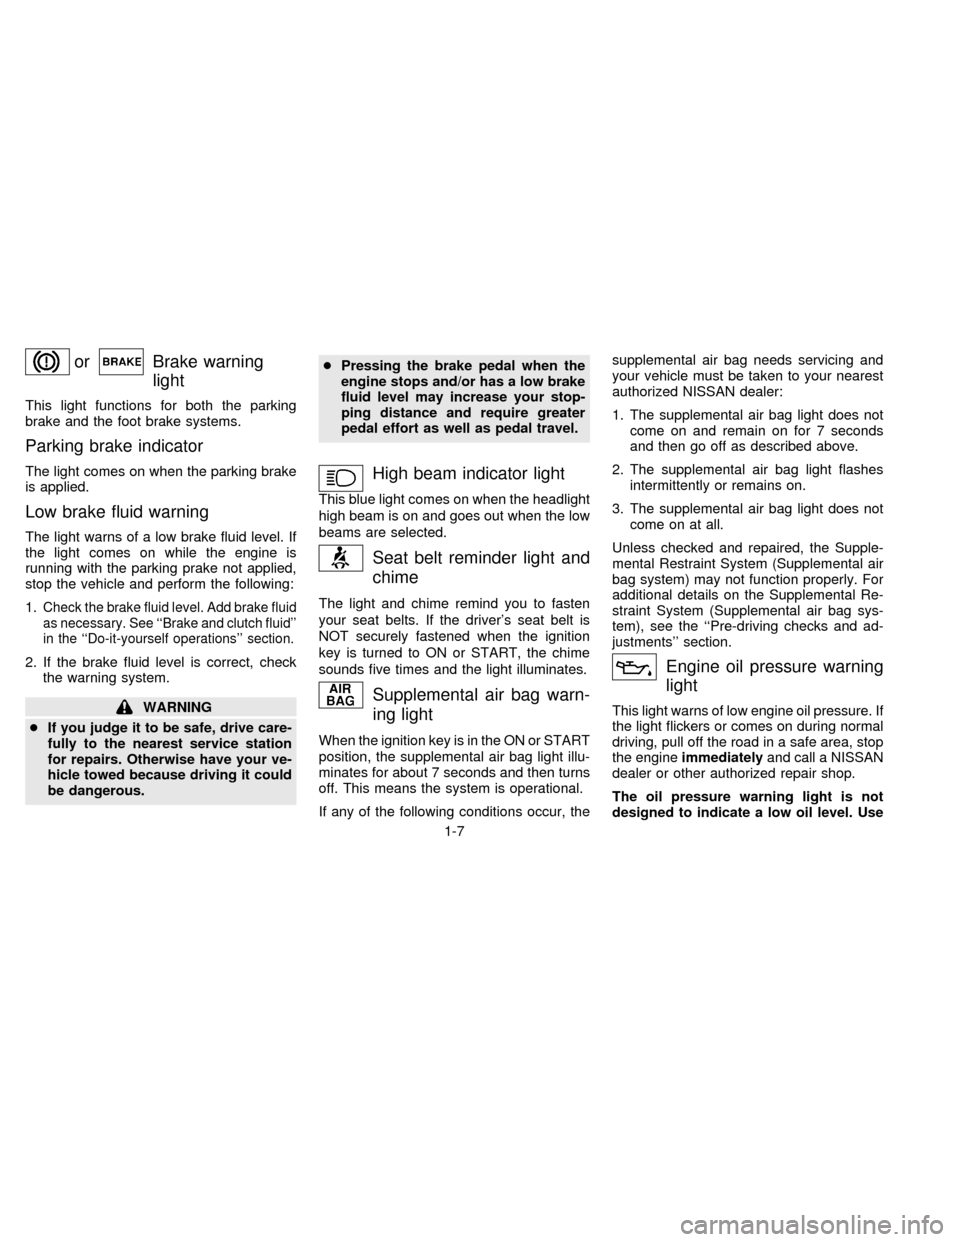
orBrake warning
light
This light functions for both the parking
brake and the foot brake systems.
Parking brake indicator
The light comes on when the parking brake
is applied.
Low brake fluid warning
The light warns of a low brake fluid level. If
the light comes on while the engine is
running with the parking prake not applied,
stop the vehicle and perform the following:
1.
Check the brake fluid level. Add brake fluid
as necessary. See ``Brake and clutch fluid''
in the ``Do-it-yourself operations'' section.
2. If the brake fluid level is correct, check
the warning system.
WARNING
cIf you judge it to be safe, drive care-
fully to the nearest service station
for repairs. Otherwise have your ve-
hicle towed because driving it could
be dangerous.cPressing the brake pedal when the
engine stops and/or has a low brake
fluid level may increase your stop-
ping distance and require greater
pedal effort as well as pedal travel.
High beam indicator light
This blue light comes on when the headlight
high beam is on and goes out when the low
beams are selected.
Seat belt reminder light and
chime
The light and chime remind you to fasten
your seat belts. If the driver's seat belt is
NOT securely fastened when the ignition
key is turned to ON or START, the chime
sounds five times and the light illuminates.
Supplemental air bag warn-
ing light
When the ignition key is in the ON or START
position, the supplemental air bag light illu-
minates for about 7 seconds and then turns
off. This means the system is operational.
If any of the following conditions occur, thesupplemental air bag needs servicing and
your vehicle must be taken to your nearest
authorized NISSAN dealer:
1. The supplemental air bag light does not
come on and remain on for 7 seconds
and then go off as described above.
2. The supplemental air bag light flashes
intermittently or remains on.
3. The supplemental air bag light does not
come on at all.
Unless checked and repaired, the Supple-
mental Restraint System (Supplemental air
bag system) may not function properly. For
additional details on the Supplemental Re-
straint System (Supplemental air bag sys-
tem), see the ``Pre-driving checks and ad-
justments'' section.
Engine oil pressure warning
light
This light warns of low engine oil pressure. If
the light flickers or comes on during normal
driving, pull off the road in a safe area, stop
the engineimmediatelyand call a NISSAN
dealer or other authorized repair shop.
The oil pressure warning light is not
designed to indicate a low oil level. Use
1-7
ZX
Page 23 of 198
Closing
Pull the handle forward to unlock, then push
the handle up completely.
Removing the sunshade
1. Turn each knob counterclockwise while
lifting the sunshade upward.
2. Slide the shade backward to remove it.
Installing the sunshade
1. Insert two hooks on front edge of sun-
shade into holders on the roof.
2. Align two bolts on rear edge of sunshade
with lock nuts, then securely tighten the
bolts.
Do not remove or install the sunshade
while driving.
IC0198AIC0706
1-18
ZX
Page 24 of 198
Removing the sunroof
1. Remove the sunshade before removing
the sunroof.
2. Tilt the roof.
3. Push the knob located on each end of the
handle and push the roof upwards to
disengage the handle linkage.
4. Pull the sunroof up from outside of the
vehicle until it is perpendicular to the roof
panel.5. Slide the sunroof to the left and remove
the roof.
Do not remove the roof while driving.
Installing the roof
1. While placing the sunroof perpendicular
to the roof panel, position the sunroof
and engage the retainer with the hinge.
2. Slide the roof to the right until the red
mark on the hinge disappears.
3. Carefully lower the panel, making sure it
is in line with the roof opening.
4. Engage the handle linkage.
Be sure the sunroof is securely in-
stalled.
SIC0072SIC0073
1-19
ZX
Page 30 of 198

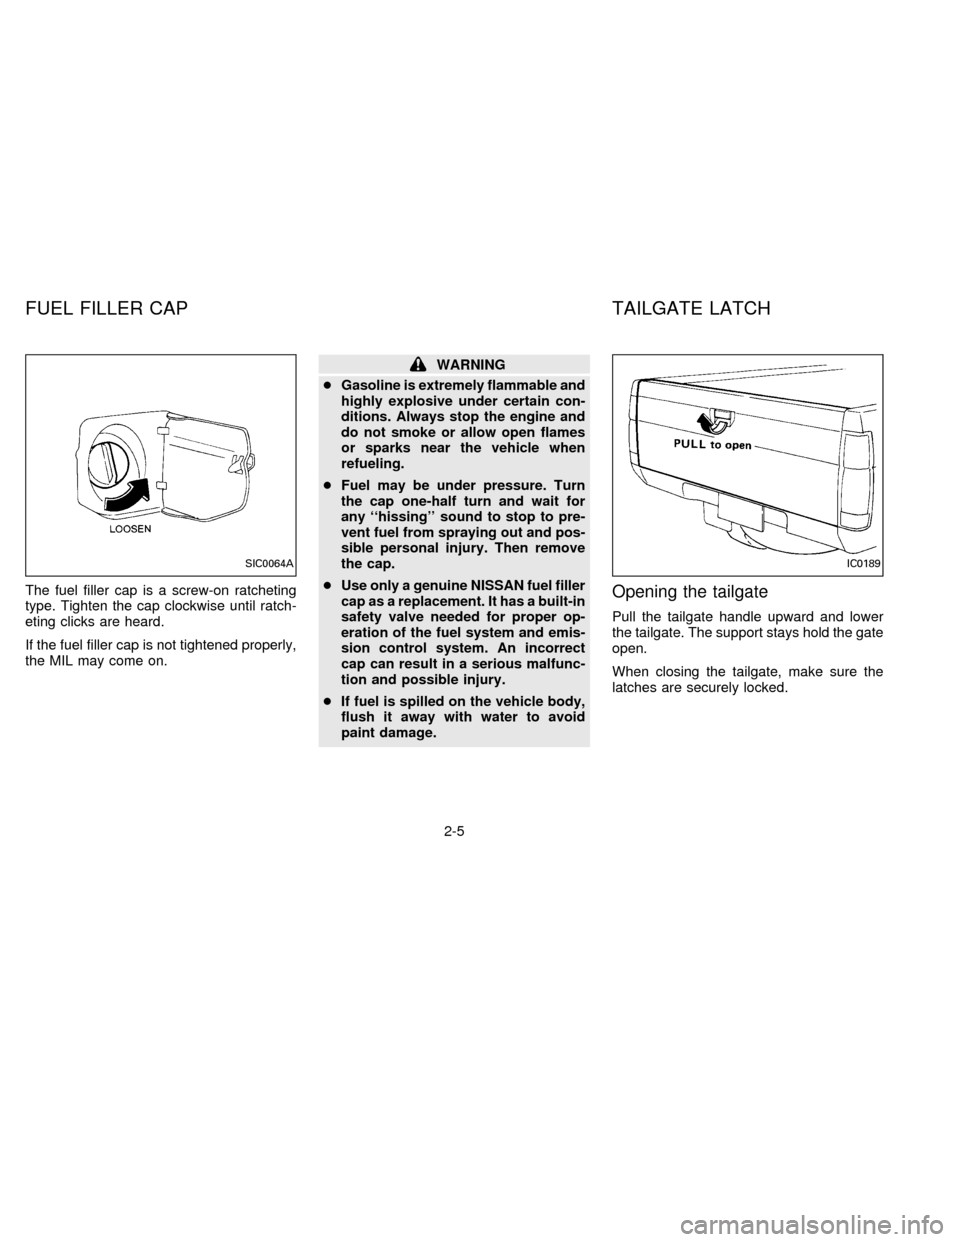
The fuel filler cap is a screw-on ratcheting
type. Tighten the cap clockwise until ratch-
eting clicks are heard.
If the fuel filler cap is not tightened properly,
the MIL may come on.
WARNING
cGasoline is extremely flammable and
highly explosive under certain con-
ditions. Always stop the engine and
do not smoke or allow open flames
or sparks near the vehicle when
refueling.
cFuel may be under pressure. Turn
the cap one-half turn and wait for
any ``hissing'' sound to stop to pre-
vent fuel from spraying out and pos-
sible personal injury. Then remove
the cap.
cUse only a genuine NISSAN fuel filler
cap as a replacement. It has a built-in
safety valve needed for proper op-
eration of the fuel system and emis-
sion control system. An incorrect
cap can result in a serious malfunc-
tion and possible injury.
cIf fuel is spilled on the vehicle body,
flush it away with water to avoid
paint damage.
Opening the tailgate
Pull the tailgate handle upward and lower
the tailgate. The support stays hold the gate
open.
When closing the tailgate, make sure the
latches are securely locked.
SIC0064AIC0189
FUEL FILLER CAP TAILGATE LATCH
2-5
ZX
Page 32 of 198
Tie down hooks are provided on the vehicle
for your convenience.
cThe weight of the cargo load must be
evenly distributed over both the front and
rear axles.
cAll cargo should be securely fastened
with ropes or straps to prevent it from
shifting or sliding within the vehicle.
STI0049
TIE DOWN HOOK
2-7
ZX
Page 33 of 198

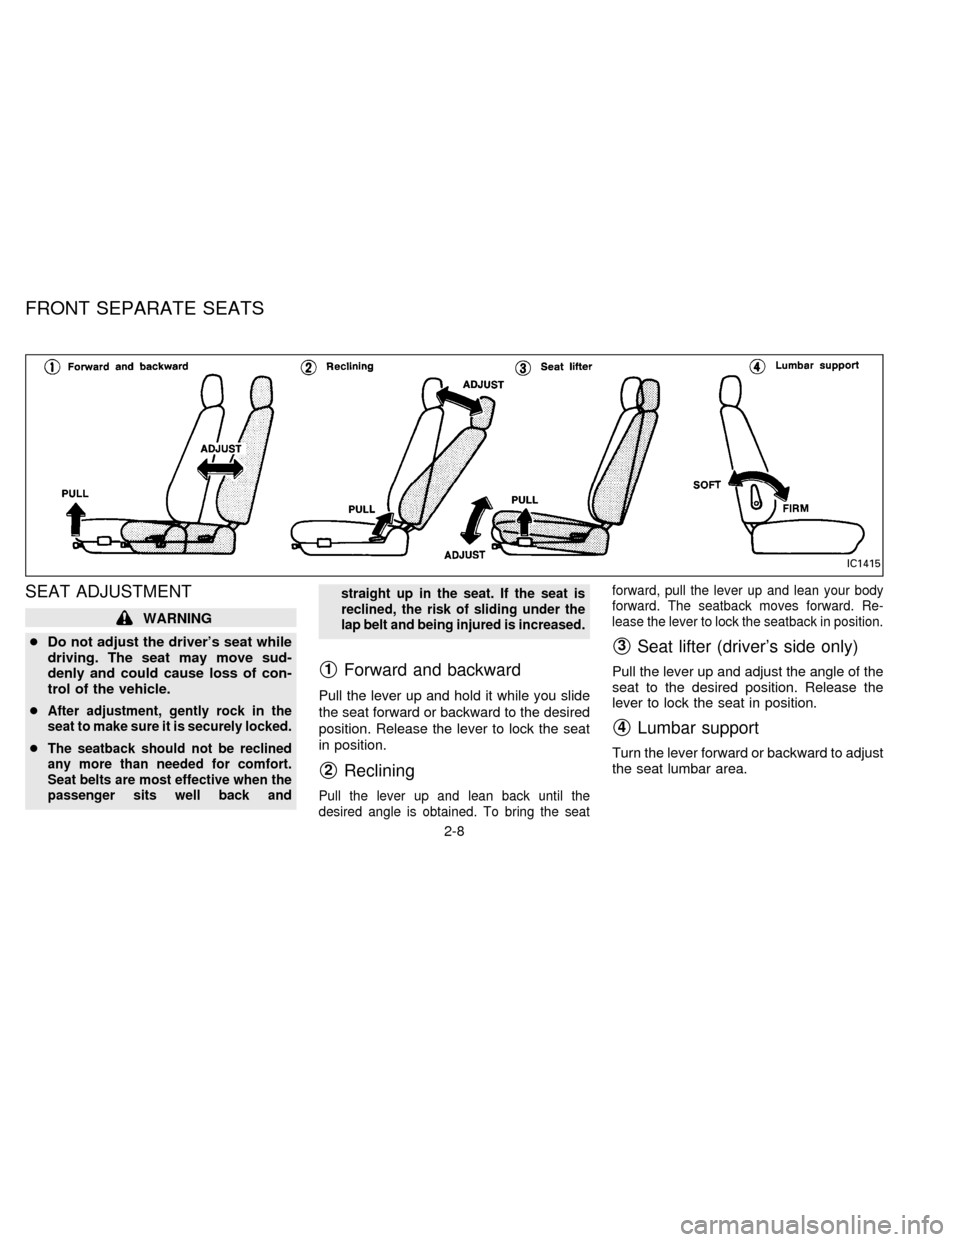
SEAT ADJUSTMENT
WARNING
cDo not adjust the driver's seat while
driving. The seat may move sud-
denly and could cause loss of con-
trol of the vehicle.
c
After adjustment, gently rock in the
seat to make sure it is securely locked.
cThe seatback should not be reclined
any more than needed for comfort.
Seat belts are most effective when the
passenger sits well back andstraight up in the seat. If the seat is
reclined, the risk of sliding under the
lap belt and being injured is increased.
s1Forward and backward
Pull the lever up and hold it while you slide
the seat forward or backward to the desired
position. Release the lever to lock the seat
in position.
s2Reclining
Pull the lever up and lean back until the
desired angle is obtained. To bring the seatforward, pull the lever up and lean your body
forward. The seatback moves forward. Re-
lease the lever to lock the seatback in position.
s3Seat lifter (driver's side only)
Pull the lever up and adjust the angle of the
seat to the desired position. Release the
lever to lock the seat in position.
s4Lumbar support
Turn the lever forward or backward to adjust
the seat lumbar area.
IC1415
FRONT SEPARATE SEATS
2-8
ZX
Page 34 of 198
HEAD RESTRAINTS
Adjust the top of the head restraints even
with the top of your ears.
To raise the head restraint, pull it up. To
lower, push the lock knob and move the
head restraint down.
WARNING
Head restraints should be adjusted
properly as they may provide signifi-
cant protection against whiplash injury.
Do not remove them. Check the adjust-
ment after someone else uses the seat.
NOTE:
The head restraints on the bench-type
seats are not adjustable.
TILTING FRONT SEPARATE SEAT
The front passenger seat can be tilted to
make it easier for the jump seat passengers
to get in and out.
To tilt the seatback, pull the reclining lever
up or pull the tilt lever. The seat automati-
cally moves forward.
To return the seat, push the seatback up and
move the whole seat backward until it locks.
WARNING
After adjustment, gently rock in the
seat to make sure it is securely locked.
MPA0001IC0204
2-9
ZX
Page 35 of 198
SEAT ADJUSTMENT
WARNING
cDo not adjust the bench seat while
driving. The seat may move sud-
denly and could cause loss of con-
trol of the vehicle.
cAfter adjustment, gently rock in the
seat to make sure it is securely
locked.
Forward and Backward
Pull the lever up and hold it while you slide
the seat forward or backward to the desired
position. Release the lever to lock the seat
in position.
TILTING BENCH SEAT
The bench seat can be tilted to make it
easier to remove the jacking tools from the
storage area.
To tilt the seatback, push the tilting lever
AIC0720
APD0703
BENCH SEAT
2-10
ZX