1996 NISSAN ALTIMA oil
[x] Cancel search: oilPage 10 of 183
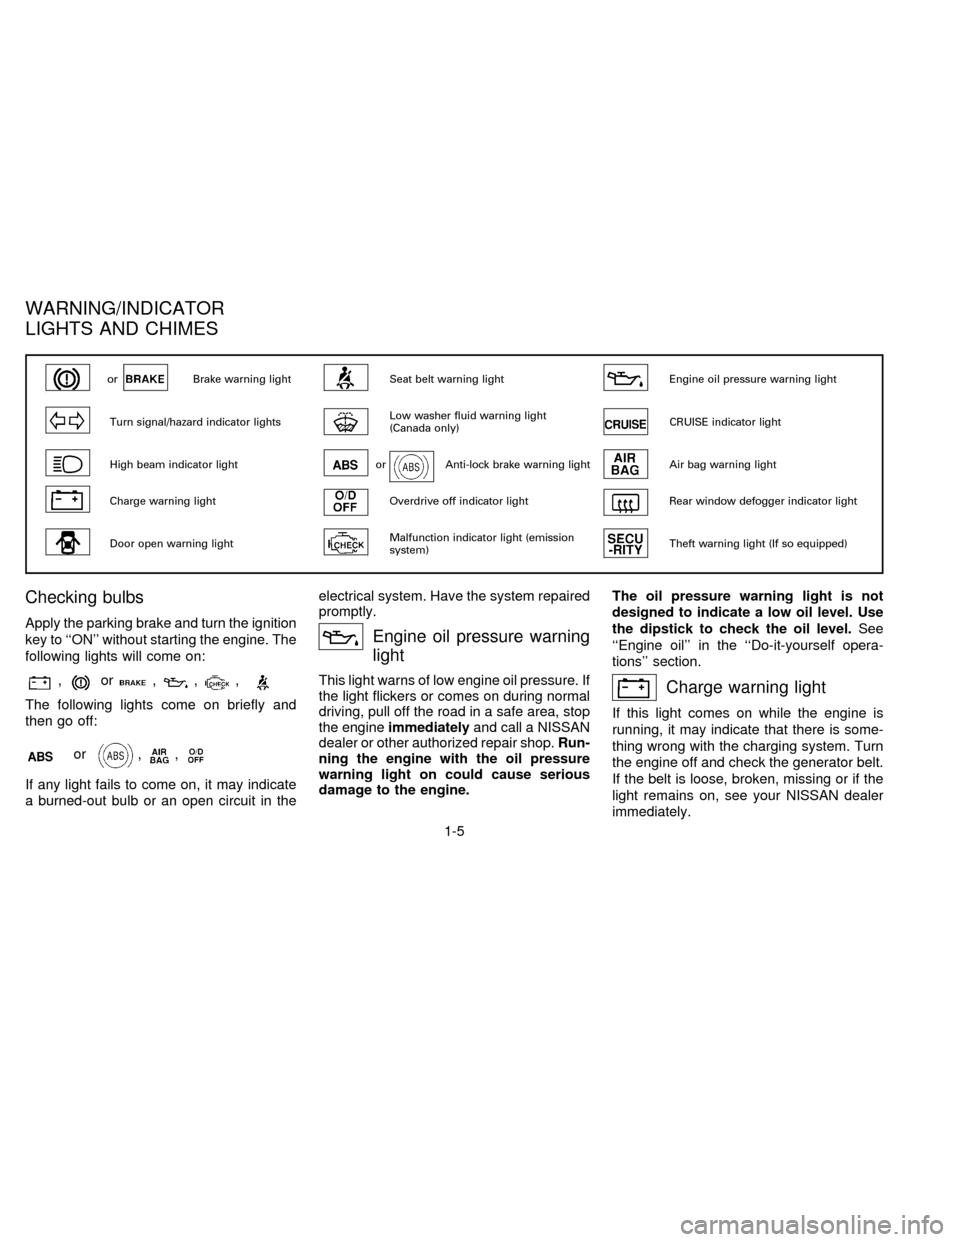
Checking bulbs
Apply the parking brake and turn the ignition
key to ``ON'' without starting the engine. The
following lights will come on:
,or,,,
The following lights come on briefly and
then go off:
or,,
If any light fails to come on, it may indicate
a burned-out bulb or an open circuit in theelectrical system. Have the system repaired
promptly.
Engine oil pressure warning
light
This light warns of low engine oil pressure. If
the light flickers or comes on during normal
driving, pull off the road in a safe area, stop
the engineimmediatelyand call a NISSAN
dealer or other authorized repair shop.Run-
ning the engine with the oil pressure
warning light on could cause serious
damage to the engine.The oil pressure warning light is not
designed to indicate a low oil level. Use
the dipstick to check the oil level.See
``Engine oil'' in the ``Do-it-yourself opera-
tions'' section.Charge warning light
If this light comes on while the engine is
running, it may indicate that there is some-
thing wrong with the charging system. Turn
the engine off and check the generator belt.
If the belt is loose, broken, missing or if the
light remains on, see your NISSAN dealer
immediately.
orBrake warning lightSeat belt warning lightEngine oil pressure warning light
Turn signal/hazard indicator lightsLow washer fluid warning light
(Canada only)CRUISE indicator light
High beam indicator lightorAnti-lock brake warning lightAir bag warning light
Charge warning lightOverdrive off indicator lightRear window defogger indicator light
Door open warning lightMalfunction indicator light (emission
system)Theft warning light (If so equipped)
WARNING/INDICATOR
LIGHTS AND CHIMES
1-5
ZX
Page 84 of 183
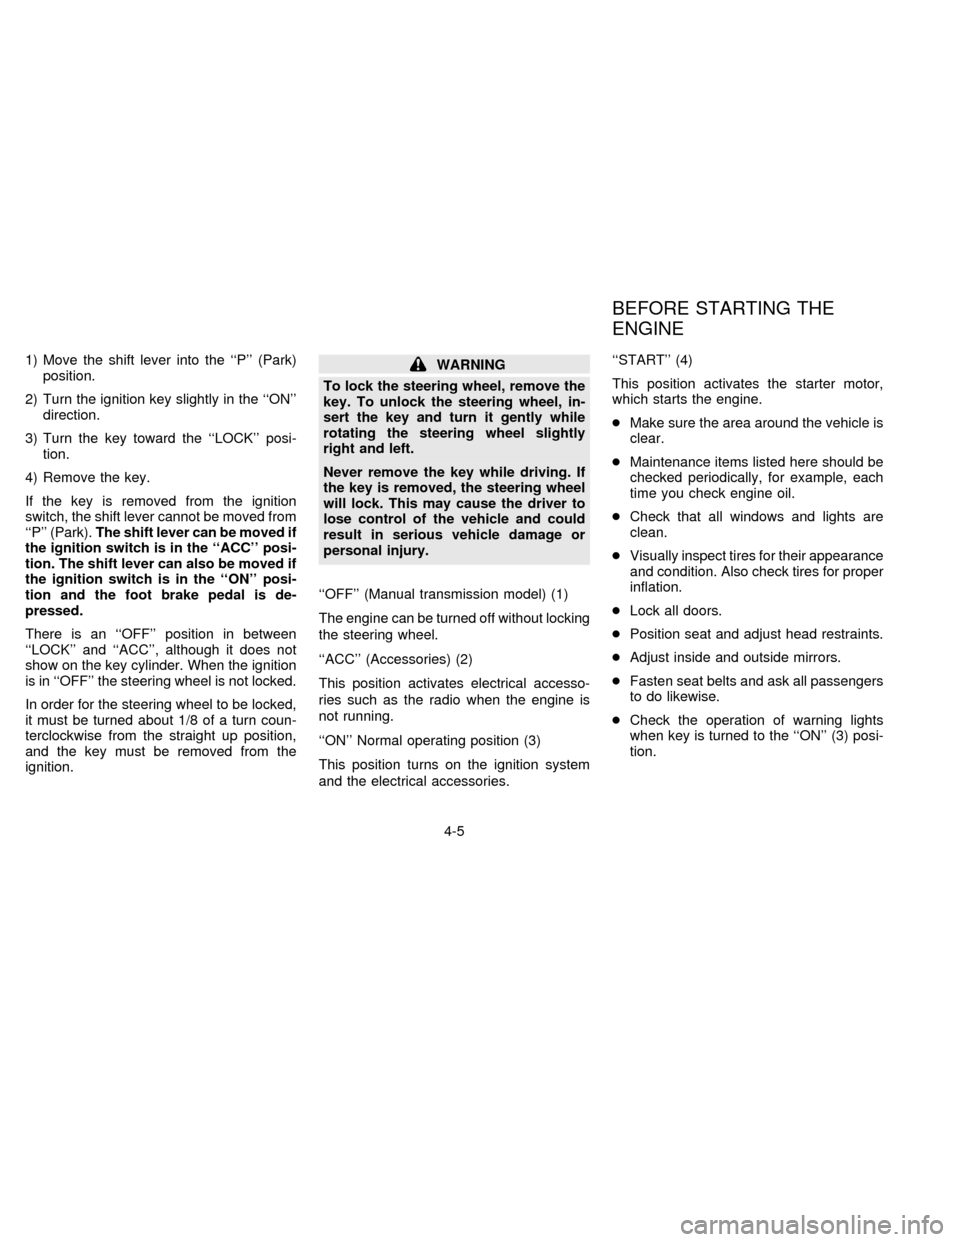
1) Move the shift lever into the ``P'' (Park)
position.
2) Turn the ignition key slightly in the ``ON''
direction.
3) Turn the key toward the ``LOCK'' posi-
tion.
4) Remove the key.
If the key is removed from the ignition
switch, the shift lever cannot be moved from
``P'' (Park).The shift lever can be moved if
the ignition switch is in the ``ACC'' posi-
tion. The shift lever can also be moved if
the ignition switch is in the ``ON'' posi-
tion and the foot brake pedal is de-
pressed.
There is an ``OFF'' position in between
``LOCK'' and ``ACC'', although it does not
show on the key cylinder. When the ignition
is in ``OFF'' the steering wheel is not locked.
In order for the steering wheel to be locked,
it must be turned about 1/8 of a turn coun-
terclockwise from the straight up position,
and the key must be removed from the
ignition.WARNING
To lock the steering wheel, remove the
key. To unlock the steering wheel, in-
sert the key and turn it gently while
rotating the steering wheel slightly
right and left.
Never remove the key while driving. If
the key is removed, the steering wheel
will lock. This may cause the driver to
lose control of the vehicle and could
result in serious vehicle damage or
personal injury.
``OFF'' (Manual transmission model) (1)
The engine can be turned off without locking
the steering wheel.
``ACC'' (Accessories) (2)
This position activates electrical accesso-
ries such as the radio when the engine is
not running.
``ON'' Normal operating position (3)
This position turns on the ignition system
and the electrical accessories.``START'' (4)
This position activates the starter motor,
which starts the engine.
cMake sure the area around the vehicle is
clear.
cMaintenance items listed here should be
checked periodically, for example, each
time you check engine oil.
cCheck that all windows and lights are
clean.
cVisually inspect tires for their appearance
and condition. Also check tires for proper
inflation.
cLock all doors.
cPosition seat and adjust head restraints.
cAdjust inside and outside mirrors.
cFasten seat belts and ask all passengers
to do likewise.
cCheck the operation of warning lights
when key is turned to the ``ON'' (3) posi-
tion.
BEFORE STARTING THE
ENGINE
4-5
ZX
Page 112 of 183
may dull the finish or leave swirl marks.
Only use black wax or black shoe polish on
black urethane or polypropylene bumpers.
Removing spots
Remove tar and oil spots, industrial dust,
insects, and tree sap as quickly as possible
from the surface of the paint to avoid lasting
damage or staining. Special cleaning prod-
ucts are available at your NISSAN dealer or
any automotive accessory store.
Underbody
In areas where road salt is used in winter,
the underbody must be cleaned regularly.
This will prevent dirt and salt from building
up and causing underbody and suspension
corrosion. Before winter and again in the
spring, the underseal must be checked and,
if necessary, re-treated.Cleaning glass
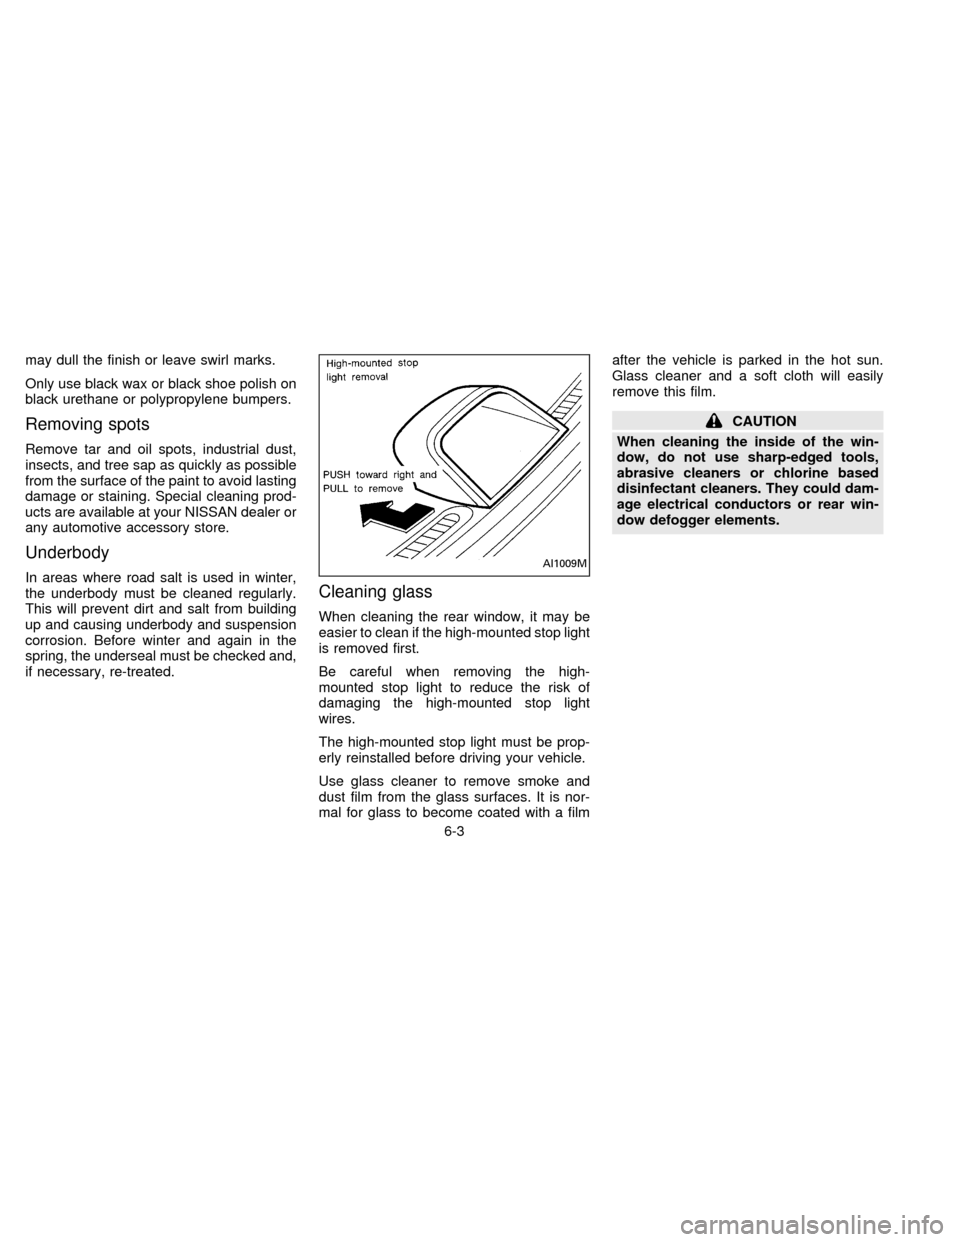
When cleaning the rear window, it may be
easier to clean if the high-mounted stop light
is removed first.
Be careful when removing the high-
mounted stop light to reduce the risk of
damaging the high-mounted stop light
wires.
The high-mounted stop light must be prop-
erly reinstalled before driving your vehicle.
Use glass cleaner to remove smoke and
dust film from the glass surfaces. It is nor-
mal for glass to become coated with a filmafter the vehicle is parked in the hot sun.
Glass cleaner and a soft cloth will easily
remove this film.
CAUTION
When cleaning the inside of the win-
dow, do not use sharp-edged tools,
abrasive cleaners or chlorine based
disinfectant cleaners. They could dam-
age electrical conductors or rear win-
dow defogger elements.
AI1009M
6-3
ZX
Page 116 of 183

7 Do-it-yourself operations
Maintenance precautions ..................................... 7-2
Engine compartment check locations ................. 7-3
Engine cooling system ......................................... 7-4
Engine oil.............................................................. 7-7
Automatic transmission fluid (ATF) ...................... 7-9
Power steering fluid............................................ 7-11
Brake and clutch fluid......................................... 7-11
Window washer fluid .......................................... 7-12
Battery ................................................................ 7-13
Drive belts .......................................................... 7-14
Spark plug replacement ..................................... 7-14Air cleaner housing filter .................................... 7-15
Wiper blades ...................................................... 7-16
Parking brake check........................................... 7-17
Brake pedal ........................................................ 7-18
Brake booster ..................................................... 7-19
Clutch pedal ....................................................... 7-19
Fuses .................................................................. 7-19
Fusible links........................................................ 7-21
Light bulbs .......................................................... 7-21
Wheels and tires ................................................ 7-28
ZX
Page 117 of 183

When performing any inspection or mainte-
nance work on your vehicle, always take
care to prevent serious accidental injury to
yourself or damage to the vehicle. The
following are general precautions which
should be closely observed.
cPark the vehicle on a level surface,
apply the parking brake securely and
block the wheels to prevent the ve-
hicle from moving. For a manual
transmission, move the shift lever to
Neutral. For an automatic transmis-
sion, move the shift lever to ``P''
(Park).
cBe sure the ignition key is ªOFFº
when performing any parts replace-
ment or repairs.
cDo not work under the hood while the
engine is hot. Turn off the engine and
wait until it cools down.
cYour vehicle is equipped with an au-
tomatic engine cooling fan. It may
come on at any time without warning,
even if the ignition key is in the ``OFF''
position and the engine is not run-
ning. To avoid injury, always discon-
nect the negative battery cable beforeworking near the fan.
cIf you must work with the engine run-
ning, keep your hands, clothing, hair
and tools away from moving fans,
belts and any other moving parts.
cIt is advisable to remove ties and any
jewelry, such as rings, watches, etc.
before working on your vehicle.
cIf you must run the engine in an en-
closed space such as a garage, be
sure there is proper ventilation for
exhaust gases.
cNever get under the vehicle while it is
supported only by a jack. If it is nec-
essary to work under the vehicle, sup-
port it with safety stands.
cKeep smoking materials, flame and
sparks away from fuel and the battery.
cNever connect or disconnect either
the battery or any transistorized com-
ponent connector while the ignition is
on.
cOn gasoline engine models with the
Multiport Fuel Injection (MFI) system,
the fuel filter or fuel lines should be
serviced by a NISSAN dealer becausethe fuel lines are under high pressure
even when the engine is off.
cFailure to follow these or other com-
mon sense guidelines may lead to
serious injury or vehicle damage.
cImproperly disposed motor oil and/or
other vehicle fluids can hurt the envi-
ronment. Always conform to local
regulations for disposal of vehicle
fluid. Avoid contact with used engine
oil.
This ``Do-it-yourself operations'' section
gives instructions regarding only those
items which are relatively easy for an owner
to perform.
You should be aware that incomplete or
improper servicing may result in operating
difficulties or excessive emissions, and
could affect your warranty coverage.If in
doubt about any servicing, have it done
by your NISSAN dealer.
MAINTENANCE
PRECAUTIONS
7-2
ZX
Page 122 of 183
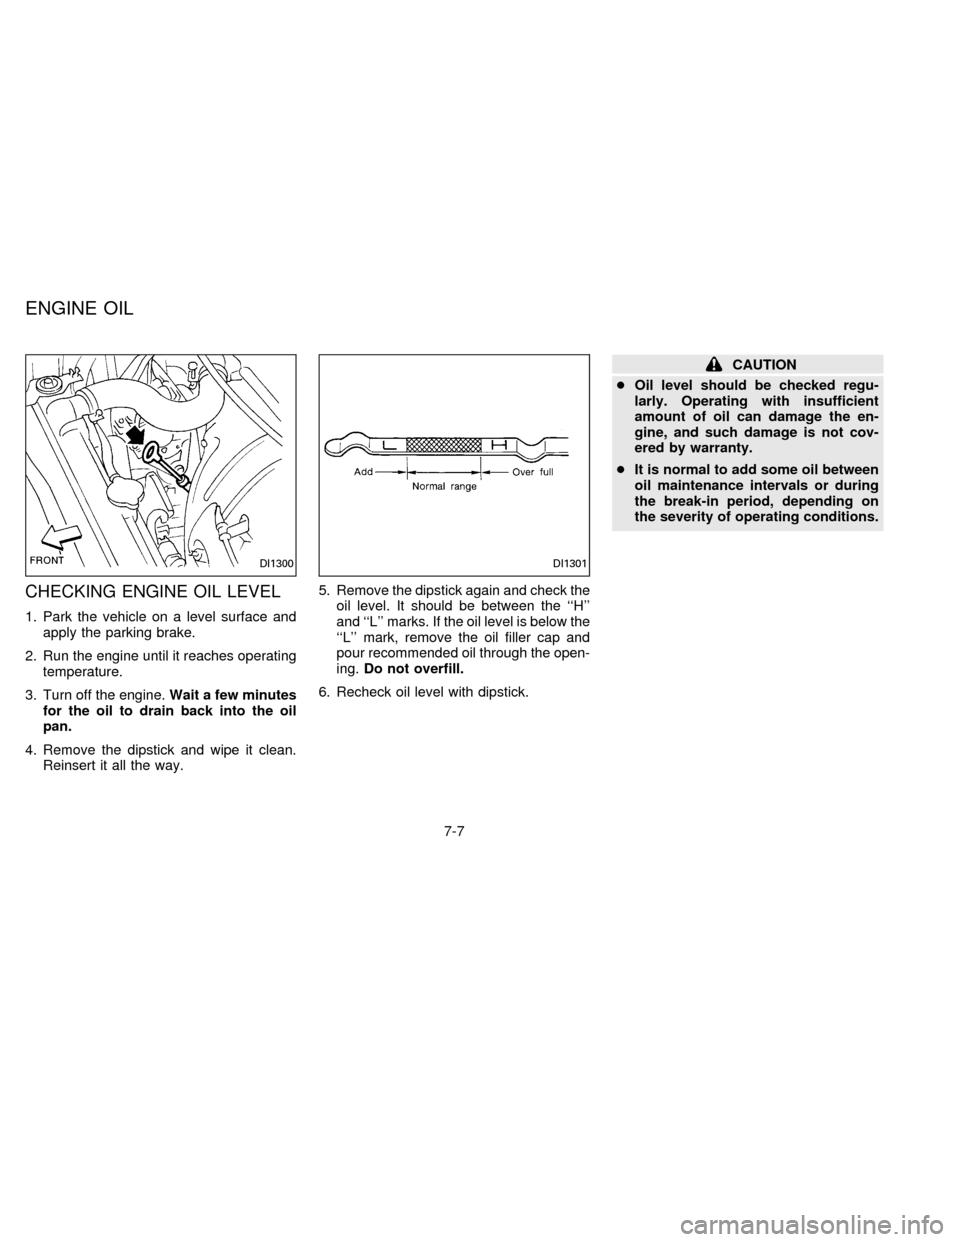
CHECKING ENGINE OIL LEVEL
1. Park the vehicle on a level surface and
apply the parking brake.
2. Run the engine until it reaches operating
temperature.
3. Turn off the engine.Wait a few minutes
for the oil to drain back into the oil
pan.
4. Remove the dipstick and wipe it clean.
Reinsert it all the way.5. Remove the dipstick again and check the
oil level. It should be between the ``H''
and ``L'' marks. If the oil level is below the
``L'' mark, remove the oil filler cap and
pour recommended oil through the open-
ing.Do not overfill.
6. Recheck oil level with dipstick.
CAUTION
cOil level should be checked regu-
larly. Operating with insufficient
amount of oil can damage the en-
gine, and such damage is not cov-
ered by warranty.
cIt is normal to add some oil between
oil maintenance intervals or during
the break-in period, depending on
the severity of operating conditions.
DI1300DI1301
ENGINE OIL
7-7
ZX
Page 123 of 183
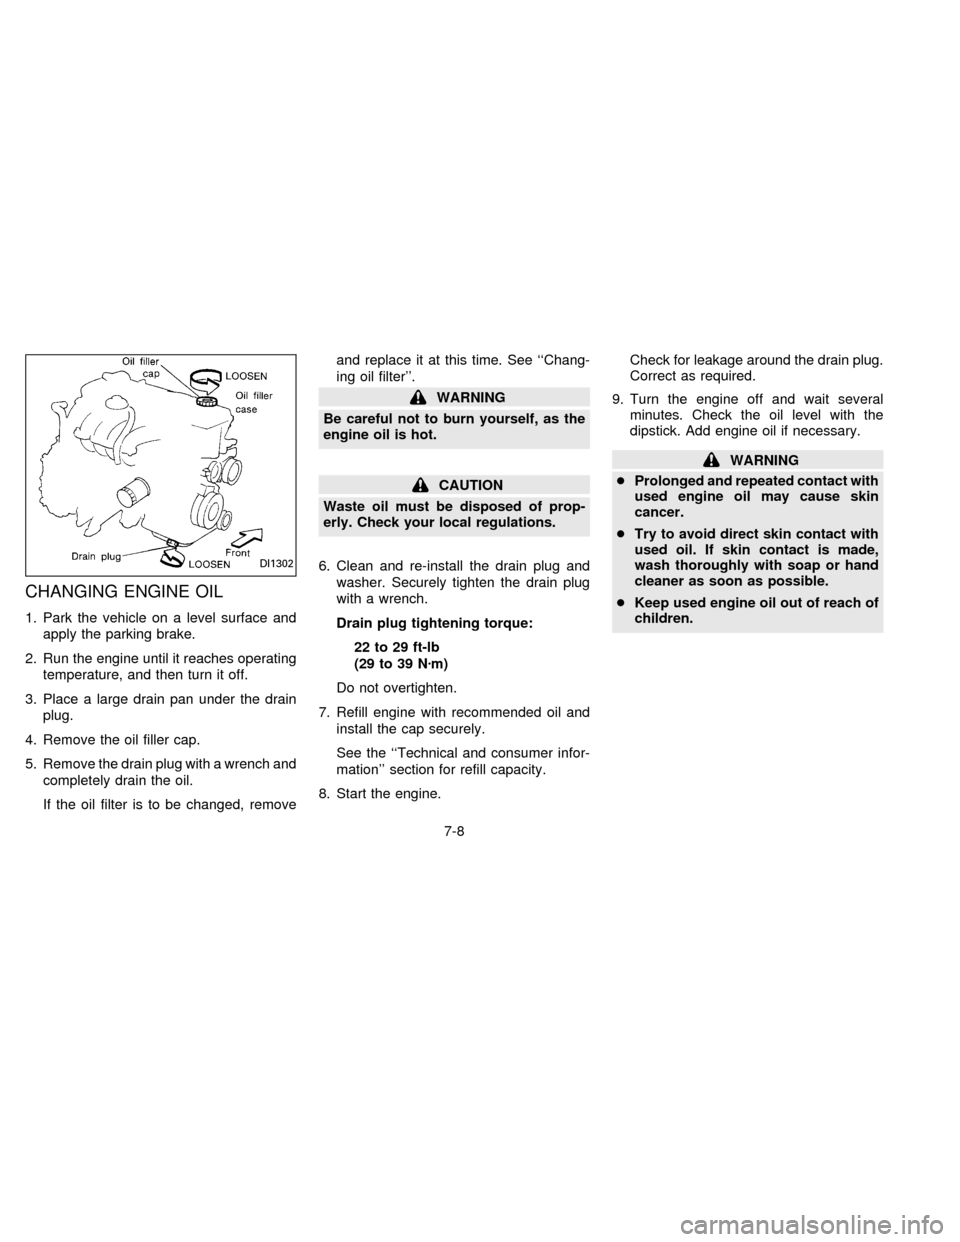
CHANGING ENGINE OIL
1. Park the vehicle on a level surface and
apply the parking brake.
2. Run the engine until it reaches operating
temperature, and then turn it off.
3. Place a large drain pan under the drain
plug.
4. Remove the oil filler cap.
5. Remove the drain plug with a wrench and
completely drain the oil.
If the oil filter is to be changed, removeand replace it at this time. See ``Chang-
ing oil filter''.
WARNING
Be careful not to burn yourself, as the
engine oil is hot.
CAUTION
Waste oil must be disposed of prop-
erly. Check your local regulations.
6. Clean and re-install the drain plug and
washer. Securely tighten the drain plug
with a wrench.
Drain plug tightening torque:
22 to 29 ft-lb
(29 to 39 Nzm)
Do not overtighten.
7. Refill engine with recommended oil and
install the cap securely.
See the ``Technical and consumer infor-
mation'' section for refill capacity.
8. Start the engine.Check for leakage around the drain plug.
Correct as required.
9. Turn the engine off and wait several
minutes. Check the oil level with the
dipstick. Add engine oil if necessary.
WARNING
cProlonged and repeated contact with
used engine oil may cause skin
cancer.
cTry to avoid direct skin contact with
used oil. If skin contact is made,
wash thoroughly with soap or hand
cleaner as soon as possible.
cKeep used engine oil out of reach of
children.
DI1302
7-8
ZX
Page 124 of 183
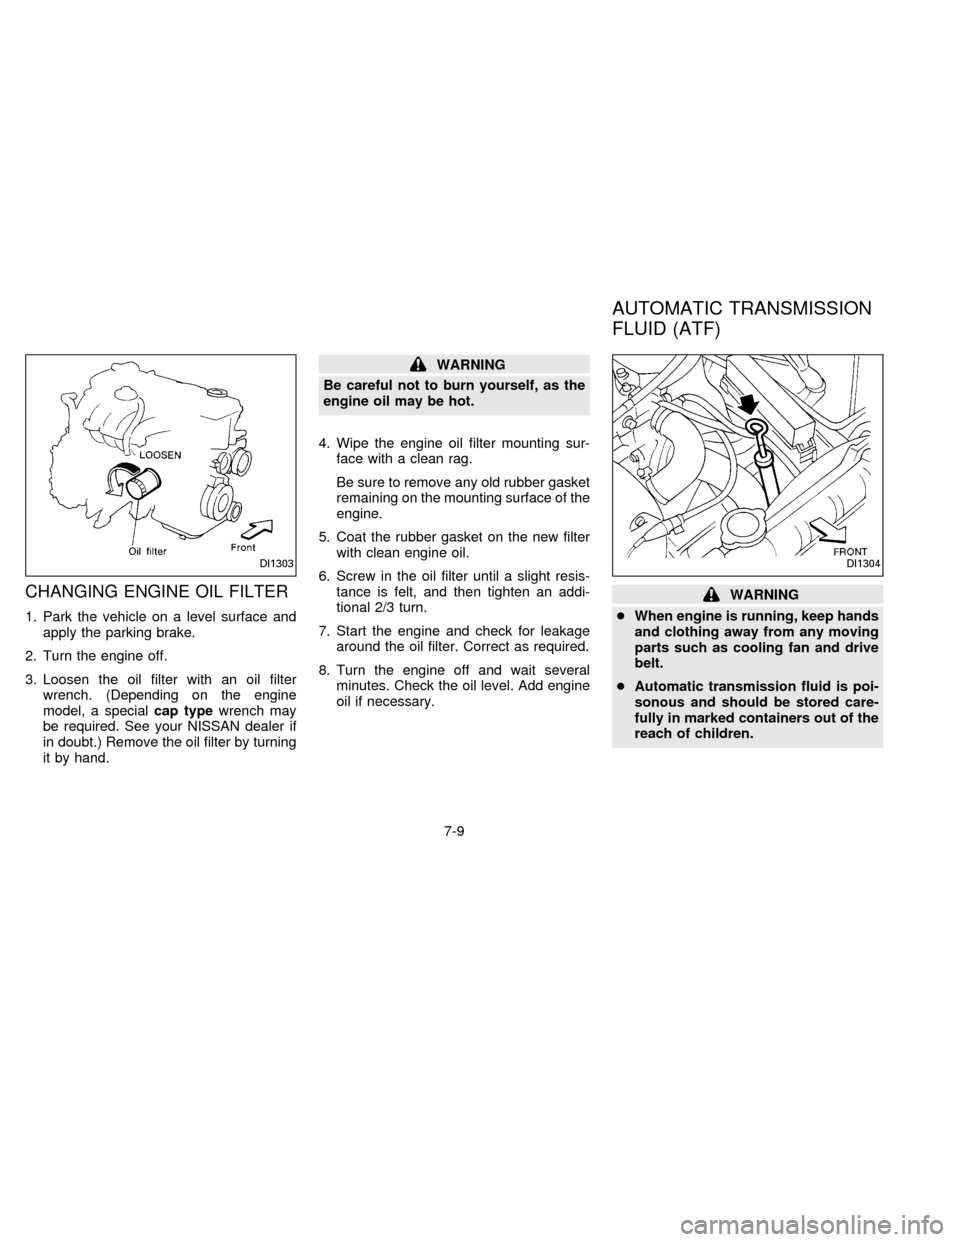
CHANGING ENGINE OIL FILTER
1. Park the vehicle on a level surface and
apply the parking brake.
2. Turn the engine off.
3. Loosen the oil filter with an oil filter
wrench. (Depending on the engine
model, a specialcap typewrench may
be required. See your NISSAN dealer if
in doubt.) Remove the oil filter by turning
it by hand.
WARNING
Be careful not to burn yourself, as the
engine oil may be hot.
4. Wipe the engine oil filter mounting sur-
face with a clean rag.
Be sure to remove any old rubber gasket
remaining on the mounting surface of the
engine.
5. Coat the rubber gasket on the new filter
with clean engine oil.
6. Screw in the oil filter until a slight resis-
tance is felt, and then tighten an addi-
tional 2/3 turn.
7. Start the engine and check for leakage
around the oil filter. Correct as required.
8. Turn the engine off and wait several
minutes. Check the oil level. Add engine
oil if necessary.
WARNING
cWhen engine is running, keep hands
and clothing away from any moving
parts such as cooling fan and drive
belt.
cAutomatic transmission fluid is poi-
sonous and should be stored care-
fully in marked containers out of the
reach of children.
DI1303DI1304
AUTOMATIC TRANSMISSION
FLUID (ATF)
7-9
ZX