1996 HONDA ODYSSEY display
[x] Cancel search: displayPage 91 of 240
Audio System
To select a different disc than the one that is playing, press the
appropriate preset button (1 — 6).
The system will load that disc and begin playing it from the first track.
You can use the TUNE/SEEKbuttons to select tracks within a disc.Push and release the appropriate
TUNE/SEEK button, the system will move to the beginning of a track. Press the button to move to the
beginning of the next track, and press the button to move to the
beginning of the current track.
If you press and hold the TUNE/SEEK button, you will hear a beep
and the system will continue to moveacross tracks. Release the button
when you think it has reached the desired place on the disc.
REPEAT — When you activate the
Repeat feature by pressing the RPT
button, the system continuously
replays the current track. You will
see RPT in the display as a reminder.
Press the RPT button again to turn it
off.
To take the system out of CD mode,
press the AM or FM button, or insert
a cassette in the player. When you
return to CD mode, play will contin-
ue at the same disc and track.
If you turn the system off while a CD
is playing, either with the PWR/VOL
knob or the ignition switch, play will
continue at the same disc and track
when you turn it back on.
Protecting Compact Discs
For information on how to handleand protect compact discs, see page
104.
CD Error Indications For information on the meaning of
the CD Error Indications and what to do when you see those indications,
refer to page 105.
Comfort and Convenience FeaturesProCarManuals.comMain Menu s t Table of Contents
Page 93 of 240
Audio System
Operating the Radio
The ignition switch must be in
ACCESSORY (I) or ON (II). Turn the system on by pushing the PWR/
VOL knob.
Adjust the volume by turning the PWR/VOL knob.
The band and frequency that the radio was last tuned to is displayed.
To change bands, press the AM or FM1/FM2 button. On the FM band,ST will be displayed if the station is
broadcasting in stereo. Stereo reproduction on AM is not available.
You can use any of three methods to find radio stations on the selectedband: TUNE, SEEK, or the Preset
buttons.
TUNE — Use the TUNE/SEEK
switch to tune the radio to a desired
frequency. Push the switch up to
tune to a higher frequency, and push the switch down to tune to a lower
frequency. The frequency numbers
will start to change rapidly. Release the switch when the display reaches
the desired frequency. To change
the frequency in small increments,push and release the TUNE/SEEKswitch quickly. SEEK — The SEEK function
searches the band for a station with
a strong signal. To activate it, push
the TUNE/SEEK switch until you
hear a beep, then release it. Depending on which way you pushed
the switch, the system scans upwardor downward from the current
frequency. It stops when it finds a
station with a strong signal.
Preset — You can store the fre- quencies of your favorite radio
stations in the six preset buttons.
Each button will store one frequency
on the AM band, and two on the FM
band.
CONTINUED
Comfort and Convenience FeaturesProCarManuals.comMain Menu s t Table of Contents
Page 95 of 240
Audio System
AUTO SELECT — If you are traveling far from home and can no longer receive the stations youpreset, you can use the Auto Select
feature to find stations in the local
area.
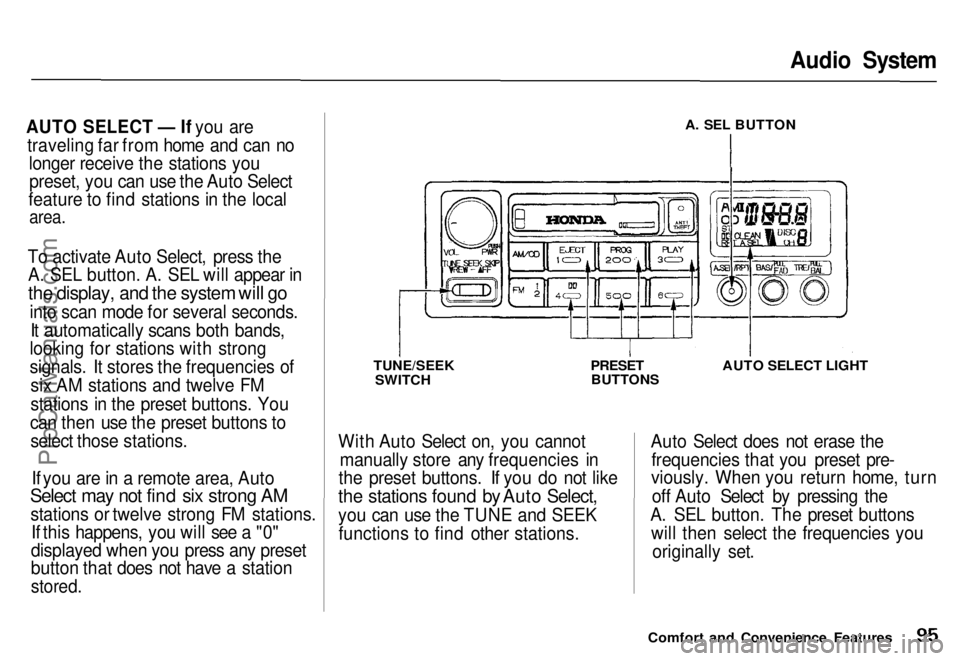
To activate Auto Select, press the A. SEL button. A. SEL will appear in
the display, and the system will go
into scan mode for several seconds.It automatically scans both bands,
looking for stations with strong
signals. It stores the frequencies of
six AM stations and twelve FM
stations in the preset buttons. You
can then use the preset buttons to select those stations.
If you are in a remote area, Auto
Select may not find six strong AM
stations or twelve strong FM stations. If this happens, you will see a "0"
displayed when you press any preset
button that does not have a station
stored.
A. SEL BUTTON
TUNE/SEEK SWITCH
PRESET
BUTTONS AUTO SELECT LIGHT
With Auto Select on, you cannot manually store any frequencies in
the preset buttons. If you do not like
the stations found by Auto Select,
you can use the TUNE and SEEK functions to find other stations. Auto Select does not erase the
frequencies that you preset pre-
viously. When you return home, turn
off Auto Select by pressing the
A. SEL button. The preset buttons will then select the frequencies you
originally set.
Comfort and Convenience FeaturesProCarManuals.comMain Menu s t Table of Contents
Page 97 of 240
Audio System
Radio Frequencies
Your Honda's radio can receive the complete AM and FM bands.
Those bands cover these frequen-
cies:
AM band: 530 to 1,710 kilohertz
FM band: 87.7 to 107.9 megahertz
Radio stations on the AM band are
assigned frequencies at least ten
kilohertz apart (530, 540, 550).
Stations on the FM band areassigned frequencies at least 0.2
megahertz apart (87.9, 88.1, 88.3).
Stations must use these exact
frequencies. It is fairly common for stations to round-off the frequency in
their advertising, so your radio could display a frequency of 100.9 even
though the announcer may identify
the station as "FM101." Radio Reception
How well your Honda's radio
receives stations is dependent on
many factors, such as the distance
from the station's transmitter,nearby large objects, and atmos-
pheric conditions.
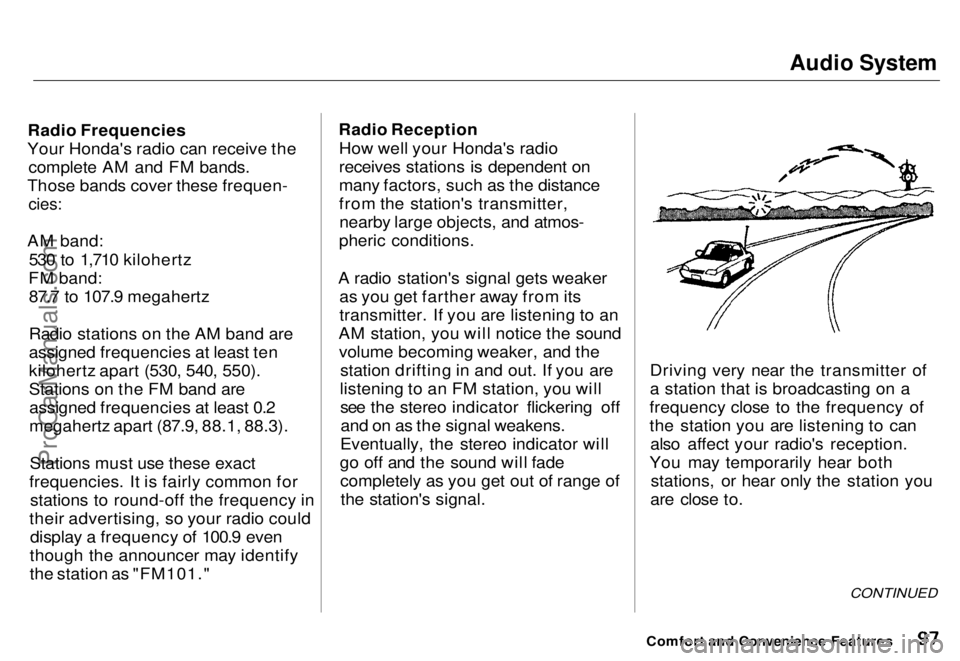
A radio station's signal gets weaker as you get farther away from its
transmitter. If you are listening to an
AM station, you will notice the sound volume becoming weaker, and the station drifting in and out. If you are
listening to an FM station, you will see the stereo indicator flickering offand on as the signal weakens.
Eventually, the stereo indicator will
go off and the sound will fade completely as you get out of range ofthe station's signal. Driving very near the transmitter of
a station that is broadcasting on a
frequency close to the frequency of
the station you are listening to can also affect your radio's reception.
You may temporarily hear both stations, or hear only the station you
are close to.
CONTINUED
Comfort and Convenience FeaturesProCarManuals.comMain Menu s t Table of Contents
Page 100 of 240
Audio System
Tape Search Functions
With a cassette playing, you can usethe FF, REW, RPT, or SKIP function
to find a desired program.
FF/REW — Fast Forward and
Rewind move the tape rapidly. To
rewind the tape, push the FF/REW/
SKIP switch down, then release it.
You will see REW in the display. To fast forward the tape, push the switch up, then release it. You will
see FF displayed. Press the PLAY
button to take the system out of rewind or fast forward. If the system
reaches the end of the tape while in
fast forward or rewind, it auto- matically stops that function,
reverses direction, and begins to play. SKIP — The SKIP function lets you
skip over a song or passage. You
activate SKIP with the FF/REW/
SKIP switch. To skip to the
beginning of a song or passage currently playing, push the switch
down and hold it until you hear a
beep. You will see REW flashing in
the display as the tape rewinds. To skip to the beginning of the next
song, push the switch up and hold it
until you hear a beep. You will see
FF flashing in the display as the tape
fast forwards. When the system
finds the beginning of a song or
passage, it goes back to PLAY. REPEAT — The Repeat function
continuously replays the current
song or passage. Press the RPT
button to activate it; you will see RPT displayed as a reminder. When thesystem reaches the end of the song
or passage currently playing, it will
automatically go into rewind. When
it senses the beginning of the same song or passage, the system returns
to PLAY mode. It will continue to repeat this same program until youdeactivate REPEAT by pressing the
button again.
The SKIP and REPEAT functions use silent periods on the tape to find
the end of a song or passage. These
features may not work to yoursatisfactorily if there is almost no
gap between selections, a high noise
level between selections, or a silent period in the middle of selection.
Comfort and Convenience FeaturesProCarManuals.comMain Menu s t Table of Contents
Page 101 of 240
Audio System
Caring for the Cassette Player
The cassette player picks up dirt and oxides from the tape. This
contamination builds up over time
and causes the sound quality todegrade. To prevent this, you should
clean the player after every 30 hours
of use.
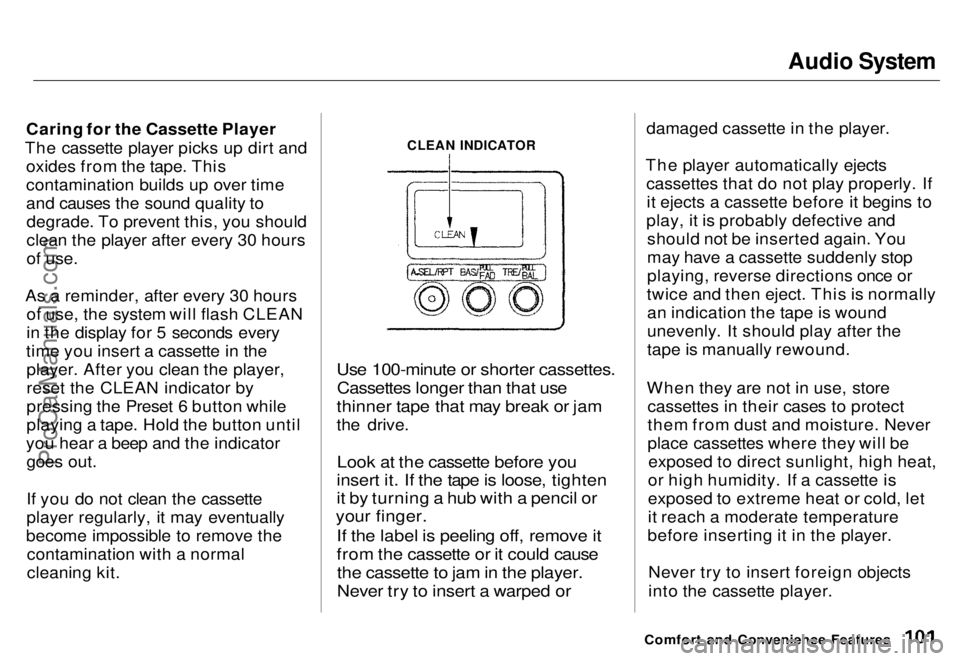
As a reminder, after every 30 hours of use, the system will flash CLEAN
in the display for 5 seconds every
time you insert a cassette in the player. After you clean the player,
reset the CLEAN indicator by
pressing the Preset 6 button while
playing a tape. Hold the button until
you hear a beep and the indicator goes out.
If you do not clean the cassette
player regularly, it may eventually
become impossible to remove the contamination with a normal
cleaning kit.
Use 100-minute or shorter cassettes.
Cassettes longer than that use
thinner tape that may break or jam
the drive.
Look at the cassette before you
insert it. If the tape is loose, tighten
it by turning a hub with a pencil or
your finger.
If the label is peeling off, remove it
from the cassette or it could cause
the cassette to jam in the player.
Never try to insert a warped or
damaged cassette in the player.
The player automatically ejects cassettes that do not play properly. Ifit ejects a cassette before it begins to
play, it is probably defective and should not be inserted again. You
may have a cassette suddenly stop
playing, reverse directions once or
twice and then eject. This is normally an indication the tape is wound
unevenly. It should play after the
tape is manually rewound.
When they are not in use, store cassettes in their cases to protect
them from dust and moisture. Never
place cassettes where they will beexposed to direct sunlight, high heat,
or high humidity. If a cassette is
exposed to extreme heat or cold, let
it reach a moderate temperature
before inserting it in the player.
Never try to insert foreign objects
into the cassette player.
Comfort and Convenience Features
CLEAN INDICATORProCarManuals.comMain Menu s t Table of Contents
Page 103 of 240
Audio System
Press the CD button until "CD"
appears in the display. The system
will start to play the first track of the first disc in the magazine.
When that disc ends, the next disc inthe magazine is loaded and played.
After the last disc finishes, the system returns to disc 1.
To select a different disc than the one that is playing, press theappropriate preset button (1 — 6).
The system will load that disc and begin playing it from the first track.
You can use the TUNE/SEEK switch to select tracks within a disc.
If you push and release the TUNE/
SEEK switch, the system will move
to the beginning of a track. Push the switch up to move to the beginning
of the next track, and push theswitch down to move to the begin-
ning of the current track.
If you push and hold the TUNE/
SEEK switch, you will hear a beep
and the system will continue to move across tracks. Release the switch
when you think it has reached the desired place on the disc.
RPT — When you activate the Repeat feature by pressing the A.SEL/RPT button, the system continu-
ously replays the current track. You
will see RPT in the display as a reminder. Press the button again to
turn it off.
RANDOM PLAY — This feature,
when activated, plays the tracks on a CD in random order, rather than in
the order they are recorded on the CD. To activate Random Play, press
the A. SEL/RPT button until you see
A. SEL in the display. The system will then select and play tracksrandomly on the current disc. When
all tracks on that disc have been
played, the next disc is loaded and
played randomly. This continues
until you deactivate Random Play by
pressing A. SEL/RPT again.
If the system is in Repeat mode, you
must turn it off by pressing A. SEL/
RPT before you can select Random
Play. Then press the button again
until you see A. SEL displayed.
To take the system out of CD mode, press the AM or FM button, or inserta cassette in the player. When you
return to CD mode, play will contin-
ue at the same disc and track.
If you turn the system off while a CD
is playing, either with the PWR/VOL
knob or the ignition switch, play will
continue at the same disc and track
when you turn it back on.
Comfort and Convenience FeaturesProCarManuals.comMain Menu s t Table of Contents
Page 105 of 240
Audio System
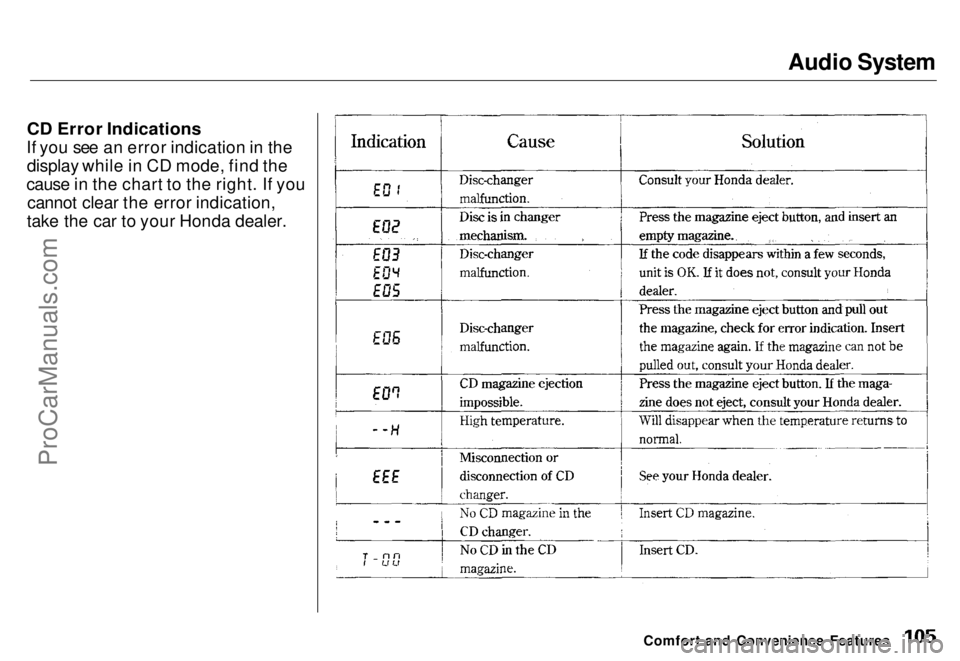
CD Error Indications
If you see an error indication in the display while in CD mode, find the
cause in the chart to the right. If you cannot clear the error indication,
take the car to your Honda dealer.
Comfort and Convenience FeaturesProCarManuals.comMain Menu s t Table of Contents