Page 79 of 240

Heating and Cooling
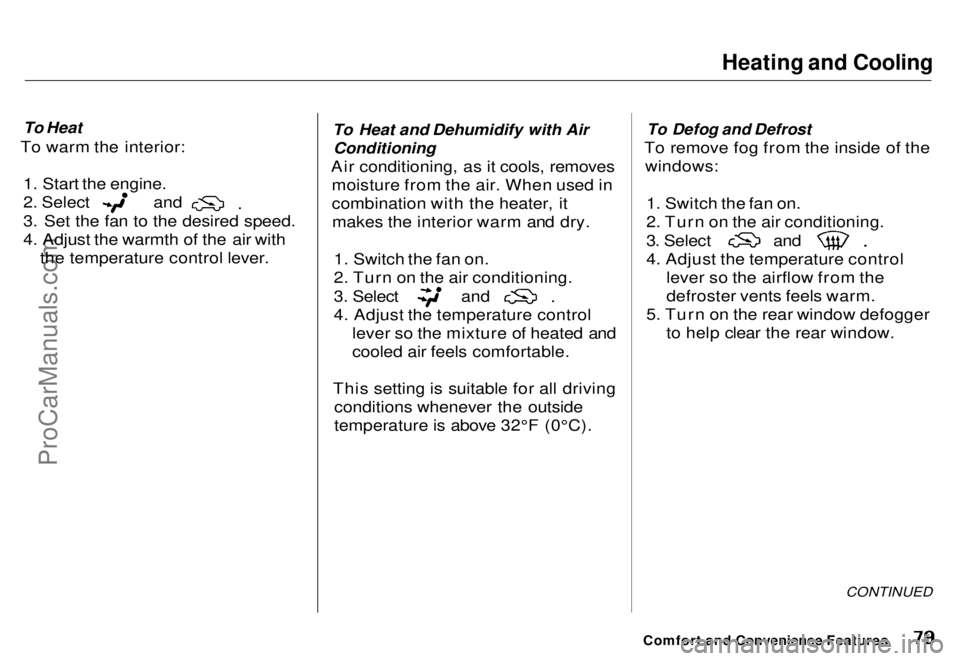
To Heat
To warm the interior:
1. Start the engine. 2. Select and
3. Set the fan to the desired speed.
4. Adjust the warmth of the air with
the temperature control lever.
To Heat and Dehumidify with Air
Conditioning
Air conditioning, as it cools, removes moisture from the air. When used in
combination with the heater, itmakes the interior warm and dry.
1. Switch the fan on.
2. Turn on the air conditioning. 3. Select and
4. Adjust the temperature control
lever so the mixture of heated and
cooled air feels comfortable.
This setting is suitable for all driving conditions whenever the outside
temperature is above 32°F (0°C).
To Defog and Defrost
To remove fog from the inside of the windows:
1. Switch the fan on.
2. Turn on the air conditioning. 3. Select and
4. Adjust the temperature control
lever so the airflow from the
defroster vents feels warm.
5. Turn on the rear window defogger to help clear the rear window.
CONTINUED
Comfort and Convenience FeaturesProCarManuals.comMain Menu s t Table of Contents
Page 80 of 240
Heating and Cooling
To remove exterior frost or ice from the windshield and side windowsafter the car has been sitting out in
cold weather:
1. Start the engine.
2. Select
and
3. Switch the fan and temperature
controls to maximum.
To rapidly remove exterior frost or ice from the windshield (on very cold days), first select Once the
windshield is clear, select to
avoid fogging the windows.
TEMPERATURE CONTROL LEVER
Comfort and Convenience Features MODE BUTTONS
RECIRCULATION
BUTTON
FRESH AIR BUTTON
FAN CONTROL
LEVER
AIR CONDITIONING
SWITCHProCarManuals.comMain Menu s t Table of Contents
Page 81 of 240

Heating and Cooling
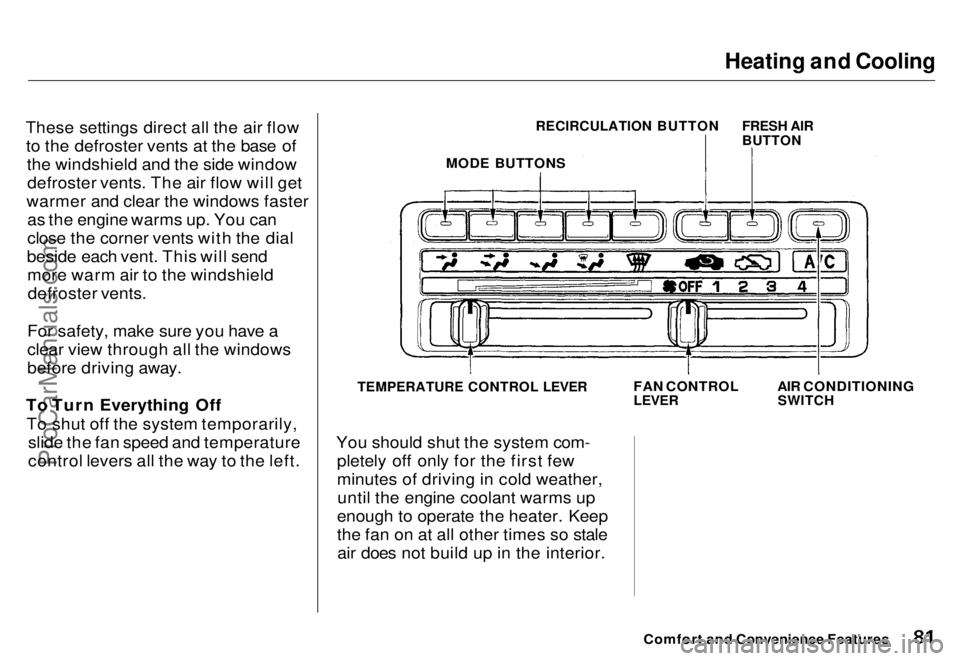
These settings direct all the air flow to the defroster vents at the base of the windshield and the side windowdefroster vents. The air flow will get
warmer and clear the windows faster as the engine warms up. You can
close the corner vents with the dial
beside each vent. This will send more warm air to the windshielddefroster vents.
For safety, make sure you have a
clear view through all the windows
before driving away.
To Turn Everything Off To shut off the system temporarily, slide the fan speed and temperature
control levers all the way to the left.
TEMPERATURE CONTROL LEVER
You should shut the system com- pletely off only for the first few
minutes of driving in cold weather,until the engine coolant warms up
enough to operate the heater. Keep
the fan on at all other times so stale air does not build up in the interior.
Comfort and Convenience Features
FAN CONTROL
LEVER
AIR CONDITIONING
SWITCH
RECIRCULATION BUTTON
FRESH AIR
BUTTON
MODE BUTTONSProCarManuals.comMain Menu s t Table of Contents
Page 82 of 240
Heating and Cooling
Rear A/C Unit
(U.S. models only)
The rear A/C can be used when the
A/C switch on the front control panel is ON. Turn the rear A/C on
by moving the fan control lever out of the "OFF" position. The indicator
will come on. Adjust the fan speed by sliding the fan control lever. To
change the direction of air flow,
move the tab in the center of each
vent up-and-down and side-to-side.
Comfort and Convenience Features FAN CONTROL
LEVERProCarManuals.comMain Menu s t Table of Contents
Page 134 of 240

Maintenance
This section explains why it is important to keep your car well
maintained and to follow basic
maintenance safety precautions.
This section also includes Maintenance Schedules for normaldriving and severe driving conditions,
a Maintenance Record, and instruc-
tions for simple maintenance tasks
you may want to take care of
yourself.
If you have the skills and tools
required to perform more complex
maintenance tasks on your Honda,
you may want to purchase the Service Manual. See page 233 for
information on how to obtain a copy,or see your Honda dealer.
Maintenance Safety....................... 136
Important Safety Precautions.. 137
Maintenance Schedule.................. 138
Maintenance Record..................... 142
Periodic Checks............................. 144
Fluid Locations............................... 145
Engine Oil....................................... 146
Checking Engine Oil................. 146
Adding Oil................................... 146 Recommended Oil..................... 147
Synthetic Oil............................... 148
Additives..................................... 148
Oil and Filter Changes.............. 148
Cooling System.............................. 150
Checking the Engine Coolant
Level........................................ 150
Adding Engine Coolant............. 151 Replacing Engine Coolant........ 152
Windshield Washers..................... 154
Automatic Transmission Fluid..... 155
Brake Fluid..................................... 156
Brake System............................. 156
Anti-lock Brake System............ 157
Power Steering............................... 157
Air Cleaner..................................... 158 Spark Plugs..................................... 160
Replacement............................... 160
Specifications............................. 161
Battery............................................ 162
Windshield Wipers........................ 165
Air Conditioning............................. 168 Drive Belts...................................... 169
Tires................................................ 169 Inflation....................................... 170
Inspection................................... 171
Maintenance............................... 171
Tire Rotation.............................. 172 Replacing Tires and Wheels .... 172
Wheels and Tires....................... 173
Winter Driving........................... 173 Snow Tires.............................. 174
Tire Chains............................. 174
Lights.............................................. 175 Headlight Aiming...................... 175Replacing Bulbs......................... 177
Storing Your Car............................ 182
MaintenanceProCarManuals.comMain Menu s t
Page 149 of 240
Engine Oil, Cooling System
If you change your own oil, pleasedispose of the used oil properly. Put it in a sealed container and take it to arecycling center. Do not discard it in a
trash bin or dump it on the ground.
Checking the Engine Coolant
Level
Check the level of the engine coolant
by looking at the radiator reserve tank next to the battery. If the coolant level in the reserve tank is ator below the MIN line, add coolant to
bring it up to the MAX line. Inspect the cooling system for leaks. Thiscoolant should always be a mixtureof 50% antifreeze and 50% water.
Never add straight antifreeze or
plain water. Always use Genuine Honda Anti-
freeze/Coolant. The cooling systemcontains many aluminum compo-nents that can corrode if an improper
antifreeze is used. Some antifreeze,even though labeled as safe for
aluminum parts, may not provideadequate protection.
Maintenance
RESERVE TANK
MIN
MAX
NOTICEProCarManuals.comMain Menu s t Table of Contents
Page 150 of 240
Cooling System
Adding Engine Coolant If the reserve tank is completely
empty, you should also check the
coolant level in the radiator.
1. Make sure the engine and radiator
are cool.
2. Turn the radiator cap counter-
clockwise, without pressing down
on it, until it stops. This relieves
any pressure remaining in the
cooling system.
3. Remove the radiator cap by pushing down and turning
counterclockwise.
4. The coolant level should be up to
the base of the filler neck. Add
coolant if it is low.
5. Put the radiator cap back on. Tighten it fully.
6. Pour coolant into the reserve tank. Fill it to halfway between the MAX
and MIN marks. Put the cap back
on the reserve tank.
Maintenance
CONTINUED
Removing the radiator cap
while the engine is hot can cause the coolant to spray out,
seriously scalding you.
Always let the engine and radiator cool down before
removing the radiator cap. RADIATOR CAP
RESERVE TANKProCarManuals.comMain Menu s t Table of Contents
Page 151 of 240
Cooling System
Do not add any rust inhibitors or
other additives to your car's cooling
system. They may not be compatible
with the coolant or engine compo-
nents.
Replacing Engine Coolant
The cooling system should be completely drained and refilled with
new coolant according to the time
and distance recommendations in
the maintenance schedule. Only use recommended antifreeze.
Draining the coolant requires access
to the underside of the car. Unless
you have the tools and knowledge,
you should have this maintenance done by a skilled mechanic. 1. Start the engine. Turn the heater
temperature control dial to
maximum heat and turn off the
engine. Open the hood. Make sure
the engine and radiator are cool to
the touch.
2. Remove the radiator cap. 3. Loosen the drain plug on the
bottom of the radiator. The
coolant will drain through the
splash guard. Remove the drain
bolt from the engine block.
Maintenance DRAIN BOLT
DRAIN PLUGProCarManuals.comMain Menu s t Table of Contents