1996 HONDA ODYSSEY coolant temperature
[x] Cancel search: coolant temperaturePage 39 of 240

Gauges
Temperature Gauge This shows the temperature of the engine's coolant. During normal
operation, the pointer should rise
from the bottom white mark to about
the middle of the gauge. In severe driving conditions, such as very hot
weather or a long period of uphill driving, the pointer may rise to the
upper white mark. If it reaches the
red "H" (Hot) mark, pull safely to
the side of the road. Turn to page 202 for instructions and precautions
on checking the engine's cooling
system.
Fuel Gauge
This shows how much fuel you have. It is most accurate when the car is on
level ground. It may show slightly
more or less than the actual amount
when you are driving on curvy or hilly roads. The gauge stays at the same fuel
level reading after you turn off theignition. When you add fuel, thegauge slowly changes to the new
reading after you turn the ignition
back ON (II).
Maintenance Required Indicator
This indicator reminds you that it is nearing 12,000 km (7,500 miles)since the last scheduled maintenance.
Refer to the Maintenance Schedules
for Normal and Severe driving conditions on page 140 . When the distance driven since the
last scheduled maintenance nears 12,000 km (7,500 miles), the
indicator will turn yellow. If you
exceed 12,000 km (7,500 miles), the indicator will turn red.
Your dealer will reset the indicator when he performs the scheduledmaintenance. If someone else
performs the maintenance, reset the indicator by inserting your key in theslot beside the indicator.
Instruments and Controls SLOT
INDICATORProCarManuals.comMain Menu s t Table of Contents
Page 76 of 240
Heating and Cooling
Vent Controls
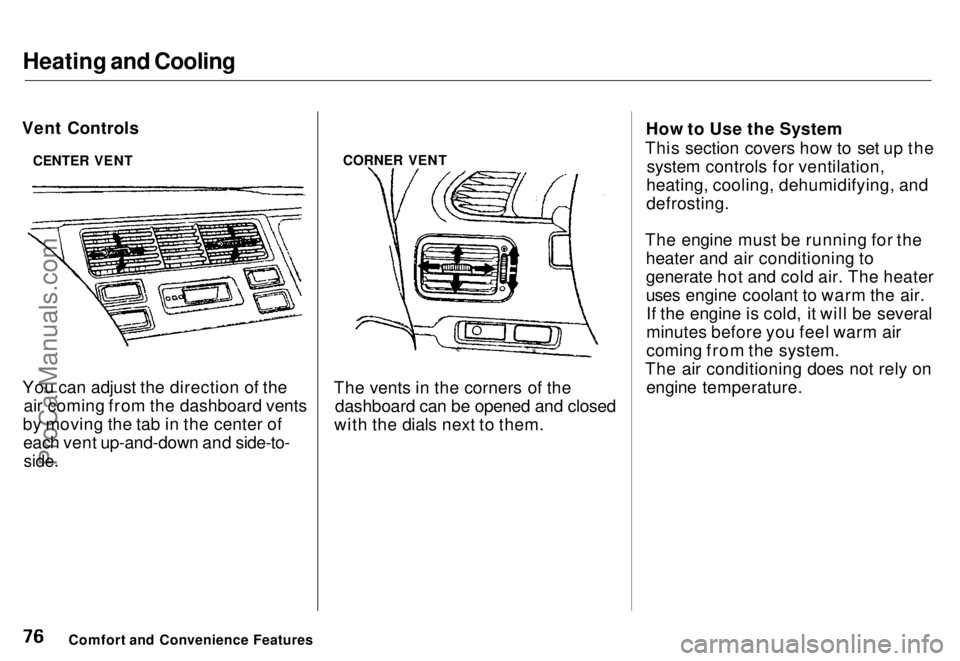
You can adjust the direction of the air coming from the dashboard vents
by moving the tab in the center of each vent up-and-down and side-to-
side.
CORNER VENT
The vents in the corners of the dashboard can be opened and closed
with the dials next to them. How to Use the System
This section covers how to set up the system controls for ventilation,
heating, cooling, dehumidifying, and
defrosting.
The engine must be running for the heater and air conditioning to
generate hot and cold air. The heater
uses engine coolant to warm the air.If the engine is cold, it will be several
minutes before you feel warm air
coming from the system.
The air conditioning does not rely on engine temperature.
Comfort and Convenience Features
CENTER VENTProCarManuals.comMain Menu s t Table of Contents
Page 78 of 240
Heating and Cooling
To Cool with A/C
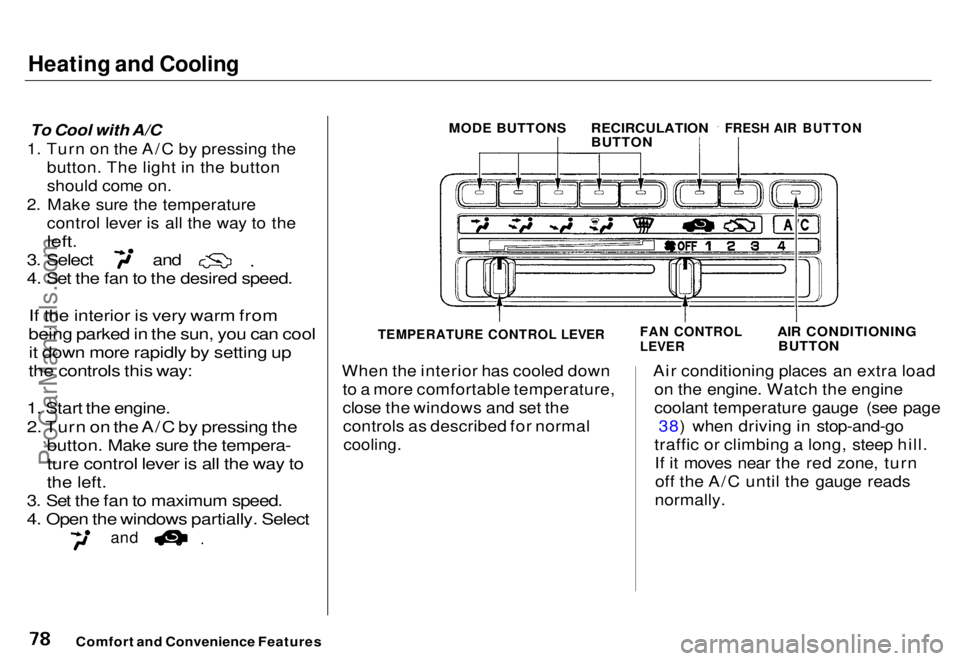
1. Turn on the A/C by pressing the button. The light in the button
should come on.
2. Make sure the temperature control lever is all the way to the
left.
3. Select and
4. Set the fan to the desired speed.
If the interior is very warm from
being parked in the sun, you can cool
it down more rapidly by setting up
the controls this way:
1. Start the engine.
2. Turn on the A/C by pressing the
button. Make sure the tempera-
ture control lever is all the way to
the left.
3. Set the fan to maximum speed.
4. Open the windows partially. Select
and
When the interior has cooled down
to a more comfortable temperature,
close the windows and set thecontrols as described for normal
cooling.
Air conditioning places an extra load
on the engine. Watch the engine
coolant temperature gauge (see page 38) when driving in stop-and-go
traffic or climbing a long, steep hill. If it moves near the red zone, turnoff the A/C until the gauge reads
normally.
Comfort and Convenience Features
MODE BUTTONS
RECIRCULATION
BUTTON
FRESH AIR BUTTON
AIR CONDITIONINGBUTTON
FAN CONTROL
LEVER
TEMPERATURE CONTROL LEVERProCarManuals.comMain Menu s t Table of Contents
Page 81 of 240
Heating and Cooling
These settings direct all the air flow to the defroster vents at the base of the windshield and the side windowdefroster vents. The air flow will get
warmer and clear the windows faster as the engine warms up. You can
close the corner vents with the dial
beside each vent. This will send more warm air to the windshielddefroster vents.
For safety, make sure you have a
clear view through all the windows
before driving away.
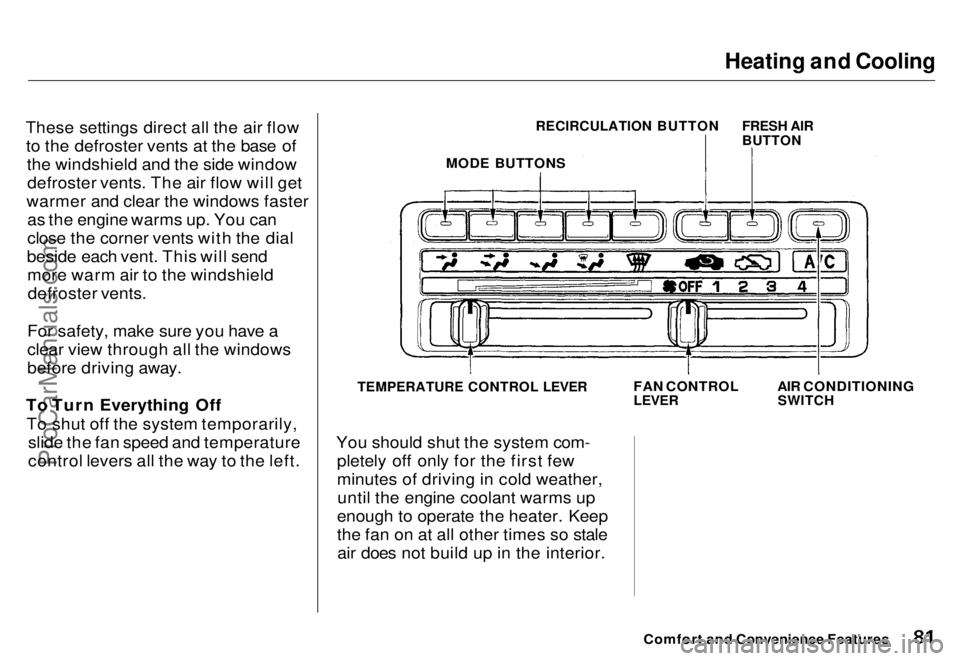
To Turn Everything Off To shut off the system temporarily, slide the fan speed and temperature
control levers all the way to the left.
TEMPERATURE CONTROL LEVER
You should shut the system com- pletely off only for the first few
minutes of driving in cold weather,until the engine coolant warms up
enough to operate the heater. Keep
the fan on at all other times so stale air does not build up in the interior.
Comfort and Convenience Features
FAN CONTROL
LEVER
AIR CONDITIONING
SWITCH
RECIRCULATION BUTTON
FRESH AIR
BUTTON
MODE BUTTONSProCarManuals.comMain Menu s t Table of Contents
Page 151 of 240
Cooling System
Do not add any rust inhibitors or
other additives to your car's cooling
system. They may not be compatible
with the coolant or engine compo-
nents.
Replacing Engine Coolant
The cooling system should be completely drained and refilled with
new coolant according to the time
and distance recommendations in
the maintenance schedule. Only use recommended antifreeze.
Draining the coolant requires access
to the underside of the car. Unless
you have the tools and knowledge,
you should have this maintenance done by a skilled mechanic. 1. Start the engine. Turn the heater
temperature control dial to
maximum heat and turn off the
engine. Open the hood. Make sure
the engine and radiator are cool to
the touch.
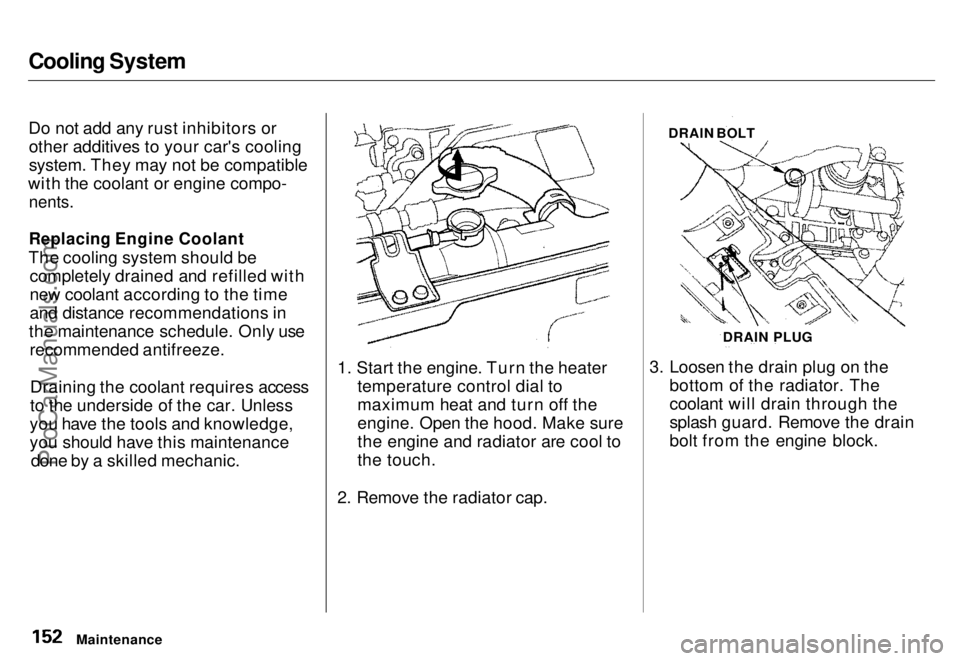
2. Remove the radiator cap. 3. Loosen the drain plug on the
bottom of the radiator. The
coolant will drain through the
splash guard. Remove the drain
bolt from the engine block.
Maintenance DRAIN BOLT
DRAIN PLUGProCarManuals.comMain Menu s t Table of Contents
Page 200 of 240
If Your Engine Overheats
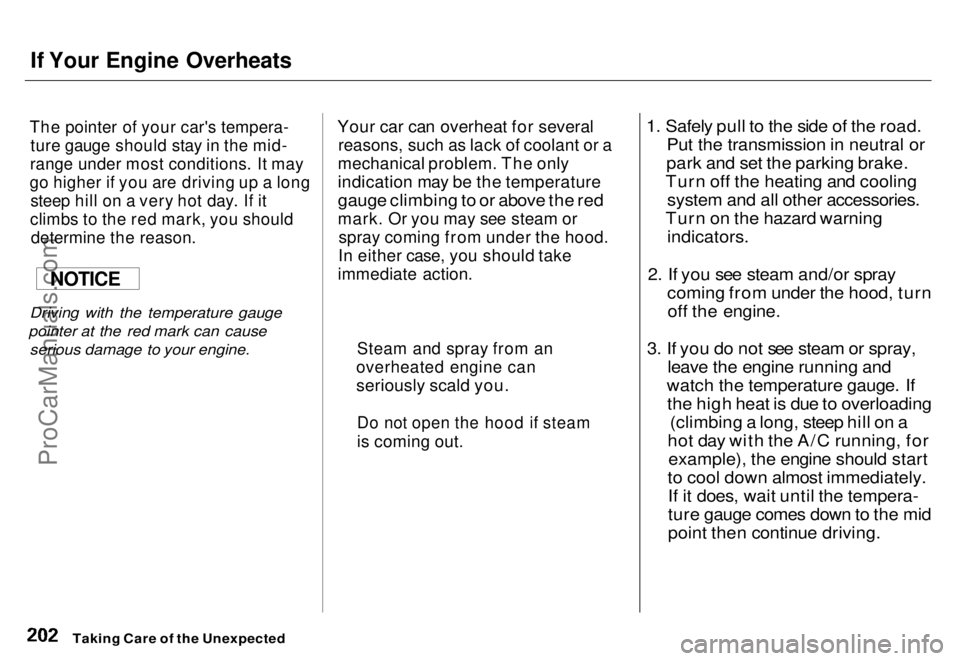
The pointer of your car's tempera-
ture gauge should stay in the mid-
range under most conditions. It may
go higher if you are driving up a long
steep hill on a very hot day. If it
climbs to the red mark, you should
determine the reason.
Driving with the temperature gauge
pointer at the red mark can cause serious damage to your engine.
Your car can overheat for several
reasons, such as lack of coolant or a
mechanical problem. The only
indication may be the temperature
gauge climbing to or above the red
mark. Or you may see steam or
spray coming from under the hood.
In either case, you should take
immediate action.
1. Safely pull to the side of the road.
Put the transmission in neutral or
park and set the parking brake.
Turn off the heating and cooling system and all other accessories.
Turn on the hazard warning indicators.
2. If you see steam and/or spray coming from under the hood, turnoff the engine.
3. If you do not see steam or spray, leave the engine running and
watch the temperature gauge. If the high heat is due to overloading (climbing a long, steep hill on a
hot day with the A/C running, for example), the engine should start
to cool down almost immediately. If it does, wait until the tempera-
ture gauge comes down to the mid
point then continue driving.
Taking Care of the Unexpected
NOTICE
Steam and spray from an
overheated engine can
seriously scald you.
Do not open the hood if steam
is coming out.ProCarManuals.coms t Main Menu Table of Contents
Page 201 of 240
If Your Engine Overheats
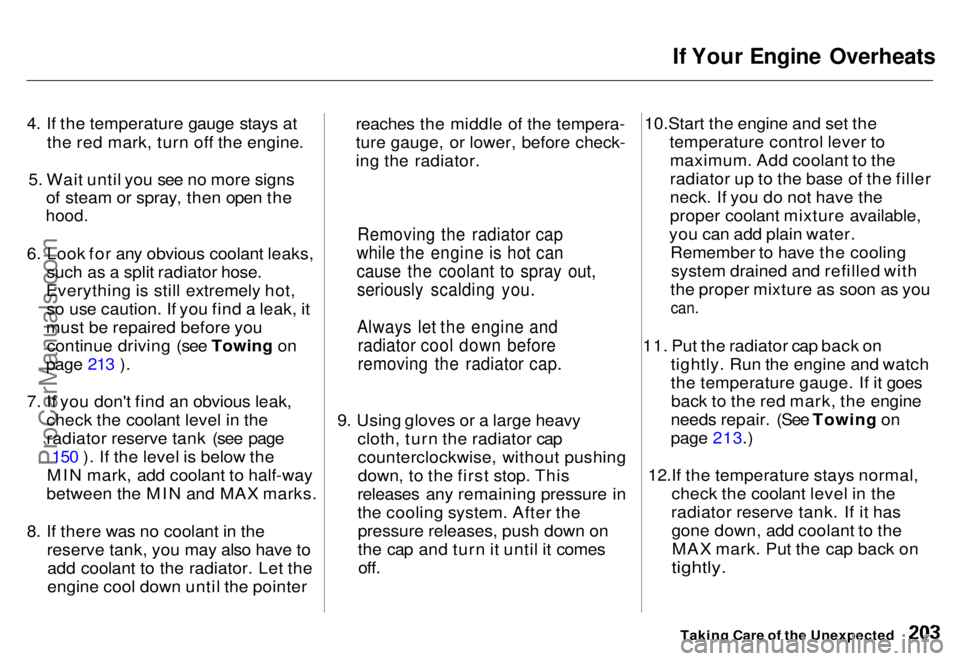
4. If the temperature gauge stays at the red mark, turn off the engine.
5. Wait until you see no more signs of steam or spray, then open the
hood.
6. Look for any obvious coolant leaks, such as a split radiator hose.
Everything is still extremely hot, so use caution. If you find a leak, it
must be repaired before you continue driving (see Towing on
page 213 ).
7. If you don't find an obvious leak, check the coolant level in the
radiator reserve tank (see page150 ). If the level is below the
MIN mark, add coolant to half-way
between the MIN and MAX marks.
8. If there was no coolant in the reserve tank, you may also have toadd coolant to the radiator. Let the
engine cool down until the pointer reaches the middle of the tempera-
ture gauge, or lower, before check-
ing the radiator.
9. Using gloves or a large heavy cloth, turn the radiator capcounterclockwise, without pushing
down, to the first stop. This
releases any remaining pressure in
the cooling system. After the pressure releases, push down on
the cap and turn it until it comesoff. 10.Start the engine and set the
temperature control lever tomaximum. Add coolant to the
radiator up to the base of the filler
neck. If you do not have the
proper coolant mixture available,
you can add plain water. Remember to have the coolingsystem drained and refilled with
the proper mixture as soon as you
can.
11. Put the radiator cap back on tightly. Run the engine and watch
the temperature gauge. If it goesback to the red mark, the engine
needs repair. (See Towing on
page 213.)
12.If the temperature stays normal, check the coolant level in the
radiator reserve tank. If it has gone down, add coolant to theMAX mark. Put the cap back on
tightly.
Taking Care of the Unexpected
Removing the radiator cap
while the engine is hot can
cause the coolant to spray out, seriously scalding you.
Always let the engine and radiator cool down before
removing the radiator cap.ProCarManuals.comMain Menu s t Table of Contents
Page 233 of 240
Index
Break-in, New Car......................... 108
Brightness Control, Instruments... 41
Brights, Headlights......................... 40
Bulb Replacement Back-up Lights........................... 179
Brake Lights............................... 179
Ceiling Light............................... 181
Front Parking Lights................. 178
Front Side Marker Lights......... 178
Headlights.................................. 177
License Plate Lights.................. 180 Specifications............................. 219
Turn Signal Lights..................... 178
Bulbs, Halogen............................... 177
Cables, Jump Starting With.......... 200
Capacities Chart............................. 218
Carbon Monoxide Hazard............ 29
Cargo, Loading............................... 116
Cassette Player Care............................................. 101
Operation.............................. 87, 99
CAUTION, Explanation of............. ii
CD Player................................. 90, 102 Center Pocket.................................. 68
Certification Label......................... 216
Chains............................................. 174
Change Oil How to......................................... 148
When to....................................... 140
Changing a Flat Tire..................... 193
Changing Engine Coolant............. 152 Charging System Indicator.... 34, 205
Checking Automatic Transmission
Fluid........................................ 155
Battery Condition...................... 162
Brake Fluid................................. 156
Drive Belts.................................. 169
Engine Coolant........................... 150
Engine Oil................................... 146
Fuses........................................... 209
Power Steering Fluid................. 157
Checklist, Before Driving............. 118
Child Safety...................................... 20 Childproof Door Locks................... 52
Cigarette Lighter............................. 69
Cleaner, Air.................................... 158
Cleaning
Aluminum Wheels..................... 185
Carpeting................................... 186
Exterior...................................... 184
Fabric......................................... 186
Interior....................................... 186
Seat Belts................................... 187
Vinyl........................................... 186
Window...................................... 187
CLEAN Light................................ 101
Clock, Setting the .........................
66
CO in the Exhaust........................
224
Cold Weather, Starting in............ 119
Compact Spare............................... 192
Consumer Information*................ 227
Controls, Instruments and.............. 33
Coolant
Adding........................................
151
Checking................................ 150
Proper Solution......................
150
Temperature Gauge.................. 38
Corrosion Protection.................... 188
Crankcase Emission Control
System........................................ 224
Cruise Control Operation............. 46
Customer Relations Office.......... 229ProCarManuals.comMain Menu s t