1996 CHEVROLET TAHOE height
[x] Cancel search: heightPage 15 of 403
Downloaded from www.Manualslib.com manuals search engine Folding the Rear Seat (2-Door Utility Model)
If your vehicle has a rear seat, the seat can be folded flat
for more cargo space. Before.folding, make sure nothing
is under or in front
of the seat. When the seat is folded,
it will lay almost flat on the floor.
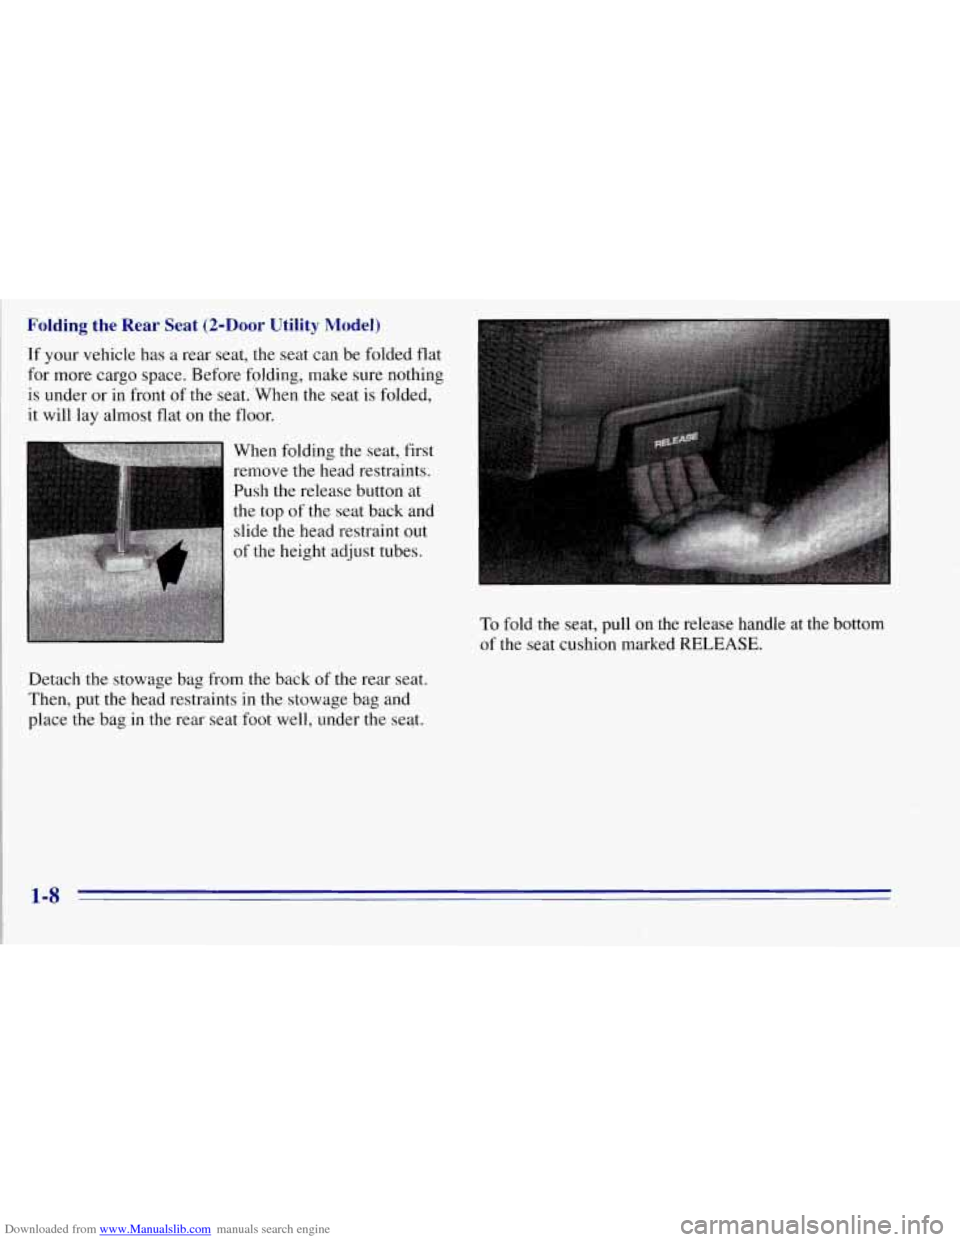
When folding the seat, first
remove the head restraints.
Push the release button at
the top
of the seat back and
slide the head restraint
out
of the height adjust tubes.
To fold the seat, pull on the' release handle at the bottom
of the seat cushion marked
RELEASE.
Detach the stowage bag from the back of the rear seat.
Then, put the head restraints in the stowage bag and
place the bag
in the rear seat foot well, under the seat.
1-8
Page 16 of 403
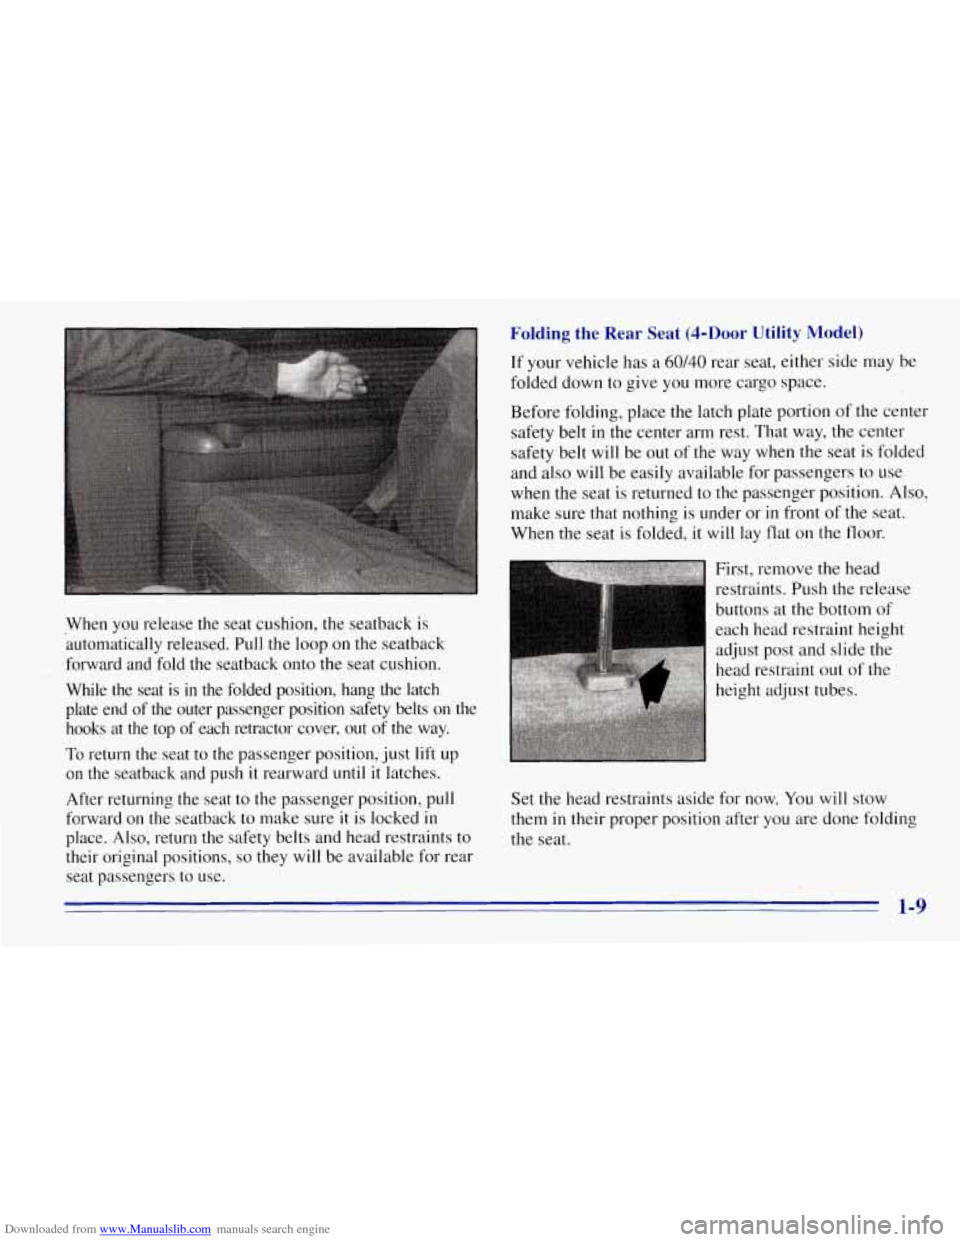
Downloaded from www.Manualslib.com manuals search engine When you release the seat cushion, the seatback is
automatically released. Pull the loop on the seatback
forward and fold the seatback onto the seat cushion.
While the seat is in the folded position, hang the latch
plate end of the outer passenger position safety belts on the \
hooks at the top of each retractor cover, out of the way.
To return the seat to the passenger position, just lift up
on the seatback and push
it rearward until it latches.
After returning the seat to the passenger position, pull
forward on the seatback to make sure it is locked in
place. Also, return the safety belts and head restraints to
their original positions,
so they will be available for rear
seat passengers to use.
Folding the Rear Seat (4-Door Utility Model)
If your vehicle has a 60/40 rear seat, either side may be
folded down to give you more cargo space.
Before folding, place the latch plate portion
of the center
safety belt in the center arm rest. That way, the center
safety belt will be out of
the way when the seat is folded
and also will be easily available for passengers to use
when the seat is returned to the passenger position. Also,
make sure that nothing is under or
in front of the seat.
When the seat is folded, it
will lay flat on the floor.
First, remove the head
restraints. Push the release
buttons at the bottom
of
each head restraint height
adiust Dost and slide the
J I
head restraint out of the
height adjust tubes.
Set the head restraints aside for now.
You will stow
them
in their proper position after you are done folding
the seat.
1-9
Page 18 of 403
Downloaded from www.Manualslib.com manuals search engine Folding Second Seat (Suburban)
If your vehicle has a 60140 second seat, either side may
be folded down to give you more cargo space.
Before folding, push
the buckle portion of the safety belt
down into the seat cushion pockets, out of the way.
Also, make sure that nothing
is under or in front of the
seat. When the seat is folded, it will lay flat on the floor.
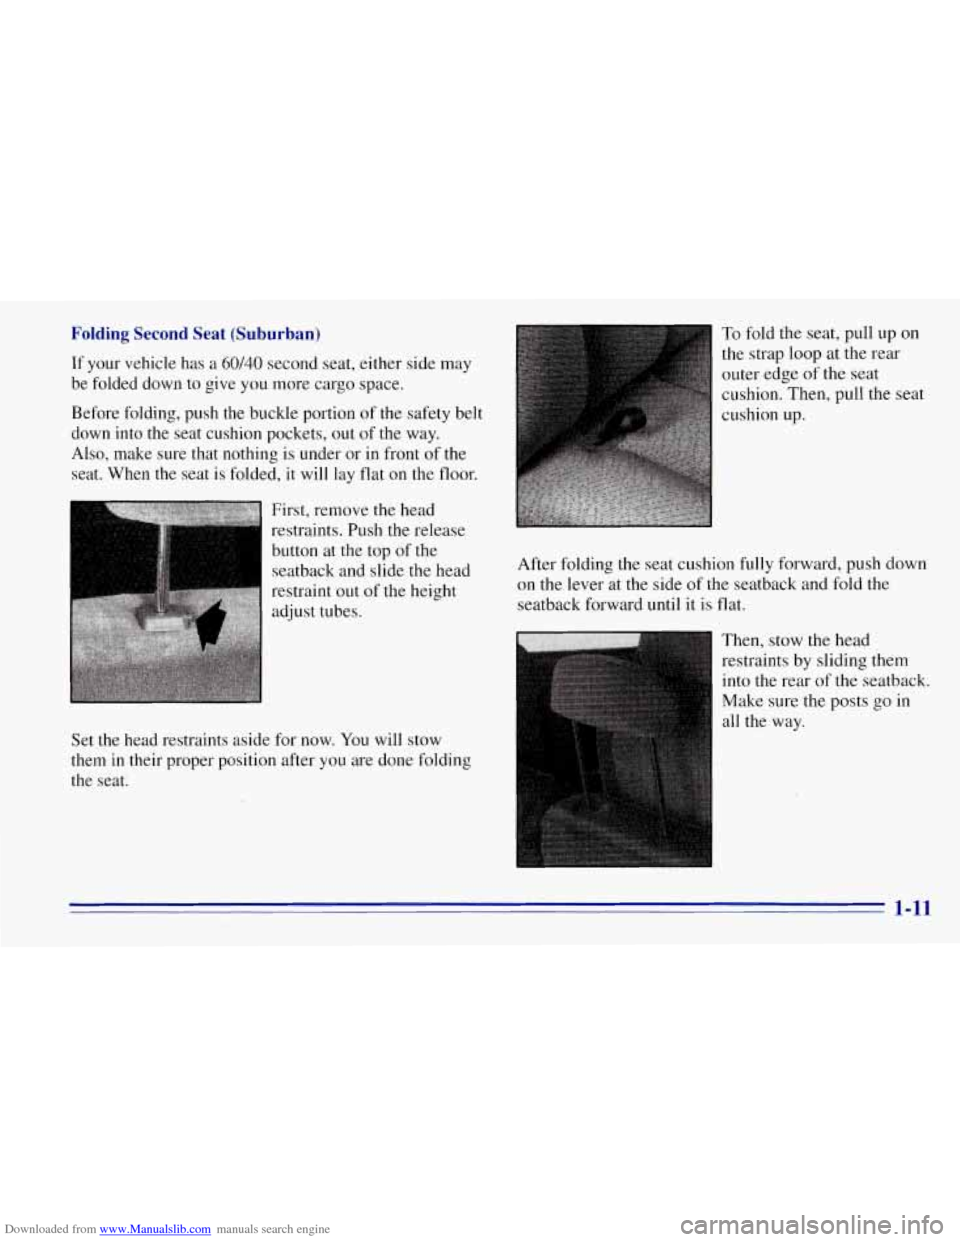
First, remove the head
restraints. Push the release
button at the top of the
seatback and slide the head
restraint out of the height
Set the head restraints aside for now. You will stow
them in their proper position after you are done folding
the seat;
To fold the seat, pull up on
the strap loop at the rear
outer edge of the seat
cushion. Then, pull the seat
cushion up.
After folding the seat cushion
fully forward, push down
on the lever at the side
of the seatback and fold the
seatback forward until it is flat.
Then, stow the head
restraints by sliding them
into the rear of the seatback.
Make sure the posts
go in
all the way.
1-11
Page 30 of 403
Downloaded from www.Manualslib.com manuals search engine Shoulder Belt Height Adjuster
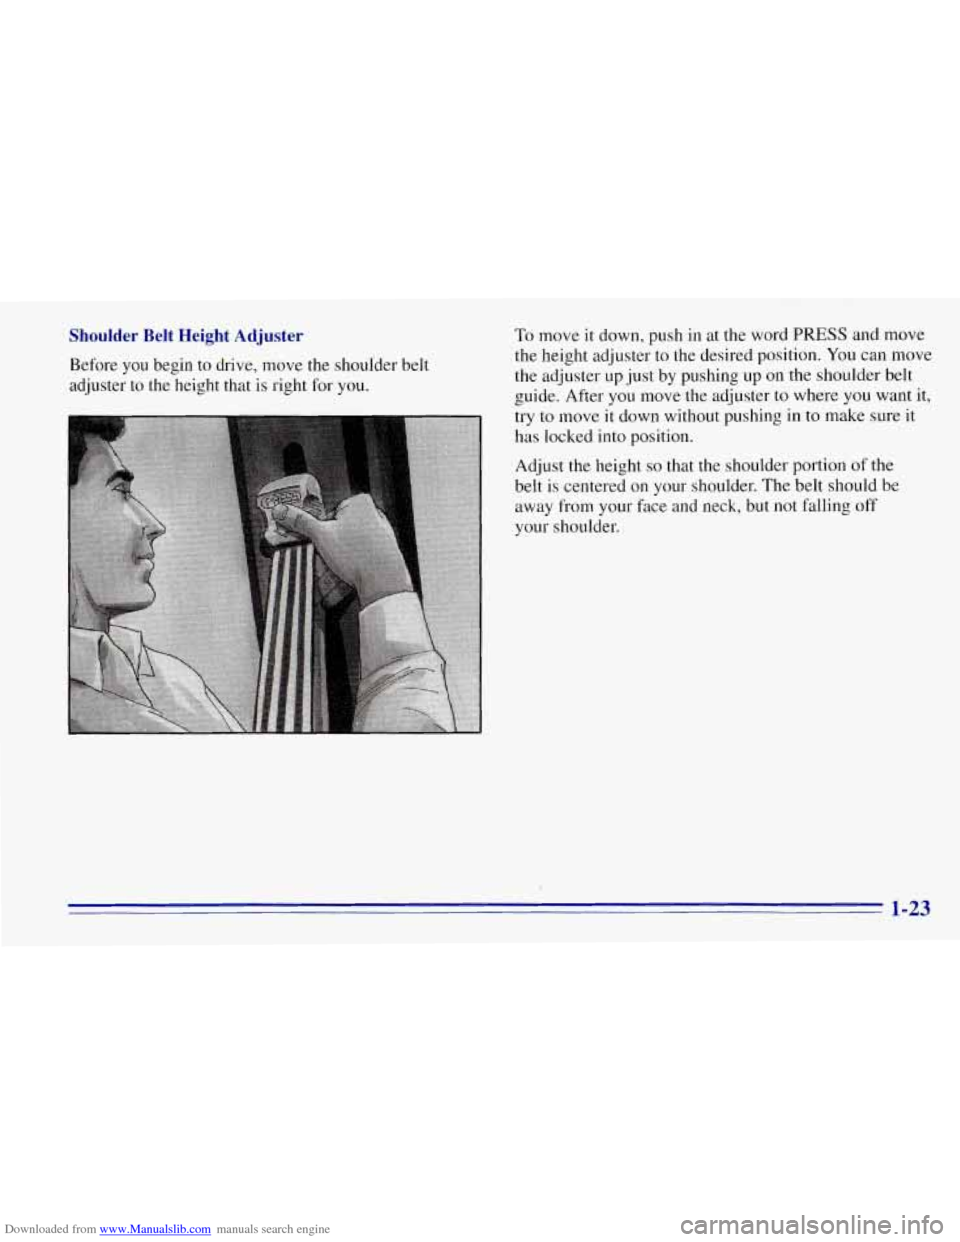
Before you begin to drive, move the shoulder belt
adjuster to the height that is right for you.
To move it down, push in at the word PRESS and move
the height adjuster to the desired position.
You can move
the adjuster up just by pushing up
on the shoulder belt
guide. After
you move the adjuster to where you want it,
try
to move it down without pushing in to make sure it
has locked into position.
Adjust the height
so that the shoulder portion of the
belt is centered on
your shoulder. The belt should be
away from your face and neck, but not falling off
your shoulder.
1-23
Page 42 of 403
Downloaded from www.Manualslib.com manuals search engine Q:
A:
Is there anything I might add to the front of the
vehicle that could keep the air bag from
working properly?
Yes. If you add things that change your vehicle's
frame, bumper system, front end sheet metal or
height, they may keep the air bag system from
working properly. Also, the air bag system may not
work properly if you relocate any of the air bag
sensors. If you have-any question about this, you
should contact Customer Assistance before you
modify your vehicle. (The phone numbers and
addresses for Customer Assistance are in Step Two
of the Customer Satisfaction Procedure in this
manual. See "Customer Satisfaction Procedure"
in the Index.)
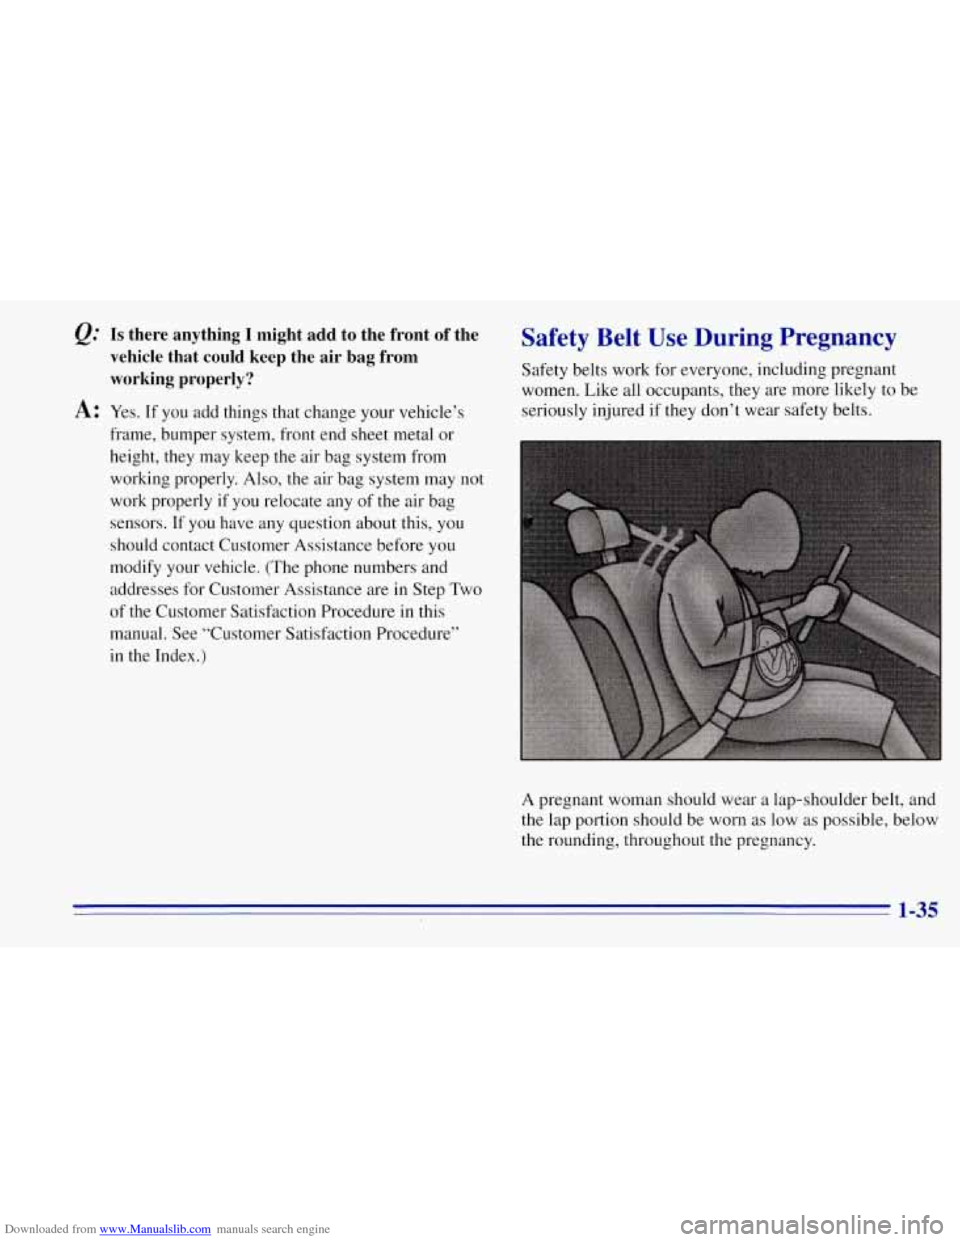
Safety Belt Use During Pregnancy
Safety belts work for everyone, including pregnant
women. Like all occupants, they are more likely to be
seriously injured if they don't wear safety belts.
A pregnant woman should wear a lap-shoulder belt, and
the lap portion should be worn as low
as possible, below
the rounding, throughout the pregnancy.
1-35
Page 48 of 403
Downloaded from www.Manualslib.com manuals search engine f
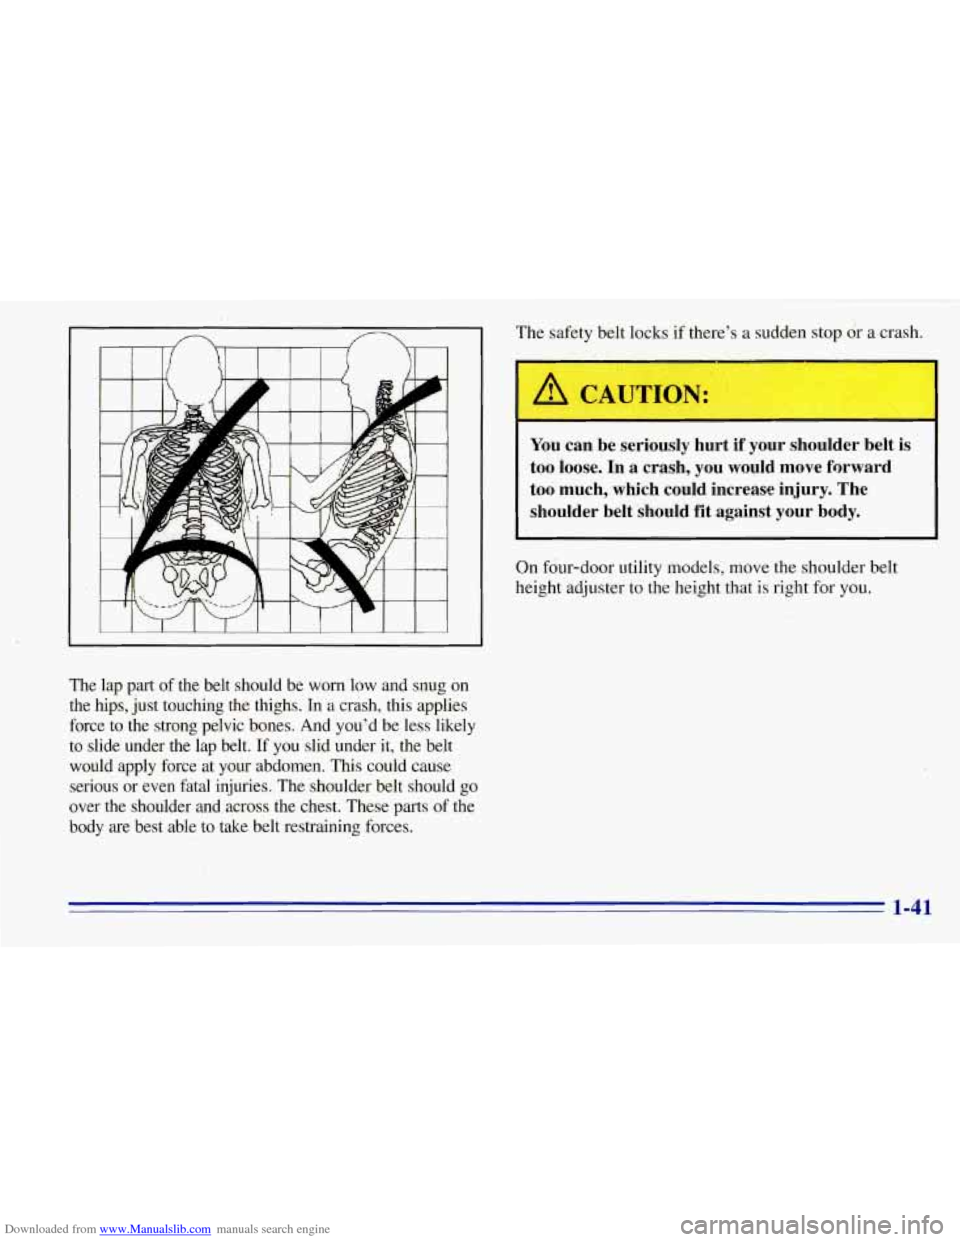
The lap part of the belt should be worn low and snug on
the hips, just touching the thighs. In a crash, this applies
force to the strong pelvic bones. And you’d be less likely
to slide under the lap belt.
If you slid under it, the belt
would apply force at your abdomen. This could cause
serious or even fatal injuries. The shoulder belt should
go
over the shoulder and across the chest. These parts of the
body are best able to take belt restraining forces. The
safety belt locks if there’s a sudden stop or a crash.
A
You can be seriously hurt if your shoulder belt is
too loose. In a crash, you would move forward
too much, which could increase injury. The
shoulder belt should fit against your body.
~~~~~
On four-door utility models, move the shoulder belt
height adjuster to the height that is right for
you.
1-41
Page 49 of 403
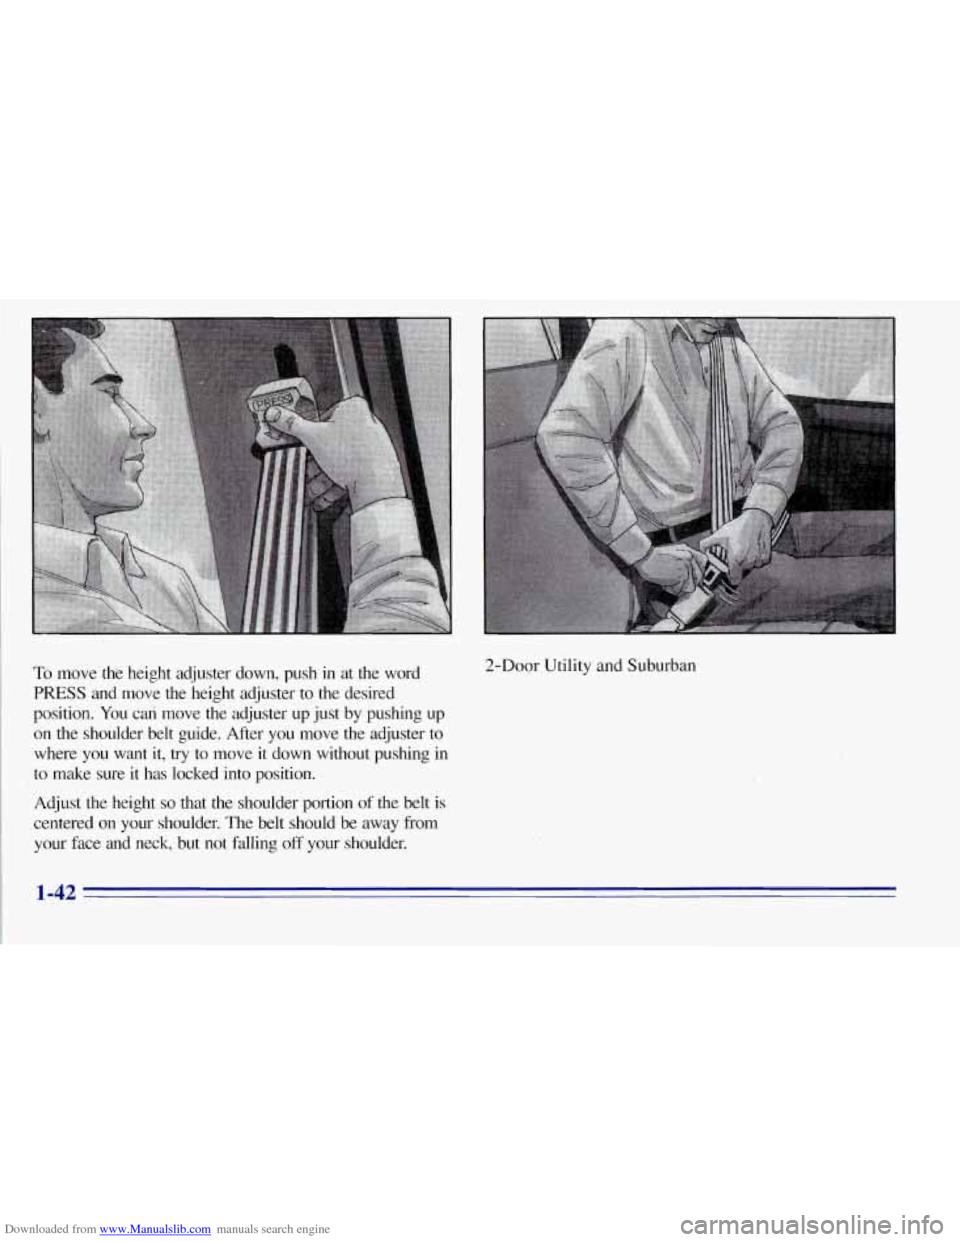
Downloaded from www.Manualslib.com manuals search engine To move the height adjuster down, push in at the word
PRESS and move the height adjuster to the desired
position. You can move the adjuster up just by pushmg up
on the shoulder
belt guide. After you move the adjuster to
where you want it, try to move it down without pushing in
to make sure it has locked into position.
Adjust the height
so that the shoulder portion of the belt is
centered on your shoulder. The belt should be away from
your face and neck, but not falling
off your shoulder. 2-Door Utility and Suburban
1-42
Page 287 of 403
Downloaded from www.Manualslib.com manuals search engine Some driving conditions or climates may cause a brake
squeal when the brakes are first applied or lightly
applied. This does not mean something is wrong with
your brakes.
Free movement
of brake calipers and properly torqued
wheel nuts are necessary
to help prevent brake
pulsation. When tires are rotated, inspect brake calipers
for movement, brake pads for wear, and evenly torque
wheel nuts in the proper sequence to
GM specifications.
Your rear drum brakes don’t have wear indicators, but if
you ever hear a rear brake rubbing noise, have the rear
brake linings inspected. Also, the rear brake drums should
be removed and inspected each time the tires are removed
for rotation or changing. When you have the front brakes
replaced, have the rear brakes inspected, too.
Brake linings should always be replaced as complete
axle sets.
Brake Pedal Travel
See your dealer if the brake pedal does not return to
normal height, or
if there is a rapid increase in pedal
travel. This could be a sign of brake trouble.
Brake Adjustment
Every time you make a brake stop, your disc brakes
adjust for wear. If
your brake pedal goes down farther than normal, your
rear drum brakes may need adjustment. Adjust them by
backing up and firmly applying the brakes a few times.
Replacing Brake System Parts
The braking system on a modern vehicle is complex. Its
many parts have to be of top quality and work well
together if the vehicle is to have really good braking.
Vehicles we design and test have top-quality
GM brake
parts in them, as your vehicle does when it is new. When
you replace parts of your braking system
-- for example,
when your brake linings wear down and you have to
have new ones put in
-- be sure you get new genuine
GM replacement parts. If you don’t, your brakes may
no longer work properly. For example, if someone
puts in brake linings that are wrong for your vehicle,
the balance between your front and rear brakes can
change
-- for the worse. The braking performance
you’ve come to expect can change in many other ways if
someone puts in the wrong replacement brake parts.
Fluid Leak Check
After the vehicle has been parked for a while, inspect the
surface under the vehicle for water, oil, fuel or other fluids\
.
Water dripping from the air conditioning system after
it
has been used is normal. If you notice fuel leaks or fumes,
the causes should
be found and corrected at once.
6-34