Page 280 of 403
Downloaded from www.Manualslib.com manuals search engine Checking Coolant Adding Coolant
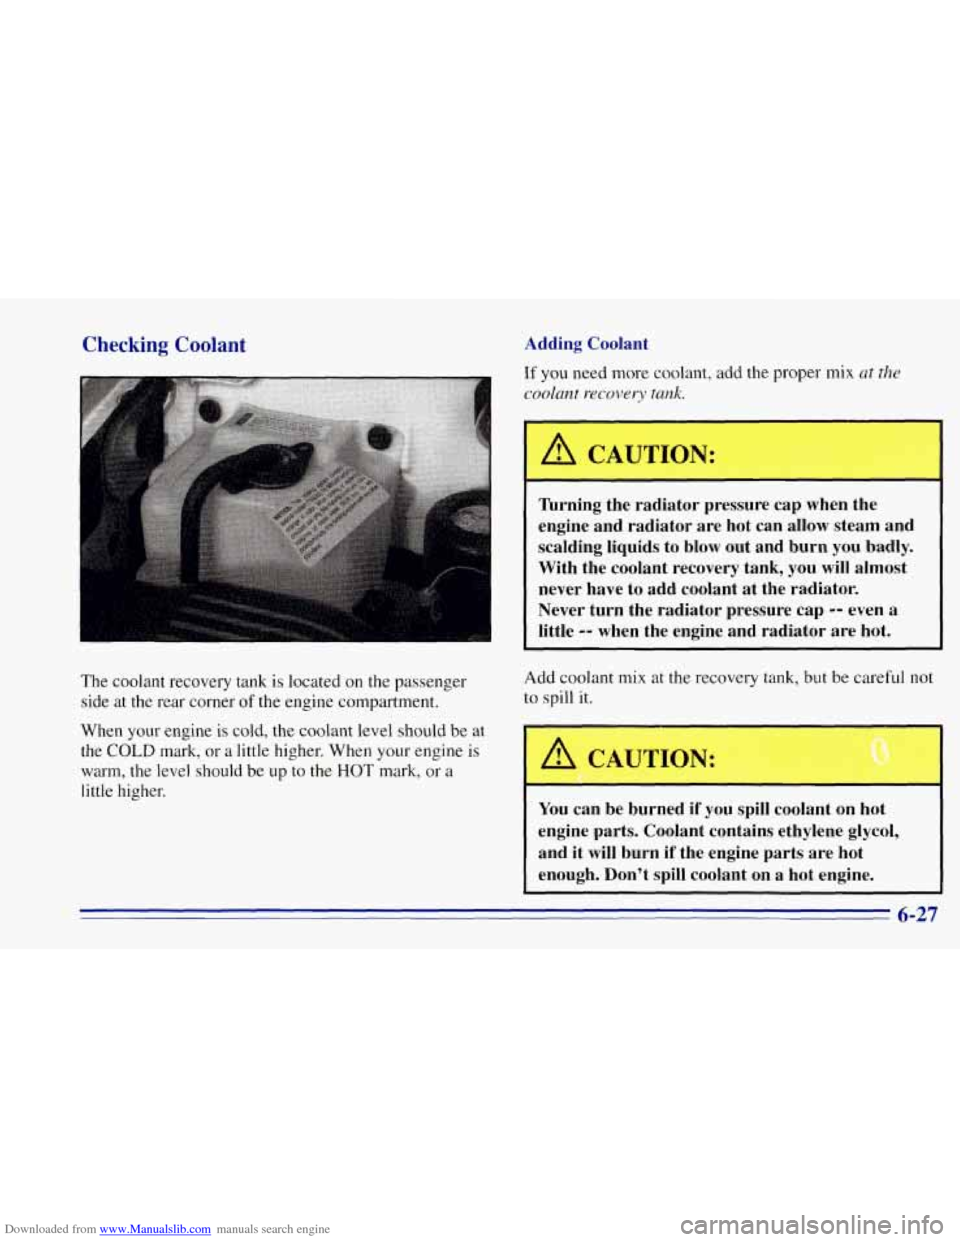
The coolant recovery tank is located on the passenger side at the rear corner
of the engine compartment.
When your engine
is cold, the coolant level should be at
the
COLD mark, or a little higher. When your engine is
warm, the level should be up to the HOT mark, or a
little higher.
If you need more coolant, add the proper mix at the
coolant
recovery tank.
A CAUTION:
' Turning the radiator pressure cap when the
engine and radiator are hot can allow steam and
scalding liquids to
blow out and burn you badly.
With the coolant recovery tank, you will almost
never have to add coolant at the radiator.
Never turn the radiator pressure cap
-- even a
~ little -- when the engine and radiator are hot.
Add coolant mix at the recovery tank, but be careful not
to spill
it.
AUTION: 0
You can be burned if you spill coolant on hot
engine parts. Coolant contains ethylene glycol,
and it will burn if the engine parts are hot
enough. Don't spill coolant on a hot engine.
6-27
Page 282 of 403
Downloaded from www.Manualslib.com manuals search engine Power Steering Fluid
When to Check Power Steering Fluid
It is not necessary to regularly check power steering
fluid unless you suspect there is a leak in the system or
you hear an unusual noise.
A fluid loss in this system
could indicate a problem. Have the system inspected
and repaired.
How To Check Power Steering Fluid
When the engine compartment is cool, unscrew the cap
and wipe the dipstick with a clean rag. Replace the cap
and completely tighten it. Then remove the cap again
and look at the fluid level
on the dipstick.
The level should
be at the FULL COLD mark. If
necessary, add only enough fluid to bring the level up to
the mark.
What to Use
Refer to the Maintenance Schedule to determine what
kind of fluid to use. See “Recommended Fluids and
Lubricants” in the Index. Always use the proper fluid.
Failure to use the proper fluid can cause leaks and
damage hoses and seals.
6-29
Page 284 of 403
Downloaded from www.Manualslib.com manuals search engine Brakes
Brake Fluid
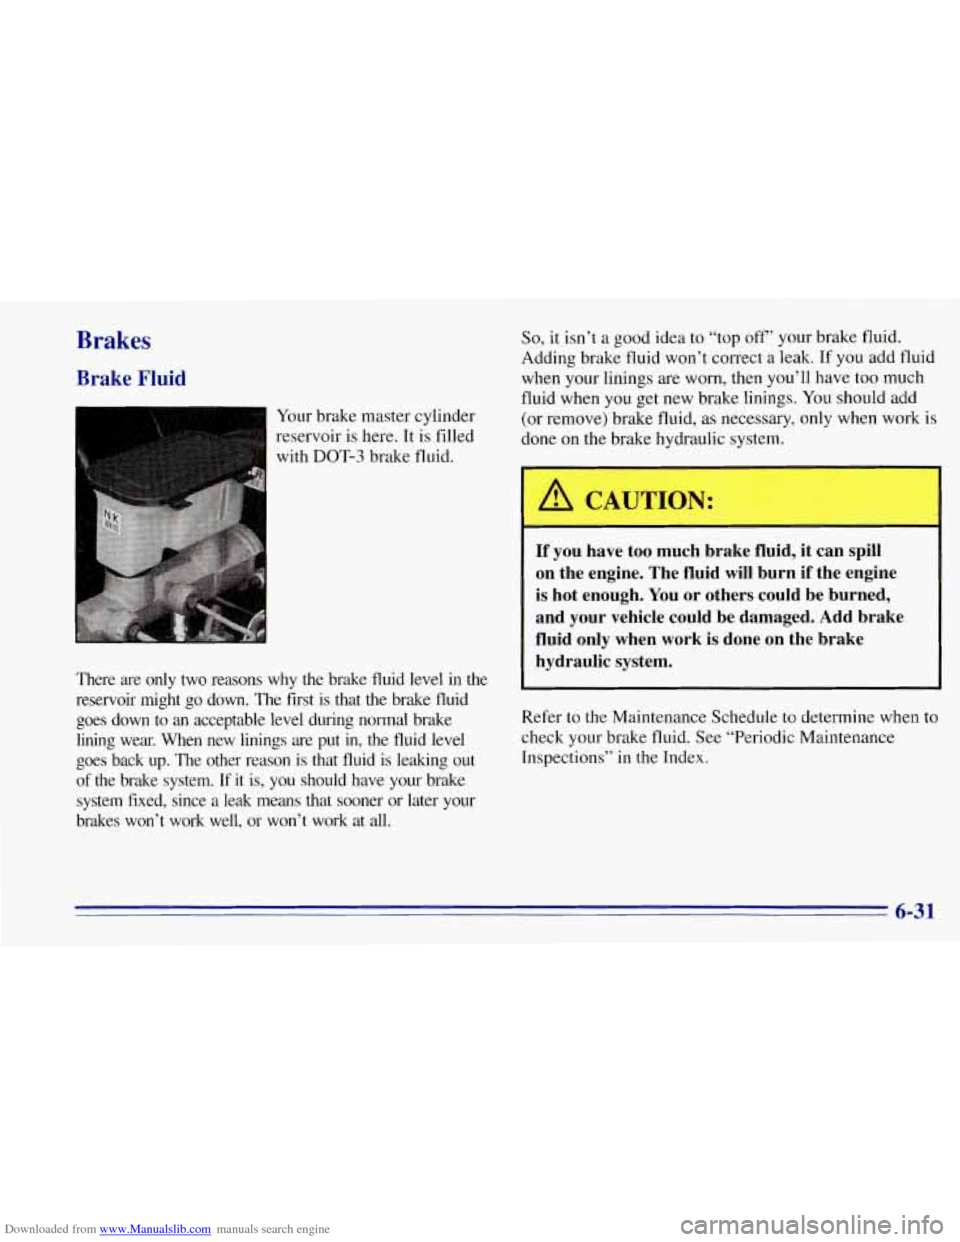
Your brake master cylinder
reservoir
is here. It is filled
with
DOT-3 brake fluid.
There are only two reasons why the brake fluid level in the
reservoir might go down. The first is that the brake fluid
goes down to an acceptable level during normal brake
lining wear. When new linings are put in, the fluid level
goes back up. The other reason is that fluid is leaking out
of the brake system. If
it is, you should have your brake
system fixed, since a leak means that sooner or later your
brakes won’t work well, or won’t work at all.
So, it isn’t a good idea to “top off’ your brake fluid.
Adding brake fluid won’t correct a leak. If you add fluid
when your linings are worn, then you’ll have
too much
fluid when you get new brake linings. You should add
(or remove) brake fluid, as necessary, only when work is
done on the brake hydraulic system.
-
-
If you have too much brake fluid, it can spill
on the engine. The fluid
will burn if the engine
is hot enough. You or others could be burned,
and your vehicle could be damaged. Add brake
fluid only when work is done
on the brake
hydraulic system.
Refer to the Maintenance Schedule to determine when to
check your brake fluid. See “Periodic Maintenance
Inspections” in the Index.
6-31
Page 285 of 403
Downloaded from www.Manualslib.com manuals search engine Checking Brake Flu: What
to Add
When you do need brake fluid, use only DOT-3 brake
fluid
-- such as Delco Supreme 11 @ (GM Part
No. 1052535). Use new brake fluid from a sealed
container only, and always clean the brake fluid
reservoir cap before removing
it.
A CAUTION:
With the wrong kind of fluid in your brake
system, your brakes may not work well, or they
may not even work at all. This could cause a crash. Always use the proper brake fluid.
You can check the brake fluid without taking off the cap.
Just look at the window
on the brake fluid reservoir. The
fluid level should be above MIN. If it isn’t, have your
brake system checked to see if there is a leak.
After work is done on the brake hydraulic system,
make sure
the level is above MIN and below the top
of the window.
6-32
Page 287 of 403
Downloaded from www.Manualslib.com manuals search engine Some driving conditions or climates may cause a brake
squeal when the brakes are first applied or lightly
applied. This does not mean something is wrong with
your brakes.
Free movement
of brake calipers and properly torqued
wheel nuts are necessary
to help prevent brake
pulsation. When tires are rotated, inspect brake calipers
for movement, brake pads for wear, and evenly torque
wheel nuts in the proper sequence to
GM specifications.
Your rear drum brakes don’t have wear indicators, but if
you ever hear a rear brake rubbing noise, have the rear
brake linings inspected. Also, the rear brake drums should
be removed and inspected each time the tires are removed
for rotation or changing. When you have the front brakes
replaced, have the rear brakes inspected, too.
Brake linings should always be replaced as complete
axle sets.
Brake Pedal Travel
See your dealer if the brake pedal does not return to
normal height, or
if there is a rapid increase in pedal
travel. This could be a sign of brake trouble.
Brake Adjustment
Every time you make a brake stop, your disc brakes
adjust for wear. If
your brake pedal goes down farther than normal, your
rear drum brakes may need adjustment. Adjust them by
backing up and firmly applying the brakes a few times.
Replacing Brake System Parts
The braking system on a modern vehicle is complex. Its
many parts have to be of top quality and work well
together if the vehicle is to have really good braking.
Vehicles we design and test have top-quality
GM brake
parts in them, as your vehicle does when it is new. When
you replace parts of your braking system
-- for example,
when your brake linings wear down and you have to
have new ones put in
-- be sure you get new genuine
GM replacement parts. If you don’t, your brakes may
no longer work properly. For example, if someone
puts in brake linings that are wrong for your vehicle,
the balance between your front and rear brakes can
change
-- for the worse. The braking performance
you’ve come to expect can change in many other ways if
someone puts in the wrong replacement brake parts.
Fluid Leak Check
After the vehicle has been parked for a while, inspect the
surface under the vehicle for water, oil, fuel or other fluids\
.
Water dripping from the air conditioning system after
it
has been used is normal. If you notice fuel leaks or fumes,
the causes should
be found and corrected at once.
6-34
Page 296 of 403
Downloaded from www.Manualslib.com manuals search engine Tires
We don’t make tires. Your new vehicle comes with
high-quality tires made by a leading tire manufacturer.
If you ever have questions about your tire warranty and
where to obtain service, see your
GM Warranty booklet
for details.
A CAUTION:
Poorly maintained and improperly used tires
are dangerous.
0 Overloading your tires can cause
overheating as a result of too much friction.
You could have an air-out and a serious
accident. See “Loading Your Vehicle” in
the Index.
CAUTION: (Continued) CAUTION:
(Continued)
0
0
0
Underinflated tires pose the same danger as
overloaded tires. The resulting accident
could cause serious injury. Check all tires
frequently to maintain the recommended
pressure. Tire pressure should be checked
when your tires are cold.
Overinflated tires are more likely to be
cut, punctured or broken by
a sudden
impact
-- such as when you hit a pothole.
Keep tires at the recommended pressure.
Worn, old tires can cause accidents.
If your
tread is badly worn, or if your tires have
been damaged, replace them.
6-43
Page 298 of 403
Downloaded from www.Manualslib.com manuals search engine When to Check
Check your tires once a month or more. Also, check the
tire pressure of the spare tire.
How to Check
Use a good quality pocket-type gage to check tire
pressure.
You can’t tell.if your tires are properly inflated
simply by looking at them. Radial tires may look
properly inflated even when they’re underinflated.
Be sure to put the valve caps back on the valve
stems. They help prevent leaks by keeping out dirt
and moisture.
Tire Inspection and Rotation
Tires should be inspected every 6,000 to 8,000 miles
(10
000 to 13 000 km) for any signs of unusual wear.
If unusual wear is present, rotate your tires as soon as
possible and check wheel alignment. Also check for
damaged tires or wheels. See “When It’s Time for New
Tires” and “Wheel Replacement” later in this section for
more information.
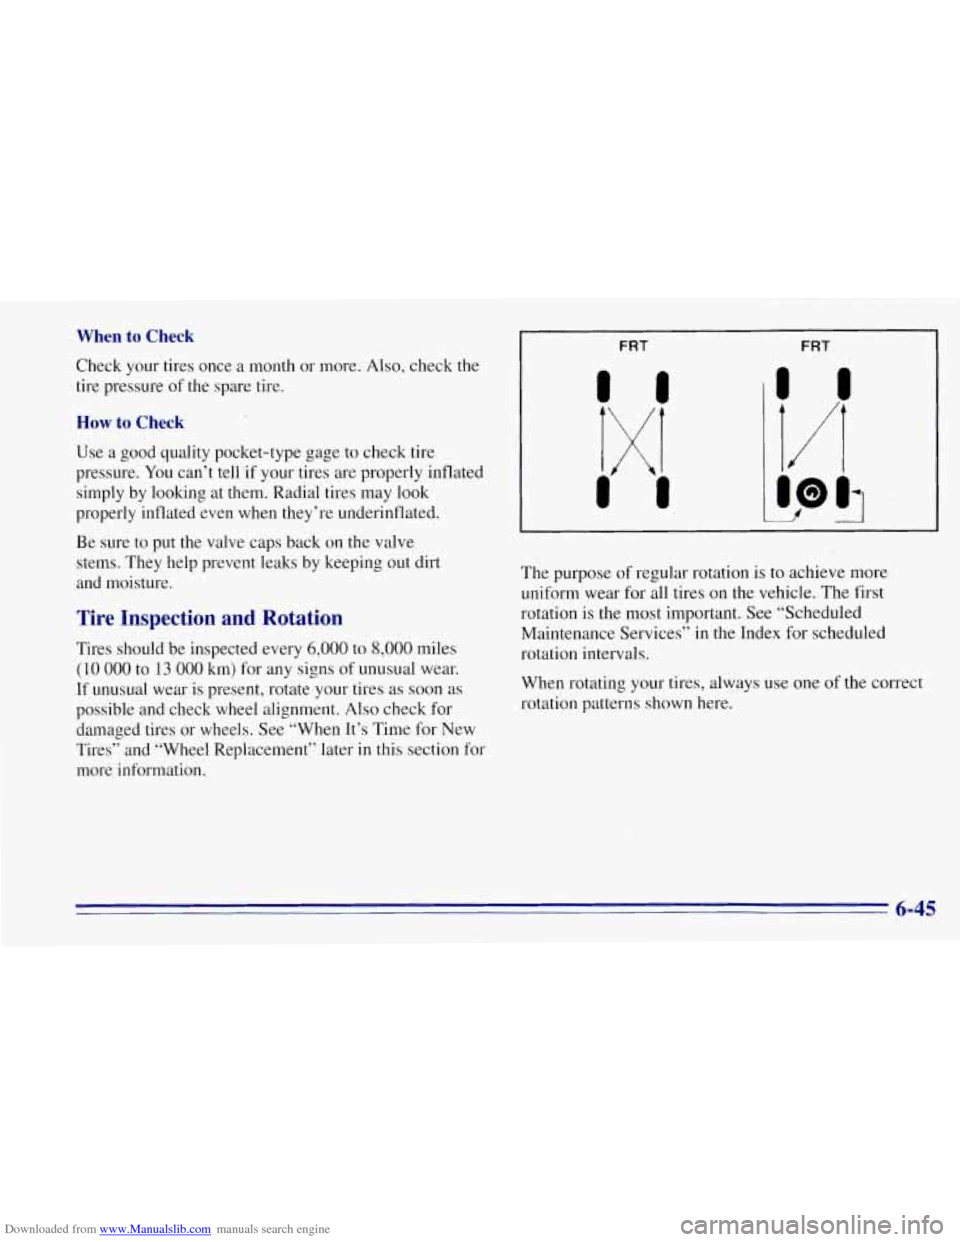
I FRT FRT
The purpose of regular rotation is to achieve more
uniform wear for all tires on the vehicle. The first
rotation
is the most important. See “Scheduled
Maintenance Services” in the Index for scheduled
rotation intervals.
When rotating your tires, always use one
of the correct
rotation patterns shown here.
6-45
Page 299 of 403
Downloaded from www.Manualslib.com manuals search engine After the tires have been rotated, adjust the front and rear inflation pressures as shown on the Certificatioflire label.
Make certain that all. wheel nuts are properly tightened. See “Wheel
Nut Torque” in the Index.
A
/! CAUTION:
Rust or dirt on a wheel, or on the parts to which
it is fastened, can make wheel nuts become
loose
after a time. The wheel could come off and cause
an accident. When you change a wheel, remove
any rust or dirt from places where the wheel
attaches
to the vehicle. In an emergency, you can
use
a cloth or a paper towel to do this; but be
sure to
use a scraper or wire brush later, if you
need to, to get all the rust or dirt
off. (See
“Changing a Flat Tire” in the Index.) When
It’s Time for New Tires
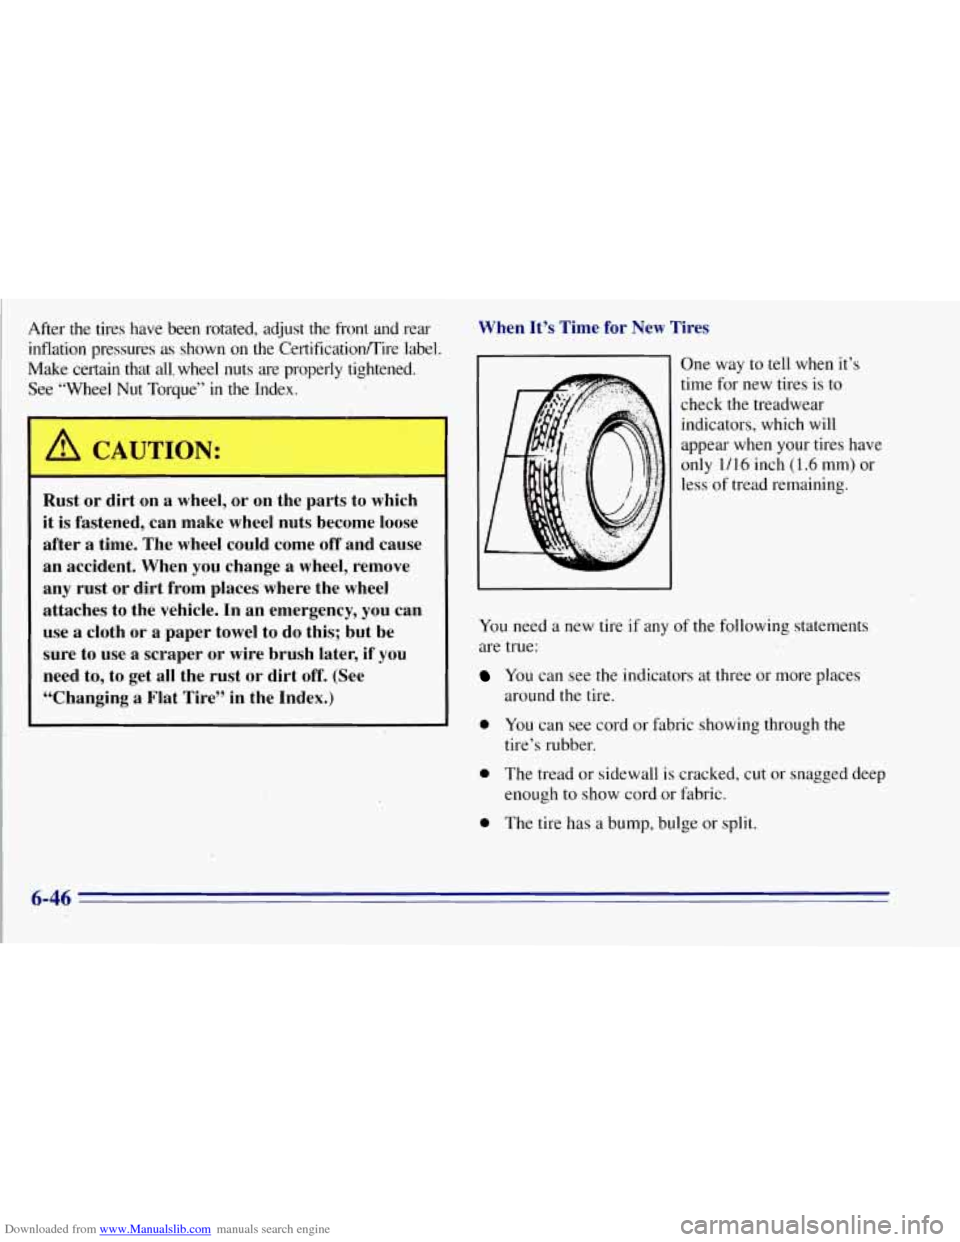
You need a new tire if any o
are true: One
way to
tell when it’s
time for new tires is
to
check the treadwear
indicators, which will
appear when your tires have
only
1/16 inch (1.6 mm) or
less of tread remaining.
f rh Ile following statements
You can see the indicators at three or more places
around the tire.
0 You can see cord or fabric showing through the
tire’s rubber.
0 The tread or sidewall is cracked, cut or snagged deep
enough to show cord or fabric.
0 The tire has a bump, bulge or split.
6-46