1996 CHEVROLET CAVALIER lock
[x] Cancel search: lockPage 291 of 372
Downloaded from www.Manualslib.com manuals search engine Electrical System
Add-on Electrical Equipment
NOTICE:
Don’t add anything electrical to your Chevrolet
unless you check with your dealer first. Some
electrical equipment can damage your vehicle and
the damage wouldn’t be covered by your warranty. Some add-on electrical equipment can keep other
components from working
as they should.
Your vehicle has an air bag system. Before attempting to
add anything electrical to your Chevrolet, see “Servicing
Your
Air Bag-Equipped Chevrolet” in the Index.
Headlamp Wiring
The headlamp wiring is protected by fuses. Should your
headlamps fail to function have your headlamp system
checked right away.
Windshield Wiper Fuse
The windshield wiper motor is protected by a circuit breaker
and a fuse.
If the motor overheats due to heavy snow, etc., the
wiper will stop until the moIor cools. If the overload is caused
by some electrical problem,
have it fixed.
Power Windows and Other Power Options
Circuit breakers in the fuse panel protect the power
windows and other power accessories. When the current
load is too heavy, the circuit breaker opens and closes,
protecting the circuit until the problem
is fixed.
Fuses and Circuit Breakers
The wiring circuits in your vehicle are protected from
short circuits by a combination of fuses, circuit breakers
and fusible thermal links. This greatly reduces the
chance of damage caused by electrical problems.
Look at the silver-colored band inside the fuse.
If the band
is broken or melted, replace the fuse. Be sure you replace
a bad fuse with a new one of the identical
size and rating.
If you ever have a problem on the road and don’t have a
spare fuse, you can borrow one that has the same
amperage. Just pick some feature of your vehicle that
you can get along without -- like the radio or cigarette
lighter
-- and use its fuse if it is the correct amperage.
Replace
it as soon as you can.
There are two fuse blocks in your vehicle: the
instrument panel fuse block and the engine compartment
fuse block.
6-53
Page 292 of 372
Downloaded from www.Manualslib.com manuals search engine Instrument Panel Fuse Block
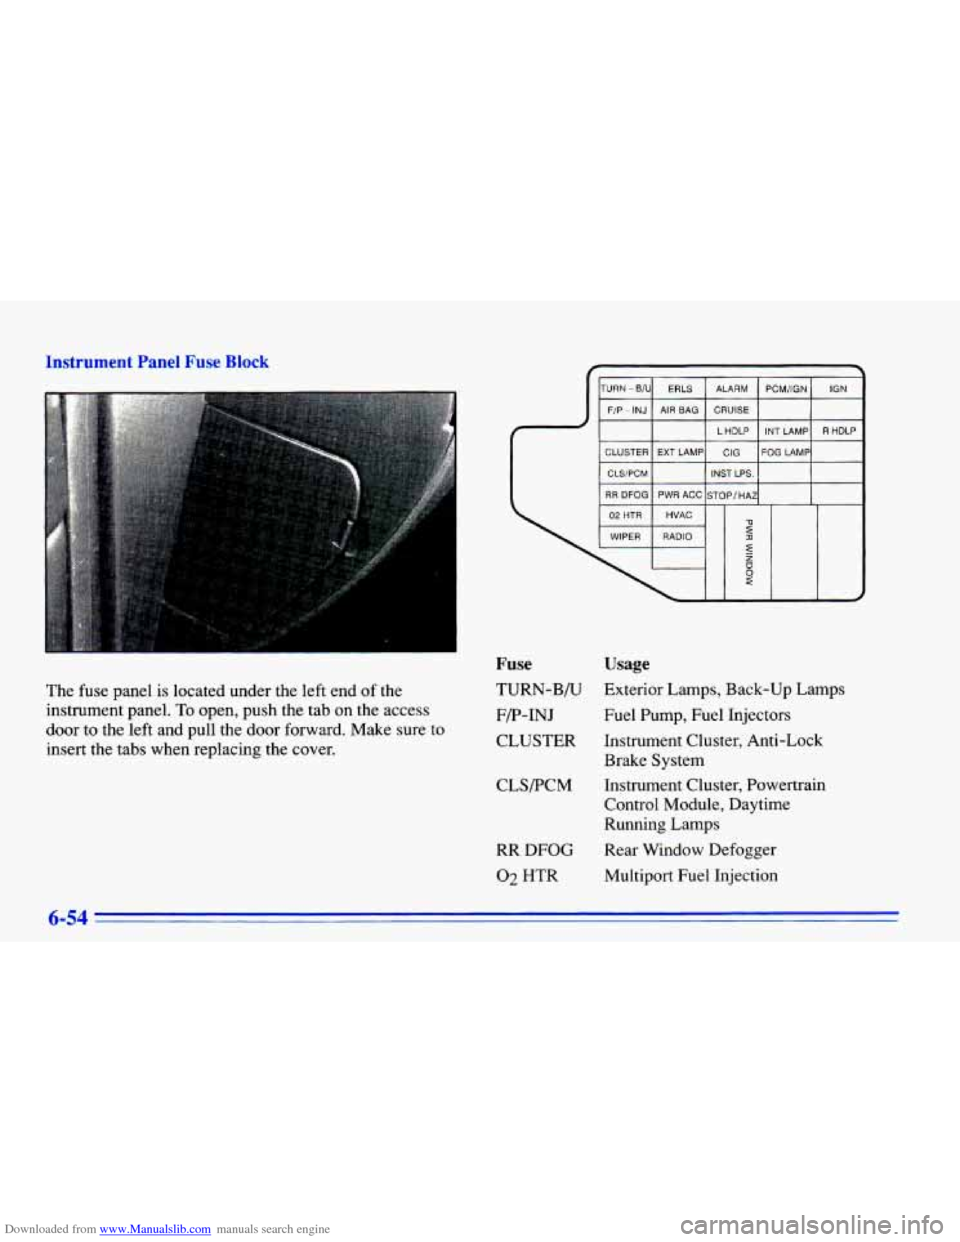
The fuse panel is located under the left end of the
instrument panel.
To open, push the tab on the access
door to the left and pull the door forward. Make sure
to
insert the tabs when replacing the cover.
TURN -B/U ERLS ALARM PCM/IGN IGN
F/P - INJ AIR BAG CRUISE
Fuse Usage
TURN-B/U Exterior Lamps, Back-up Lamps
F/P-INJ Fuel Pump,
Fuel Injectors
CLUSTER Instrument Cluster, Anti-Lock Brake System
CLS/PCM
RR
DFOG
02 HTR Instrument Cluster, Powertrain
Control Module, Daytime
Running Lamps
Rear Window Defogger Multiport Fuel Injection
6-54
Page 293 of 372
Downloaded from www.Manualslib.com manuals search engine Fuse Usage
WIPER Windshield Wipers, Windshield Washers
ERLS Automatic Transaxle,
Brake-Transaxle Shift Interlock,
A/C Compressor, Cruise Control, Multiport Fuel Injection
AIR BAG Supplemental Inflatable Restraint
EXT LAMP Exterior Lamps, Instrument Panel
PWR ACC Power Door Locks, Convertible System
Lights
Top (Convertible Model)
HVAC
RADIO ALARM
CRUISE Heater and
A/C Control,
Anti-Lock Brake System, Engine Cooling Fan (2.2L Engine),
Engine Vent Heater
(2.4L Engine)
Radio, Remote Keyless Entry
Alarm Module
- Interior Lamps,
Warning Chimes
Cruise Control
Fuse
L HDLP
CIG
INST LPS
STOP/HAZ
PWR
WINDOW
PCM/IGN
INT LAMP
FOG LAMP
IGN
R HDLP
Usage
Left Headlamp
Cigarette Lighter,
Horn, Interior
Lamps, Diagnostic Connector
Instrument Panel Lights, Warning Chimes
Exterior Lamps, Anti-Lock Brake
System, Cruise Control
Power Windows, Power
Sunroof,
Convertible Top Controls (Convertible Model) (Circuit
Breaker)
Powertrain Control Module
Alarm Module: Illuminated Entry,
Warning Chimes, Overhead
Lamps, Mapmeading Lamps,
Glove Box Lamp,
Trunk Lamp,
Radio, Power Mirrors, Remote
Keyless Entry
Fog Lamps (2-24 Only)
Engine Ignition
Right Headlamp
6-55
Page 294 of 372
Downloaded from www.Manualslib.com manuals search engine Engine Compartment Fuse Block
J
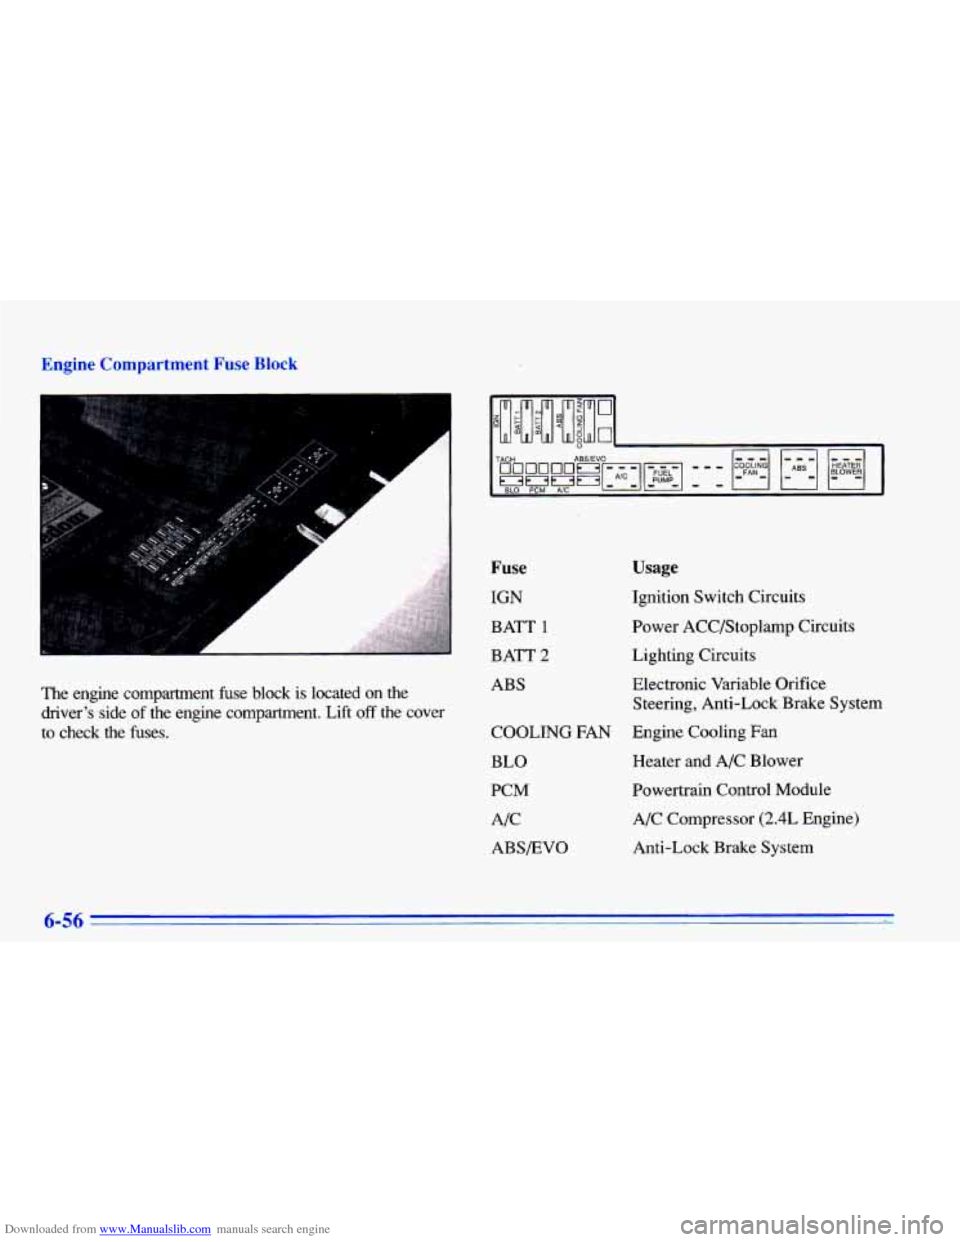
The engine compartment fuse block is located on the
driver’s side of the engine compartment. Lift off the cover
to check the fuses.
Fuse
IGN
BATT
1
BATT 2
ABS
Usage
Ignition Switch Circuits
Power ACC/Stoplamp Circuits Lighting Circuits
Electronic Variable Orifice
Steering, Anti-Lock Brake System
COOLING
FAN Engine Cooling Fan
BLO Heater and A/C Blower
PCM Powertrain Control Module
A/C A/C Compressor
(2.4L Engine)
ABS/EVO Anti-Lock Brake System
6-56
Page 337 of 372
Downloaded from www.Manualslib.com manuals search engine Manual Transaxle Check
Check the transaxle fluid level; add if needed. See
“Manual Transaxle” in the Index. A fluid loss may
indicate
a problem. Check the system and repair if needed.
At Least Once a Year
Automatic TLansaxle Check (Except 2.4L Code
T Engine)
Check the transaxle fluid level; add if needed. See
“Automatic Transaxle”
in the Index. A fluid loss may
indicate
a problem. Check the system and repair if needed.
Automatic Transaxle Inspection (2.4L Code
T Engine Only)
If you have the optional 2.4L Code T engine (see “Engine
Identification”
in the Index) and an automatic transaxle, it is
not necessary to check the transaxle fluid level.
A transaxle
fluid leak is the only reason for fluid loss. Check for leaks\
.
If a
leak occurs,
take the vehicle to your Chevrolet dealership
Service Department and have it repaired
as soon as possible.
You may
also have your fluid checked by your dealer or
service center when you have your engine
oil changed.
HyG lulic Clutch System Check
Check the fluid level in the clutch reservoir. See
“Hydraulic Clutch Fluid” in the Index.
A fluid loss in
this system could indicate a problem. Have the system
inspected and repaired at once.
Key Lock Cylinders Service
Lubricate the key lock cylinders with the lubricant
specified
in Part D.
Body Lubrication Service
Lubricate all body door and rear compartment hinges. Also lubricate all hinges and latches, including those for
the primary and secondary hood latches, glove box door,
console door and any folding seat hardware.
Part D tells
you what to use. More frequent lubrication may be
required when exposed to a corrosive environment.
Starter Switch Check
I A CAUTION:
When you are doing this check, the vehicle could
move suddenly.
If it does, you or others could be
injured. Follow the steps below.
1. Before you start, be sure you have enough room
around the vehicle.
Page 338 of 372
Downloaded from www.Manualslib.com manuals search engine 2. Firmly apply both the parking brake (see “Parking
Brake” in the Index
if necessary) and the regular brake.
NOTE: Do not use the accelerator pedal, and be
ready to turn off the engine immediately if it starts.
3. On automatic transaxle vehicles, try to start the
engine in each gear. The starter should work only in
PARK
(P) or NEUTRAL (N). If the starter works in
any other position, your vehicle needs service.
On manual transaxle vehicles, put the shift lever in
NEUTRAL
(N), push the clutch down halfway and
try to start the engine. The starter should work only
when the clutch is pushed down all the way to the
floor. If the starter works when the clutch isn’t
pushed all the way down, your vehicle needs service.
Brake-Tkansaxle Shift Interlock (BTSI) Check
(Automatic Transaxle)
When
you are doing this check, the vehicle could
move suddenly. If it does, you or others could be
injured. Follow the steps below.
1. Before you start, be sure you have enough room around
the vehicle. It should be parked
on a level surface.
2. Firmly apply the parking brake (see “Parking Brake”
in the Index if necessary).
NOTE: Be ready to apply the regular brake
immediately
if the vehicle begins to move.
3. With the engine off, turn the key to the RUN position,
but don’t start the engine. Without applying the regular
brake,
try to move the shift lever out of PARK (P)
with normal effort. If the shift lever moves out of
PARK (P), your vehicle’s BTSI needs service.
Steering Column Lock Check
While parked, and with the parking brake set, try to turn
the key to LOCK in each shift lever position.
‘With an automatic transaxle, the key should turn to
LOCK only when the shift lever is in PARK
(P).
With a manual transaxle, the key should turn to LOCK
only when the shift lever is
in REVERSE (R).
On vehicles with a key release button, try to turn the key
to LOCK without pressing the button. The key should
turn to LOCK only when you press the key button.
On all vehicles, the key should come out only in LOCK.
I
- -
I Turn the steering wheel to the left and to the right. It
should only lock when turned to the right.
7-40
Page 341 of 372
Downloaded from www.Manualslib.com manuals search engine Part D: Recommended Fluids and
Lubricants
NOTE: Fluids and lubricants identified below by name,
part number or specification may be obtained from your
SM dealer.
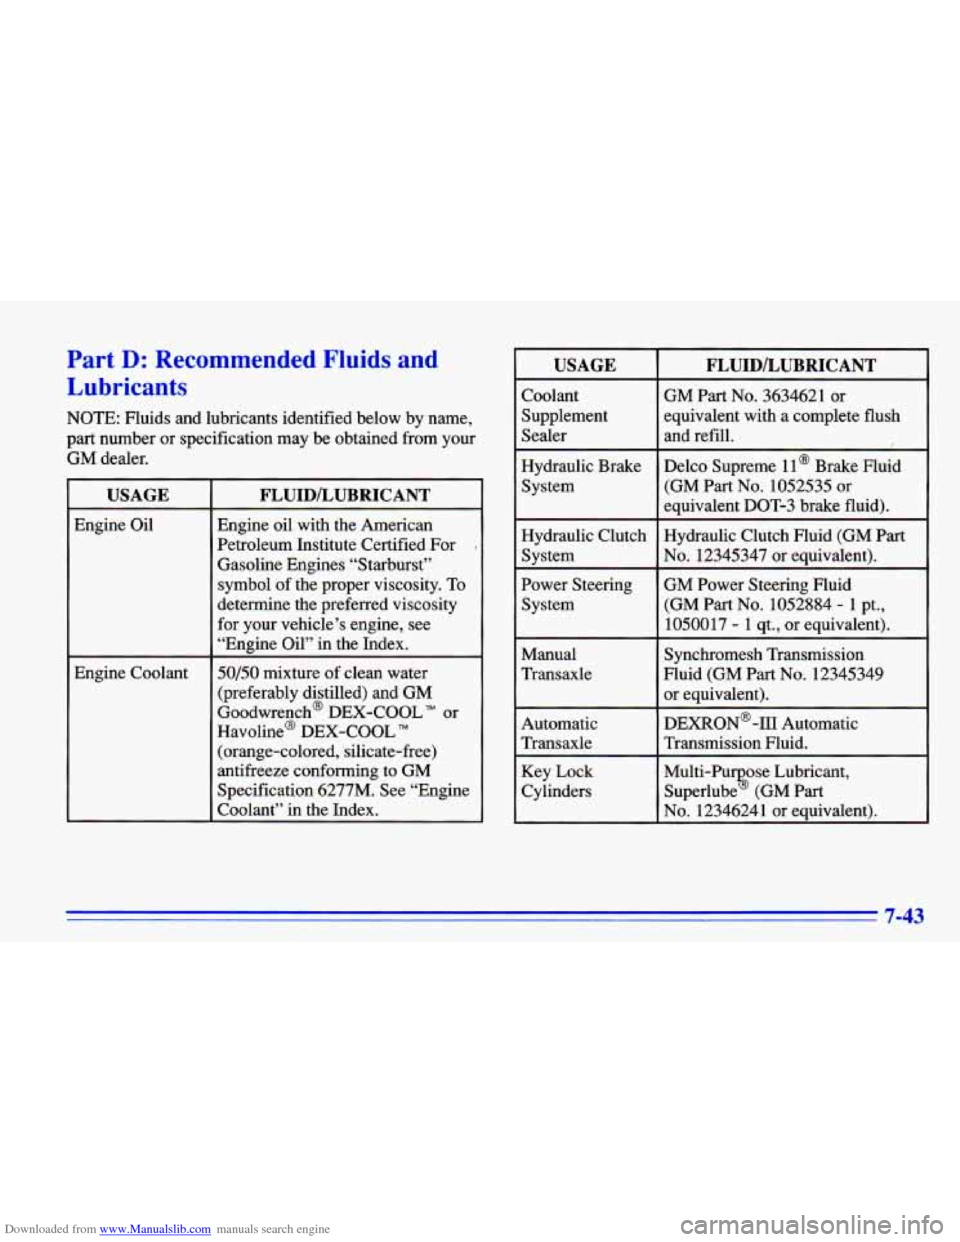
USAGE
Engine Oil
Engine Coolant
FLUID/LUBRICANT
Engine oil with the American
Petroleum Institute Certified For
Gasoline Engines “Starburst” symbol of the proper viscosity.
To
determine the preferred viscosity
for your vehicle’s engine, see
“Engine Oil” in the Index.
50/50 mixture of clean water
(preferably distilled) and GM
Goodwrench@ DEX-COOL
TM or
Havoline@ DEX-COOL TM
(orange-colored, silicate-free)
antifreeze conforming to GM
Specification 6277M. See “Engine
Coolant’’ in the Index.
USAGE
Coolant
Supplement
Sealer
Hydraulic Brake
System
Hydraulic Clutch System
Power Steering System
Manual
Transaxle
Automatic
Transaxle
Key Lock
Cylinders
FLUIDlLUBRICANT
GM Part No. 3634621 or
equivalent with a complete flush
and refill.
Delco Supreme
ll@ Brake Fluid
(GM
Part No. 1052535 or
equivalent DOT-3 brake fluid).
Hydraulic Clutch Fluid (GM Part
No. 12345347 or equivalent).
GM Power Steering Fluid
1050017
- 1 qt., or equivalent).
Synchromesh Transmission
Fluid (GM Part
No. 12345349
or equivalent).
DEXRON@ -111 Automatic
Transmission Fluid.
Multi-Pu ose Lubricant,
Superlube
% (GM Part
No. 1234624 1 or equivalent).
(GM Part
NO. 1052884 - 1
Pt.,
Page 350 of 372
Downloaded from www.Manualslib.com manuals search engine Chevrolet Roadside Assistance Program
To enhance Chevrolet’s strong commitment to customer
satisfaction, Chevrolet is excited to announce the
establishment
of the Chevrolet/Geo Roadside Assistance
Center. As the owner
of a 1996 Chevrolet/Geo,
membership in Roadside Assistance is free. Roadside Assistance is available 24 hours a day,
365 days a year, by calling
1-800-CHEV-USA
(1-800-243-8872). This toll-free number will provide
you over-the-phone roadside assistance with minor
mechanical problems. If your problem cannot be
resolved over the phone, our advisors have access to a
nationwide network
of dealer recommended service
providers. Roadside membership is free, however some
services may incur costs.
Roadside offers two levels of service to the customer,
Basic Care and Courtesy TM Care:
Toll-free number, 1 -800-CHEV-USA
0 Free towing for warranty repairs
0 Basic over-the-phone technical advice
Available dealer services at reasonable costs (ie.,
wrecker services, locksmith/key service, glass repair,
etc.)
ROADSIDE
Courtesy TM Care PROVIDES:
Roadside Basic Care services (as outlined above)
0 FREE Non-Warranty Towing (to the closest dealer
Plus:
from a legal roadway)
8-4