1996 CHEVROLET ASTRO clock
[x] Cancel search: clockPage 72 of 372
To release the hatch using the optional Keyless Entry
hand-held transmitter, see “Keyless Entry System”
in
the Index.
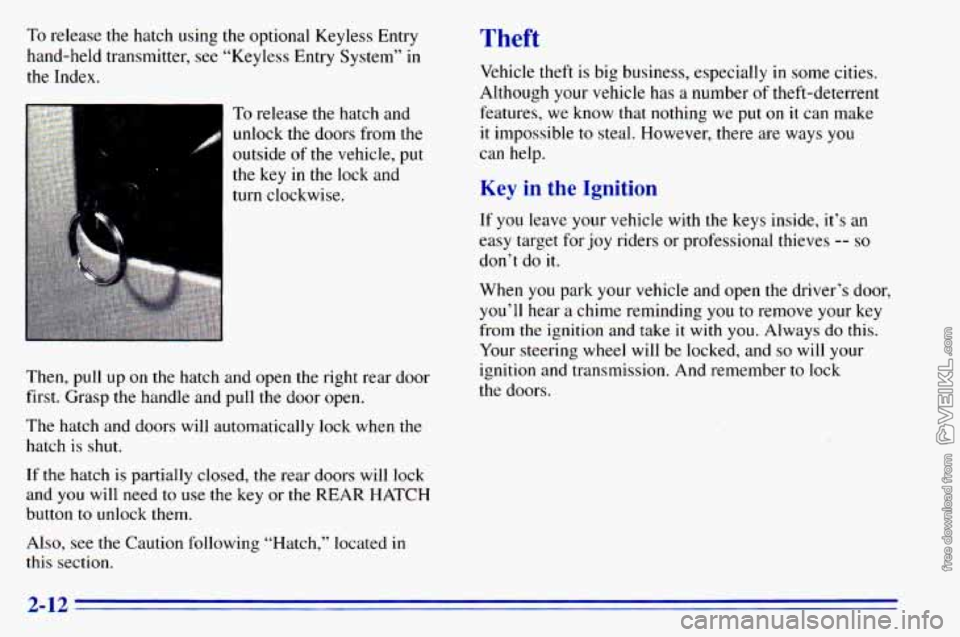
To release the hatch and unlock the doors from the
outside
of the vehicle, put
the key in the lock and
turn clockwise.
Then, pull up
on the hatch and open the right rear door
first. Grasp the handle and pull the door open.
The hatch and doors will automatically lock when the
hatch is shut.
If
the hatch is partially closed, the rear doors will lock
and you will need to use the key or the REAR HATCH
button to unlock them.
Also, see the Caution following “Hatch,” located in
this section.
Theft
Vehicle theft is big business, especially in some cities.
Although your vehicle has a number
of theft-deterrent
features, we know
that nothing we put on it can make
it impossible
to steal. However, there are ways you
can help.
Key in the Ignition
If you leave your vehicle with the keys inside, it’s an
easy target for joy riders or professional thieves
-- so
don’t do it.
When you park your vehicle and open the driver’s door,
you’ll hear a chime reminding
you to remove your key
from the ignition and take
it with you. Always do this.
Your steering wheel will be locked, and
so will your
ignition and transmission. And remember to lock
the doors.
2-12
Page 126 of 372
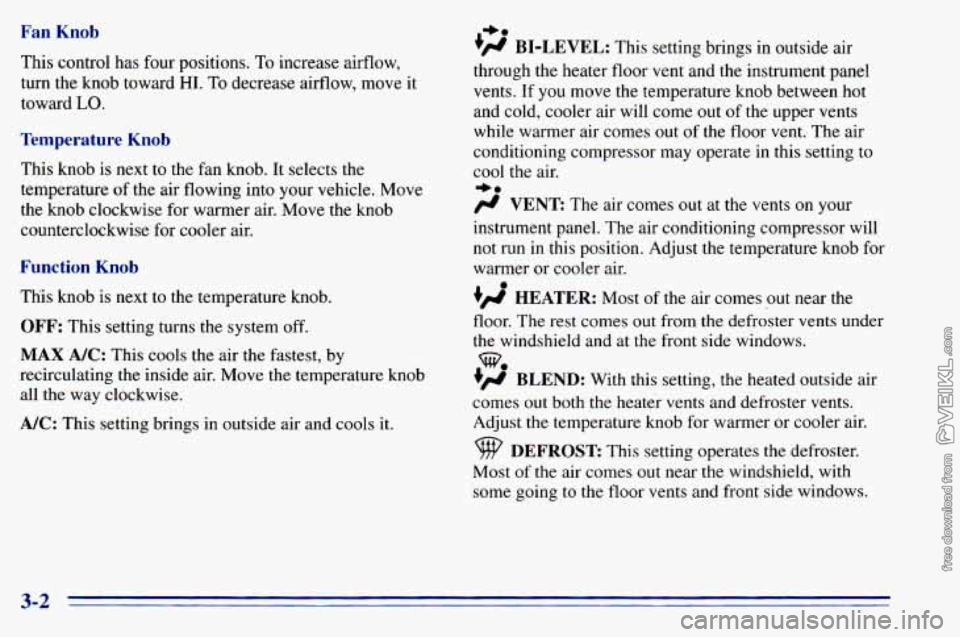
Fan Knob
This control has four positions. To increase airflow,
turn the knob toward
HI. To decrease airflow, move it
toward
LO.
Temperature Knob
This knob is next to the fan knob. It selects the
temperature
of the air flowing into your vehicle. Move
the knob clockwise for warmer air. Move the knob
counterclockwise for cooler
air.
Function Knob
This knob is next to the temperature knob.
OFF: This setting turns the system off.
MAX A/C: This cools the air the fastest, by
recirculating the inside air. Move the temperature knob
all the way clockwise.
A/C: This setting brings in outside air and cools it.
I,.
+fl BI-LEVEL: This setting brings in outside air
through the heater floor vent and the instrument panel
vents.
If you move the temperature knob between hot
and cold, cooler air will come out
of the upper vents
while warmer air comes out of the floor vent. The air
conditioning compressor may operate in this setting to
cool the air.
+.
/J VENT The ax comes out at the vents on your
instrument panel. The air conditioning compressor will
not run in this position. Adjust the temperature knob for
warmer or cooler air.
+’ HEATER: Most of the air comes out near the
floor. The rest comes out from the defroster vents under
the windshield and at the front side windows.
+’ BLEND: With this setting, the heated outside air
comes
out both the heater vents and defroster vents.
Adjust the temperature knob for warmer or cooler air.
Most
of the air comes out near the windshield, with
some going
to the floor vents and front side windows.
we
DEFROST This setting operates the defroster.
3-2
Page 127 of 372
Heating System Function Knob
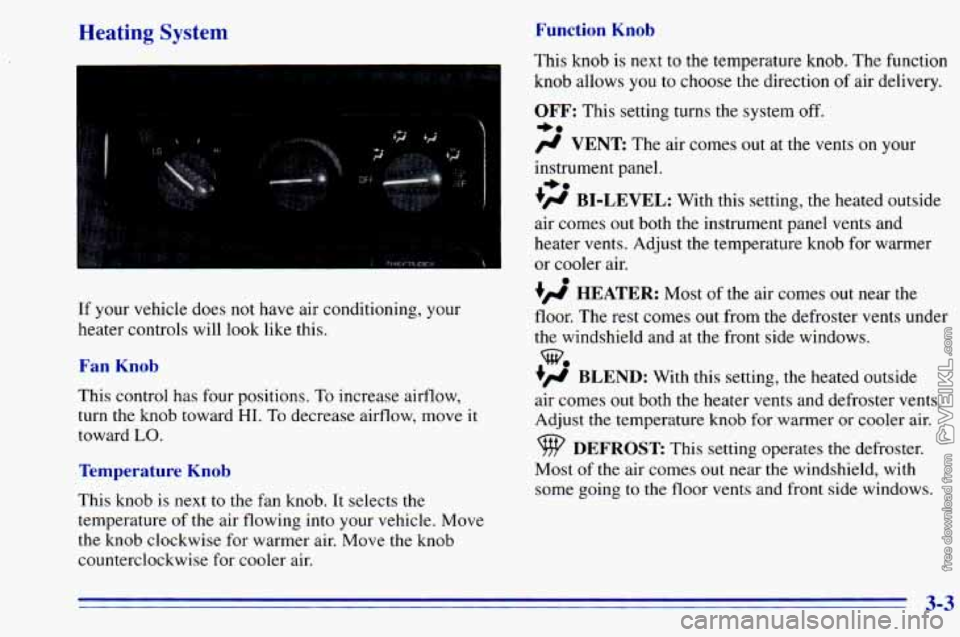
If your vehicle does not have air conditioning, your
heater controls will look like this.
Fan Knob
This control has four positions, To increase airflow,
turn the knob toward
HI. To decrease airflow, move it
toward
LO.
Temperature Knob
This knob is next to the fan knob. It selects the
temperature
of the air flowing into your vehicle. Move
the knob clockwise for warmer air. Move
the knob
counterclockwise for cooler air. This
knob is next to the temperature knob. The function
knob allows
you to choose the direction of air delivery.
OFF: This setting turns the system off.
-a
# VENT The air comes out at the vents on y r
instrument panel.
+# BI-LEVEL: With this setting, the heated outside
air comes out both the instrument panel vents and
heater vents. Adjust the temperature knob for warmer
or cooler air.
+’, HEATER: Most of the air comes out near the
floor. The rest comes out from the defroster vents under
the windshield and at the front side windows.
+’, BLEND: With this setting, the heated outside
air comes
out both the heater vents and defroster vents.
Adjust
the temperature knob for warmer or cooler air.
+.
%
DEFROST This setting operates the defroster.
Most
of the air comes out near the windshield, with
some going to the floor vents and front side windows.
3-3
Page 132 of 372

You can turn the defogger off at any time by pressing
the button again. The defogger will shut itself off after
several minutes
so that the elass does not eet too hot. If
Setting the Clock for AM-FM Stereo and
AM-FM Stereo with Cassette Tape Player
U
the window still isn’t clear, turn the defogger on again. Press SET. Within
five seconds, press and hold the
SEEK right arrow until the correct minute appears on
the display. Press and hold
the SEEK left arrow until the
0 ~~
NOTICE: correct hour appears on the display.
L
Setting the Clock for AM-FM Stereo with
Compact
Disc Player
Scraping the inside of your rear window could
cut and damage the defogger. Your warranty
would not cover this damage. And don’t put
Press and hold HR until the correct hour appears on the
decals there, you might have to scrape them off. display. Press and hold MIN until the correct minute
appears on the display.
To display the clock with the
ignition
off, press RECALL and the time will be displayed
before the clock goes into the time-set mode.
Audio Systems for a few seconds. There is an initial two-second delay
Your Delco@ audio system has been designed to operate
easily and give years of listening pleasure. You will get
the most enjoyment out of
it if you acquaint yourself
with it first. Find out
what your Delco system can do
and how to operate all its controls, to be sure you’re
getting the most out of the advanced engineering that
went into
it.
3-8
Page 133 of 372
II AM-FM Stereo
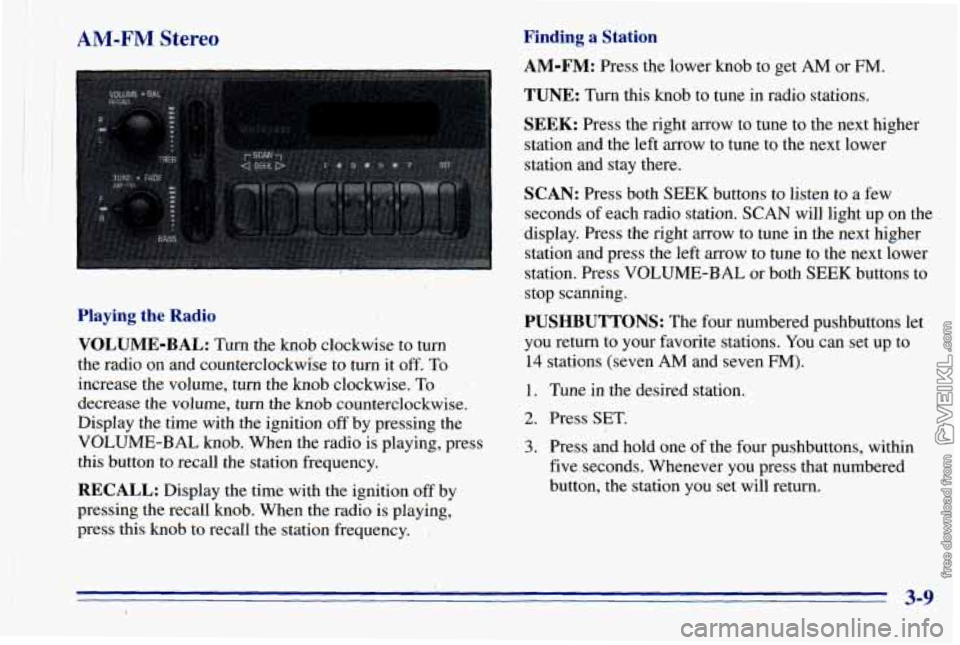
Playing the Radio
VOLUME-BAL:
Turn the knob clockwise to turn
the radio on and counterclockwise to turn it
off. To
increase the volume, turn the knob clockwise.
To
decrease the volume, turn the knob counterclockwise.
Display the time
with the ignition off by pressing the
VOLUME-BAL knob. When the radio is playing, press
this button to recall the station frequency.
RECALL: Display the time with the ignition off by
pressing the recall knob. When the radio is playing,.
press this knob to recall the station frequency.
Finding a Station
AM-FM: Press the lower knob to get AM or FM.
TUNE: Turn this knob to tune in radio stations.
SEEK: Press the right arrow to. tune to the next higher
station and the left arrow to tune to the next lower
station and stay there.
SCAN: Press both SEEK buttons to listen to a few
seconds of each radio station. SCAN will light up on the
display. Press the right mow to tune in
the next higher
station
and press the left arrow to tune to the next lower
station. Press VOLUME-BAL or both SEE-K buttons to
stop scanning.
PUSHBUTTONS: The four numbered pushbuttons let
you return to your favorite stations. You can set up to
14 stations (seven AM and seven FM).
1. Tune in the desired station.
2. Press SET,
3. Press and hold one of the four pushbuttons, within
five seconds. Whenever you press that numbered
button, the station you set will return.
3-9
Page 134 of 372

In addition to the four stations set as above, up to
three additional stations may be preset on each band by
pressing two adjoining buttons at the same time. Just: AM-FM Stereo with Cassette Tape Player
(Option)
1. Tune in the desired station.
2. Press SET.
3. Press two adjoining buttons at the same time,
within five seconds. Whenever you press
the same
two buttons, the station you set will return.
4. Repeat these steps for each pair of buttons.
Setting the Tone
BASS:
Slide this lever up to increase the bass.
TREB: Slide this lever up to increase the treble.
Slide the lever down to reduce noise with a weak or
noisy station.
Adjusting the Speakers
BAL:
The control behind the VOLUME-BAL knob
balances the sound between the right and
left speakers.
FADE: The control behind the TUNE knob fades the
sound between the front and rear speakers.
Playing the Radio
VOLUME-BAL:
Turn the knob clockwise to turn the
radio on and counterclockwise to turn it off.
To increase
the volume, turn the knob clockwise. To decrease the
volume, turn the knob counterclockwise.
RECALL: Display the time with the ignition off by
pressing the RECALL knob. When the radio is playing,
press this button
to recall the station frequency.
3-10
Page 136 of 372
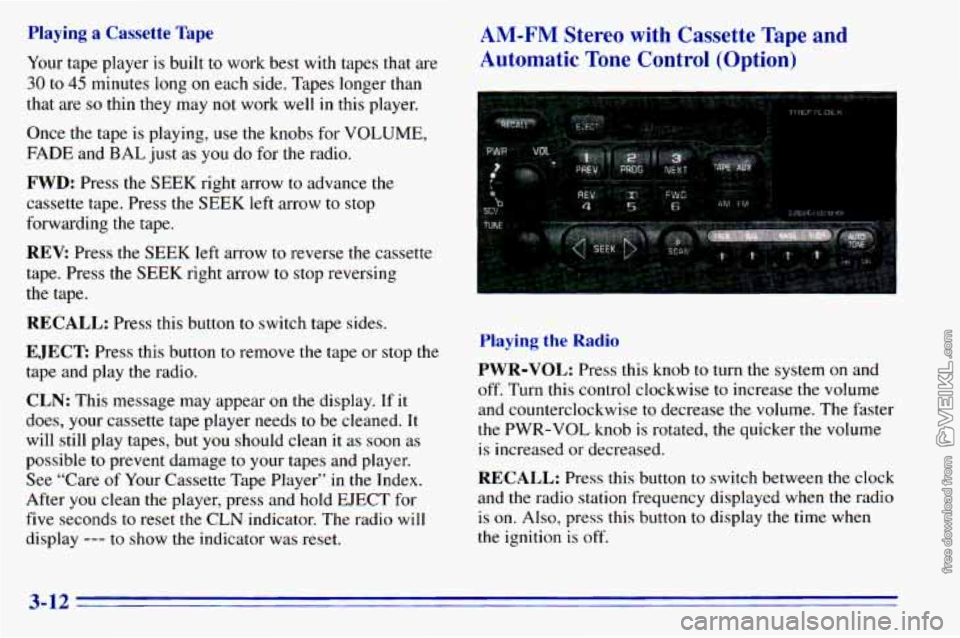
Playing a Cassette Tape
Your tape player is built to work best with tapes that are
30 to 45 minutes long on each side. Tapes longer than
that are
so thin they may not work well in this player.
Once the tape is playing, use the knobs for VOLUME,
FADE and
BAL just as you do for the radio.
FWD: Press the SEEK right arrow to advance the
cassette tape. Press the SEEK left arrow to stop
forwarding the tape.
REV: Press the SEEK left arrow to reverse the cassette
tape. Press the SEEK right arrow
to stop reversing
the tape.
RECALL: Press this button to switch tape sides.
EJECT Press this button to remove the tape or stop the
tape and play the radio.
CLN: This message may appear on the display. If it
does, your cassette tape player needs to be cleaned. It
will still play tapes, but
you should clean it as soon as
possible to prevent damage
to your tapes and player.
See “Care of Your Cassette Tape Player” in the Index.
After you clean the player, press and hold EJECT for
five seconds
to reset the CLN indicator. The radio will
display
--- to show the indicator was reset.
AM-FM Stereo with Cassette Tape and
Automatic Tone Control (Option)
Playing the Radio
PWR-VOL:
Press this knob to turn the system on and
off. Turn this control clockwise to increase the volume
and counterclockwise to decrease the volume. The faster
the PWR-VOL knob is rotated,
the quicker the volume
is increased or decreased.
RECALL: Press this button to switch between the clock
and the radio station frequency displayed when the radio
is on. Also, press
this button to display the time when
the ignition is
off.
3-12
Page 137 of 372

SCV: This is the Speed-Compensated-Volume (SCV)
knob. Move the control ring behind the PWR-VOL knob
clockwise to adjust the SCV. Set
the volume at the
desired level. As you dnve, the SCV automatically
increases the volume, as necessary, to overcome road and
wind noise at any particular speed. The volume should
always sound the same. Each clockwise position on the
control ring allows for more compensation
at a faster rate.
Finding a Station
AM-FM:
Press this button to switch between AM, FMl
and FM2. The display will show your selection.
TUNE: Press lightly on this knob to release it from its
stored position. Rotate the knob clockwise to increase
frequency and counterclockwise to decrease frequency.
When finished tuning, press the knob again
to return it
to its stored position.
SEEK: Press the right arrow to tune to the next higher
station and the left arrow to tune to the next lower station \
and stay there. The sound will mute
while seeking.
SCAN: Press and hold SEEK for two seconds until
SCAN appears on the display. SCAN allows you to
listen to stations for a few seconds. The receiver will
continue to scan and momentarily stop at each station
until you press the button again. The sound will mute
while scanning.
AUTO TONE: Press this button to select among the
five preset equalization settings and tailor the sound to
the music
or voice being heard. Each time you press
the button, the selection
will switch to one of the preset
settings of CLASSIC,
NEWS, ROCK, POP or JAZZ. To
return to the manual mode, press and release this button
until MAN appears on the display. This will return the
tone adjustment to the TREB and BASS controls. If a
TREB or BASS control is rotated, the AUTO TONE
setting will change to MAN.
PUSHBUTTONS: The six numbered pushbuttons let
you return to your favorite stations. You can set up to
18 stations (six AM, six FMl and six FM2).
1. Press AM-FM to select the band.
2. Tune in the desired station by pressing TUNE or the
3. Press AUTO TONE to select the setting you prefer.
4. Press and hold one of the six pushbuttons.
SEEK
left or right arrows.
5. The sound will mute. When it returns, release the
button. Whenever you press that numbered button, the station you set will return and the tone you selected
will be automatically selected for that button.
3-13