1996 CADILLAC SEVILLE reset
[x] Cancel search: resetPage 146 of 354
Downloaded from www.Manualslib.com manuals search engine Oil Life Indicator
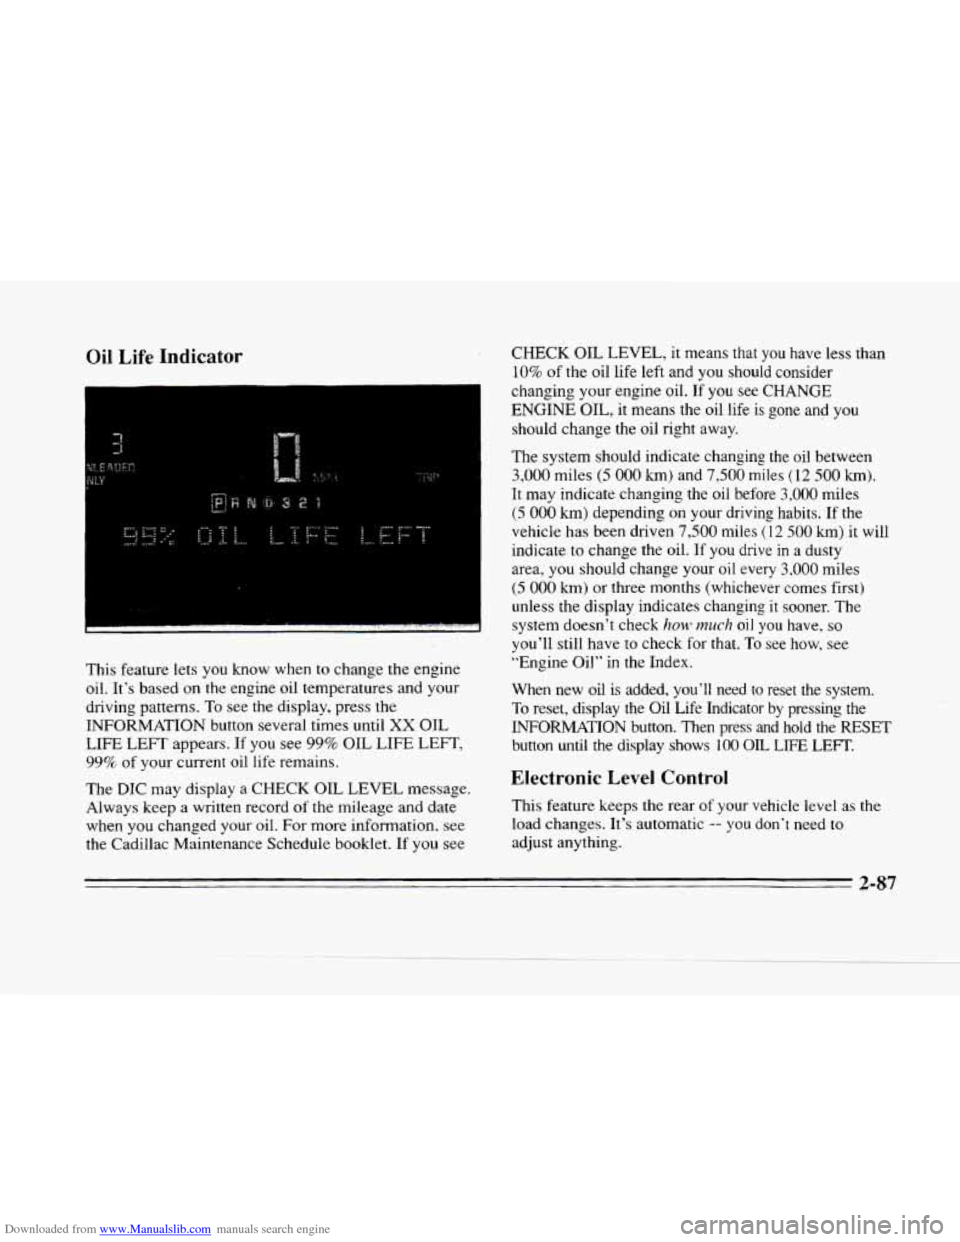
This feature lets you know when to change the engine
oil. It's based on
the engine oil temperatures and your
driving patterns. To see the display, press the
INFORMATION button several times until
XX OIL
LIFE LEFT appears. If you see 99% OIL LIFE LEFT,
99% of your current oil life remains.
The
DIC may display a CHECK OIL LEVEL message.
Always keep a written record
of the mileage and date
when you changed your oil. For more information, see
the Cadillac Maintenance Schedule booklet. If you see
CHECK OIL LEVEL, it means that you have less than
10% of the oil life left and you should consider
changing your engine oil.
If you see CHANGE
ENGINE OIL, it means the oil life is gone and you
should change the oil right away.
The
system should indicate changing the oil between
3,000 miles (5 000 km) and 7,500 miles (12 500 km).
It may indicate changing the oil before 3,000 miles
(5 000 km) depending on your driving habits. If the
vehicle has been driven
7,500 miles (12 500 km) it will
indicate
to change the oil. If you drive in a dusty
area, you should change your
oil every 3,000 miles
(5 000 km) or three months (whichever comes first)
unless the display indicates changing it sooner. The
system doesn't check
120~) much oil you have. so
you'll still have to check for that. To see how, see
"Engine Oil"
in the Index.
When new
oil is added, you'll need to reset the system.
To reset, display the Oil Life Indicator by pressing the
INFORMATION button. Then press and hold the RESET
button until
the display shows 100 OIL LIFE LEFT.
Electronic Level Control
This feature keeps the rear of your vehicle level as the
load changes. It's automatic -- you don't need to
adjust anything.
2-87
Page 162 of 354
Downloaded from www.Manualslib.com manuals search engine AM-FM Stereo with Cassette Tape Player
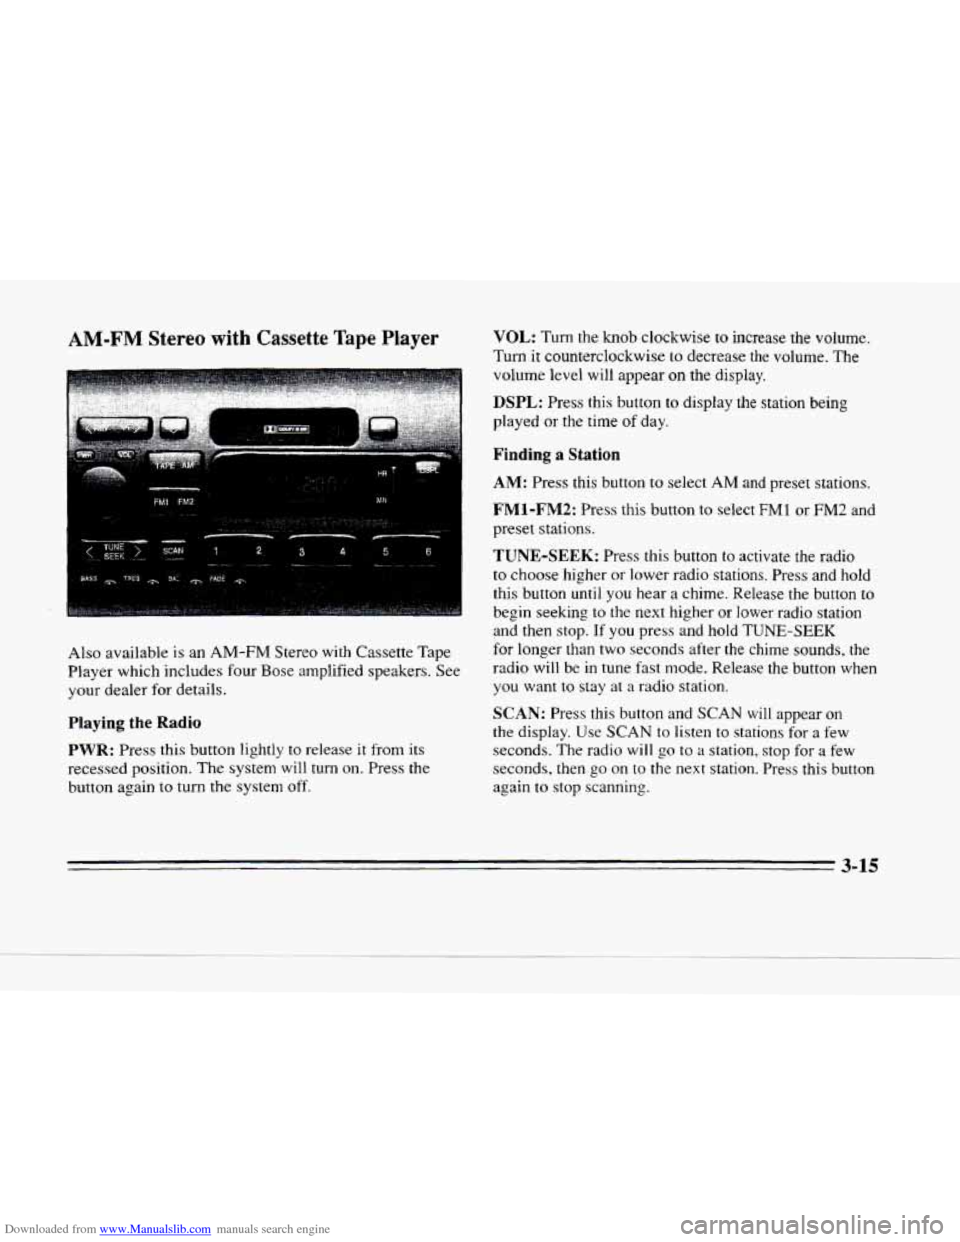
Also available is an AM-FM Stereo with Cassette Tape
Player which includes four Bose amplified speakers. See
your dealer for details.
Playing the Radio
PWR: Press this button lightly to release it from its
recessed position. The system will
turn on. Press the
button again
to turn the system off.
VOL: Turn the knob clockwise to increase the volume.
Turn it counterclockwise to decrease the volume. The
volume level will appear on the display.
DSPL: Press this button to display the station being
played or the time
of day.
Finding a Station
AM: Press this button to select AM and preset stations.
FM1-FM2: Press this button to select FMl or FM2 and
preset stations.
TUNE-SEEK: Press this button to activate the radio
to choose higher or lower radio stations. Press and hold
this
button until you hear a chime. Release the button to
begin seeking to the next higher or lower radio station
and then stop.
If you press and hold TUNE-SEEK
for longer than two seconds after the chime sounds. the
radio will be in tune fast mode. Release the button when
you want to
stay at a radio station.
SCAN: Press this button and SCAN will appear on
the display. Use SCAN to listen to stations for a few
seconds. The radio will
go to a station. stop for a few
seconds, then
go on to the next station. Press this button
again
to stop scanning.
3-15
Page 163 of 354
Downloaded from www.Manualslib.com manuals search engine PUSHBUTTONS: The six numbered pushbuttons let
you return to your favorite stations. You can set up to
18 stations (six AM, six FM1 and six FM2).
1. Press AM, FM1 or FM2 to select the band.
Setting the Tone
BASS: Press this button lightly so it extends. Turn the
BASS knob clockwise to increase and counterclockwise
to decrease bass. The middle position is a detent.
2. Find the station you want by pressing TUNE-SEEK.
3. Press and hold one of the six numbered buttons until
you hear a chime. A preset number will appear on
the display.
4. The sound will mute. When it returns, release the
button. Whenever you press that numbered button,
the station you set will return.
PSCAN: Press and hold SCAN for two to three seconds
until
PSCAN (preset scan) appears on the display to
listen to each
of your preset stations for a few seconds
(factory presets which have not been reprogrammed
with your stations will be ignored). The radio will go to
the first preset station stored on your pushbuttons, stop
for
a few seconds, then go on to the next preset station.
Press
SCAN again to stop scanning. If a preset station
has weak reception, the radio will not stop at the preset
station.
TREB: Press this button lightly so it extends. Turn the
TREB knob clockwise to increase and counterclockwise
to decrease
treble. The middle position is a detent.
Push
the knobs back in when you are not using them.
Adjusting the Speakers
BAL: Press this button lightly so it extends. Turn
the
BAL knob to move the sound to the left or right
speakers. The middle position is a detent and balances
the speakers.
Turn the knob clockwise to adjust sound
to the right speakers and counterclockwise for left
speakers.
FADE: Press this button lightly so it extends. Turn
the FADE knob to move the sound to the front or rear
speakers. The middle position
is a detent and balances
the speakers. Turn the knob clockwise
to adjust the
sound to the front speakers and counterclockwise for
rear speakers.
Push the knobs back in when you’re not using them.
3-16
b
Page 165 of 354
Downloaded from www.Manualslib.com manuals search engine SCAN: Press this button. SCAN wi11 appear on the
display until the next selection is found and then
PLAY
will appear on the display. Use SCAN to listen to
selections for a few seconds. The tape will go to a
selection, stop for
a few seconds, then go on to the next
selection. Press this button again to stop scanning.
A (EJECT): Press the upward triangle button to
remove a tape. The radio will play. Eject may be
activated with the radio off if the ignition is on. Cassette
tapes may
be loaded with the radio off but they will not
start playing until the
PWR button is turned on. Press
PWR or turn the ignition key OFF to stop the cassette
tape player.
The tape will stay in the player and resume
play at the point where
it stopped.
CLN: This message may appear on the display. If it
does, your cassette tape player needs to be cleaned. It
will still play tapes, but you should clean it as soon as
possible to prevent damage to your tapes and player.
See "Care
of Your Cassette Tape Player" in the Index.
After you clean the player, press and hold
EJECT for
five seconds to reset the CLN indicator. The radio will
display
--- to show the indicator was reset.
Dolby@ Noise Reduction is manufactured under
a
license from Dolby Laboratories Licensing Corporation.
Dolby and
the double-D symbol are trademarks of
Dolby Laboratories Licensing Corporation.
Base@ AM-FM Stereo with Cassette Tape
and Compact Disc Players with Digital
Signal Processing (Option)
Playing the Radio
PWR: Press this button lightly to release it from its
recessed position. The system
will turn on. Press the
button again
to turn the system off.
VOL: Turn the knob clockwise to increase the volume.
Turn it counterclockwise
to decrease the volume. The
volume level will appear
on the display.
3-18
Page 166 of 354
Downloaded from www.Manualslib.com manuals search engine c
c
L
Finding a Station
AM: Press this button to select AM ana preset stations.
FM 1-2: Press this button to select FM1 or FM2 and
preset stations.
TUNE-SEEK: Press this button to activate the radio to
choose higher or lower radio stations. Press and hold
this button until you hear a chime. Release the button to
begin seeking to the next higher or lower radio station
and then stop.
If you press and hold TUNE-SEEK for
longer than two seconds after the chime sounds, the
radio will be
in tune fast mode. Release the button when
you want to stay
at a radio station.
SCAN: Press this button and SCAN will appear on the
display. Use
SCAN to listen to stations for a few
seconds. The radio will go to
a station, stop for a few
seconds, then go
on to the next station. Press this button
again to stop scanning.
PUSHBUTTONS: The six numbered pushbuttons let
you return to your favorite stations. You can set up to
18 stations (six AM, six FM 1 and six FM2).
1. Press AM or FM 1-2 to select the band.
2. Find the station you want by pressing TUNE-SEEK.
3. Press and hold one of the six numbered buttons until
you hear
a chime. A preset number will appear on
the display.
4. The sound will mute. When it returns, release the
button. Whenever
you press that numbered button,
the station you set will return.
PSCAN: Press and hold SCAN for two to three seconds
until
PSCAN (preset scan) appears on the display to listen
to each of your preset stations for a few seconds (factory
presets which have not been reprogrammed with your
stations will be ignored). The radio will go to the fast
preset station stored on your pushbuttons, stop for a few
seconds, then
go on to the next preset station. Press SCAN
again to stop scanning. If a preset station has weak
reception, the radio will not stop at the preset station.
Setting the Tone
BASS: Press this button lightly so it extends. Turn the
BASS knob clockwise to increase and counterclockwise
to decrease bass. The middle position
is a detent.
TREB: Press this button lightly so it extends. Turn the
TREB knob clockwise to increase and counterclockwise
to decrease treble. The middle position is a detent.
Push the knobs back
in when you are not using them.
3-19
Page 169 of 354
Downloaded from www.Manualslib.com manuals search engine SCAN: Press this button. SCAN will appear on the
display until the next selection is found and then
PLAY
will appear on the display. Use SCAN to listen to
selections for a few seconds. The tape will
go to a
selection, stop for a few seconds, then go on to the next
station. Press this button again to stop scanning.
A (EJECT): Press the upward triangle button to
remove
a tape. The radio will play. Eject may be
activated with the radio off if the ignition is on. Cassette
tapes may be loaded with the radio off but they
will not
start playing until the
PWR button is turned on. Press
PWR or turn the ignition key OFF to stop the cassette
tape player. The tape will stay in the player and resume
play at the point where it stopped.
CLN: This message may appear on the display. If it
does, your cassette tape player needs to be cleaned. It
will still play tapes, but you should clean
it as soon as
possible to prevent damage to your tapes and player.
See “Care of Your Cassette Tape Player” in the Index.
After you clean the player, press and hold EJECT for
five seconds to reset the CLN indicator. The radio
will
display --- to show the indicator was reset.
Dolby@ Noise Reduction is manufactured under a
license from Dolby Laboratories Licensing Corporation.
Dolby and the double-D symbol are trademarks
of
Dolby Laboratories Licensing Corporation.
Trunk Mounted CD Changer (Option)
With the optional compact disc changer, you can play up
to 12 discs continuously. Normal size discs may be
played using the trays supplied in the magazine.’The
small discs
(8 cm) can be played only with specially
designed trays.
NOTICE:
Objects in the trunk which may shift or slide
during driving could damage your
CD changer.
Protect your
CD changer by using the convenience
net whenever possible. Place large objects
in the
trunk appropriately
so that they will not come
into contact with the CD changer.
.-
3-22
Page 172 of 354
Downloaded from www.Manualslib.com manuals search engine DSPL: Press this button to display the time of day. Press
this button again within five seconds to see the element
time. Press DSPL again within five seconds to see how
many compact discs are loaded
in the changer and
where they are loaded. Press DSPL again to review the
active preset buttons
(1 through 6 or 7 through 12).
PUSHBUTTONS: Press buttons one through six to go
from one compact disc to another that is loaded in the
changer.
SIDE: Press this button to select the next disc in the
changer. Each time you press
this button, DISC
LOADING will appear on the display and the disc
number on the radio display will move to the next
available
CD.
REV: Press this button to reverse quickly through a
track selection.
FF: Press this button to advance quickly through a track
selection.
RDM: Press this button to enter random play mode,
RDM will appear on the display. The loaded discs will
be played in random rather than sequential
(1,2, 3. . .)
order. Press SEEK while RDM is on the display to
randomly seek through discs and tracks. Press
RDM
again to return to sequential order.
SEEK: Press the left arrow while playing a compact
disc to
go back to the start of a current track, if more
than eight seconds have played. Press the left arrow
again and the changer will
go to previous tracks. Press
the right arrow to
go to the next higher track on the disc.
SCAN: When you press SCAN while playing a CD, you
will hear the first few seconds
of each disc. Press SCAN
again to stop on a CD. The CD will be muted while
scanning and
SCAN will appear on the display.
EJECT Slide the CD changer door all the way open
and the disc will automatically eject.
3-25
Page 174 of 354
Downloaded from www.Manualslib.com manuals search engine II
c
Finding a Station
AM: Press this button to select AM and preset stations.
FM 1-2: Press this button to select FMl or FM2 and
preset stations.
TUNE-SEEK: Press this button to activate the radio to
choose higher or lower radio stations. Press and hold
this button until you hear
a chime. Release the button to
begin seeking to the next higher or lower radio station
and then stop. If
you press and hold TUNE-SEEK for
longer than two seconds after the chime sounds, the
radio will be in tune fast mode. Release the button when
you want to stay at a radio station.
SCAN: Press this button and SCAN will appear on the
display. Use SCAN to listen to stations
for a few
seconds. The radio will go to a station, stop for a few
seconds, then
go on to the next station. Press this button
again
to stop scanning.
PUSHBUTTONS: The six numbered pushbuttons let
you return to your favorite stations. You can set up to
18
stations (six AM, six FM1 and six FM2).
1. Press AM or FM 1-2 to select the band.
2. Find the station you want by pressing TUNE-SEEK.
3. Press and hold one of the six numbered buttons until
you hear a chime.
A preset number will appear on
the display.
4. The sound will mute. When it returns, release the
button. Whenever you press that numbered button,
the station you set will return.
PSCAN: Press and hold SCAN for two to three seconds
until PSCAN (preset sc.an) appears on the display to
listen to each
of your preset stations for a few seconds
(factory presets which have not been reprogrammed
with your stations will be ignored).
The radio will go to
the first preset station stored on your pushbuttons, stop
for a few seconds, then
go on to the next preset station.
Press SCAN again
to stop scanning. If a preset station
has weak reception, the radio will not stop at the preset
station.
Setting the Tone
BASS:
Press this button lightly so it extends. Turn the
BASS knob clockwise to increase and counterclockwise
to decrease bass. The middle position is a detent.
TREB: Press this button lightly so it extends. Turn the
TREB knob clockwise
to increase and counterclockwise
to decrease treble. The middle position is a detent.
Push the knobs back in when you are not using them.
3-27