Page 204 of 354
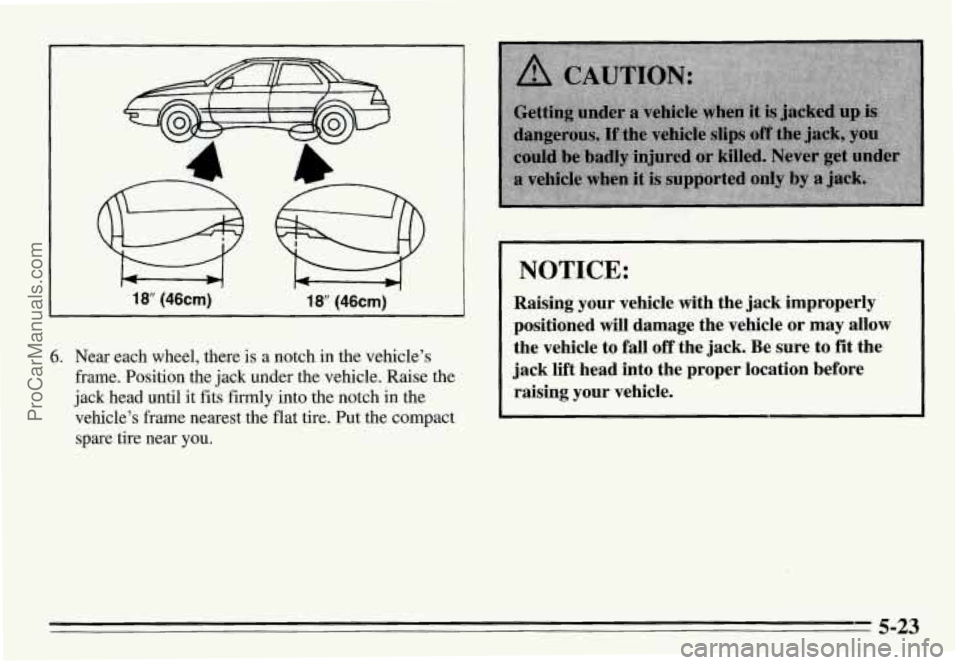
18” (46cm) 18 (46cm)
6. Near each wheel, there is a notch in the vehicle’s
frame. Position the jack under the vehicle. Raise the
jack head until it fits firmly into the notch in the
vehicle’s frame nearest the flat tire. ht the compact
spare tire near you.
NOTICE:
Raising your vehicle with the jack improperly
positioned will damage the vehicle or may allow
the vehicle to fall off the jack. Be sure to
fit the
jack lift head into the proper location before raising your vehicle.
5-23
ProCarManuals.com
Page 205 of 354
I I
NOTICE: I
Do not jack or lift vehicle using oil pan. Pans
could crack and begin to leak fluid.
I
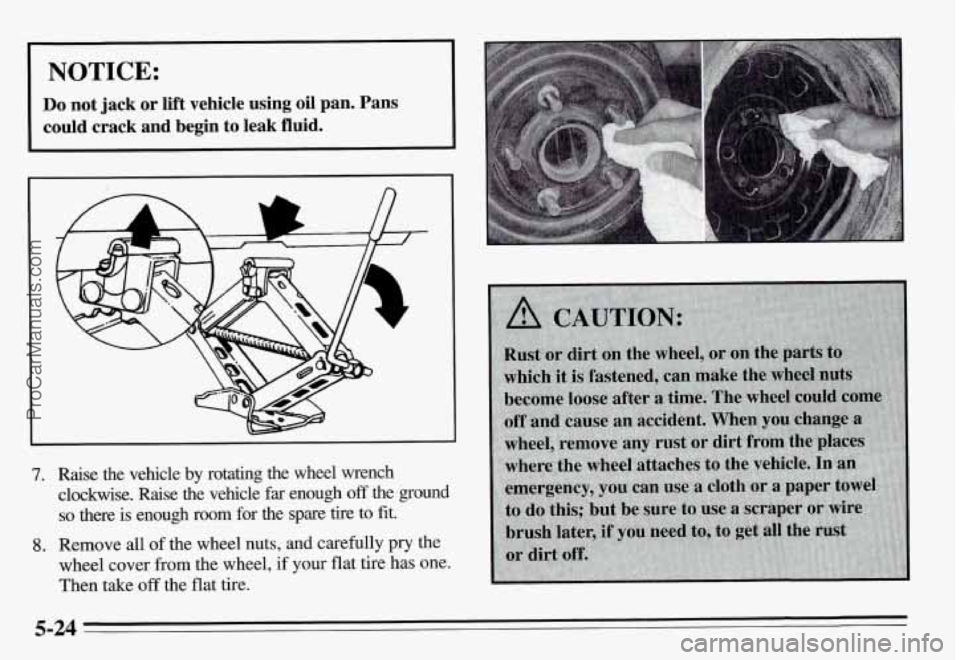
7. Raise the vehicle by rotating the wheel wrench
clockwise. Raise the vehicle far enough
off the ground
so there is enough room for the spare tire to fit.
wheel cover from the wheel, if your flat tire has one.
Then take
off the flat tire.
8. Remove all of the wheel nuts, and carefully pry the
5-24
ProCarManuals.com
Page 206 of 354
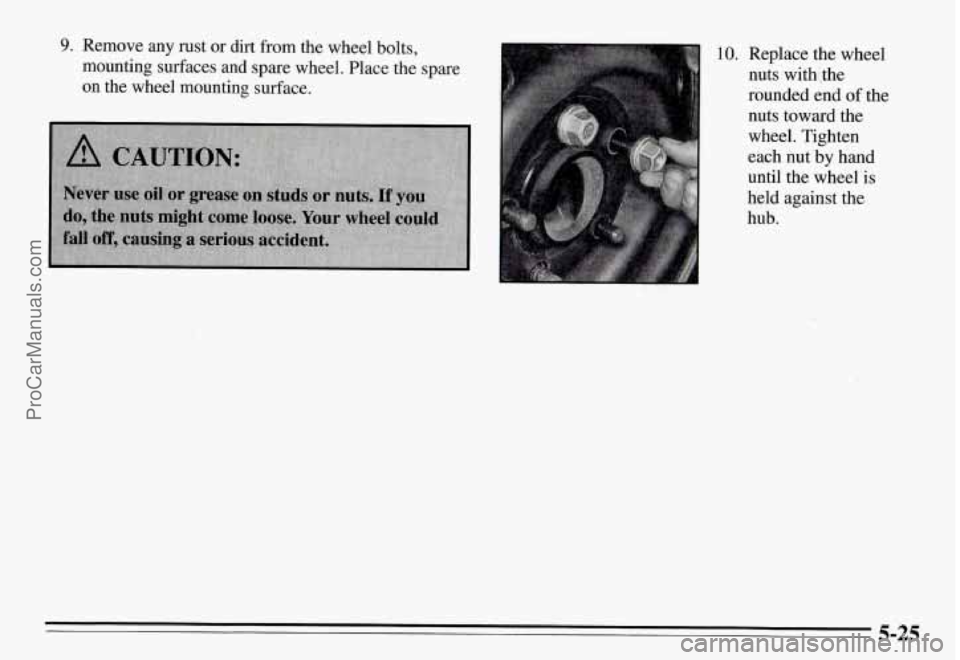
9. Remove any rust or dirt from the wheel bolts,
mounting surfaces and spare wheel. Place the spare
on the wheel mounting surface.
10. Replace the wheel
nuts withthe
rounded end
of the
nuts toward the
wheel. Tighten
each nut
by hand
until the wheel is
held against the
hub.
5-25
ProCarManuals.com
Page 207 of 354
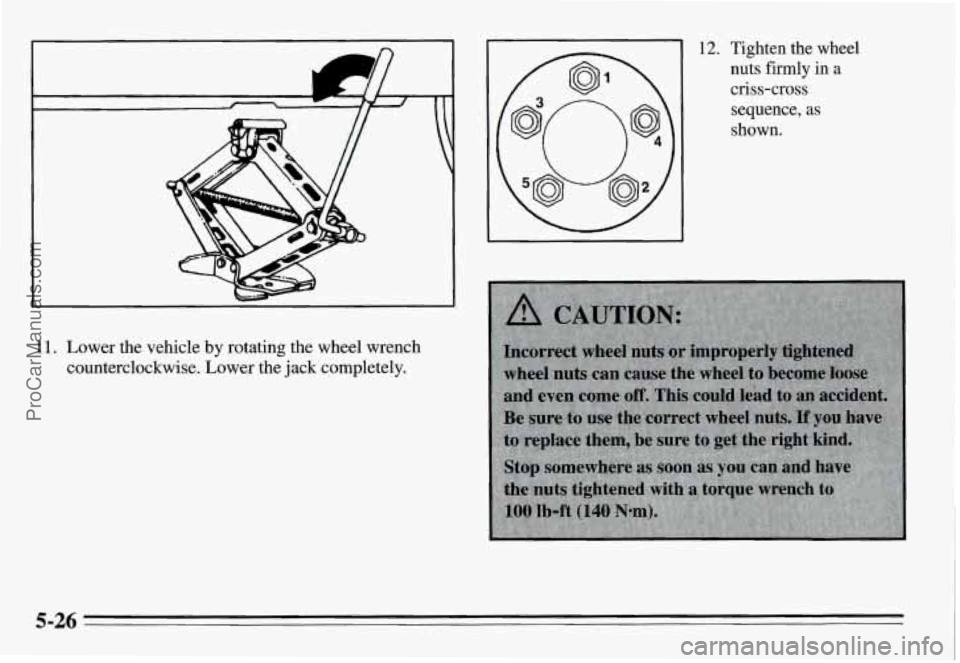
11. Lower the vehicle by rotating the wheel wrench
counterclockwise. Lower the jack completely.
12. Tighten the wheel
nuts firmly in a
criss-cross
sequence,
as
shown.
5-26
ProCarManuals.com
Page 208 of 354
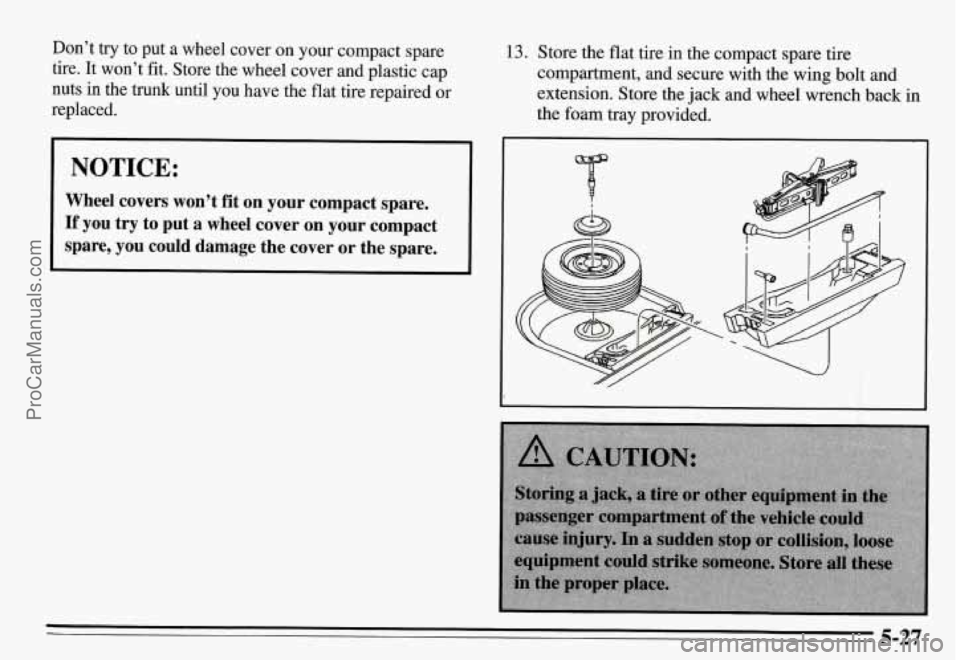
Don’t try to put a wheel cover on your compact spare
tire. It won’t fit. Store the wheel cover and plastic cap
nuts in the trunk
until you have the flat tire repaired or
replaced.
NOTICE:
Wheel covers won’t fit on your compact spare.
If you try to put a wheel cover on your compact
spare, you
could damage the cover or the spare.
13. Store the flat tire in the compact spare tire
compartment, and secure with the wing bolt and
extension. Store the jack and wheel wrench back in
the foam tray provided.
I
5-27
ProCarManuals.com
Page 209 of 354
Compact Spare Tire
Although the compact spare was fully inflated when
your vehicle was new, it can lose air after a time. Check
the inflation pressure regularly. It should be
60 psi
(420 Wa). After installing the compact spare on your
vehicle, you should stop as soon as possible and make
sure your spare tire is correctly inflated. The compact
spare is made to perform well at posted speed limits for
distances up to
3,000 miles (5 000 km), so you can
finish your trip and have your full-size tire repaired or
replaced where you want. Of course, it’s best to replace
your spare with a full-size tire as soon as you can. Your
spare will last longer and be in good shape in case you
need it again.
I NOTICE:
Don’t take your compact spare through an
automatic car wash with guide rails. The
compact spare can get caught on the rails. That
can damage the tire and wheel, and maybe other
parts of your vehicle.
Don’t use your compact spare on some other vehicle.
And don’t mix your compact spare or wheel with other
wheels or tires. They won’t fit. Keep your spare and its
wheel together.
NOTICE:
Tire chains won’t fit your compact spare. Using
them
will damage your vehicle and destroy the
chains too. Don’t use tire chains on your compact
spare.
5-28
ProCarManuals.com
Page 210 of 354
If You’re Stuck: In Sand, Mud, Ice or
Snow
What you don’t want to do when your vehicle is stuck is
to spin your wheels too fast. The method known as
“rocking” can help you get out when you’re stuck, but
you must use caution.
For information about using tire chains on your vehicle,
see “Tire Chains” in the Index.
I NOTICE: I
Spinning your wheels can destroy parts of your
vehicle
as well as the tires. If you spin the wheels
too fast while shifting your transaxle back and
forth, you can destroy your transaxle.
Rocking your vehicle to get it out
First, turn your steering wheel left and right. That will
clear the area around your front wheels. Then shift back
and forth between REVERSE
(R) and a forward gear
(or with a manual transaxle, between F’IRST
(1) or
SECOND
(2) gear and REVERSE (R)), spinning the
wheels as little as possible. Release the accelerator pedal
while
you shift, and press lightly on the accelerator
pedal when the transaxle is in gear.
If that doesn’t get
you out after a few tries, you
may need to be towed out.
If you do need to be towed out, see “Towing Your
Vehicle” in the Index.
5-29
ProCarManuals.com
Page 248 of 354
Tire Inspection and Rotation
Tires should be inspected every 6,000 to 8,000 miles
(1 0 000 to 13 000 km) for any signs of unusual wear. If
unusual wear is present, rotate your tires as soon as
possible
and check wheel alignment. Also check for
damaged tires or wheels. See “When it’s Time for New
Tires”
and “Wheel Replacement” later in this section for
more information.
The purpose of regular rotation is to achieve more uniform
wear for all tires on the vehicle. The first rotation is the
most important.
See “Scheduled Maintenance Services” in
the Index for scheduled rotation intervals.
When rotating your tires, always use the correct rotation
pattern shown here.
Don’t include the compact spare tire in your tire
rotation.
After the tires have been rotated, adjust the front and
rear inflation pressures as shown on the Tire-Loading
Information label. Make certain that all wheel nuts are
properly tightened. See “Wheel Nut Torque” in the
Index.
6-37
ProCarManuals.com