1995 PONTIAC BONNEVILLE clock
[x] Cancel search: clockPage 88 of 338
Instrument Panel Intensity Control
You can brighten or dim your instrument cluster lamps
by rotating the headlamp switch. Rotate the switch all
the way counterclockwise to turn on the interior
courtesy lamps. Rotate the switch clockwise to
turn off
the instrument cluster lamps and displays.
Twilight Sentinel (Option)
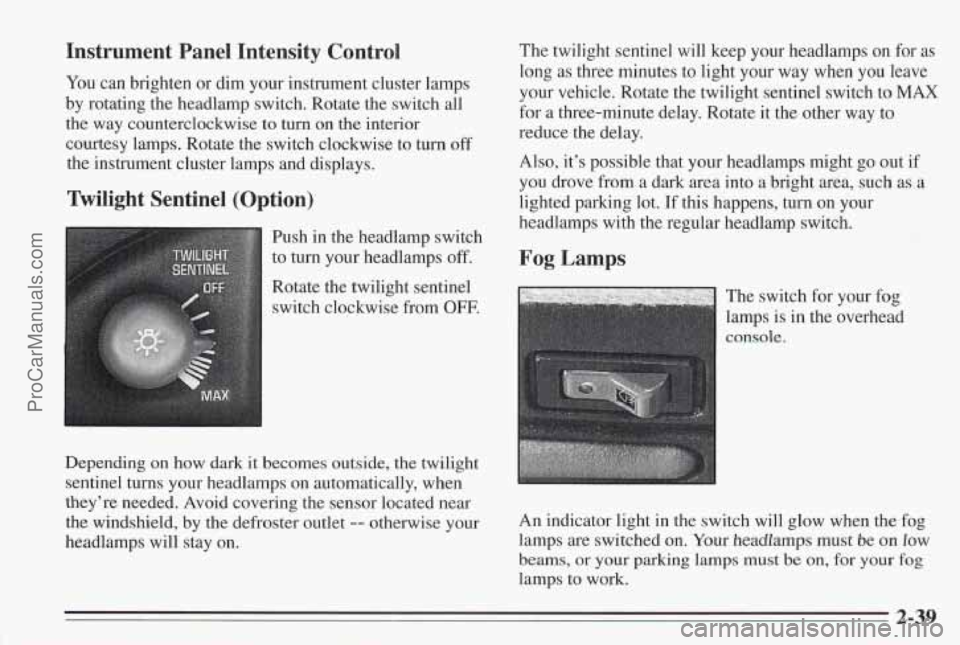
Push in the headlamp switch
to
turn your headlamps off.
Rotate the twilight sentinel
switch clockwise from
OFF.
Depending on how dark it becomes outside, the twilight
sentinel
turns your headlamps on automatically, when
they’re needed. Avoid covering the sensor located near
the windshield, by the defroster outlet
-- otherwise your
headlamps will stay on. The
twilight sentinel will keep your headlamps on
for as
long as three minutes to light your way when you leave
your vehicle. Rotate the twilight sentinel switch to
MAX
for a three-minute delay. Rotate it the other way to
reduce the delay.
Also, it’s possible that your headlamps might go out if
you drove from a dark area into a bright area, such as a
lighted parking lot.
If this happens, turn on your
headlamps with the regular headlamp switch.
Fog Lamps
The switch for your fog
lamps is in the overhead
An indicator light in the switch will glow when the fog
lamps are switched
on. Your headlamps must be on low
beams, or your parking lamps must be on, for your fog
lamps to work.
2-39
ProCarManuals.com
Page 123 of 338
Standard Climate Control
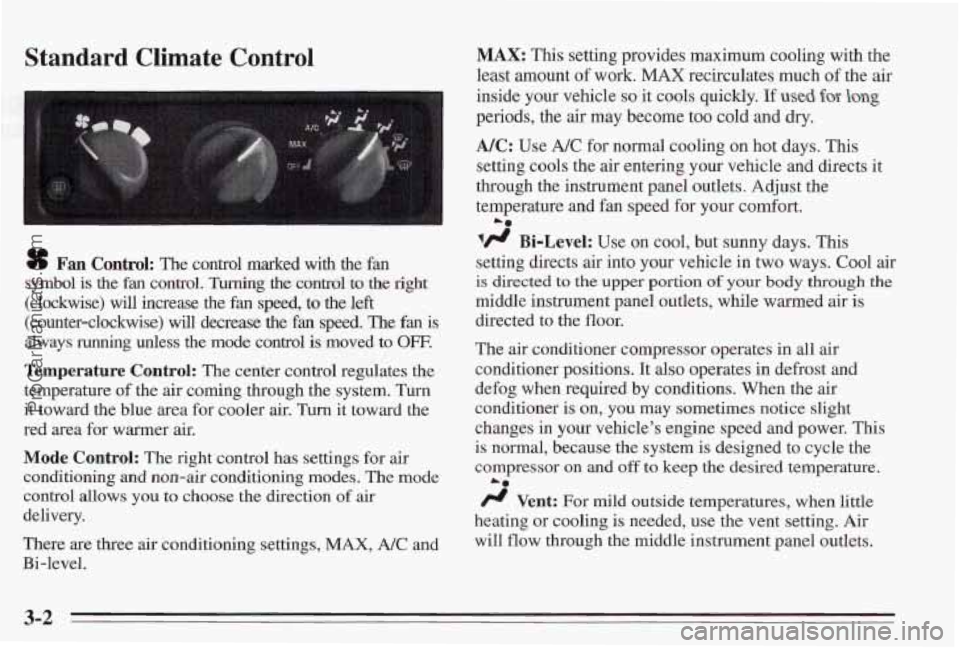
sf Fan Control: The control marked with the fan
symbol is
the fan control. Turning the control to the right
(clockwise) will increase the fan speed, to the left
(counter-clockwise) will decrease the fan speed. The fan is
always running unless the mode control is moved to OFF.
Temperature Control: The center control regulates the
temperature
of the air coming through the system. Turn
it toward the blue area for cooler air.
Turn it toward the
red area for warmer air.
Mode Control: The right control has settings for air
conditioning and non-air conditioning modes.
The mode
control allows
you to choose the direction of air
delivery.
There are three air conditioning settings,
MAX, A/C and
Bi-level.
MAX: This setting provides maximum cooling with the
least amount
of work. MAX recirculates much of the air
inside your vehicle
so it cools quickly. If used for- long
periods, the air may become too cold and dry.
NC: Use A/C for normal cooling on hot days. This
setting cools the air entering your vehicle and directs it
through the instrument panel outlets. Adjust the
temperature
and fan speed for your comfort.
lfl Bi-Level: Use on cool, but sunny days. This
setting directs air into your vehlcle in two ways. Cool air
is directed to the upper portion of your body through the
middle instrument panel outlets, while warmed air is
directed to the floor.
The
air conditioner compressor operates in all air
conditioner positions. It also operates in defrost and
defog when required by conditions. When the
air
conditioner is on, you may sometimes notice slight
changes
in your vehicle’s engine speed and power. This
is
normal, because the system is designed to cycle the
compressor on
and off to keep the desired temperature.
/J Vent: For mild outside temperatures, when little
heating or cooling is needed, use the vent setting. Air
will
flow through the middle instrument panel outlets.
La
3-2
ProCarManuals.com
Page 128 of 338
Audio Systems
The following pages describe the audio systems
available for your Pontiac, and how to get the best
performance from them. Please read about the system in
your vehicle.
Setting the Clock for Stereo Radio
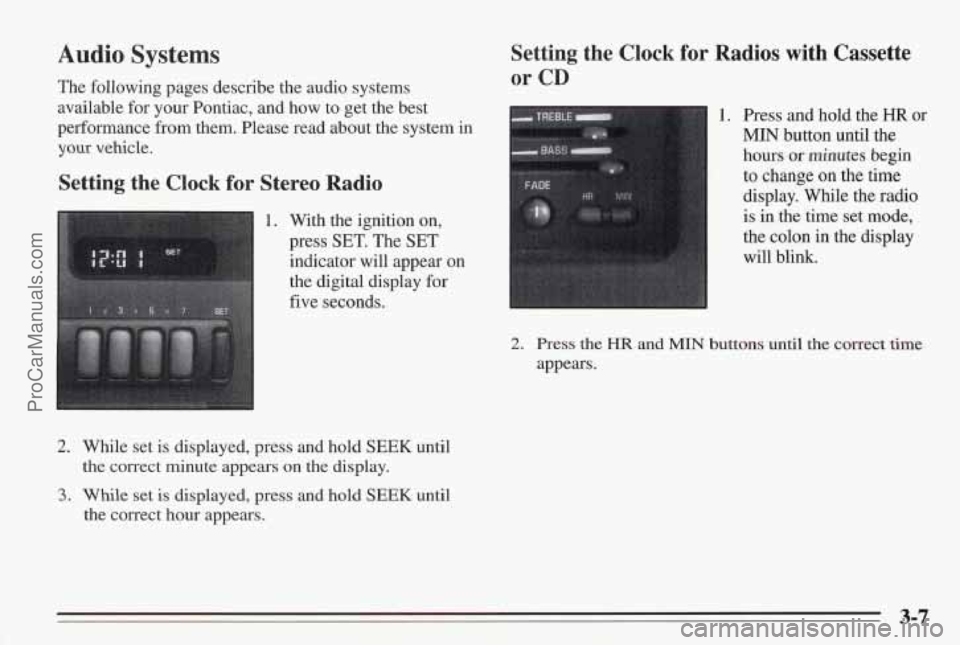
1. With the ignition on,
press
SET. The SET
indicator will appear on
the digital display
for
five seconds.
2. While set is displayed, press and hold SEEK until
the correct minute appears
on the display.
3. While set is displayed, press and hold SEEK until
the correct hour appears.
Setting the Clock for Radios with Cassette
or CD
1. Press and hold the HR or
MIN button until the
hours or minutes begin
to change on the time
display. While the radio
is in the time set mode,
the colon in
the display
will blink.
2. Press the HR and MIN buttons until the correct time
appears.
ProCarManuals.com
Page 137 of 338
Cassette Tape and CD Errors
If “E” and a number appears in the radio display, an
error has occurred and the cassette or compact disc
cannot play temporarily.
If the error occurred while trying to play a cassette tape,
the following conditions may have caused the error:
The cassette tape is tight and the cassette player
cannot
turn the hubs of the cassette tape. “E10” may
be displayed.
Hold the cassette with the open end
down and try turning the right hub
counter-clockwise
with a pencil. Flip the tiq% dmr
and repeat. If the hubs do not turn easily, your
cassette tape may be damaged and should not be
used
in the cassette player. Try a new tape to make
sure that your cassette player is working properly.
The cassette tape is broken. “El 1” may be displayed.
Check to see if your tape is broken.
Try a new
cassette tape.
If the error occurred while trying to play a CD in the
radio or in the
CD changer, the following conditions
may have caused the error:
The road is too rough. The disc should play when the
road is smoother.
0 The disc is dirty, scratched, wet or upside down.
The air is very humid. If so, wait about an hour and
try again.
If any error oc’curs repeatedly or if an error cannot be
corrected, please contact your dealer.
If your radio
displays an error number, write it down and provide it to
your dealer when reporting the problem.
3-16
ProCarManuals.com
Page 138 of 338
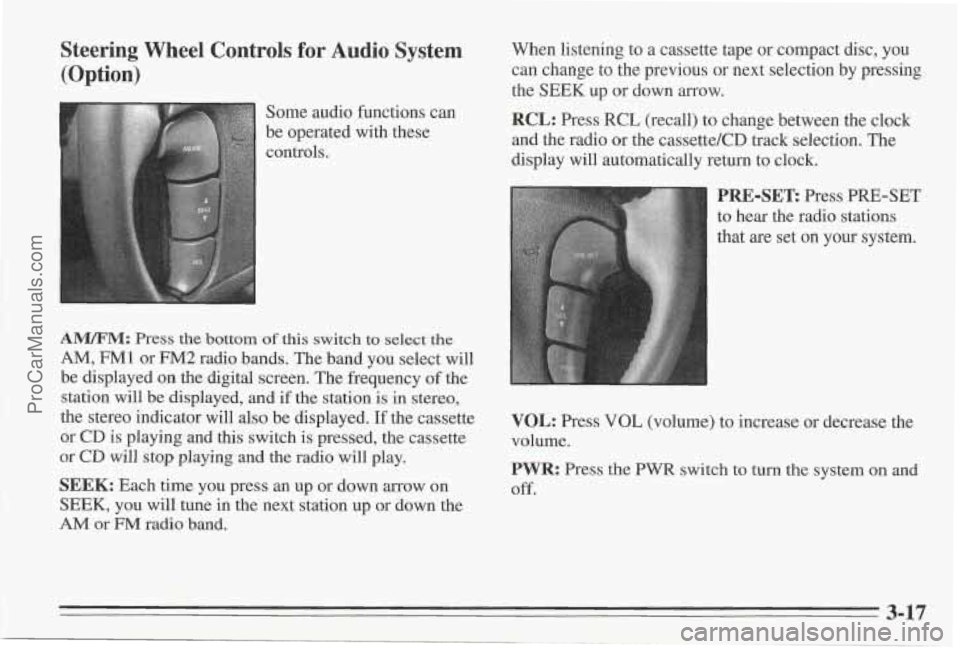
Steering Wheel Controls for Audio System (Option)
Some audio functions can
be operated with these
controls,
A"M: Press the bottom of this switch to select the
AM, FM1 or FM2 radio bands. The band you select will
be displayed on the digital screen. The frequency
of the
station will be displayed, and if the station is
in stereo,
the stereo indicator will also be displayed.
If the cassette
or
CD is playing and this switch is pressed, the cassette
or CD will stop playing and the radio will play.
SEEK: Each time you press an up or down arrow on
SEEK, you will tune in the next station up or down the
AM or FM radio band. When listening to
a cassette tape or compact disc, you
can change to the previous or next selection by pressing
the
SEEK up or down arrow.
RCL: Press RCL (recall) to change between the clock
and the radio or the cassette/CD track selection. The
display will automatically return to clock.
'RE-SET: Press PRE-SET
o hear the radio stations
hat
are set on your system.
VOL: Press VOL (volume) to increase or decrease the
volume.
PWR: Press the PWR switch to turn the system on and
Off.
3-17
ProCarManuals.com
Page 153 of 338
If you need to reduce your speed as you approach a
curve, do it before you enter the curve, while your front
wheels
are straight ahead.
Try to adjust your speed so you can “drive’’ through the
curve. Maintain
a reasonable, steady speed. Wait to
accelerate until you are out
of the curve, and then
accelerate gently into
the straightaway.
Steering in Emergencies
There are times when steering can be more effective
than braking. For example, you come over a hill and
find a truck stopped in your lane, or a car suddenly pulls
out from nowhere, or a child darts out from between
parked cars and stops right in front of you. You can
avoid these problems by braking
-- if you can stop in
time.
But sometimes you can’t; there isn’t room. That’s
the time for evasive action
-- steering around the
problem.
Your Pontiac can perform very well in emergencies like
these. First apply your brakes. It
is better to remove as
much speed as
you can from a possible collision. Then
steer around the problem, to the left
OF right depending
on the space available.
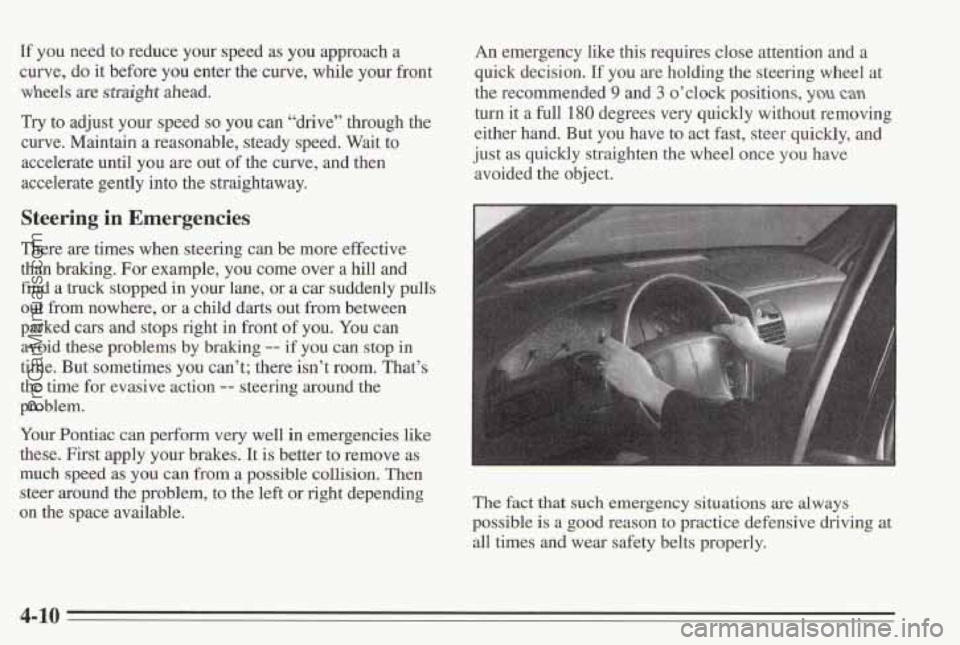
An emergency like this requires close attention and a
quick decision.
If you are holding the steering wheel at
the recommended
9 and 3 o’clock positions, you can
turn it a full 180 degrees very quickly without removing
either hand. But you have to act fast, steer quickly, and
just as quickly straighten
the wheel once you have
avoided
the object.
The fact that such emergency situations are always
possible is a good reason to practice defensive driving at
all times and wear safety belts properly.
4-10
ProCarManuals.com
Page 202 of 338
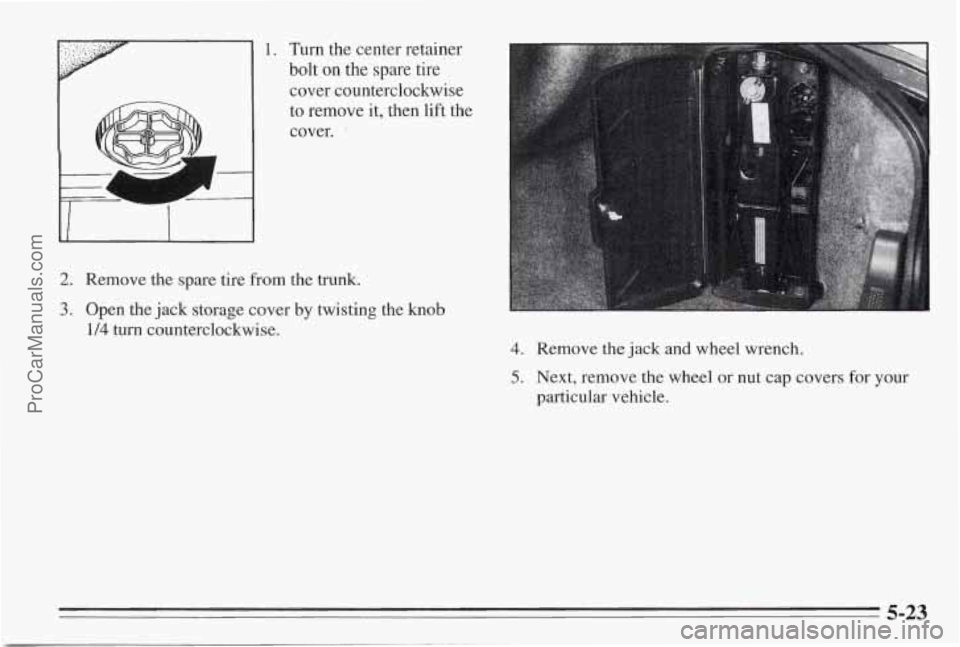
1. Turn the center retainer
bolt on the spare tire
cover counterclockwise
to remove it, then lift the
cover.
2. Remove the spare tire from the trunk.
3. Open the jack storage cover by twisting the knob
1/4 turn counterclockwise.
4. Remove the jack and wheel wrench.
5. Next, remove the wheel or nut cap covers for your
particular vehicle.
5-23
ProCarManuals.com
Page 204 of 338
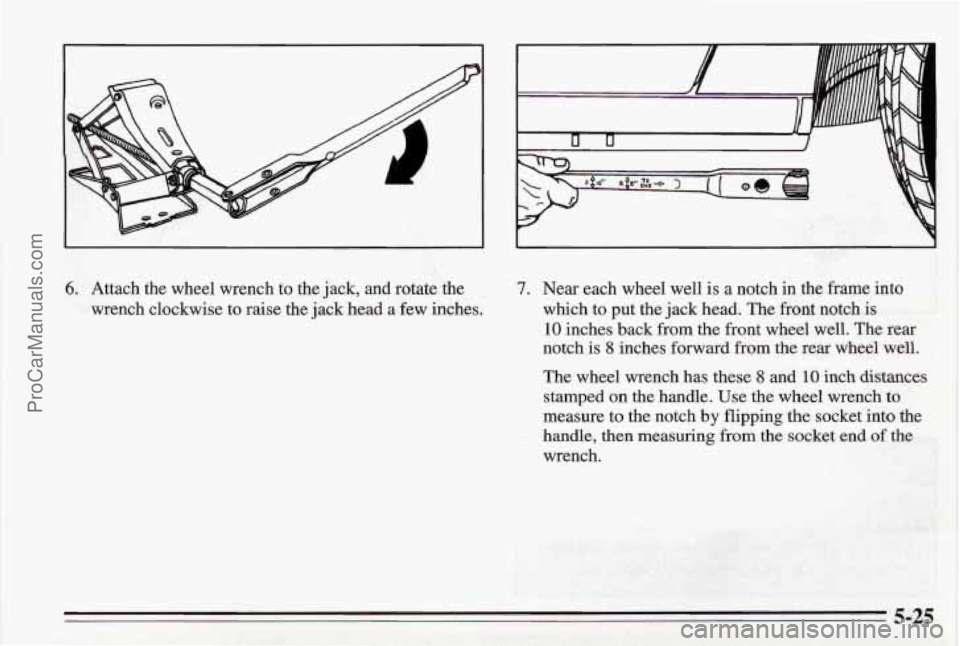
6. Attach the wheel wrench to the jack, and rotate the
wrench clockwise
to raise the jack head a few inches.
7. Near each wheel well is a notch in the frame into
which to put the jack head. The front notch is
10 inches back from the front wheel well. The rear
notch is 8 inches forward from the rear wheel well.
The wheel wrench has these 8 and 10 inch distances
stamped
on the handle. Use the wheel wrench to
measure to the notch
by flipping the socket into the
handle, then measuring
from the socket end of the
wrench.
5-25
ProCarManuals.com