1995 Oldsmobile Cutlass Supreme audio
[x] Cancel search: audioPage 3 of 340

I The 1995 Oldsmobile Cutlass Supreme! Owner’s Manual
... How to Use this Manual ..................................... :.. ........................ .~II
This section tells you how to use your manual and includes sa\
fety and vehicle damage warnings and symbols.
This section tells you how to, use your seats and safety belt\
s properly. It also explains the “SRS’;.system.
Seats and Restraint Systems ........................................................... 1-1
Features and Controls ................................................................
This section explains how to start and operate .your Oldsmobile.
Comfort Controls and Audio Systems ..................................................
This’section tells you how to adjust the ‘ventilation and \
comfort conpols and how to operate your
audio system.
YourDrivingandtheRoad ...........................................................
Here you’ll find information and tips about the road and ho\
w to drive under different conditions.
ProblemsontheRoad ...............................................................
This section tells you what .to do if you have a problem while driving, such as a flat tire or
overheated engine, etc.
Here the manual tells you how to keep your Oldsmobile running \
properly and looking good.
This section tells you when to perform vehicle maintenance and what \
fluids and lubricants to use.
This section tells you how to contact Oldsmobile for assistance\
and how
to get service publications.
It also gives you infomation on “Reporting Safety Defects” on page
8-4.
Here’s an alphabetical listing of almost every subject in th\
is manual. You can use it to quickly find
something you want to read.
Service.and Appearance Care ..........................................................
Maintenanceschedule... ............................................................
Customer Assistance Information .....................................................
Index ........................................................................\
......
2-1
3- 1
4-1
5-1
6- 1
7-1
8-1
9-1
Page 100 of 340
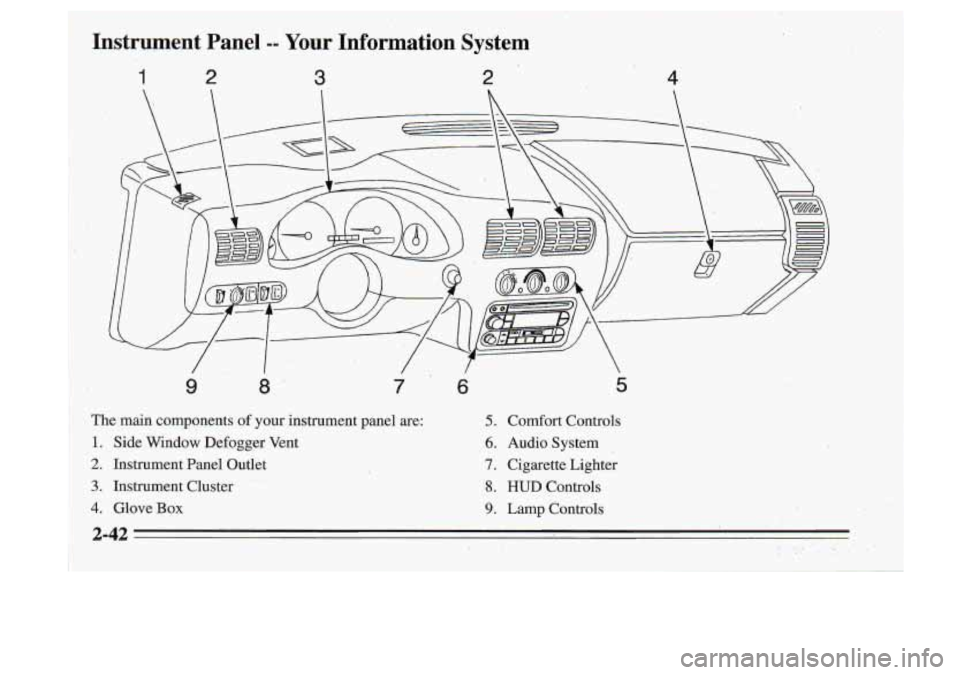
,Instrument Panel -- Your Information System
1 2 3 2
9 8’ 7 6 5
The main components of your instrument panel are: 5. comfort Controls
1. Side Window Defogger Vent 6. Audio System
2. Instrument Panel Outlet 7. Cigarette. Lighter
3. Instrument~Cluster 8. HUD Controls
4. Glove Box 9. Lamp C,ontrols
2-42 .. .’ . . , ..
Page 117 of 340
Section 3 Comfort Controls and Au,dio Systems
In this section you'll find out how to operate the comfort With this system, you can control the heating, cooling '
control systems and audio systems offered with your and ventilation in your vehicle. The system works best if
Oldsmobile. Be sure to read about the particular system you keep your windows closed while using it.
supplied with your vehicle.
System Controls
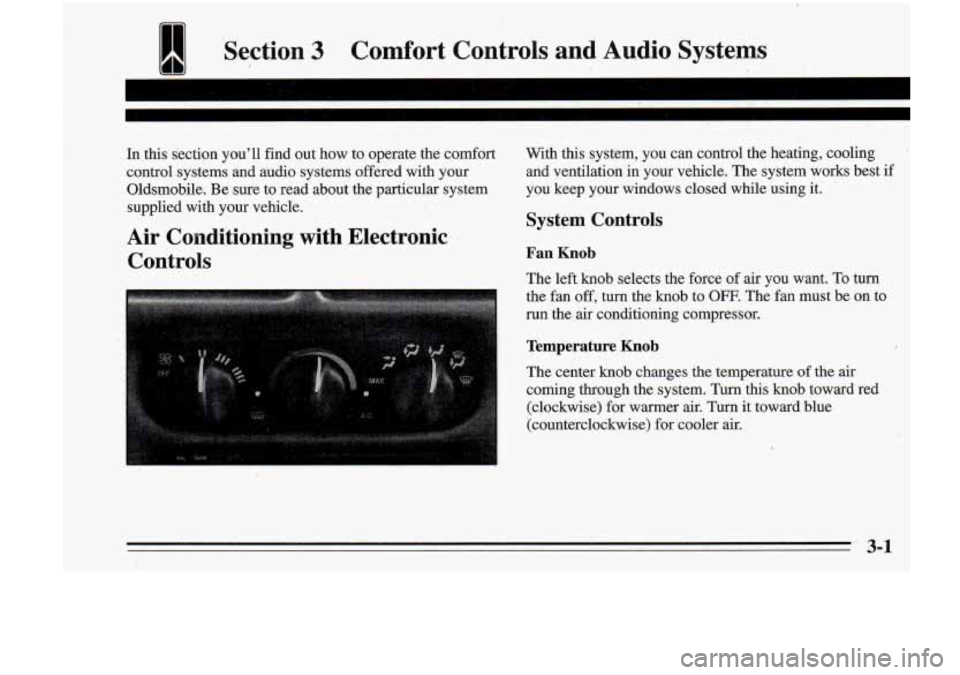
Air Conditioning with Electronic Controls
Fan ,Knob
The left knob selects the force of air you want. To turn
the
fan off, turn the knob to OFF. The fan must be on to
run the air conditioning compressor.
Temperature I(nob
The center knob changes the temperature of the .air
coming through the system.
Turn this knob toward red
(clockwise) for warrner
air. Turn it toward blue
(counterclockwise)
for cooler air.
3-1
Page 124 of 340

Flow-Through Ventilation System
Your vehicle's flow-through ventilation system supplies
outside air info the vehicle when it is moving. Outside
air will also enter the vehicle when the air conditioning
fan
is running.
Ventilation Tips
Keep the hood and fkont air inlet free of ice, snow or
any other obstruction, such- as leaves. The heater and
defroster will work far better, reducing the chance
of
fogging the inside of your windows.
, When you enter a vehicle in cold weather, set the
mode to
FLQOR or LOWER and the fan to .the
highest speed for a few moments before driving off.
This helps clear the intake ,ducts of snow and
moisture and reduces the chance of fogging the
inside of your windows.
'0 Keep the air path under the front seats'clear of
objects. This helps air to circulate throughout your
vehicle.
Audio Systems
Your Delco@ aubo system has been designed to operate
easily and give years of listening pleasure.
You will get
the most enjoyment out of 'it if you acquaint yourself with
it first. Find out what your Delco@system cpn do and how
.
,to operdte all its controls, to be sure you're getting the most
out of the advanced engineering that went into it.
Setting the Clock
You can set the-clock with the ignition on or off.
I
1. Press and hold HR until the correct hour appears.
The letter
A or'-P may appear in'the display for, AM
or PM.
2. Press and hold MN until the correct minute appears.
Page 133 of 340
Disabling THEFTLOCK
If you want to turn off THEFTLOCK, you will need to
enter your code.
If you lose or forget your code, see
your retailer.
1. Turn the ignition on and the radio off.
2. Press the 1 and 4 preset buttons at the same time and
hold until
SEC shows on the display.
You now have only
15 seconds between each of the
following steps.
3. Press MN and “000” will appear on the display.
4. Press MN again and hold until the last two digits of
5. Press and hold HR until the first digit or digits of
your code
appear.
your code appear.
4. Press AM/FM after you make sure the code matches
!lie one you wrote down.
“- - -” should appear on the
display, meaning your system is unsecured.
If SEC
appears, you entered the wrong code and the system
is still secured.
Understanding Radio Reception
FM Stereo
EM Stereo will give you the best sound, but FM signals
will reach only about
10 to 40 miles (14 to 45 km). Tall
buildings or hills can interfere with
FM signals, causing
the sound to come and go.
AM
The range for most AM stations is greater than for F”,
especially at night. The longer range, however, can
cause stations to interfere withveach other.
AM can also
pick up noise from things like storms and power lines.
To lower this noise, try reducing the treble level.
Tips about Your Audio System
Hearing damage from loud noise is almost undetectable
until it is too late. Your hearing. can adapt to higher
volumes
of sound. Sound that seems normal can be loud
and harmful to your hearing. Take precautions by
adjusting the volume control on your radio to a safe sound level before your hearing adapts to it.
3-17
Page 137 of 340
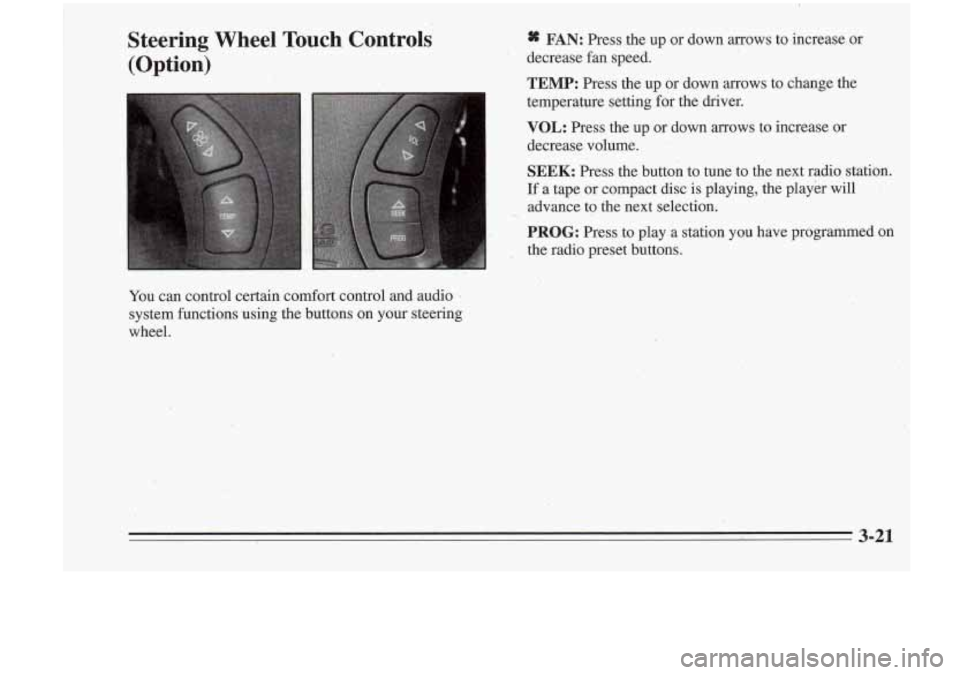
Steering Wheel Touch Controls (Option) 8S FAN: Press the up or down arrows to increase or
decrease fan speed.
TEMP: Press the up or down arrows to change the
temperature setting for the driver.
VOL: Press the up or down arrows to increase or
decrease volume.
SEEK: Press the button to tune to the next radio station.
If a tape or compact disc is playing, the player will
advance to the next selection.
’ PROG: Press to play a station you have programmed on
the radio preset buttons.
You
can control certain comfort control and audio -
system functions using the buttons on your steering
wheel.
3-21
Page 306 of 340
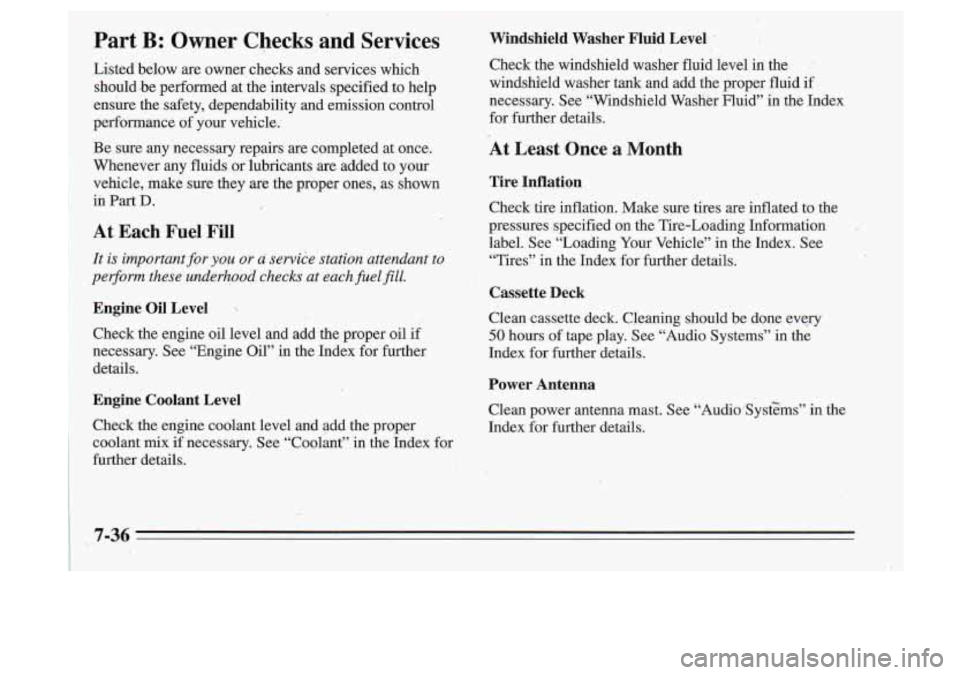
~ Part B: Owner Checks and Services Windshield Washer Fluid Level
Listed below are owner checks and services which
Check the windshield washer fluid level in the
should
be performed at the intervals specified to help windshield washer tank and add the proper fluid if
ensure the safety, dependability and emission control
necessary.
See “Windshield Washer Fluid” in the Index
performance of your vehicle. for further details.
Be sure any necessary repairs are completed at once.
Whenever any fluids or lubricants are added to your vehicle, make sure they are the proper ones, as shown
in Part
D.
’ At Each Fuel Fill
It is important for you or a service station attendant to
perform these underhood checks at each fuel
fill.
Engine Oil Level
Check the engine oil level and add the proper oil if
1 necessary. See “Engine Oil” in the Index for further
details.
Engine Coolant Level
Check the engine coolant level and add the proper coolant mix
if necessary. See “Coolant” in the Index for
further details.
At Least Once a Month
Tire Inflation
Check tire inflation. Make sure tires are inflated to the
pressures specified on the Tire-Loading Information
label.
See “Loading Your Vehicle” in the Index. See
“Tires” in the Index for further details.
Cassette Deck
Clean cassette deck. Gleaning should,be done every
50 hours of tape play. See “Audio Systems” in the
Index for further details.
Power Antenna
Clean power antenna mast. See “Audio*Syst$ms” in the
Index for further details.