1995 JEEP YJ fuse chart
[x] Cancel search: fuse chartPage 525 of 2158

POWER MIRRORS
CONTENTS
page page
DIAGNOSIS............................. 1
GENERAL INFORMATION.................. 1SERVICE PROCEDURES................... 4
GENERAL INFORMATION
Power outside rear view mirrors are an available
option on XJ (Cherokee) models. Following are gen-
eral descriptions of the major components in the
power mirror system. Refer to Group 8W - Wiring Di-
agrams for complete circuit descriptions and dia-
grams.
POWER MIRROR
The power mirrors are connected to battery feed at
all times. Each mirror head contains two electric mo-
tors, two drive mechanisms and the mirror glass.
One motor and drive controls mirror up-and-down
movement, and the other controls right-and-left
movement.
The mirror glass is the only serviced replacement
part for the power mirror assembly. If any other com-ponent of the mirror unit is faulty or damaged, the
entire assembly must be replaced.
POWER MIRROR SWITCH
Both the right and left mirror are controlled by a
multi-function switch located on the front of the cen-
ter console storage compartment, directly below the
armrest. The selector switch is moved right (right
mirror control), left (left mirror control), or center to
turn power mirrors off. Then one of four directional
control buttons is depressed to control movement of
the selected mirror up, down, right, or left. The
power mirror switch is serviced only as a complete
unit.
DIAGNOSIS
POWER MIRROR SYSTEM
(1) Check fuse 16 in Power Distribution Center
(PDC) and fuse 9 in fuseblock module. If OK, go to
next step. If not OK, replace fuse.
(2) Check for battery voltage at fuse 9 in fuseblock
module. If OK, go to next step. If not OK, repair cir-
cuit to fuse 16 in PDC.
(3) Remove power mirror switch from the center
console. See Power Mirror Switch Remove/Install.
(4) Disconnect wiring harness connector from
switch. Check for battery voltage at pink wire. If OK,
go to next step. If not OK, repair circuit to fuse 9 in
fuseblock module.
(5) Check for continuity between black wire in
switch harness connector and a good ground. There
should be continuity. If OK, go to next step. If not
OK, repair circuit to ground.
(6) Check switch continuity as shown in the Mirror
Switch Continuity charts. If OK, go to next step. If
not OK, replace switch.(7) See Power Mirror Switch illustration. Connect
a jumper wire from mirror switch connector cavity
for pin E to cavity for pin F. Now connect a second
jumper from connector cavity for pin G to each of the
following pin cavities: A, B, C, then D. In each case,
the selected mirror head should move. If OK, replace
switch. If not OK, go to next step.
(8) Remove door trim panel and unplug power mir-
ror connector inside door. Connect one jumper wire to
a good ground and a second jumper wire to a battery
feed. Connect other ends of jumpers to the mirror
side of connector in door (refer to Group 8W - Wiring
Diagrams for connector cavity identification). Mirror
head should move in each of the four directions. If
OK, repair wiring between mirror switch and door
connectors. If not OK, replace mirror.
JPOWER MIRRORS 8T - 1
Page 543 of 2158

WIRING DIAGRAMS
CONTENTS
page page
8W-01 GENERAL INFORMATIONÐWIRING
DIAGRAMS.................... 8W-01-1
8W-10 FUSE/FUSE BLOCK........... 8W-10-1
8W-11 POWER DISTRIBUTION........ 8W-11-1
8W-15 GROUND DISTRIBUTION....... 8W-15-1
8W-20 CHARGING SYSTEM.......... 8W-20-1
8W-21 STARTING SYSTEM........... 8W-21-1
8W-30 FUEL/IGNITION.............. 8W-30-1
8W-31 TRANSMISSION CONTROLS.... 8W-31-1
8W-32 ANTI-LOCK BRAKES.......... 8W-32-1
8W-33 VEHICLE SPEED CONTROL..... 8W-33-1
8W-40 INSTRUMENT CLUSTER....... 8W-40-1
8W-41 HORN/CIGAR LIGHTER......... 8W-41-1
8W-42 AIR CONDITIONING/HEATER.... 8W-42-1
8W-44 INTERIOR LIGHTING.......... 8W-44-1
8W-47 AUDIO SYSTEM.............. 8W-47-18W-48 HEATED REAR WINDOW....... 8W-48-1
8W-49 OVERHEAD CONSOLE......... 8W-49-1
8W-50 FRONT LIGHTING............. 8W-50-1
8W-51 REAR LIGHTING............. 8W-51-1
8W-52 TURN SIGNALS.............. 8W-52-1
8W-53 WIPERS..................... 8W-53-1
8W-54 TRAILER TOW................ 8W-54-1
8W-60 POWER WINDOWS.......... 8W-60-1
8W-61 POWER DOOR LOCKS......... 8W-61-1
8W-62 POWER MIRRORS............ 8W-62-1
8W-63 POWER SEAT................ 8W-63-1
8W-70 SPLICE INFORMATION........ 8W-70-1
8W-80 CONNECTOR PIN OUTS....... 8W-80-1
8W-90 CONNECTOR LOCATIONS...... 8W-90-1
8W-95 SPLICE LOCATIONS........... 8W-95-1
HOW TO USE THIS GROUP
The purpose of this group is to show the electrical
circuits in a clear, simple fashion and to make trou-
bleshooting easier. Components that work together
are shown together. All electrical components used in
a specific system are shown on one diagram. The feed
for a system is shown at the top of the page. All
wires, connectors, splices, and components are shown
in the flow of current to the bottom of the page. Wir-
ing which is not part of the circuit represented is ref-
erenced to another page/section, where the complete
circuit is shown. In addition, all switches, compo-
nents, and modules are shown in theat rest posi-
tion with the doors closed and the key removed
from the ignition.
If a component is part of several different circuits,
it is shown in the diagram for each. For example, the
headlamp switch is the main part of the exterior
lighting, but it also affects the interior lighting and
the chime warning system.
It is important to realize that no attempt is
made on the diagrams to represent components
and wiring as they appear on the vehicle. For
example, a short piece of wire is treated the
same as a long one. In addition, switches and
other components are shown as simply as pos-
sible, with regard to function only.
The wiring diagram show circuits for all wheel-
bases. If there is a difference in systems or compo-
nents between wheel-bases, an identifier is placed
next to the component.
SECTION IDENTIFICATION
Sections in Group 8W are organized by sub-sys-
tems. The sections contain circuit operation descrip-
tions, helpful information, and system diagrams. The
intention is to organize information by system, con-
sistently from year to year.
CONNECTOR LOCATIONS
Section 8W-90 contains Connector Location illus-
trations. The illustrations contain the connector
number and component identification. Connector Lo-
cation charts in Section 8W-90 reference the illustra-
tion number for components and connectors.
Section 8W-80 shows each connector and the cir-
cuits involved with that connector. The connectors
are identified using the number on the Diagram
pages.
SPLICE LOCATIONS
Splice Location charts in Section 8W-70 show the
entire splice, and provide references to other sections
the splice serves.
Section 8W-95 contains illustrations that show the
general location of the splices in each harness. The
illustrations show the splice by number, and provide
a written location.
JWIRING DIAGRAMSÐXJ VEHICLES 8W - 1 - 1
Page 819 of 2158

WIRING DIAGRAMS
CONTENTS
page page
8W-01 GENERAL INFORMATIONÐWIRING
DIAGRAMS...................... 8W-01-1
8W-10 FUSE/FUSE BLOCK........... 8W-10-1
8W-11 POWER DISTRIBUTION........ 8W-11-1
8W-15 GROUND DISTRIBUTION....... 8W-15-1
8W-20 CHARGING SYSTEM.......... 8W-20-1
8W-21 STARTING SYSTEM........... 8W-21-1
8W-30 FUEL/IGNITION.............. 8W-30-1
8W-31 TRANSMISSION CONTROLS.... 8W-31-1
8W-32 ANTI-LOCK BRAKES........... 8W-32-1
8W-33 VEHICLE SPEED CONTROL..... 8W-33-1
8W-40 INSTRUMENT CLUSTER....... 8W-40-1
8W-41 HORN/CIGAR LIGHTER........ 8W-41-1
8W-42 AIR CONDITIONING/HEATER.... 8W-42-1
8W-44 INTERIOR LIGHTING.......... 8W-44-1
8W-47 AUDIO SYSTEM.............. 8W-47-18W-48 HEATED REAR WINDOW....... 8W-48-1
8W-49 OVERHEAD CONSOLE.......... 8W-49-1
8W-50 FRONT LIGHTING............ 8W-50-1
8W-51 REAR LIGHTING............. 8W-51-1
8W-52 TURN SIGNALS.............. 8W-52-1
8W-53 WIPERS.................... 8W-53-1
8W-54 TRAILER TOW................ 8W-54-1
8W-60 POWER WINDOWS............ 8W-60-1
8W-61 POWER DOOR LOCKS......... 8W-61-1
8W-62 POWER MIRRORS............ 8W-62-1
8W-63 POWER SEAT................ 8W-63-1
8W-70 SPLICE INFORMATION........ 8W-70-1
8W-80 CONNECTOR PIN OUTS....... 8W-80-1
8W-90 CONNECTOR LOCATIONS...... 8W-90-1
8W-95 SPLICE LOCATIONS........... 8W-95-1
HOW TO USE THIS GROUP
The purpose of this group is to show the electrical
circuits in a clear, simple fashion and to make trou-
bleshooting easier. Components that work together
are shown together. All electrical components used in
a specific system are shown on one diagram. The feed
for a system is shown at the top of the page. All
wires, connectors, splices, and components are shown
in the flow of current to the bottom of the page. Wir-
ing which is not part of the circuit represented is ref-
erenced to another page/section, where the complete
circuit is shown. In addition, all switches, compo-
nents, and modules are shown in theat rest posi-
tion with the doors closed and the key removed
from the ignition.
If a component is part of several different circuits,
it is shown in the diagram for each. For example, the
headlamp switch is the main part of the exterior
lighting, but it also affects the interior lighting and
the chime warning system.
It is important to realize that no attempt is
made on the diagrams to represent components
and wiring as they appear on the vehicle. For
example, a short piece of wire is treated the
same as a long one. In addition, switches and
other components are shown as simply as pos-
sible, with regard to function only.
The wiring diagram show circuits for all wheel-
bases. If there is a difference in systems or compo-
nents between wheel-bases, an identifier is placed
next to the component.
SECTION IDENTIFICATION
Sections in Group 8W are organized by sub-sys-
tems. The sections contain circuit operation descrip-
tions, helpful information, and system diagrams. The
intention is to organize information by system, con-
sistently from year to year.
CONNECTOR LOCATIONS
Section 8W-90 contains Connector Location illus-
trations. The illustrations contain the connector
number and component identification. Connector Lo-
cation charts in Section 8W-90 reference the illustra-
tion number for components and connectors.
Section 8W-80 shows each connector and the cir-
cuits involved with that connector. The connectors
are identified using the number on the Diagram
pages.
SPLICE LOCATIONS
Splice Location charts in Section 8W-70 show the
entire splice, and provide references to other sections
the splice serves.
Section 8W-95 contains illustrations that show the
general location of the splices in each harness. The
illustrations show the splice by number, and provide
a written location.
JWIRING DIAGRAMSÐXJ-RHD 8W - 1 - 1
Page 1094 of 2158
WIRING DIAGRAMS
CONTENTS
page page
8W-01 GENERAL INFORMATIONÐWIRING
DIAGRAMS...................... 8W-01-1
8W-10 FUSE/FUSE BLOCK........... 8W-10-1
8W-11 POWER DISTRIBUTION........ 8W-11-1
8W-15 GROUND DISTRIBUTION....... 8W-15-1
8W-20 CHARGING SYSTEM.......... 8W-20-1
8W-21 STARTING SYSTEM........... 8W-21-1
8W-30 FUEL/IGNITION.............. 8W-30-1
8W-31 TRANSMISSION CONTROLS.... 8W-31-1
8W-32 ANTI-LOCK BRAKES.......... 8W-32-1
8W-40 INSTRUMENT CLUSTER....... 8W-40-1
8W-41 HORN/CIGAR LIGHTER........ 8W-41-18W-42 AIR CONDITIONING/HEATER.... 8W-42-1
8W-44 INTERIOR LIGHTING.......... 8W-44-1
8W-47 AUDIO SYSTEM.............. 8W-47-1
8W-48 HEATED REAR WINDOW....... 8W-48-1
8W-50 FRONT LIGHTING............ 8W-50-1
8W-51 REAR LIGHTING............. 8W-51-1
8W-52 TURN SIGNALS.............. 8W-52-1
8W-53 WIPERS.................... 8W-53-1
8W-70 SPLICE INFORMATION........ 8W-70-1
8W-80 CONNECTOR PIN OUTS....... 8W-80-1
8W-90 CONNECTOR LOCATIONS...... 8W-90-1
8W-95 SPLICE LOCATIONS........... 8W-95-1
HOW TO USE THIS GROUP
The purpose of this group is to show the electrical
circuits in a clear, simple fashion and to make trou-
bleshooting easier. Components that work together
are shown together. All electrical components used in
a specific system are shown on one diagram. The feed
for a system is shown at the top of the page. All
wires, connectors, splices, and components are shown
in the flow of current to the bottom of the page. Wir-
ing which is not part of the circuit represented is ref-
erenced to another page/section, where the complete
circuit is shown. In addition, all switches, compo-
nents, and modules are shown in theat rest posi-
tion with the doors closed and the key removed
from the ignition.
If a component is part of several different circuits,
it is shown in the diagram for each. For example, the
headlamp switch is the main part of the exterior
lighting, but it also affects the interior lighting and
the chime warning system.
It is important to realize that no attempt is
made on the diagrams to represent components
and wiring as they appear on the vehicle. For
example, a short piece of wire is treated the
same as a long one. In addition, switches and
other components are shown as simply as pos-
sible, with regard to function only.
The wiring diagram show circuits for all wheel-
bases. If there is a difference in systems or compo-
nents between wheel-bases, an identifier is placed
next to the component.
SECTION IDENTIFICATION
Sections in Group 8W are organized by sub-sys-
tems. The sections contain circuit operation descrip-
tions, helpful information, and system diagrams. The
intention is to organize information by system, con-
sistently from year to year.
CONNECTOR LOCATIONS
Section 8W-90 contains Connector Location illus-
trations. The illustrations contain the connector
number and component identification. Connector Lo-
cation charts in Section 8W-90 reference the illustra-
tion number for components and connectors.
Section 8W-80 shows each connector and the cir-
cuits involved with that connector. The connectors
are identified using the number on the Diagram
pages.
SPLICE LOCATIONS
Splice Location charts in Section 8W-70 show the
entire splice, and provide references to other sections
the splice serves.
Section 8W-95 contains illustrations that show the
general location of the splices in each harness. The
illustrations show the splice by number, and provide
a written location.
JWIRING DIAGRAMSÐÐYJ VEHICLES 8W - 1 - 1
Page 1739 of 2158
(2) Verify transmission throttle cable operation.
Repair or replace cable if necessary.
(3) Check engine throttle operation. Operate accel-
erator pedal and observe injector throttle plate move-
ment. Adjust linkage if throttle plate does not reach
wide open position.
(4) Check transmission fluid level when fluid is at
normal operating temperature. Start engine. Shift
transmission through all gear ranges then back to
Neutral. Correct level is to Full or Add mark on dip-
stick with engine at curb idle speed.
(5) Check and adjust park/neutral position switch
if necessary.
(6) Check throttle position sensor adjustment and
operation. Adjust the sensor if necessary.
MANUAL SHIFTING TEST
(1) This test determines if problem is related to
mechanical or electrical component.
(2) Stop engine and disconnect transmission con-
trol module or module fuse.
(3) Road test vehicle. Shift transmission into each
gear range. Transmission should operate as follows:
²lock in Park
²back up in Reverse
²not move in Neutral
²provide first gear only with shift lever in 1-2 posi-
tion
²operate in third gear only with shift lever in 3 po-
sition
²operate in overdrive fourth gear in D position
(4) If transmission operates as described, proceed
to next step. However, if forward gear ranges were
difficult to distinguish (all feel the same), or vehicle
would not back up, refer to diagnosis charts. Do not
perform stall or time lag tests.
CAUTION: Do not overspeed the engine during the
next test step. Ease off the throttle and allow the
vehicle to slow before downshifting.
(5) Continue road test. Manually downshift trans-
mission from D to 3, and from 3 to 1-2 position. Then
manually upshift transmission through forward
ranges again.
(6) If transmission operation is OK, perform stall,
time lag and pressure tests. If transmission shifting
problem is encountered, refer to diagnosis charts.
(7) If a problem still exists, continue testing with
DRB scan tool.
HYDRAULIC PRESSURE TEST
PRESSURE TEST PROCEDURE
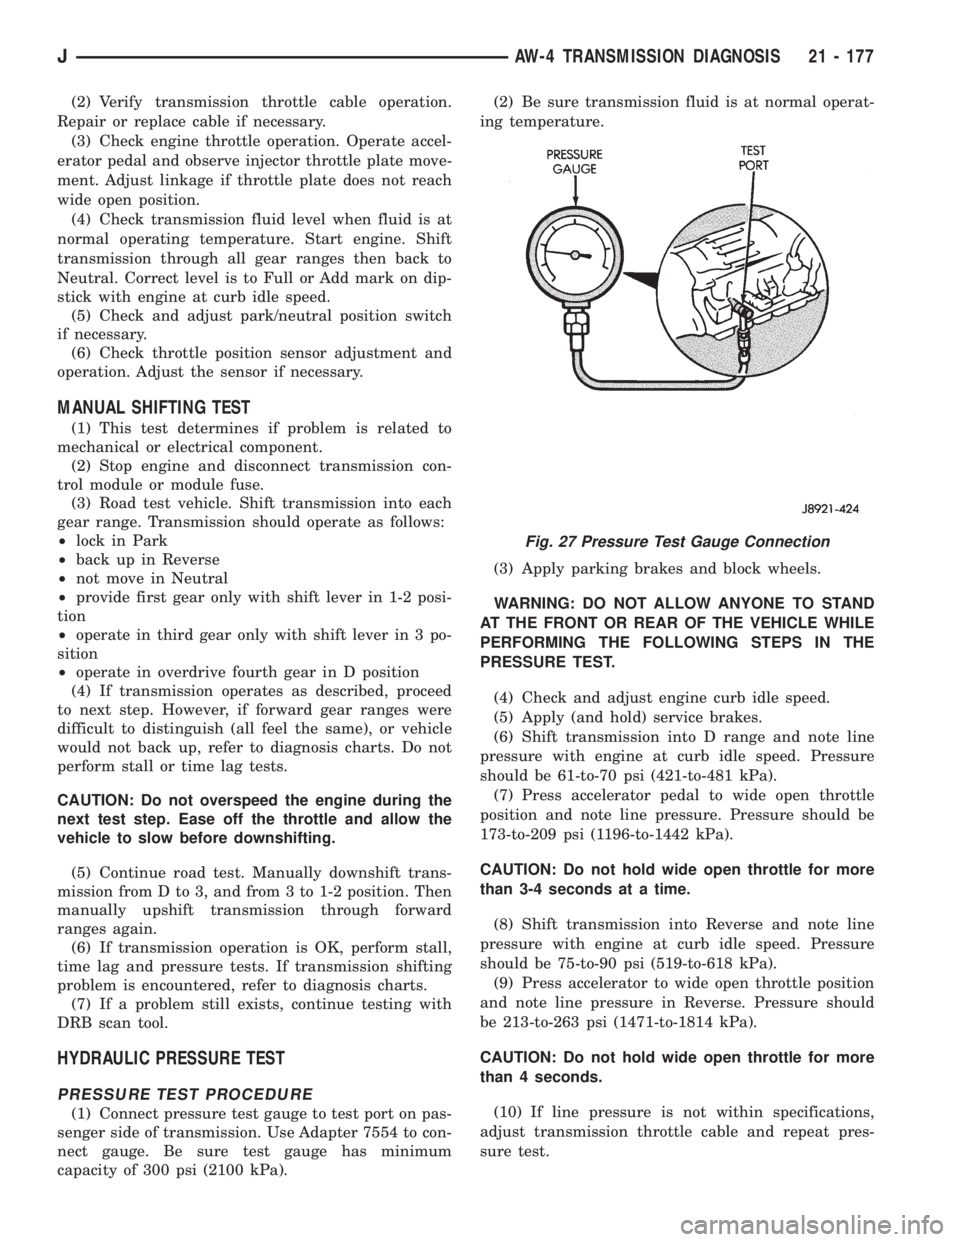
(1) Connect pressure test gauge to test port on pas-
senger side of transmission. Use Adapter 7554 to con-
nect gauge. Be sure test gauge has minimum
capacity of 300 psi (2100 kPa).(2) Be sure transmission fluid is at normal operat-
ing temperature.
(3) Apply parking brakes and block wheels.
WARNING: DO NOT ALLOW ANYONE TO STAND
AT THE FRONT OR REAR OF THE VEHICLE WHILE
PERFORMING THE FOLLOWING STEPS IN THE
PRESSURE TEST.
(4) Check and adjust engine curb idle speed.
(5) Apply (and hold) service brakes.
(6) Shift transmission into D range and note line
pressure with engine at curb idle speed. Pressure
should be 61-to-70 psi (421-to-481 kPa).
(7) Press accelerator pedal to wide open throttle
position and note line pressure. Pressure should be
173-to-209 psi (1196-to-1442 kPa).
CAUTION: Do not hold wide open throttle for more
than 3-4 seconds at a time.
(8) Shift transmission into Reverse and note line
pressure with engine at curb idle speed. Pressure
should be 75-to-90 psi (519-to-618 kPa).
(9) Press accelerator to wide open throttle position
and note line pressure in Reverse. Pressure should
be 213-to-263 psi (1471-to-1814 kPa).
CAUTION: Do not hold wide open throttle for more
than 4 seconds.
(10) If line pressure is not within specifications,
adjust transmission throttle cable and repeat pres-
sure test.
Fig. 27 Pressure Test Gauge Connection
JAW-4 TRANSMISSION DIAGNOSIS 21 - 177
Page 2097 of 2158
(6) Test A/C blower switch HIGH terminal with
blower switch in HIGH, should be battery voltage. If
not, replace switch.
BLOWER MOTOR
The A/C blower motor is attached to the evaporator
housing mounted under the instrument panel. The
motor has a ground wire and 3 wires connect to the
motor brushes. When voltage is applied to the sepa-
rate brushes it provides the 3 blower speeds LO,
MED, and HIGH.
BLOWER MOTOR TEST
Turn ignition switch to RUN for voltage tests and
turn ignition switch to OFF for resistance test.
(1) Test A/C blower motor ground terminal should
be 0 ohms. If not, repair ground circuit.
(2) Test A/C blower motor connector LO terminal
with blower switch in LO, should be battery voltage.
If not repair open from blower switch. If the blower
motor is still inoperative replace motor.
(3) Test A/C blower motor connector MED terminal
with blower switch in MED, should be battery volt-
age. If not repair open from blower switch. If the
blower motor is still inoperative replace motor.
(4) Test A/C blower motor connector HIGH termi-
nal with blower switch in HIGH, should be battery
voltage. If not, repair open from blower switch. If the
blower motor is still inoperative, replace motor.
HEATER DIAGNOSIS
On LHD XJ vehicles a water valve controls coolant
flow to the heater core. The valve is vacuum oper-
ated. When vacuum is applied, the valve opens and
coolant is directed through the heater core and back
to the engine. When the water valve is closed (no
vacuum applied) coolant flow bypasses the heater
core back to the engine.
The heating system receives its battery feed from
the fuse box. On YJ vehicles the feed circuit runs to
the HEATER/OFF switch and then to the BLOWER
switch. On XJ vehicles the feed circuit runs to the
HEAT/MODE switch and then to the BLOWER
switch.
The blower speed is controlled by the blower switch
and blower resistors. With the switch in LO, battery
voltage is supplied to the motor through all of the re-
sistors. The motor runs slowly. When the blower
switch is moved to a higher speed, battery voltage in-
creases to the blower motor which increase its speed.
This is accomplished by bypassing some of the blower
resistors. When the switch is in HI, blower resistors
are bypassed and battery voltage is applied directly
to the blower motor.
The following chart has been developed for quick
reference.
Refer to the Group 8W Wiring Diagrams for com-
plete wiring schematic.
JHEATING AND AIR CONDITIONING 24 - 17
Page 2135 of 2158
FUEL INJECTION (MFI)ÐCOMPONENT
DESCRIPTION/SYSTEM OPERATION,
MULTI-PORT........................14-19
FUEL INJECTION (MFI)ÐCOMPONENT
REMOVAL/INSTALLATION, MULTI-PORT . . . 14-58
FUEL INJECTION (MFI)ÐGENERAL
DIAGNOSIS, MULTI-PORT..............14-35
FUEL INJECTOR......................14-60
FUEL INJECTOR TEST.................14-51
FUEL INJECTORS; FUEL/IGNITION (XJ) . 8W-30-1
FUEL INJECTORS; FUEL/IGNITION (YJ) . 8W-30-2
FUEL INJECTORS; FUEL/IGNITION
(XJ-RHD).........................8W-30-1
FUEL INJECTORSÐPCM OUTPUT........14-27
FUEL PRESSURE LEAK DOWN TEST......14-8
FUEL PRESSURE REGULATOR.....14-33,14-61
FUEL PRESSURE RELEASE PROCEDURE . . . 14-6
FUEL PUMP CAPACITY TEST............14-7
FUEL PUMP ELECTRICAL CONTROL.......14-5
FUEL PUMP MODULE; FUEL SYSTEM....14-61,
14-3
FUEL PUMP MODULE; FUEL/IGNITION
(XJ).............................8W-30-2
FUEL PUMP MODULE; FUEL/IGNITION
(YJ).............................8W-30-2
FUEL PUMP MODULE; FUEL/IGNITION
(XJ-RHD).........................8W-30-2
FUEL PUMP RELAY; FUEL SYSTEM......14-61
FUEL PUMP RELAY; FUEL/IGNITION
(XJ).............................8W-30-2
FUEL PUMP RELAY; FUEL/IGNITION
(YJ).............................8W-30-2
FUEL PUMP RELAY; FUEL/IGNITION
(XJ-RHD).........................8W-30-2
FUEL PUMP RELAY TESTING...........14-47
FUEL PUMP RELAYÐPCM OUTPUT......14-27
FUEL RAIL..........................14-33
FUEL RAIL ASSEMBLY................14-62
FUEL REQUIREMENTS...................0-1
FUEL SYSTEM.......................14-67
FUEL SYSTEM PRESSURE RELEASE
PROCEDURE........................14-62
FUEL SYSTEM PRESSURE TEST.....14-51,14-6
FUEL TANK.........................14-13
FUEL TANK CAPACITIES..........14-13,14-67
FUEL TANK FILLER TUBE CAP;
EMISSION CONTROL SYSTEMS......25-4,25-7
FUEL TANK FILLER TUBE CAP; FUEL
SYSTEM............................14-13
FUEL TANK FILLER TUBE, NO-LEAD......14-13
FUEL TANK PRESSURE RELIEF/
ROLLOVER VALVE...............14-16,14-62
FUEL TANK SKID PLATE...........13-15,13-3
FUEL TANK SUPPORT STRAP............13-4
FUEL TANKS...................14-13,14-62
FUEL TUBES/LINES/HOSES AND CLAMPS . 14-62,
14-9
FUEL USAGE STATEMENT...............14-1
FUEL USAGE STATEMENTÐGAS
ENGINES............................0-19
FUEL WARNING LAMP, LOW;
INSTRUMENT CLUSTER (XJ).........8W-40-1
FULL FLOOR CONSOLEÐXJ............23-95
FULL-METAL DOOR ASSIST HANDLEÐ
YJ ...............................23-136
FULL-METAL DOOR HINGESÐYJ.......23-140
FULL-METAL DOOR KEY LOCK
CYLINDERÐYJ.....................23-139
FULL-METAL DOOR LATCH EXTERNAL
RELEASE HANDLEÐYJ...............23-140
FULL-METAL DOOR LATCH INSIDE
RELEASE AND LOCK HANDLEÐYJ......23-137
FULL-METAL DOOR LATCHÐYJ........23-140
FULL-METAL DOOR SERVICEÐYJ......23-142
FULL-METAL DOOR TRIM PANELÐYJ . . . 23-137
FULL-METAL DOOR VENT WINDOW
GLASSÐYJ........................23-137
FULL-METAL DOOR WATERDAMÐYJ....23-137
FULL-METAL DOOR WEATHERSTRIP
SEALSÐYJ
........................23-141
FULL-METAL DOOR WINDOW GLASS
REGULATOR HANDLEÐYJ
............23-136
FULL-METAL DOOR WINDOW GLASS
REGULATORÐYJ
...................23-138
FULL-METAL DOOR WINDOW
GLASSÐYJ
........................23-139
FUNCTION TROUBLE DIAGNOSISÐXJ,
HEADLAMP DELAY
...................8L-14FUSE, IGNITION-OFF DRAW.............8F-1
FUSE, IN-LINE........................8F-1
GAP, SPEED SENSOR AIR...............5-37
GARAGE DOOR OPENER STORAGE,
REMOTE............................8C-1
GAS RECIRCULATION (EGR) SYSTEM,
EXHAUST............................25-1
GASKET FAILURE DIAGNOSIS, ENGINE
CYLINDER HEAD.......................9-5
GASKETS, FORM-IN-PLACE...............9-1
GAUGE CLUSTER, 9 X 3.5 ..............8E-23
GAUGE CLUSTER (LHD), HIGH-LINE.......8E-9
GAUGE CLUSTER, LOW-LINE............8E-8
GAUGE, ENGINE COOLANT
TEMPERATURE; INSTRUMENT
CLUSTER (XJ).....................8W-40-1
GAUGE, FUEL; INSTRUMENT CLUSTER
(XJ).............................8W-40-1
GAUGE, FUEL; INSTRUMENT CLUSTER
(XJ-RHD).........................8W-40-1
GAUGE HOUSINGSÐYJ, INSTRUMENT
CLUSTER..........................23-151
GAUGE, OIL PRESSURE; INSTRUMENT
CLUSTER (XJ).....................8W-40-2
GAUGE PACKAGE CLUSTER.......8E-31,8E-43
GAUGE SENDING UNIT, FUEL...........14-16
GAUGE SET, MANIFOLD................24-7
GAUGES..............8E-24,8E-27,8E-2,8E-5
GAUGES, PRESSURE...................22-2
GAUGES REMOVE/INSTALL.........8E-17,8E-39
GAUGESÐYJ, INSTRUMENT PANEL......8E-24
GEAR ADJUSTMENTS IN VEHICLE.......19-39
GEAR ADJUSTMENTS ON BENCH........19-44
GEAR ADJUSTMENTS, STEERING........19-24
GEAR AND BEARING NOISE; FRONT
SUSPENSION AND AXLE................2-18
GEAR AND BEARING NOISE; REAR
SUSPENSION AND AXLES................3-9
GEAR AND CLUTCH OVERHAUL,
OVERDRIVE PLANETARY..............21-218
GEAR AND NO. 1 ONE-WAY CLUTCH
OVERHAUL, SUN....................21-238
GEAR ASSEMBLY....................19-43
GEAR ASSEMBLY/INSTALLATION, PINION . . 2-42
GEAR CLEANING AND INSPECTION......19-42
GEAR DEPTH INFORMATION, PINION;
FRONT SUSPENSION AND AXLE..........2-39
GEAR DEPTH INFORMATION, PINION;
REAR SUSPENSION AND AXLES..........3-21
GEAR DEPTH VARIANCE, PINION; FRONT
SUSPENSION AND AXLE................2-40
GEAR DEPTH VARIANCE, PINION; REAR
SUSPENSION AND AXLES...........3-22,3-39
GEAR DISASSEMBLY..................19-39
GEAR DISASSEMBLY INFORMATION......19-26
GEAR LEAKAGE DIAGNOSIS............19-10
GEAR, MANUAL STEERING;
LUBRICATION AND MAINTENANCE........0-30
GEAR, MANUAL STEERING; STEERING . . . 19-37,
19-78
GEAR OVERDRIVE COMPONENTS,
FOURTH...........................21-167
GEAR OVERHAUL, FRONT PLANETARY . . . 21-237
GEAR OVERHAUL, GOVERNOR AND
PARK .............................21-127
GEAR, POWER STEERING..............19-78
GEAR RATIOS........................21-2
GEAR RATIOS, TRANSMISSION.........21-34
GEAR, RECIRCULATING BALL POWER
STEERING..........................19-21
GEAR REPLACEMENT, STEERING . . . 19-23,19-45
GEAR SERVICE, GOVERNOR AND PARK . . 21-105
GEAR SPECIFICATIONS, MANUAL
STEERING..........................19-46
GEAR SPECIFICATIONS, POWER
STEERING..........................19-36
GEAR, SPEED SENSOR ROTORÐ
SPEEDOMETER DRIVE...............21-193
GEAR TRAIN OVERHAUL, PLANETARY . . . 21-141
GEARS, RECIRCULATING-BALL POWER
STEERING
..........................19-74
GEARSHIFT CABLE/LINKAGE
ADJUSTMENT
.......................21-71
GEARTRAIN OPERATION AND
APPLICATION CHARTS
...............21-169
GENERAL BODY SERVICE INFORMATION
. . . 23-1
GENERAL DIAGNOSIS INFORMATION;
CLUTCH
..............................6-3GENERAL DIAGNOSIS INFORMATION;
TRANSMISSION AND TRANSFER CASE . . 21-176
GENERAL INFORMATION; AIR
CONDITIONING/HEATER (XJ).........8W-42-1
GENERAL INFORMATION; AIR
CONDITIONING/HEATER (XJ-RHD).....8W-42-1
GENERAL INFORMATION; AIR
CONDITIONING/HEATER (YJ) . . 8W-42-1,8W-42-2
GENERAL INFORMATION; ANTI-LOCK
BRAKES (XJ)......................8W-32-1
GENERAL INFORMATION; ANTI-LOCK
BRAKES (XJ-RHD).................8W-32-1
GENERAL INFORMATION; ANTI-LOCK
BRAKES (YJ)......................8W-32-1
GENERAL INFORMATION; AUDIO
SYSTEMS............................8F-1
GENERAL INFORMATION; BATTERY/
STARTER/GENERATOR SERVICE . 8B-1,8B-4,8B-6
GENERAL INFORMATION; BATTERY/
STARTING/CHARGING SYSTEMS
DIAGNOSTICS . . . 8A-10,8A-11,8A-17,8A-22,8A-1,
8A-2
GENERAL INFORMATION; BRAKES . . . 5-22,5-45,
5-1,5-3,5-4
GENERAL INFORMATION; CHIME/BUZZER
WARNING SYSTEMS...................8U-1
GENERAL INFORMATION; CLUTCH.........6-1
GENERAL INFORMATION; CONNECTOR
LOCATIONS (XJ)...................8W-90-1
GENERAL INFORMATION; CONNECTOR
LOCATIONS (XJ-RHD)...............8W-90-1
GENERAL INFORMATION; CONNECTOR
LOCATIONS (YJ)...................8W-90-1
GENERAL INFORMATION; CONNECTOR
PIN OUTS (XJ)....................8W-80-1
GENERAL INFORMATION; CONNECTOR
PIN OUTS (XJ-RHD)................8W-80-1
GENERAL INFORMATION; CONNECTOR
PIN OUTS (YJ)....................8W-80-1
GENERAL INFORMATION; COOLING
SYSTEM.................7-38,7-44,7-45,7-1
GENERAL INFORMATION; EMISSION
CONTROL SYSTEMS...................25-1
GENERAL INFORMATION; ENGINES . . . 9-13,9-55,
9-5
GENERAL INFORMATION; EXHAUST
SYSTEM AND INTAKE MANIFOLD.........11-1
GENERAL INFORMATION; FRAME AND
BUMPERS......................13-10,13-1
GENERAL INFORMATION; FRONT
SUSPENSION AND AXLE..........2-18,2-1,2-5
GENERAL INFORMATION; FUEL SYSTEM . . 14-13,
14-17,14-19,14-35,14-67,14-1
GENERAL INFORMATION; FUSE/FUSE
BLOCK (XJ).......................8W-10-1
GENERAL INFORMATION; FUSE/FUSE
BLOCK (XJ-RHD)..................8W-10-1
GENERAL INFORMATION; GROUND
DISTRIBUTION (XJ)................8W-15-1
GENERAL INFORMATION; GROUND
DISTRIBUTION (XJ-RHD)............8W-15-1
GENERAL INFORMATION; GROUND
DISTRIBUTION (YJ)................8W-15-1
GENERAL INFORMATION; HEATING AND
AIR CONDITIONING....................24-1
GENERAL INFORMATION; HORNS........8G-1
GENERAL INFORMATION; IGNITION
SYSTEMS.......8D-17,8D-29,8D-32,8D-1,8D-6
GENERAL INFORMATION; INSTRUMENT
PANEL AND GAUGESÐXJ..........8E-24,8E-1
GENERAL INFORMATION; INTERIOR
LIGHTING (XJ)....................8W-44-1
GENERAL INFORMATION; INTERIOR
LIGHTING (XJ-RHD)................8W-44-1
GENERAL INFORMATION; INTERIOR
LIGHTING (YJ)....................8W-44-1
GENERAL INFORMATION; LAMPS . . 8L-18,8L-19,
8L-32,8L-1
GENERAL INFORMATION; LUBRICATION
AND MAINTENANCE
....................0-1
GENERAL INFORMATION; OVERHEAD
CONSOLE
...........................8C-1
GENERAL INFORMATION; POWER
DISTRIBUTION (XJ)
................8W-11-1
GENERAL INFORMATION; POWER
DISTRIBUTION (XJ-RHD)
............8W-11-1
GENERAL INFORMATION; POWER
DISTRIBUTION (YJ)
................8W-11-1
JINDEX 11
Description Group-Page Description Group-Page Description Group-Page
Page 2138 of 2158
INDEX, DIAGRAM; FRONT LIGHTING
(XJ).............................8W-50-2
INDEX, DIAGRAM; FRONT LIGHTING
(XJ-RHD).........................8W-50-3
INDEX, DIAGRAM; FRONT LIGHTING
(YJ).............................8W-50-2
INDEX, DIAGRAM; FUEL/IGNITION (YJ) . 8W-30-5
INDEX, DIAGRAM; FUSE/FUSE BLOCK
(XJ).............................8W-10-1
INDEX, DIAGRAM; FUSE/FUSE BLOCK
(XJ-RHD).........................8W-10-1
INDEX, DIAGRAM; FUSE/FUSE BLOCK
(YJ).............................8W-10-1
INDEX, DIAGRAM; GROUND
DISTRIBUTION (XJ)................8W-15-1
INDEX, DIAGRAM; GROUND
DISTRIBUTION (XJ-RHD)............8W-15-1
INDEX, DIAGRAM; GROUND
DISTRIBUTION (YJ)................8W-15-1
INDEX, DIAGRAM; HEATED REAR
WINDOW (XJ).....................8W-48-1
INDEX, DIAGRAM; HEATED REAR
WINDOW (XJ-RHD).................8W-48-1
INDEX, DIAGRAM; HEATED REAR
WINDOW (YJ).....................8W-48-1
INDEX, DIAGRAM; HORN/CIGAR
LIGHTER............................8E-1
INDEX, DIAGRAM; HORN/CIGAR
LIGHTER (YJ).....................8W-41-1
INDEX, DIAGRAM; INSTRUMENT
CLUSTER (XJ).............8W-40-1,8W-40-3
INDEX, DIAGRAM; INSTRUMENT
CLUSTER (XJ-RHD)................8W-40-3
INDEX, DIAGRAM; INSTRUMENT
CLUSTER (YJ).....................8W-40-2
INDEX, DIAGRAM; INTERIOR LIGHTING
(XJ).............................8W-44-2
INDEX, DIAGRAM; INTERIOR LIGHTING
(XJ-RHD).........................8W-44-2
INDEX, DIAGRAM; INTERIOR LIGHTING
(YJ).............................8W-44-2
INDEX, DIAGRAM; OVERHEAD CONSOLE
(XJ).............................8W-49-1
INDEX, DIAGRAM; OVERHEAD CONSOLE
(XJ-RHD).........................8W-49-1
INDEX, DIAGRAM; POWER
DISTRIBUTION (XJ)................8W-11-1
INDEX, DIAGRAM; POWER
DISTRIBUTION (XJ-RHD)............8W-11-1
INDEX, DIAGRAM; POWER
DISTRIBUTION (YJ)................8W-11-1
INDEX, DIAGRAM; POWER DOOR LOCKS
(XJ).............................8W-61-1
INDEX, DIAGRAM; POWER DOOR LOCKS
(XJ-RHD).........................8W-61-1
INDEX, DIAGRAM; POWER MIRRORS
(XJ).............................8W-62-1
INDEX, DIAGRAM; POWER MIRRORS
(XJ-RHD).........................8W-62-1
INDEX, DIAGRAM; POWER SEAT (XJ) . . 8W-63-1
INDEX, DIAGRAM; POWER SEAT
(XJ-RHD).........................8W-63-1
INDEX, DIAGRAM; POWER WINDOWS
(XJ).............................8W-60-2
INDEX, DIAGRAM; POWER WINDOWS
(XJ-RHD).........................8W-60-2
INDEX, DIAGRAM; REAR LIGHTING
(XJ).............................8W-51-1
INDEX, DIAGRAM; REAR LIGHTING
(XJ-RHD).........................8W-51-1
INDEX, DIAGRAM; REAR LIGHTING
(YJ).............................8W-51-1
INDEX, DIAGRAM; STARTING SYSTEM
(XJ).............................8W-21-1
INDEX, DIAGRAM; STARTING SYSTEM
(XJ-RHD).........................8W-21-1
INDEX, DIAGRAM; STARTING SYSTEM
(YJ).............................8W-21-1
INDEX, DIAGRAM; TRAILER TOW (XJ) . . 8W-54-1
INDEX, DIAGRAM; TRAILER TOW
(XJ-RHD)
.........................8W-54-1
INDEX, DIAGRAM; TRANSMISSION
CONTROLS (XJ)
...................8W-31-1
INDEX, DIAGRAM; TRANSMISSION
CONTROLS (XJ-RHD)
...............8W-31-1
INDEX, DIAGRAM; TRANSMISSION
CONTROLS (YJ)
...................8W-31-1
INDEX, DIAGRAM; TURN SIGNALS (XJ)
. 8W-52-1INDEX, DIAGRAM; TURN SIGNALS
(XJ-RHD).........................8W-52-1
INDEX, DIAGRAM; TURN SIGNALS (YJ) . 8W-52-1
INDEX, DIAGRAM; VEHICLE SPEED
CONTROL (XJ)....................8W-33-1
INDEX, DIAGRAM; VEHICLE SPEED
CONTROL (XJ-RHD)................8W-33-1
INDEX, DIAGRAM; WIPERS (XJ).......8W-53-2
INDEX, DIAGRAM; WIPERS (XJ-RHD) . . 8W-53-2
INDEX, DIAGRAM; WIPERS (YJ).......8W-53-2
INDEX, DIAGRAM; FUEL/IGNITION
(XJ-RHD).........................8W-30-5
INDEX, GROUP; COOLING SYSTEM.......8E-1
INDEX, GROUP; INSTRUMENT PANEL
AND GAUGES........................8E-1
INDEX, SPLICE; SPLICE INFORMATION
(XJ).............................8W-70-1
INDEX, SPLICE; SPLICE INFORMATION
(XJ-RHD).........................8W-70-1
INDEX, SPLICE; SPLICE INFORMATION
(YJ).............................8W-70-1
INDEXÐ2.5L ENGINE, DIAGRAM......8W-30-6
INDEXÐ4.0L ENGINE, DIAGRAM......8W-30-6
INDICATOR LAMP, CHARGING SYSTEM . 8W-40-3
INDICATOR LAMP, HIGH-BEAM;
INSTRUMENT CLUSTER (XJ).........8W-40-2
INDICATOR LAMP, HIGH-BEAM;
INSTRUMENT CLUSTER (XJ-RHD).....8W-40-2
INDICATOR LAMP (MIL), MALFUNCTION;
FUEL/IGNITION (XJ)................8W-30-5
INDICATOR LAMP (MIL), MALFUNCTION;
FUEL/IGNITION (YJ)................8W-30-5
INDICATOR LAMP (MIL), MALFUNCTION;
INSTRUMENT CLUSTER (XJ).........8W-40-2
INDICATOR LAMP (MIL), MALFUNCTION;
INSTRUMENT CLUSTER (XJ-RHD).....8W-40-1
INDICATOR LAMP (MIL), MALFUNCTION;
FUEL/IGNITION (XJ-RHD)............8W-30-4
INDICATOR LAMPÐPCM OUTPUT,
MALFUNCTION......................14-28
INDICATOR LAMPS.....8E-12,8E-25,8E-32,8E-3
INDICATOR LAMPS, TURN SIGNAL;
INSTRUMENT CLUSTER (XJ).........8W-40-2
INDICATOR LAMPS, TURN SIGNAL;
INSTRUMENT CLUSTER (XJ-RHD).....8W-40-2
INDICATOR (SRI) LAMP, SERVICE
REMINDER..........................25-1
INDICATOR WARNING LAMP, SEAT BELT;
INSTRUMENT CLUSTER (XJ).........8W-40-2
INDICATOR WARNING LAMP, SEAT BELT;
INSTRUMENT CLUSTER (XJ-RHD).....8W-40-2
INDICATORÐPCM OUTPUT, SHIFT.......14-29
INDICATORS, TREAD WEAR.............22-3
INFLATION PRESSURES, TIRE...........22-2
INFORMATIONÐXJ, DOME/COURTESY
LAMP SERVICE......................8L-16
INFORMATIONÐXJ, UNDERHOOD LAMP
SERVICE...........................8L-12
INFORMATIONÐYJ, DOME/COURTESY
LAMP SERVICE......................8L-31
INFORMATIONÐYJ, SOFT TOP SERVICE . 23-127
INFORMATIONÐYJ, UNDERHOOD LAMP
SERVICE...........................8L-28
INITIALIZATION, ABS SYSTEM
POWER-UP..........................5-35
INJECTION (MFI)ÐCOMPONENT
DESCRIPTION/SYSTEM OPERATION,
MULTI-PORT FUEL...................14-19
INJECTION (MFI)ÐCOMPONENT
REMOVAL/INSTALLATION, MULTI-PORT
FUEL..............................14-58
INJECTION (MFI)ÐGENERAL
DIAGNOSIS, MULTI-PORT FUEL.........14-35
INJECTOR DIAGNOSISÐVEHICLE RUNS
ROUGH AND/OR HAS A MISS...........14-52
INJECTOR, FUEL.....................14-60
INJECTOR TEST, FUEL.................14-51
INJECTORS, FUEL; FUEL/IGNITION (XJ) . 8W-30-1
INJECTORS, FUEL; FUEL/IGNITION (YJ) . 8W-30-2
INJECTORS, FUEL; FUEL/IGNITION
(XJ-RHD).........................8W-30-1
INJECTORSÐPCM OUTPUT, FUEL
.......14-27
IN-LINE FUSE
........................8F-1
INNER AXLE SHAFT OIL SEAL
REPLACEMENT
.......................2-35
INNER SCUFF PLATE/COWL SIDE TRIM
PANELÐXJ, FRONT
...................23-86
INNER SPLASH SHIELDSÐYJ, FENDER
. . 23-116INPUT, AIR CONDITIONING (A/C)
CONTROLSÐPCM....................14-21
INPUT, AUTOMATIC SHUTDOWN (ASD)
SENSEÐPCM.......................14-21
INPUT, BATTERY VOLTAGEÐPCM........14-21
INPUT, BRAKE SWITCH; ANTI-LOCK
BRAKES (XJ)......................8W-32-2
INPUT, BRAKE SWITCH; ANTI-LOCK
BRAKES (XJ-RHD).................8W-32-2
INPUT, BRAKE SWITCH; ANTI-LOCK
BRAKES (YJ)......................8W-32-2
INPUT, BRAKE SWITCH; FUEL/IGNITION
(XJ).............................8W-30-5
INPUT, BRAKE SWITCH; FUEL/IGNITION
(YJ).............................8W-30-5
INPUT, BRAKE SWITCH; FUEL/IGNITION
(XJ-RHD).........................8W-30-5
INPUT, BRAKE SWITCHÐPCM..........14-22
INPUT, CAMSHAFT POSITION SENSORÐ
PCM...............................14-22
INPUT, CRANKSHAFT POSITION
SENSORÐPCM......................14-22
INPUT, DATA LINK CONNECTORÐPCM . . . 14-22
INPUT, ENGINE COOLANT
TEMPERATURE SENSORÐPCM.........14-23
INPUT, EXTENDED IDLE SWITCHÐPCM . . . 14-23
INPUT, IGNITION CIRCUIT SENSEÐPCM . . 14-23
INPUT, INTAKE MANIFOLD AIR
TEMPERATURE SENSORÐPCM.........14-22
INPUT, MANIFOLD ABSOLUTE
PRESSURE (MAP) SENSORÐPCM.......14-23
INPUT, OXYGEN (O2S) SENSORÐPCM.....14-24
INPUT, PARK/NEUTRAL SWITCHÐPCM . . . 14-24
INPUT, POWER STEERING PRESSURE
SWITCHÐPCM......................14-24
INPUT, SCI RECEIVEÐPCM............14-24
INPUT, SENSOR RETURNÐPCM.........14-25
INPUT SIGNALS, WHEEL/TIRE SIZE........5-3
INPUT, SPEED CONTROLÐPCM.........14-25
INPUT, THROTTLE POSITION SENSOR
(TPS)ÐPCM........................14-25
INPUT, VEHICLE SPEED SENSORÐPCM . . 14-25
INSERTÐXJ, REAR QUARTER WINDOW
GLASS/REAR QUARTER PLASTIC........23-73
INSIDE LATCH RELEASE AND LOCK
RODSÐXJ, DOOR....................23-50
INSIDE RELEASE AND LOCK HANDLEÐ
YJ, FULL-METAL DOOR LATCH.........23-137
INSPECTION AND ADJUSTMENT,
PRELIMINARY......................21-176
INSPECTION AND DIAGNOSIS CHARTS.....6-4
INSPECTION AND PARK LOCK
COMPONENT OVERHAUL, ADAPTER/
EXTENSION HOUSING................21-127
INSPECTION, CALIPER CLEANING........5-50
INSPECTION (ENGINE OIL LEAKS IN
GENERAL)............................9-6
INSPECTION, GEAR CLEANING..........19-42
INSPECTION, OVERHAUL CLEANING....21-294,
21-318
INSPECTION, PRE-ALIGNMENT............2-6
INSPECTION, RUBBER AND PLASTIC
COMPONENT.........................0-20
INSPECTION, TORQUE CONVERTER
STATOR CLUTCH....................21-199
INSPECTION, TRANSMISSION CASE
CLEANING.........................21-125
INSPECTION, VALVE BODY
DISASSEMBLY......................21-147
INSTALLATION, 30RH/32RH
TRANSMISSION REMOVAL............21-115
INSTALLATION, ACCELERATION SWITCH . . . 5-39
INSTALLATION AND ADJUSTMENT, REAR
WHEEL SENSOR......................5-38
INSTALLATION, AW-4 TRANSMISSION
REMOVAL.........................21-198
INSTALLATION, BRAKE PEDAL...........5-31
INSTALLATION, BRAKELIGHT SWITCH.....5-32
INSTALLATION, CALIPER................5-51
INSTALLATION, CLUTCH COVER AND
DISC...............................6-10
INSTALLATION, CLUTCH HYDRAULIC
LINKAGE
............................6-14
INSTALLATION, CLUTCH PEDAL
..........6-15
INSTALLATION, DIFFERENTIAL
...........2-44
INSTALLATION, DIFFERENTIAL
MEASUREMENT
.......................3-25
INSTALLATION, DISC BRAKESHOE
........5-47
14 INDEXJ
Description Group-Page Description Group-Page Description Group-Page