1995 JEEP YJ wheel
[x] Cancel search: wheelPage 873 of 2158

TRANSMISSION CONTROLS
FOUR-WHEEL DRIVE (4WD) SWITCH
When the 4WD switch closes, circuit Z1 provides
ground for the 4WD indicator lamp in the instrument
cluster. Circuit F87 connects to the instrument clus-
ter and supplies battery voltage to the 4WD indicator
lamp. Circuit 107 connects the indicator lamp to the
4WD switch. Circuit 106 connects the lamp to the in-
strument cluster and circuit F87.
TRANSMISSION COMFORT SWITCH
Circuit T17 from fuse 12 in the Power Distribution
Center (PDC) supplies battery voltage to the trans-
mission comfort switch. Circuit Z1 provides ground
for the switch. Circuit T177 Connects the switch to
the Transmission Control Module (TCM).
TRANSMISSION CONTROL MODULE
Vehicles equipped with the 4.0L engine have elec-
tronically controlled solenoids in the automatic trans-
mission valve body.
The transmission control module (TCM) receives
inputs from the throttle position sensor (TPS) on cir-
cuit K22 and the stop lamp switch on circuit K29.
Circuit K4 connects to the TCM to provide ground for
the TPS signal.
The TCM receives the transmission output speed
sensor signal on circuit 505. Circuit A14 from fuse 2
in the Power Distribution Center (PDC) supplies bat-
tery voltage to the TCM. Circuit T17 from fuse 12 in
the PDC also connects to the TCM. Circuit Z12 pro-
vides ground for the TCM.The TCM powers the S1 solenoid on circuit 510,
the S2 solenoid on circuit 509, and the S3 solenoid on
circuit 508. Circuit Z12 provides ground for the S1,
S2, and S3 solenoids.
Circuits 506 and 507 from the Park/Neutral posi-
tion switch connect to the TCM. Circuits 506 and 507
tell the TCM what drive range the transmission is in.
DATA LINK CONNECTOR
Circuit 137 from the TCM connects to the data link
connector. Circuit F39 from fuse 5 in the PDC sup-
plies power to the data link connector. Circuit Z12
provides ground for the data link connector.
DIAGRAM INDEX
Component Page
ABS Data Link Connector...................8W-31-3
4-WD Indicator Lamp......................8W-31-4
4-WD Indicator Switch.....................8W-31-4
Fuse 2 (PDC)...........................8W-31-4
Fuse 6 (PDC).........................8W-31-2, 3
Fuse 11 (PDC)..........................8W-31-3
Fuse 12 (PDC)..........................8W-31-2
Ignition Switch........................8W-31-2, 3
Park/Neutral Position Switch.................8W-31-3
Telltale Connector (Instrument Cluster)...........8W-31-4
Transmission Comfort Switch.................8W-31-2
Transmission Control Module.............8W-31-2, 3, 4
Transmission Valve Body Solenoids.............8W-31-4
J8W-31 TRANSMISSION CONTROLSÐXJ-RHD 8W - 31 - 1
Page 877 of 2158

ANTI-LOCK BRAKES
INDEX
page page
ABS Power Relay.......................... 1
ABS Pump Motor Relay..................... 1
ABS Warning Lamp........................ 2
Acceleration Switch......................... 1
Brake Pedal Travel Sensor................... 2
Brake Switch Input......................... 2Data Link Connector........................ 2
Diagram Index............................ 3
General Information........................ 1
Hydraulic Control Unit....................... 2
Pump Motor Speed Sensor................... 2
Wheel Speed Sensors...................... 1
GENERAL INFORMATION
Three fuses supply power for the Anti-Lock Brake
System (ABS); fuses 6 and 10 in the Power Distribu-
tion Center (PDC) and fuse 2 in the fuse block. Fuses
6 and 10 in the PDC are connected directly to battery
voltage and are HOT all times. Fuse 2 in the fuse
block is HOT when the ignition switch is the RUN
Position.
In the RUN position, the ignition switch connects
circuit A1 from fuse 6 in the PDC with circuit A38.
Circuit A38 connects to a bus bar in the fuse block.
The bus bar feeds circuit B236 through fuse 2. Fuse
2 is a 2 amp fuse.
Circuit B236 connects to the coil side of the ABS
power relay and cavity 53 of the ABS control module.
Circuit Z1 provides ground for the ABS control
module. Circuit Z1 connects to cavities 1 and 19 of
the ABS control module.
Refer to group 5, Brakes for operational descrip-
tions of ABS system components.
WHEEL SPEED SENSORS
The all wheel anti-lock system uses four wheel
speed sensors; one for each wheel. Each sensor con-
verts wheel speed into an electrical signal that it
transmits to the ABS control module. A pair of
twisted wires connect to each sensor to provide sig-
nals to the ABS control module.
Circuits B6 and B7 provide signals to ABS control
module from the right front wheel speed sensor. Cir-
cuit B6 which provides the LOW signal connects to
cavity 29 of the ABS control module. Circuit B7 con-
nects to cavity 47 of the module and provides the
HIGH signal.
Circuits B8 and B9 provide signals to ABS control
module from the left front wheel speed sensor. Cir-
cuit B8, which provides the LOW signal, connects to
cavity 30 of the ABS control module. Circuit B9 con-
nects to cavity 48 of the module and provides the
HIGH signal.
Circuits B1 and B2 provide signals to ABS control
module from the right rear wheel speed sensor. Cir-
cuit B1 which provides the LOW signal connects tocavity 45 of the ABS control module. Circuit B2 con-
nects to cavity 27 of the module and provides the
HIGH signal.
Circuits B4 and B3 provide signals to ABS control
module from the left rear wheel speed sensor. Circuit
B3, which provides the LOW signal, connects to cav-
ity 28 of the ABS control module. Circuit B4 connects
to cavity 46 of the module and provides the HIGH
signal.
ACCELERATION SWITCH
During four-wheel drive operation, the acceleration
switch provides deceleration data to the ABS control
module. Refer to Group 5, Brakes for additional in-
formation.
Circuits B515, B516, and B517 connect the acceler-
ation sensor to the ABS control module. Circuits
B515 and B516 provide switch states while circuit
B517 provides ground. At the ABS control module cir-
cuit B515 connects to cavity 25, circuit B516 connects
to cavity 43 and circuit B517 connects to cavity 26.
ABS POWER RELAY
The ABS power relay is located in the power distri-
bution center (PDC). When the ABS module grounds
the ABS power relay on circuit B207, the relay
switches to connect circuit A20 from PDC fuse 10 to
circuit B235. Circuit B236 from fuse 7 in the fuse
block splices to feed the coil side of the ABS power
relay. Circuit B207 connects to cavity 34 of the ABS
control module.
Circuit B235 is double crimped at the ABS power
relay. One branch of circuit B235 supplies power to
the coil side of the ABS pump motor relay. The other
branch of circuit B235 splices to cavities 3 and 33 of
the ABS control module and to the hydraulic control
unit.
ABS PUMP MOTOR RELAY
The ABS pump motor relay in the power distribu-
tion center (PDC) supplies voltage to the ABS pump
motor. When the ABS power relay energizes, circuit
B235 supplies battery voltage to the coil side of the
J8W-32 ANTI-LOCK BRAKESÐXJ-RHD 8W - 32 - 1
Page 879 of 2158

DIAGRAM INDEX
Component Page
ABS Control Module..................8W-32-4 thru 8
ABS Hydraulic Unit.......................8W-32-6
ABS Power Relay........................8W-32-4
ABS Pump Motor........................8W-32-4
ABS Pump Motor Relay....................8W-32-5
Data Link Connector......................8W-32-8
Diode................................8W-32-6
Fuse 6 (PDC)...........................8W-32-5
Fuse 7 (PDC)...........................8W-32-8
Fuse 8 (PDC)...........................8W-32-5
Fuse 10 (PDC)..........................8W-32-4
Fuse 13 (PDC)..........................8W-32-8
Fuse 18 (Fuse Block)......................8W-32-5
G-Sensor..............................8W-32-8
Ignition Switch..........................8W-32-5
Powertrain Control Module..................8W-32-8
Telltale Connector (Instrument Cluster)...........8W-32-6
Wheel Speed Sensors......................8W-32-7
J8W-32 ANTI-LOCK BRAKESÐXJ-RHD 8W - 32 - 3
Page 890 of 2158
LOW WASHER FLUID WARNING LAMP
Circuit G29 connects the low washer fluid switch to
the warning lamp in the instrument cluster. Circuit
F12 supplies battery voltage to the switch.
When the low washer fluid switch closes, it con-
nects circuits G29 and F12. Battery voltage from cir-
cuit F12 powers the low washer fluid lamp. Circuit
Z1 at the instrument cluster provides ground to illu-
minate the warning lamp.
SEAT BELT INDICATOR WARNING LAMP
The seat belt indicator warning lamp is activated
by the chime/buzzer on circuit G11. Circuit G11 sup-
plies power to instrument cluster for the lamp. Cir-
cuit Z1 provides ground for the lamp at the cluster.
The chime/buzzer module powers circuit G11 after
it receives an input on circuit G10 indicating the seat
belt switch is open.
HIGH-BEAM INDICATOR LAMP
Circuit L3 supplies power for the high beam indi-
cator lamp. The ground path for the lamp is through
circuit Z1. Circuit Z1 provides ground for the indica-
tor lamp at the cluster.
ABS WARNING LAMP
Circuit F87 provides power for the ABS warning
lamp at the instrument cluster. Ground for the ABS
warning lamp is provided by either the ABS control
module or by the ABS power relay when the relay is
not energized. The ABS control module illuminates
the lamp by providing ground on circuit B205.
Circuit B205 splices to connect to circuit B235
through a diode. When the ABS power relay is not
energized, it connects circuit B235 to circuit Z12. The
ground path for the warning lamp is through the di-
ode to circuit B235, through the ABS power relay to
ground on circuit Z12.
The diode between circuits B205 and B235 pre-
vents voltage from flowing to the ABS control module
when the ABS power relay switches to supply power
on circuit B235.
TURN SIGNAL INDICATOR LAMPS
Circuits L61 and L60 power for the turn signal in-
dicator lamps. Circuit L61 powers the left indicator
lamp. Circuit L60 powers the right indicator lamp.
Circuit Z1 provides ground for the lamps.
BRAKE WARNING LAMP
Circuit F87 supplies power to the park brake lamp.
Ground for the park brake lamp is supplied through
the case grounded park brake switch or brake warn-
ing switch on circuit G9. Circuit G9 connects to the
brake warning lamp at the instrument cluster.
FOUR-WHEEL DRIVE (4WD) SWITCH
When the 4WD switch closes, circuit Z1 provides
ground for the 4WD indicator lamp in the instrument
cluster. Circuit F87 connects to the instrument clus-
ter and supplies battery voltage to the 4WD indicator
lamp. Circuit G107 connects the indicator lamp to
the 4WD switch. Circuit G106 connects the lamp to
the instrument cluster and circuit F87.
TACHOMETER
The Powertrain Control Module (PCM) supplies the
signal to the tachometer on circuit G21. Circuit G21
connects to cavity 43 of the PCM.
CLUSTER GROUND
Circuit Z1 from the instrument cluster left connec-
tor provides ground for the illumination lamps and
indicator lamps.
HELPFUL INFORMATION
²If the warning lamps don't operate, check fuse 26
in the fuse block.
²If the indicator lamps don't operate, check fuse 14
in the fuse block.
²If the illumination lamps don't operate, check fuse
25 in the fuse block.
8W - 40 - 2 8W-40 INSTRUMENT CLUSTERÐXJ-RHDJ
Page 903 of 2158
HORN/CIGAR LIGHTER
HORN
The horn system uses two switches and horn relay.
The horn switches are on the steering wheel.
Circuit A7 from fuse 3 in the power distribution
center (PDC) feeds a fuse block bus bar that powers
circuit X4 through fuse 5 in the fuse block. Circuit
X4 is HOT at all times and powers the coil and con-
tact sides of the horn relay.
When the case grounded horn switch is depressed,
circuit X3 provides ground for the coil side of the re-
lay and the contacts close. When the contacts close,
circuit X2 supplies voltage to the case grounded
horns.
HELPFUL INFORMATION
²The horn switches are grounded to the steering
wheel.
²Circuit X4 is double crimped at the coil side of the
horn relay.
²Check fuse 3 in the PDC and fuse 5 in the fuse
block.
CIGAR LIGHTER
In the ACCESSORY or RUN position, the ignition
switch supplies voltage to fuse 13 in the fuse block
on circuit A48. Fuse 13 feeds circuit F85 which con-
nects to the cigar lighter. When the lighter is de-
pressed, the contacts inside of the lighter element
close and voltage flows to ground on circuit Z1.
HELPFUL INFORMATION
²In the ACCESSORY or RUN position, the ignition
switch connects circuit A1 from fuse 6 in the PDC
with circuit A48.
DIAGRAM INDEX
Component Page
Cigar Lighter...........................8W-41-3
Fuse 3 (PDC)...........................8W-41-2
Fuse 6 (PDC)...........................8W-41-3
Fuse 5 (Fuse Block).......................8W-41-2
Fuse 13 (Fuse Block)......................8W-41-3
Horns................................8W-41-2
Horn Relay.............................8W-41-2
Horn Switch............................8W-41-2
Ignition Switch..........................8W-41-3
J8W-41 HORN/CIGAR LIGHTERÐXJ-RHD 8W - 41 - 1
Page 1081 of 2158
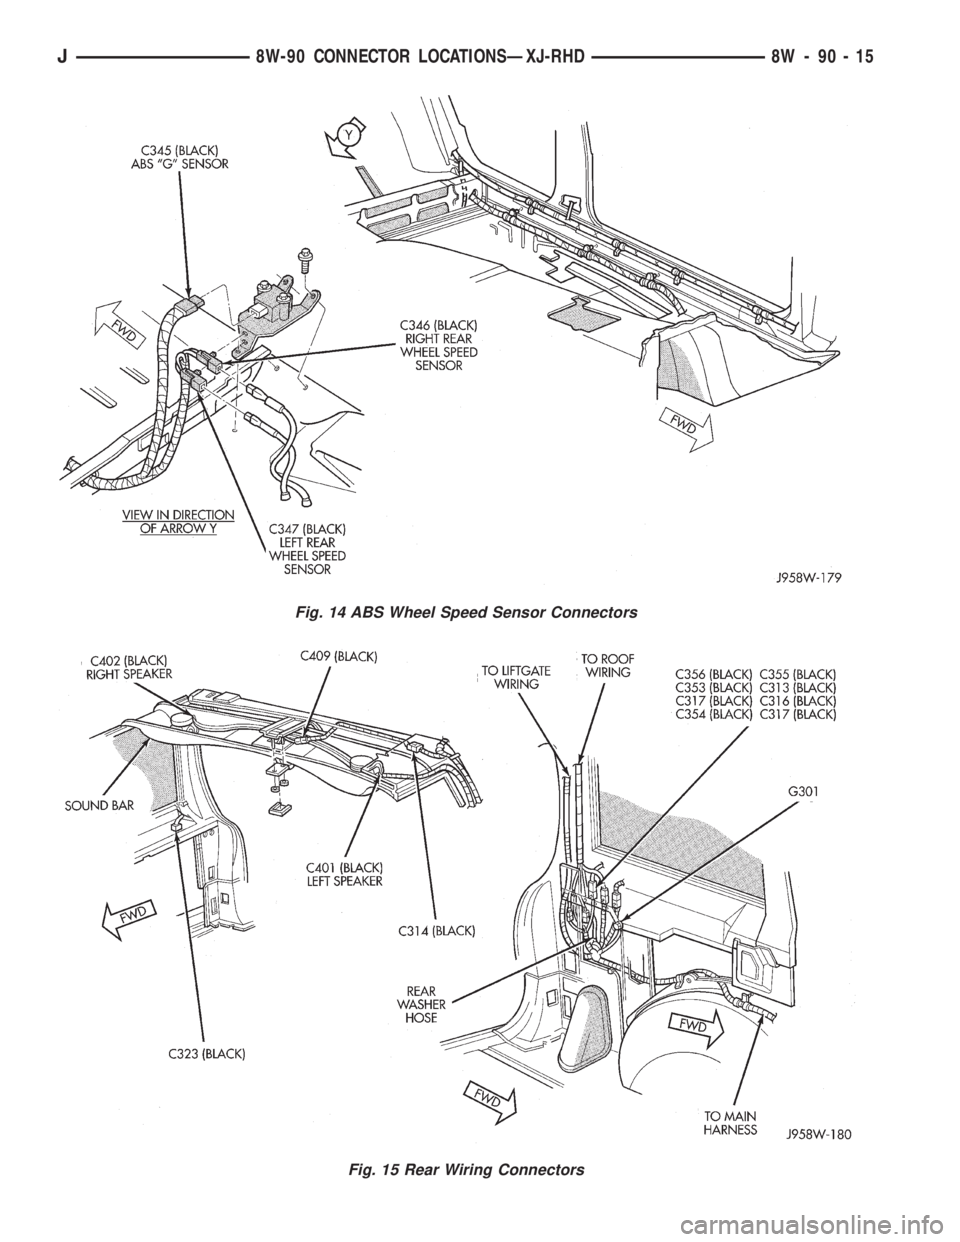
Fig. 14 ABS Wheel Speed Sensor Connectors
Fig. 15 Rear Wiring Connectors
J8W-90 CONNECTOR LOCATIONSÐXJ-RHD 8W - 90 - 15
Page 1086 of 2158
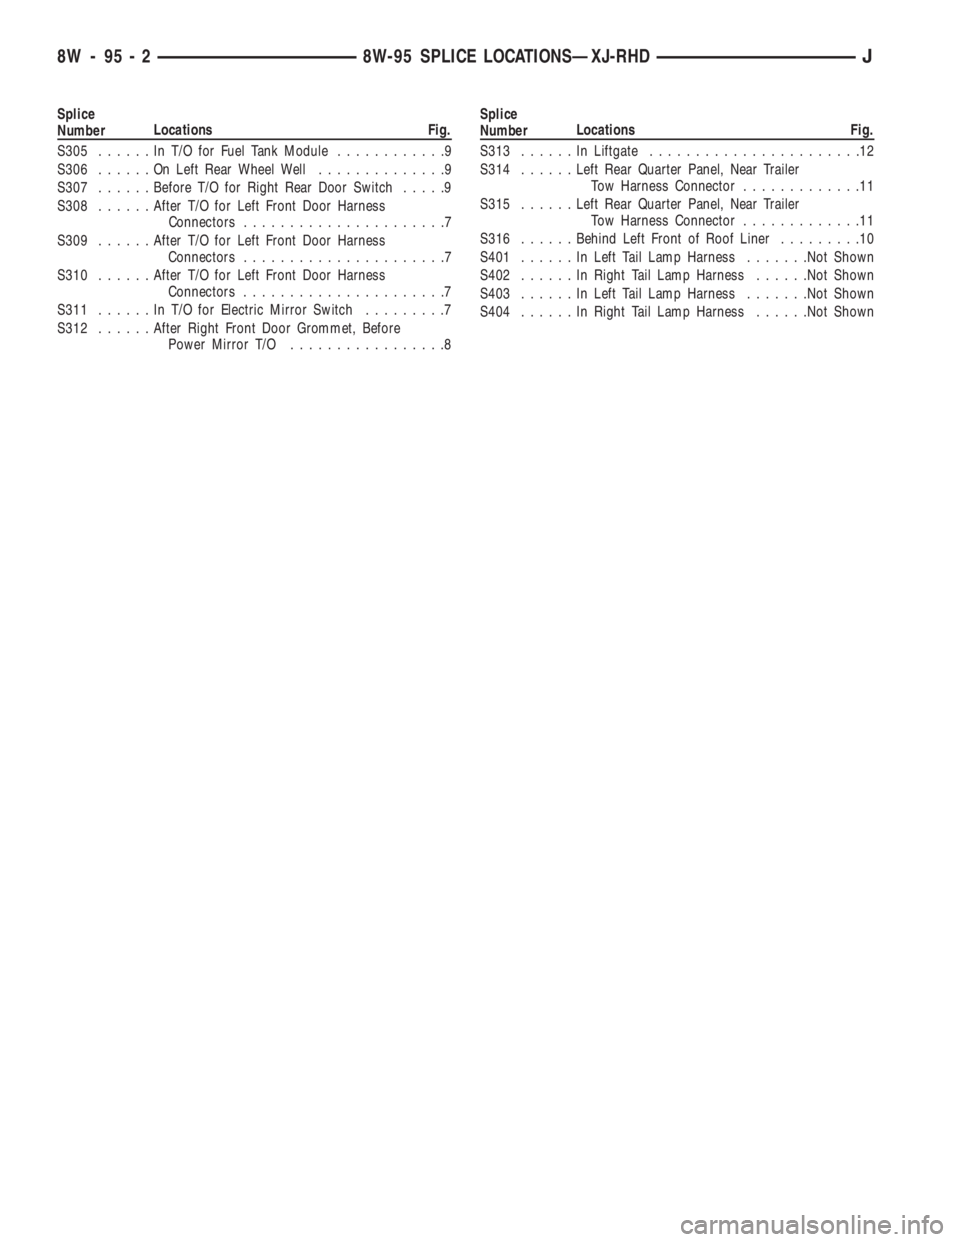
Splice
NumberLocations Fig.
S305......InT/OforFuel Tank Module............9
S306......OnLeft Rear Wheel Well..............9
S307......Before T/O for Right Rear Door Switch.....9
S308......After T/O for Left Front Door Harness
Connectors......................7
S309......After T/O for Left Front Door Harness
Connectors......................7
S310......After T/O for Left Front Door Harness
Connectors......................7
S311......InT/OforElectric Mirror Switch.........7
S312......After Right Front Door Grommet, Before
Power Mirror T/O.................8Splice
NumberLocations Fig.
S313......InLiftgate.......................12
S314......Left Rear Quarter Panel, Near Trailer
Tow Harness Connector.............11
S315......Left Rear Quarter Panel, Near Trailer
Tow Harness Connector.............11
S316......Behind Left Front of Roof Liner.........10
S401......InLeft Tail Lamp Harness.......Not Shown
S402......InRight Tail Lamp Harness......Not Shown
S403......InLeft Tail Lamp Harness.......Not Shown
S404......InRight Tail Lamp Harness......Not Shown
8W - 95 - 2 8W-95 SPLICE LOCATIONSÐXJ-RHDJ
Page 1094 of 2158
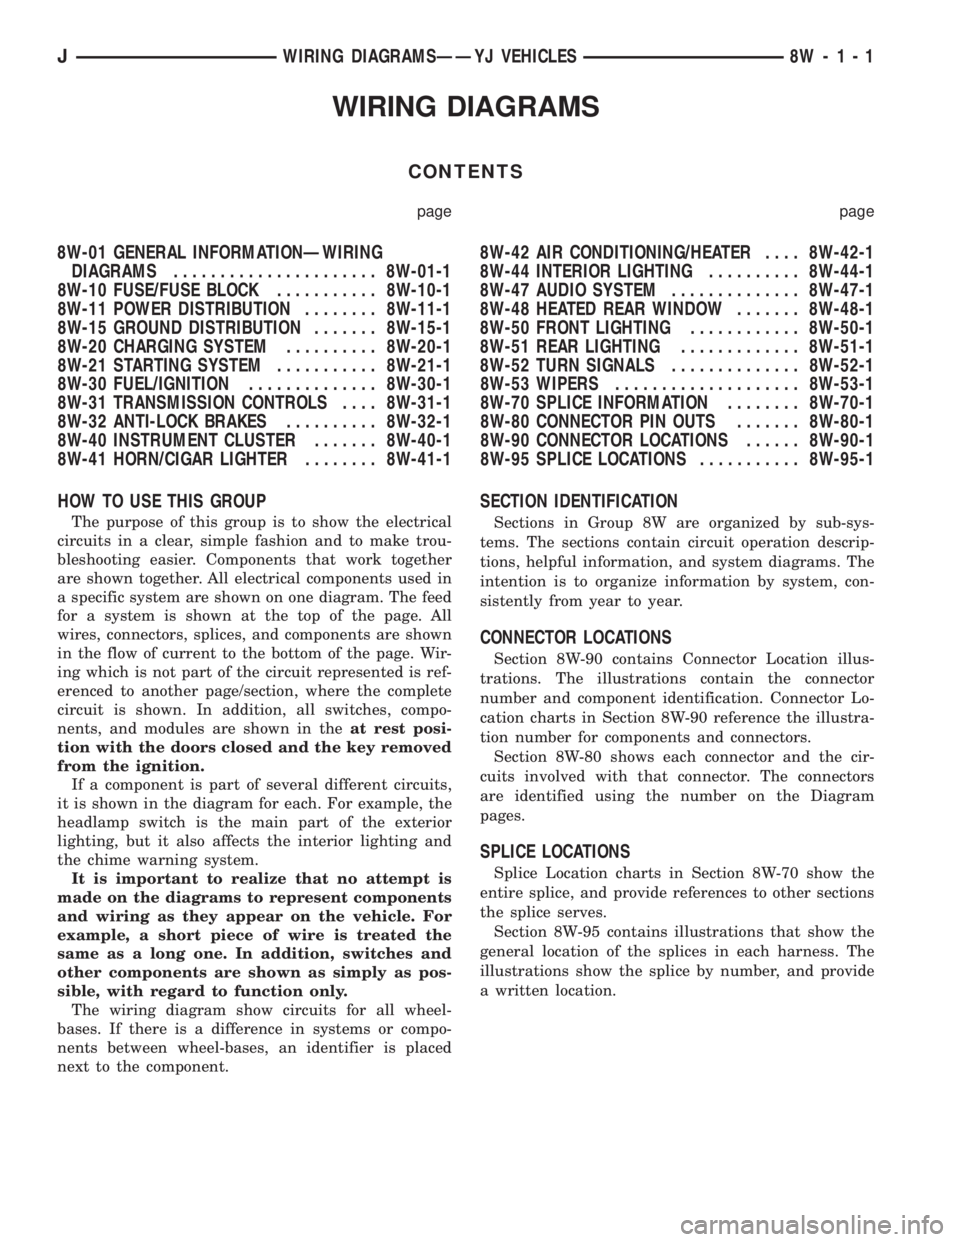
WIRING DIAGRAMS
CONTENTS
page page
8W-01 GENERAL INFORMATIONÐWIRING
DIAGRAMS...................... 8W-01-1
8W-10 FUSE/FUSE BLOCK........... 8W-10-1
8W-11 POWER DISTRIBUTION........ 8W-11-1
8W-15 GROUND DISTRIBUTION....... 8W-15-1
8W-20 CHARGING SYSTEM.......... 8W-20-1
8W-21 STARTING SYSTEM........... 8W-21-1
8W-30 FUEL/IGNITION.............. 8W-30-1
8W-31 TRANSMISSION CONTROLS.... 8W-31-1
8W-32 ANTI-LOCK BRAKES.......... 8W-32-1
8W-40 INSTRUMENT CLUSTER....... 8W-40-1
8W-41 HORN/CIGAR LIGHTER........ 8W-41-18W-42 AIR CONDITIONING/HEATER.... 8W-42-1
8W-44 INTERIOR LIGHTING.......... 8W-44-1
8W-47 AUDIO SYSTEM.............. 8W-47-1
8W-48 HEATED REAR WINDOW....... 8W-48-1
8W-50 FRONT LIGHTING............ 8W-50-1
8W-51 REAR LIGHTING............. 8W-51-1
8W-52 TURN SIGNALS.............. 8W-52-1
8W-53 WIPERS.................... 8W-53-1
8W-70 SPLICE INFORMATION........ 8W-70-1
8W-80 CONNECTOR PIN OUTS....... 8W-80-1
8W-90 CONNECTOR LOCATIONS...... 8W-90-1
8W-95 SPLICE LOCATIONS........... 8W-95-1
HOW TO USE THIS GROUP
The purpose of this group is to show the electrical
circuits in a clear, simple fashion and to make trou-
bleshooting easier. Components that work together
are shown together. All electrical components used in
a specific system are shown on one diagram. The feed
for a system is shown at the top of the page. All
wires, connectors, splices, and components are shown
in the flow of current to the bottom of the page. Wir-
ing which is not part of the circuit represented is ref-
erenced to another page/section, where the complete
circuit is shown. In addition, all switches, compo-
nents, and modules are shown in theat rest posi-
tion with the doors closed and the key removed
from the ignition.
If a component is part of several different circuits,
it is shown in the diagram for each. For example, the
headlamp switch is the main part of the exterior
lighting, but it also affects the interior lighting and
the chime warning system.
It is important to realize that no attempt is
made on the diagrams to represent components
and wiring as they appear on the vehicle. For
example, a short piece of wire is treated the
same as a long one. In addition, switches and
other components are shown as simply as pos-
sible, with regard to function only.
The wiring diagram show circuits for all wheel-
bases. If there is a difference in systems or compo-
nents between wheel-bases, an identifier is placed
next to the component.
SECTION IDENTIFICATION
Sections in Group 8W are organized by sub-sys-
tems. The sections contain circuit operation descrip-
tions, helpful information, and system diagrams. The
intention is to organize information by system, con-
sistently from year to year.
CONNECTOR LOCATIONS
Section 8W-90 contains Connector Location illus-
trations. The illustrations contain the connector
number and component identification. Connector Lo-
cation charts in Section 8W-90 reference the illustra-
tion number for components and connectors.
Section 8W-80 shows each connector and the cir-
cuits involved with that connector. The connectors
are identified using the number on the Diagram
pages.
SPLICE LOCATIONS
Splice Location charts in Section 8W-70 show the
entire splice, and provide references to other sections
the splice serves.
Section 8W-95 contains illustrations that show the
general location of the splices in each harness. The
illustrations show the splice by number, and provide
a written location.
JWIRING DIAGRAMSÐÐYJ VEHICLES 8W - 1 - 1