Page 95 of 240

Audio System
Once that station's frequency is
stored, simply press and release the
proper preset button to tune to it. If
you want to change any preset button's selection, store another fre-
quency as described. The frequen-
cies you preset will be lost if your
car's battery goes dead or is discon-
nected.
The AUTO SELECT function allows
you to find stations easily when youare in an unfamiliar area. Press the
AUTO SELECT button. The system automatically scans both bands to
find six strong stations on AM and twelve on FM, and stores their
frequencies in the Preset buttons.
You can then use the Preset buttons in the normal manner to select thosestations. "A SEL" stays displayed
next to the frequency as a reminder.
If you are in a remote area, AUTO
SELECT may not find enough stations to fill all the available
presets. If this is the case, you will see a "0" displayed when you press
any Preset button that does not have
a station stored. You cannot manually store radio
station frequencies in the Preset
buttons when AUTO SELECT is ON. If you do not like the stations found
by AUTO SELECT, you can still use
the TUNE or SEEK function to findother stations.
AUTO SELECT does not erase the stations you have manually preset.
When you return to your normal reception area, turn off AUTO
SELECT by pressing the buttonagain. The light goes out and the
Preset buttons can then select thestations you originally set.
Comfort and Convenience FeaturesProCarManuals.comMain Menu Table of Contents s t
Page 96 of 240

Audio System
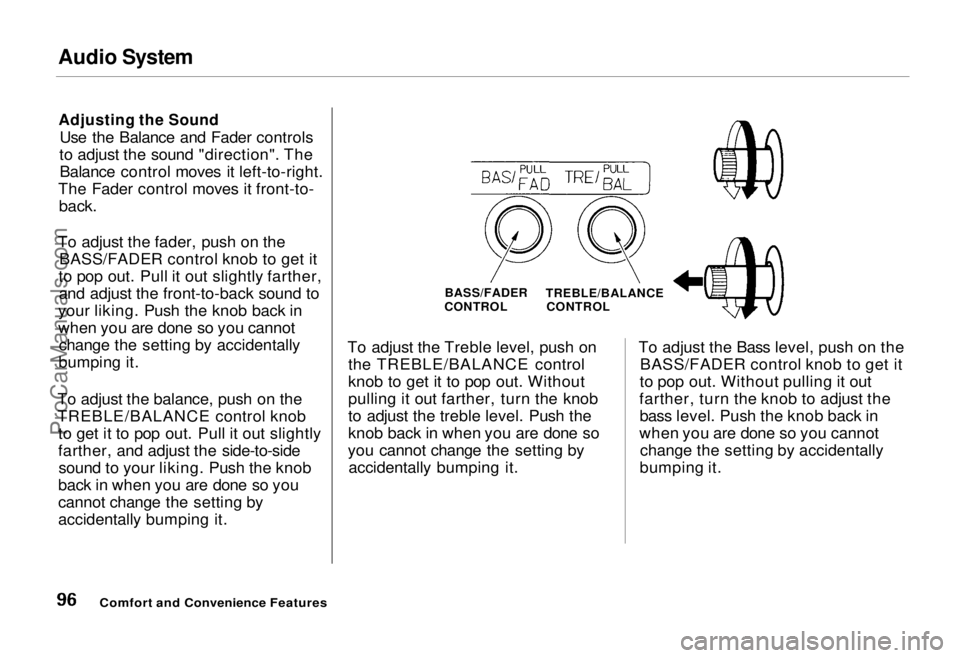
Adjusting the Sound
Use the Balance and Fader controls
to adjust the sound "direction". The Balance control moves it left-to-right.
The Fader control moves it front-to-
back.
To adjust the fader, push on the BASS/FADER control knob to get it
to pop out. Pull it out slightly farther, and adjust the front-to-back sound to
your liking. Push the knob back in
when you are done so you cannot change the setting by accidentally
bumping it.
To adjust the balance, push on the
TREBLE/BALANCE control knob to get it to pop out. Pull it out slightly
farther, and adjust the side-to-sidesound to your liking. Push the knob
back in when you are done so you
cannot change the setting by
accidentally bumping it. To adjust the Treble level, push on
the TREBLE/BALANCE control
knob to get it to pop out. Without
pulling it out farther, turn the knob
to adjust the treble level. Push the
knob back in when you are done so
you cannot change the setting by accidentally bumping it. To adjust the Bass level, push on the
BASS/FADER control knob to get it
to pop out. Without pulling it out
farther, turn the knob to adjust the bass level. Push the knob back in
when you are done so you cannot change the setting by accidentally
bumping it.
Comfort and Convenience Features
BASS/FADER
CONTROL TREBLE/BALANCE
CONTROLProCarManuals.comMain Menu Table of Contents s t
Page 98 of 240
Audio System
Operating the Cassette Player
Turn the system ON. Insert the cassette into the slot with the tape
opening to the right. Push the
cassette in most of the way. The drive will pull it in the rest of the way
and begin to play. The or will light to show you
which side of the cassette is playing. The indicates the side you
inserted facing upward is now
playing. To play the other side of the
tape, press the PROG button.
The system also has an Auto-reverse feature. It will automatically reversedirection when it reaches the end of
the cassette.
PWR/VOL KNOB
EJECT
BUTTON
CASSETTE
SLOT
TAPE DIRECTION
INDICATOR
PROG BUTTON
Dolby ®
noise reduction turns on
when you insert a cassette. If the tape was not recorded with Dolby"B" noise reduction, turn it off by pressing the button.
To remove the cassette from the
drive, press the EJECT button.
Comfort and Convenience Features
PLAY
BUTTON
DOLBY
BUTTONProCarManuals.comMain Menu Table of Contents s t
Page 111 of 240
Service Station Procedures
Opening the Hood HOOD RELEASE HANDLE
1. Shift to Park or Neutral and set the parking brake. Pull the hood
release handle, located under the
left lower corner of the dashboard.
The hood will pop up slightly.
LATCH
2. Standing in front of the car, put your fingers under the front edgeof the hood to the right of center.
Slide your hand to the left until
you feel the hood latch handle. Push this handle up until it
releases the hood. Lift the hood. SUPPORT ROD
3. Pull the support rod out of its clip and insert the end into the hole on
the left side of the hood.
To close the hood, lift it up slightly to remove the support rod from the
hole. Put the support rod back into its holding clip. Lower the hood to
about a foot above the fender, then
let it drop.
Before Driving
CONTINUEDProCarManuals.comMain Menu Table of Contents s t
Page 118 of 240

Preparing to Drive
You should do the following checks and adjustments every day before
you drive your car.
1. Make sure all windows, mirrors, and outside lights are clean and
unobstructed. Remove frost, snow,
or ice.
2. Check that the hood and tailgate are fully closed.
3. Visually check the tires. If a tire looks low, use a gauge to check its
pressure.
4. Check that any items you may be carrying with you inside are stored
properly or fastened down
securely. 5. Check the adjustment of the seat
(see page 56).
6. Check the adjustment of the inside and outside mirrors (see
page 66).
7. Check the adjustment of the steering wheel (see page 46).
8. Make sure the doors are securely closed and locked.
9. Fasten your seat belt. Check that your passengers have fastened
their seat belts (see page 7). 10. Turn the ignition ON (II). Check
the indicator lights in the instru-
ment panel.
11. Start the engine (see page 119).
12. Check the gauges and indicator lights in the instrument panel (see
page 35).
DrivingProCarManuals.comMain Menu Table of Contents s t
Page 120 of 240
Automatic Transmission
Your Honda's transmission has fourforward speeds, and is electronically
controlled for smoother shifting. Italso has a "lock-up" torque converter
for better fuel economy. You may
feel what seems like another shift
when the converter locks. Shift Lever Positions
This display is on the instrument panel. It shows you the position of
the shift lever. It also indicates a
possible problem in the transmissionif the "D4" indicator light flashes. The shift lever has seven positions.
It must be in Park or Neutral to start
the engine. When you are stopped in D4, D3, 2,1, N or R, press firmly on
the brake pedal and keep your foot off the accelerator pedal.
Driving
SHIFT LEVERProCarManuals.comMain Menu Table of Contents s t
Page 124 of 240

The Braking System
Your Honda is equipped with disc brakes at all four wheels. The
braking system is power-assisted to reduce the effort needed on the
brake pedal.
Put your foot on the brake pedal only
when you intend to brake. Resting
your foot on the pedal keeps the brakes applied lightly, causing them
to build up heat. Heat build-up canreduce how well your brakes work. It
also keeps your brake lights on all
the time, confusing drivers behind
you.
Constant application of the brakes
when going down a long hill builds up heat and reduces their effective-
ness. Use the engine to assist the
brakes by downshifting to a lower
gear and taking your foot off the accelerator pedal. Check your brakes after driving
through deep water. Apply the
brakes moderately to see if they feel normal. If not, apply them gently and
frequently until they do. Since a
longer distance is needed to stop
with wet brakes, be extra cautious and alert in your driving.
Brake Wear Indicators
All four brakes have audible brake wear indicators.
When the brake pads need replacing, you will hear a distinctive metallic "screeching" sound when you apply
the brakes. If you do not have the
brake pads replaced, they will begin screeching all the time.
Your brakes may sometimes squeal or squeak when you apply them
lightly. Do not confuse this with the
brake wear indicators. They make a
very audible "screeching". Brake System Design
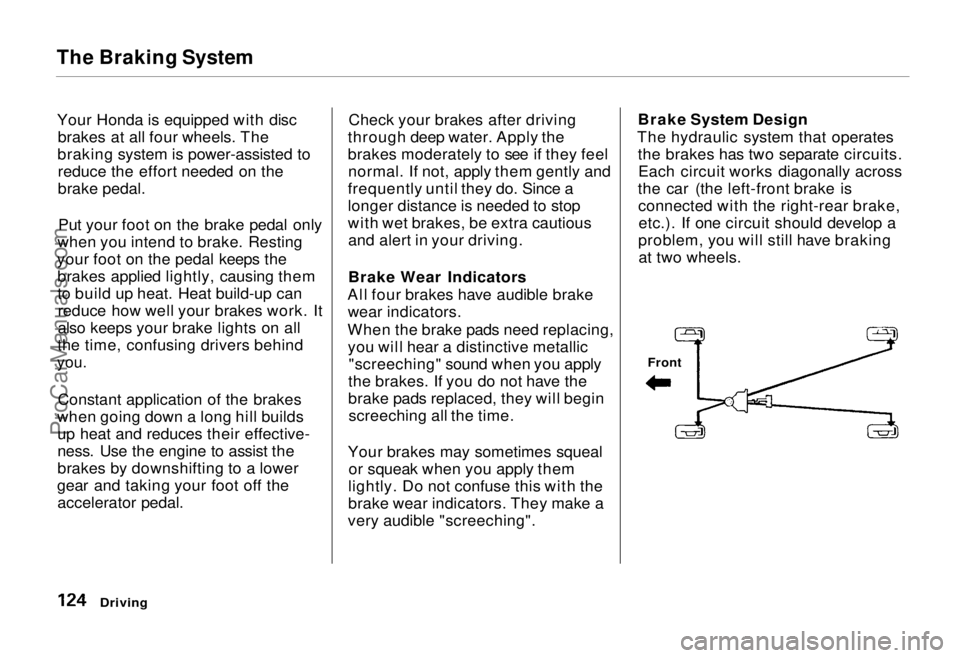
The hydraulic system that operates the brakes has two separate circuits.Each circuit works diagonally across
the car (the left-front brake is connected with the right-rear brake,etc.). If one circuit should develop a
problem, you will still have braking at two wheels.
Driving
FrontProCarManuals.comMain Menu Table of Contents s t
Page 125 of 240

The Braking System
If this happens, you will immediately
notice that the brake pedal goes down much farther and you need to
press on it much harder. A much
longer distance will be needed to stop the car.
Slow the car by downshifting to a
lower gear and removing your foot
from the accelerator pedal. Pull to the side of the road as soon as it issafe. Because of the longer stopping
distance needed, brake system
failure is very hazardous. It is best to
have your car towed, but if you must drive the car in this condition, be
extremely cautious. Have your car
repaired as soon as possible.
Anti-lock Brakes
All U.S. models and the Canadian six-passenger model have an Anti-lockBrake System (ABS) as standard
equipment. It is optional on the
Canadian seven-passenger model.
ABS helps you maintain steering control. It does this by helping you to
prevent the wheels from locking up and skidding.
The ABS is always "On". It requires no special effort or driving technique.
You will feel a pulsation in the brake pedal when the ABS activates.
Activation varies with the amount of traction your tires have. On dry
pavement, you will need to press on
the brake pedal very hard before you
feel the pedal pulsation that means
the ABS has activated. However, youmay feel the ABS activate immedi-
ately if you are trying to stop on
snow or ice. Under all conditions, the
ABS is helping to prevent the wheels from locking so you can retainsteering control. You should con-
tinue to press on the brake pedal
with the same force.
You may feel a slight movement of the brake pedal just after you start
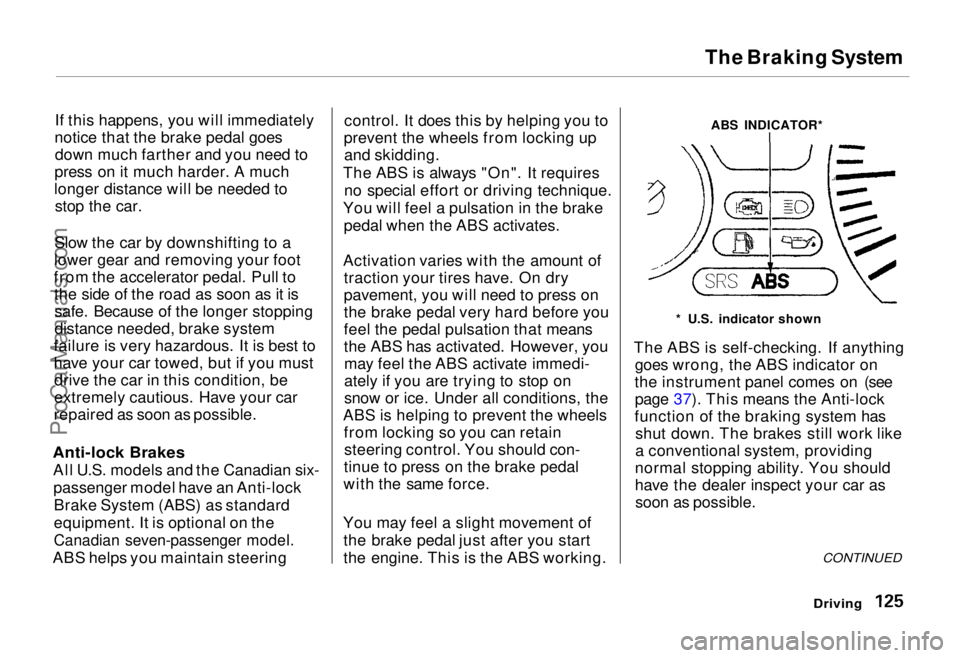
the engine. This is the ABS working. ABS INDICATOR*
* U.S. indicator shown
The ABS is self-checking. If anything goes wrong, the ABS indicator on
the instrument panel comes on (see page 37). This means the Anti-lock
function of the braking system has shut down. The brakes still work like
a conventional system, providing
normal stopping ability. You should
have the dealer inspect your car as soon as possible.
CONTINUED
DrivingProCarManuals.comMain Menu Table of Contents s t