1995 GMC SIERRA clock
[x] Cancel search: clockPage 163 of 488
Upper Knob (PWR-VOL) - The upper knob has these two functions:
0 Push it to switch the system on and off.
0 Turn it to control the volume.
SCV (Speed Compensated Volume)
- Move the control ring behind the
upper knob clockwise
to adjust the Speed Compensated Volume feature. As
you drive, this feature increases the volume to overcome noise at any
particular speed. Each clockwise position on the control ring allows more
compensation and at a faster rate.
AM/FM
- Press this button to switch between AM, FM I and FM2. The
display will show what mode the receiver
is in.
RCL (Recall) - Press this button to change between the clock and the radio
station frequency displayed when the radio
is on. Also, press this button to
display the time when the ignition is off.
TUNE
- Press lightly on the TUNE button to release it from its stored
position. Rotate the knob clockwise to increase frequency and
counterclockwise to decrease radio frequency. When done, press
the knob
again to return
it to its stored position.
Pushbuttons
- The six pushbuttons let you return to favorite stations. To
set the pushbuttons for up to 18 fworite stations (6 AM, 6 FM 1 and 6 FM2):
1. Tune in the desired station.
2. Press AUTO TONE to select the best setting for the type of station
chosen.
3. Press and hold one of the pushbuttons until sound returns
(approximately two seconds). Whenever you press that button, the
preset station
will return.
Repeat these steps for each pushbutton.
SEEK
- Press SEEK to cause the receiver to seek the next higher
station.
rress
4 SEEK to cause the receiver to seek the next lower station.
3-17
ProCarManuals.com
Page 164 of 488
SCAN - Press and hold the center of the SEEK button to momentarily hear
each available station. Release the button when SCAN appears in the
display. The receiver will continue to scan and momentarily stop at each
station until you press
the center of the SEEK button again.
p. SCAN (Preset Scan) - Press this button to scan each preset pushbutton
station. The receiver
will continue to scan and momentarily stop at each
station until
you press either P. SCAN again or one of the six pushbuttons.
The AUTO SCAN setting for that preset button will also return. The
pushbutton number (Pl-P6) will appear momentarily just before frequency
is displayed.
AUTO TONE -Press this button to select between five preset equalization
settings and tailor the sound to the music or voice being heard. Each time
you press the button, the selection will switch to one
of the preset settings of
CLASSIC, NEWS, ROCK, POP, or JAZZ. The display will show which
mode the receiver is in.
To return to the manual mode, press and release
AUTO TONE
until MAN (manual) appears in the display. This will return
the
tone adjustment to the TREB and BASS controls. Also, any time a
TREB
or BASS control is rotated, tone is automatically set back to MAN
(manual).
FADE
- Press lightly on the FADE knob to release it from its stored
position and pull it
out to the fully extended position. Rotate the knob
clockwise to adjust sound
to the front speakers and counterclockwise to
adjust sound
to the rear speakers. Push the knob back in to the stored
position when done.
BAL
- Press lightly on the BAL knob to release it from its stored position
and pull
it out to the fully extended position. Rotate the knob clockwise to
adjust sound to the right speakers and counterclockwise to adjust sound
to
the left speakers. Push the knob back in to the stored position when done.
BASS
- Press lightly on the BASS knob to release it from its stored
position and pull
it out to the fully extended position. Rotate the knob
clockwise
to increase the bass response and counterclockwise to decrease
bass response. Any time the
BASS control is rotated, tone is automatically
set back to MAN (manual). Push
the knob back in to the stored position
when done.
TREBLE
- Press lightly on the TREB knob to release it from its stored
position and pull it out to the
fully extended position. Rotate the knob
clockwise to increase the treble response and counterclockwise to decrease
treble response. Any time the TREB control
is rotated, tone is automatically
set back
to MAN (manual). Push the knob back in to the stored position
when done.
3-18
ProCarManuals.com
Page 182 of 488
Suppose you’re steering through a sharp curve. Then you suddenly
accelerate.
Both control systems - steering and acceleration - have to do
their work where the tires meet the road. Adding the sudden acceleration
can demand too much of those places. You can lose control.
What should you do if
this ever happens‘? Ease up on the accelerator pedal,
steer the vehicle the way you want
it to go, and slow down.
Speed limit signs near curves warn that you should adjust your speed.
Of
course, the posted speeds are based on good weather and road conditions.
Under less fivorable conditions you’ll want to go slower.
If you need to reduce your speed as
you approach a curve, do it before you
enter the curve, while your front wheels are straight ahead.
Try
to adjust your speed so you can “drive” through the curve. Maintain a
reasonable, steady speed. Wdit to accelerate until you are out of the curve,
and then accelerate gently
into the straightaway.
Steering in Emergencies
There are times when steering can be more effective than braking. For
example, you come over a
hill and find a truck stopped in your lane, or a car
suddenly
pulls out from nowhere, or a child darts out from between parked
cars and stops right in front of you. You can avoid these problems by
braking
- if you can stop in time. But sometimes you can’t; there isn’t
room. That’s the time for evasive action
- steering around the problem.
Your vehicle can perform very
well in emergencies like these. First apply
your brakes. (See “Braking in Emergencies” earlier
in this section.) It is
better to remove
as much speed as you can from a possible collision. Then
steer around the problem, to the left or right depending on the space
available.
An emergency like this requires close attention and a quick decision. If you
are holding the steering wheel at the recommended
9 and 3 o’clock
positions, you can turn
it a full 180 degrees very quickly without removing
either hand. But you have to act fast, steer quickly, and just as quickly
straighten the wheel once you have avoided the object.
4-8
ProCarManuals.com
Page 191 of 488
A CAUTION:
Driving to the top (crest) of a hill at full speed can cause an
accident. There could be a drop-off, embankment, cliff, or even
another vehicle. You could be seriously injured
or killed. As you
near the top
of a hill, slow down and stay alert.
Q: What should I do if my vehicle stalls, or is about to stall, and I
A: If this happens, there are some things you should do, and there are
some things you must not do. First, here’s what you
shoclld do:
can’t make it up the hill?
0 Push the brake pedal to stop the vehicle and keep it from rolling
backwards. Also, apply the parking brake.
If your engine is still running, shift the transmission into reverse,
release the parking brake, and slowly back down the
hill in reverse.
If your engine has stopped running, you’ll need to restart it. With the
brake pedal depressed and the parking brake still applied, shift the
transmission to PARK (P) (or, shift to NEUTRAL
(N) if your vehicle
has a manual transmission) and restart the engine. Then, shift
to
reverse, release the parking brake, and slowly back down the hill as
straight
as possible in reverse.
0 As you are backing down the hill, put your left hand on the steering
wheel at the
12 o’clock position. This way, you’ll be able to tell if your
wheels are straight and maneuver
as you back down. It’s best that you
back down the hill with your wheels straight rather than in the left or
right direction. Turning the
wheel too far to the left or right will
increase the possibility
of a rollover.
Here are some things you
must mt do if you stall, or are about to stall,
when going
up a hill.
0 Never attempt to prevent a stall by shifting into NEUTRAL (N) (or
depressing the clutch,
if you have a manual transmission) to ”rev-up”
the engine and regain forward momentum. This won’t work. Your
vehicle will roll backwards very quickly and
you could go out of
control.
4-’17
ProCarManuals.com
Page 250 of 488
Changing a Flat Tire
If a tire goes flat, avoid further tire and wheel damage by driving slowly to a
level place. Turn on your hazard warning flashers.
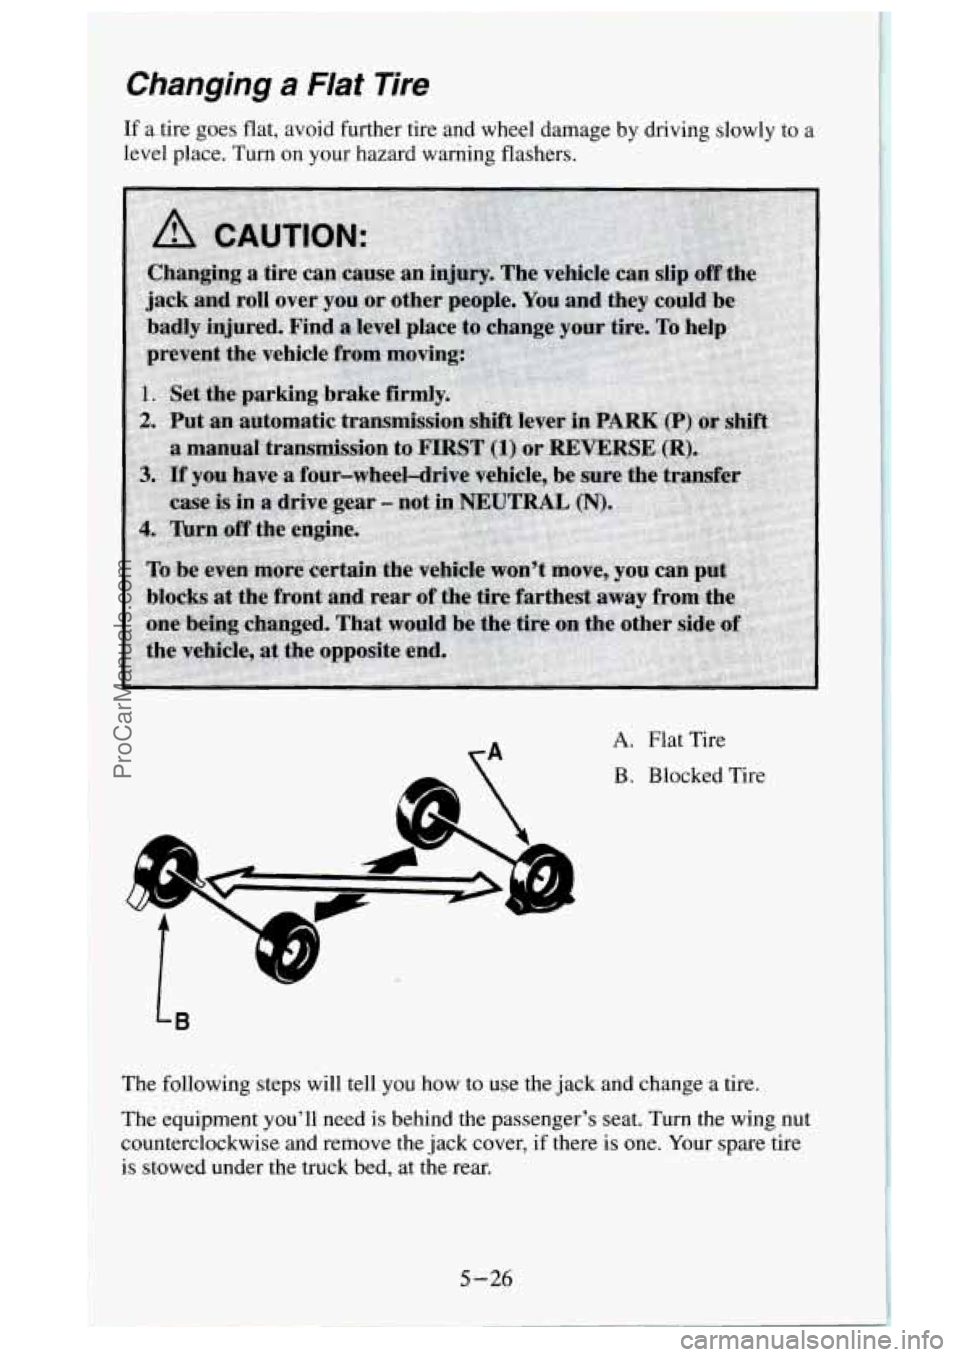
A. Flat Tire
B. Blocked Tire
The following steps will tell
you how to use the jack and change a tire.
The equipment you’ll need
is behind the passenger’s seat. Turn the wing nut
counterclockwise and remove the jack cover, if there is one.
Your spare tire
is stowed under the truck bed, at the
rear.
5-26
ProCarManuals.com
Page 255 of 488
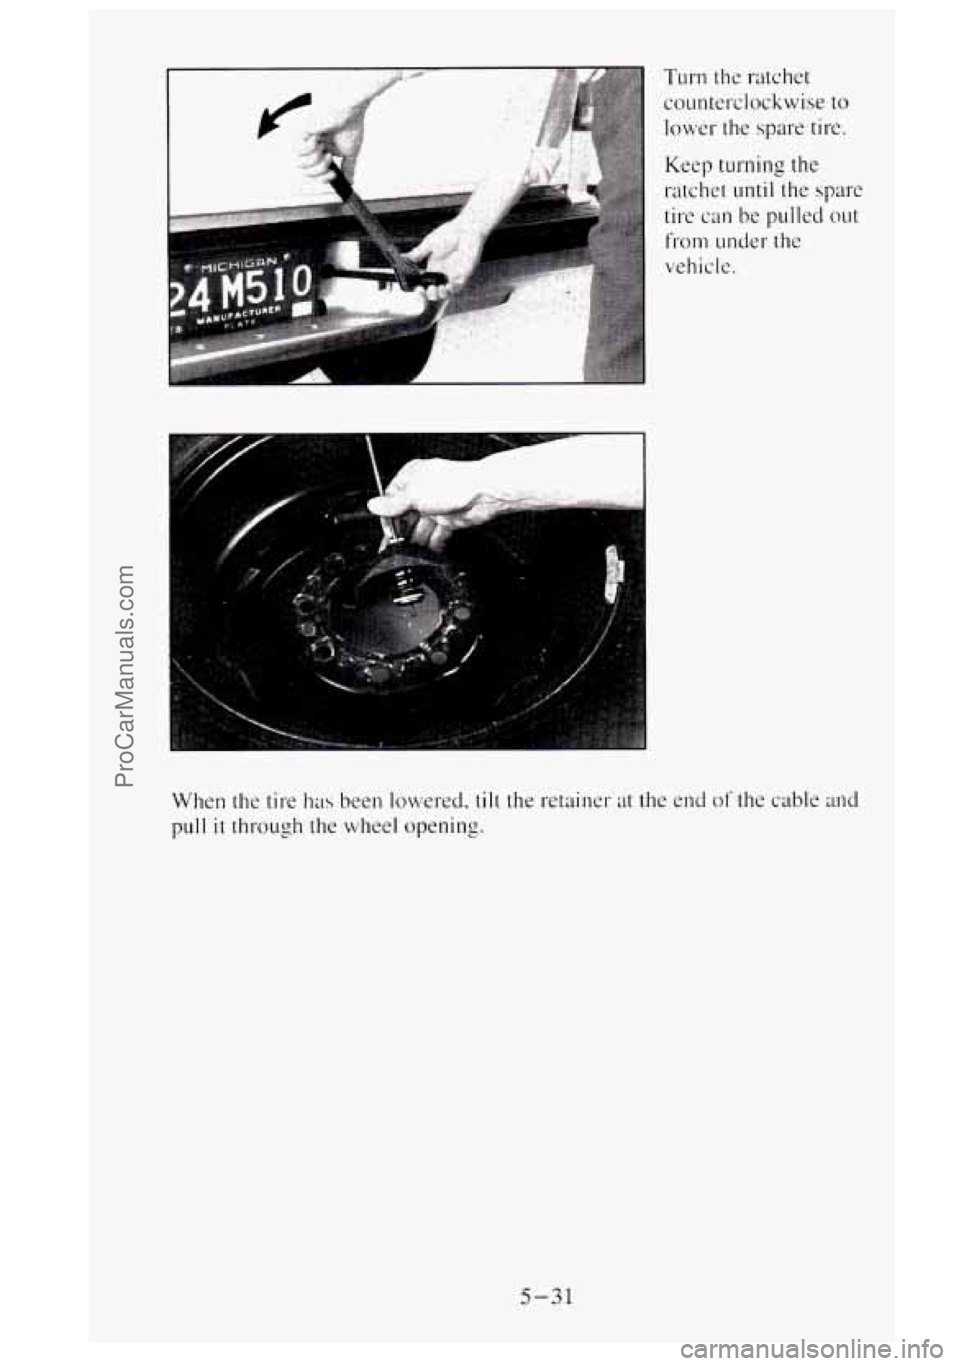
Turn the ratchet
counterclockwise to
lower- the spare tire.
Keep turning the
ratchet
until the spare
tire
can be pulled out
from under the
vehicle.
When the tire
has been lowered. till the retainer at the end of the cable and
pull it through the wheel opening.
5-31
ProCarManuals.com
Page 256 of 488
Changing the Tire
.
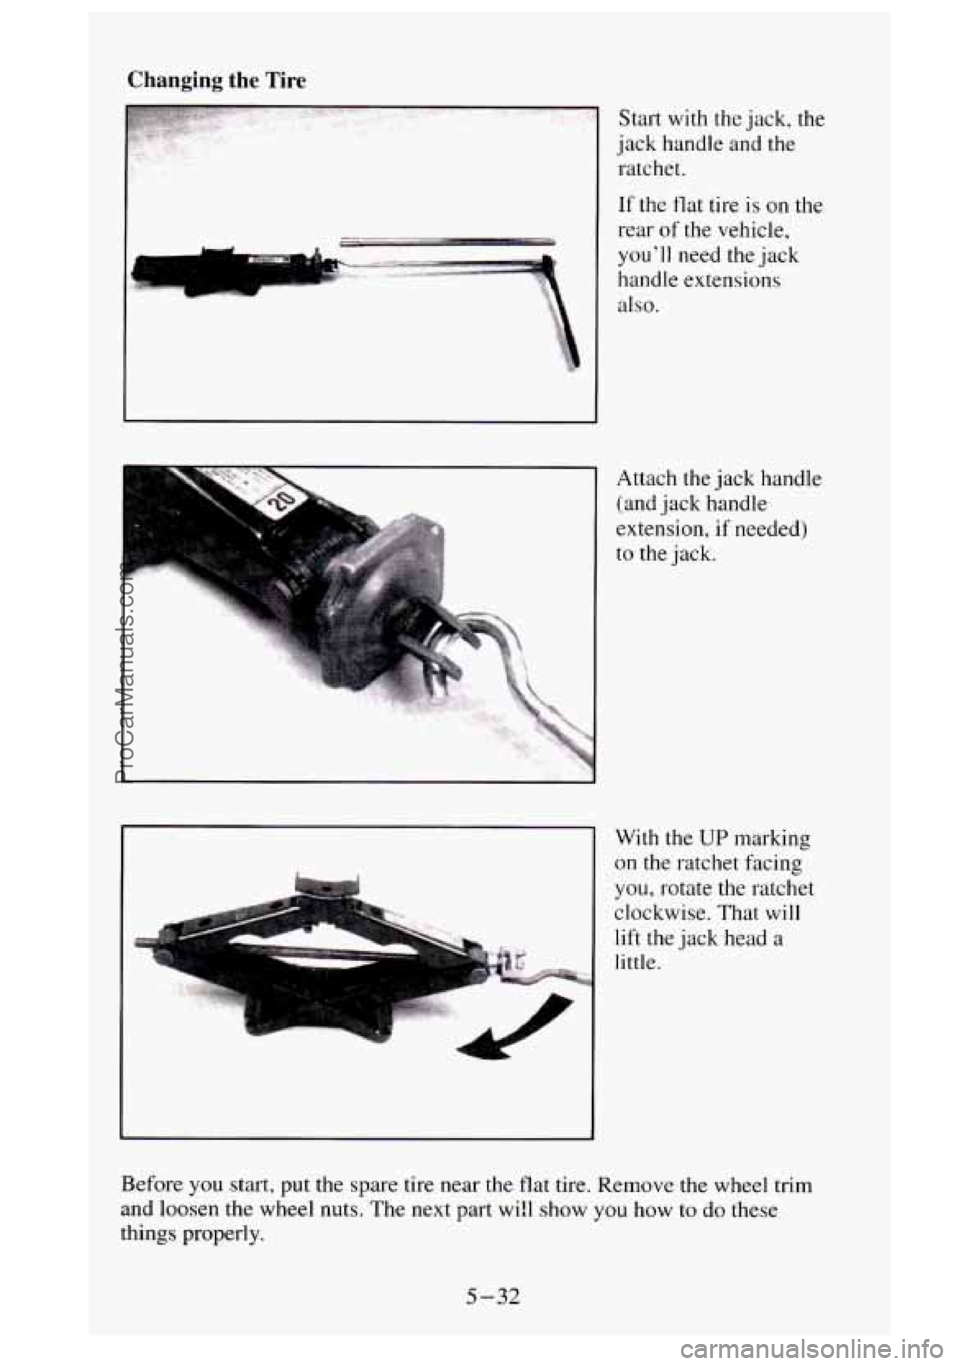
Start with the jack, the
jack handle and the
ratchet.
If
the flat tire is on the
rear of
the vehicle,
you’ll need the jack
handle extensions
also.
Attach the jack handle
(and jack handle
extension, if needed)
to the jack.
With the
Up marking
on the ratchet facing
you, rotate the ratchet
clockwise. That will
lift the jack head a
little.
Before
you start, put the spare tire near the flat tire. Remove the wheel trim
and loosen
the wheel nuts. The next part wi!l show you how to do these
things properly.
5-32
ProCarManuals.com
Page 257 of 488
Kemoving Wheel Trim
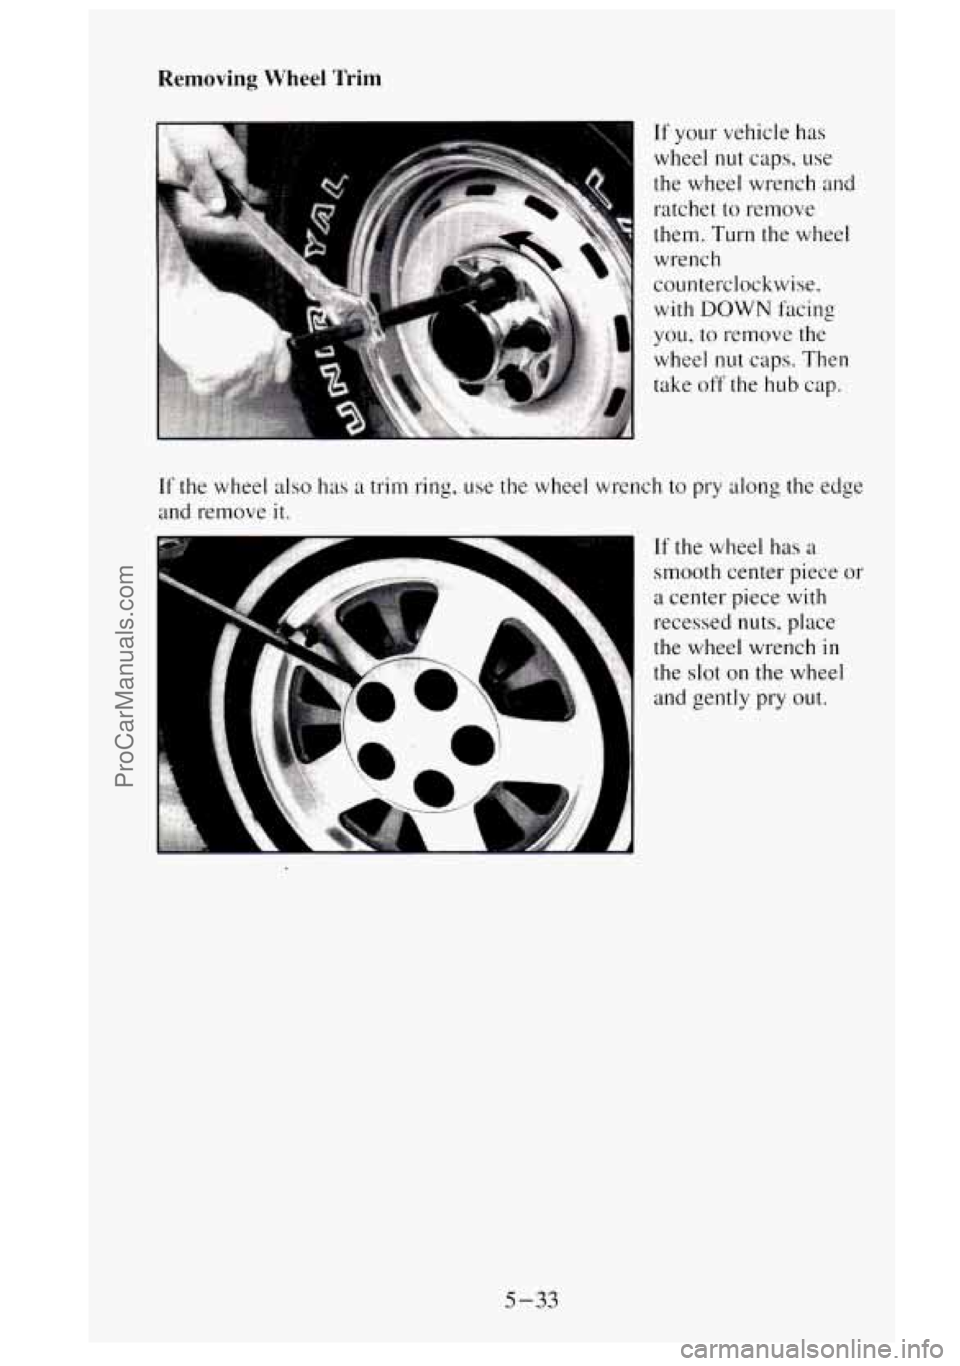
If your vehicle has
wheel
nut caps, use
the wheel wrench and
ratchet
to remove
them. Turn the wheel
wrench
counterclockwise.
with DOWN facing
you, to remove the
wheel
nut caps. Then
take off the hub cap.
If the wheel also has a trim ring. use the wheel wrench to pry along the edge
and remove
it.
If the wheel has a
smooth center piece or
a center piece with
recessed nuts, place
the wheel wrench
in
the slot on the wheel
and gently
pry out.
5-33
ProCarManuals.com