1995 CHEVROLET S10 audio
[x] Cancel search: audioPage 2 of 354
Downloaded from www.Manualslib.com manuals search engine Table of Contents
Introduction - How to Use this Manual
This section tells you how to use your manual and includes safety
and vehicle damage warnings and symbols.
Section 1 - Seats and Restraint Systems
This section tells you how to use your seats and safety belts
properly. It also explains the air bag system.
Section 2 - Features & Controls
This section explains how to start and operate your vehicle.
Section 3 - Comfort Controls & Audio Systems
This section tells you how to adjust the ventilation and comfort
controls and how to operate your audio system.
Section 4 - Your Driving and the Road
Here you’ll find helpful information and tips about the road and
how to drive under different conditions.
Section 5 - Problems on the Road
This section tells you what to do if you have a problem while
driving, such as a flat tire or engine overheating, etc.
Section 6- Service & Appearance Care
Here the manual tells you how to keep your vehicle running
properly and looking good.
Section 7 - Maintenance Schedule
This section tells you when to perform vehicle maintenance and
what fluids and lubricants to use.
Section 8 - Customer Assistance Information
This section tells you how to contact GM for assistance and how to
get service publications. It also gives you information on
“Reporting Safety Defects” on page
8-4.
Index
Here’s an alphabetical listing of almost every subject in this
manual. You can use it to quickly find something you want to read.
1
Page 114 of 354
Downloaded from www.Manualslib.com manuals search engine Comfort Controls & Audio Systems
Section
In this section you'll find out how to operate the comfort control systems
and audio systems offered with your vehicle. Be sure to read about the
particular system supplied with your vehicle.
Comfort Controls
Heater Controls
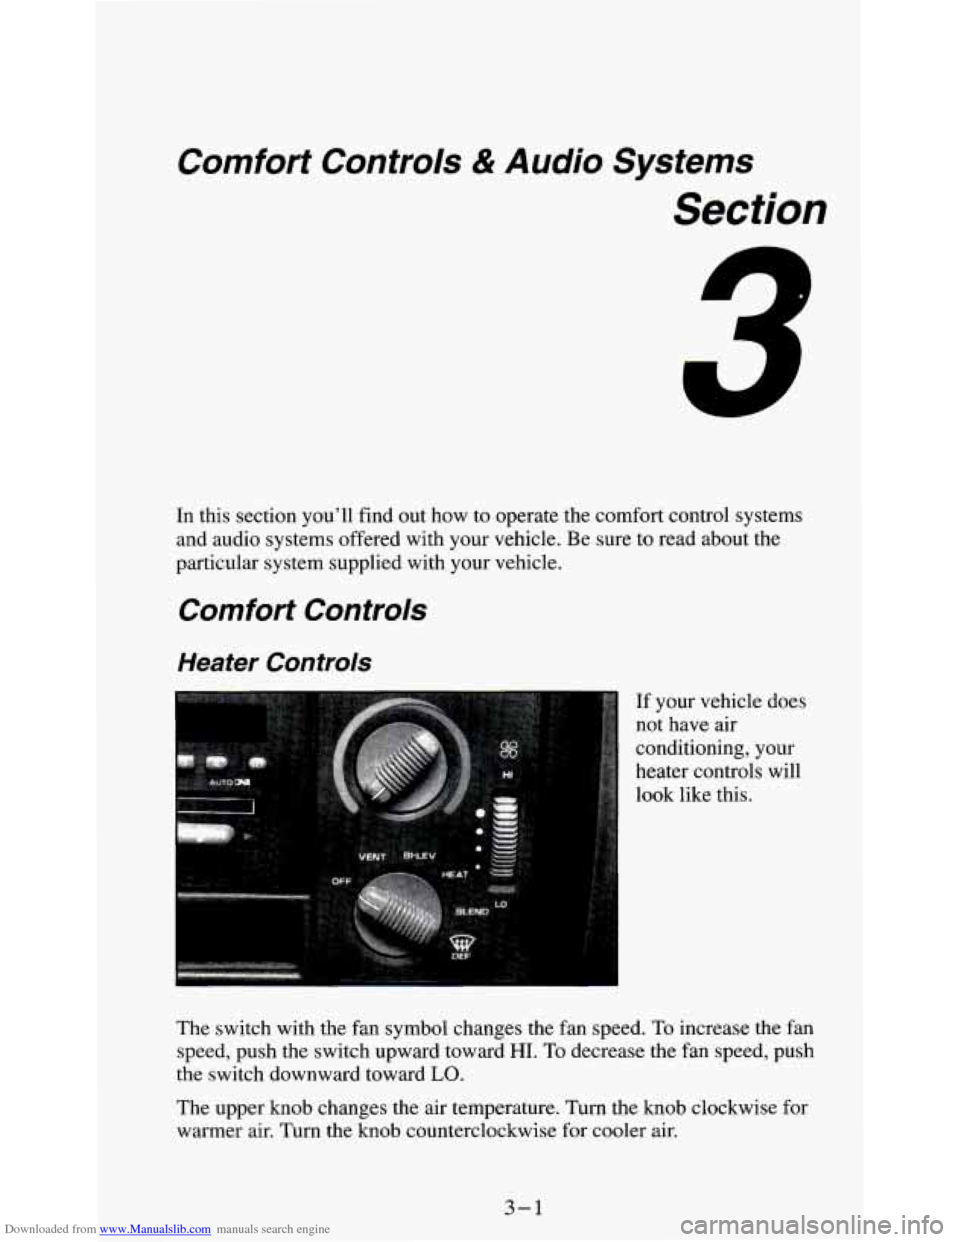
If your vehicle does
not have air
conditioning, your
heater controls will
look like this.
The switch with the fan symbol changes the fan speed.
To increase the fan
speed, push the switch upward toward
HI. To decrease the fan speed, push
the switch downward toward
LO.
The upper knob changes the air temperature. Turn the knob clockwise for
warmer air. Turn the knob counterclockwise for cooler air.
3-1
Page 118 of 354
Downloaded from www.Manualslib.com manuals search engine You can move the vents to direct the flow of air, or close the vents
altogether. When you close
a vent, it will increase the flow of air coming out
of any
vents that are open.
Audio Systems
Your Delco@ audio system has been designed to operate easily and give
years of listening pleasure. But you will get the most enjoyment out of it
if
you acquaint yourself with it first. Find out what your Delco@system can do
and how to operate all its controls, to be sure you’re getting the most out of
the advanced engineering that went into it.
Setting the Clock (Audio Systems without a Compact
Disc)
To set the clock:
1. Press the SET button.
2. Within 5 seconds, push and hold SEEK until the correct minute appears
3. Press and hold SCAN until the correct hour appears on the display.
on
the display.
To display the clock with the ignition off, push the upper knob. The time
will be displayed for a few seconds.
Setting the Clock (Audio Systems with a Compact
Disc)
To set the clock:
1. Press the SET button. The radio may be on or off.
2. Within 5 seconds, press and hold either SEEK or 4 SEEK until the
3. Press and hold SCAN until the correct hour appears on the display.
correct
minute appears on the display.
3-5
Page 119 of 354
Downloaded from www.Manualslib.com manuals search engine How to Operate Your ETW AM-FM Stereo Audio
System
:.*:,.: . .. . ..
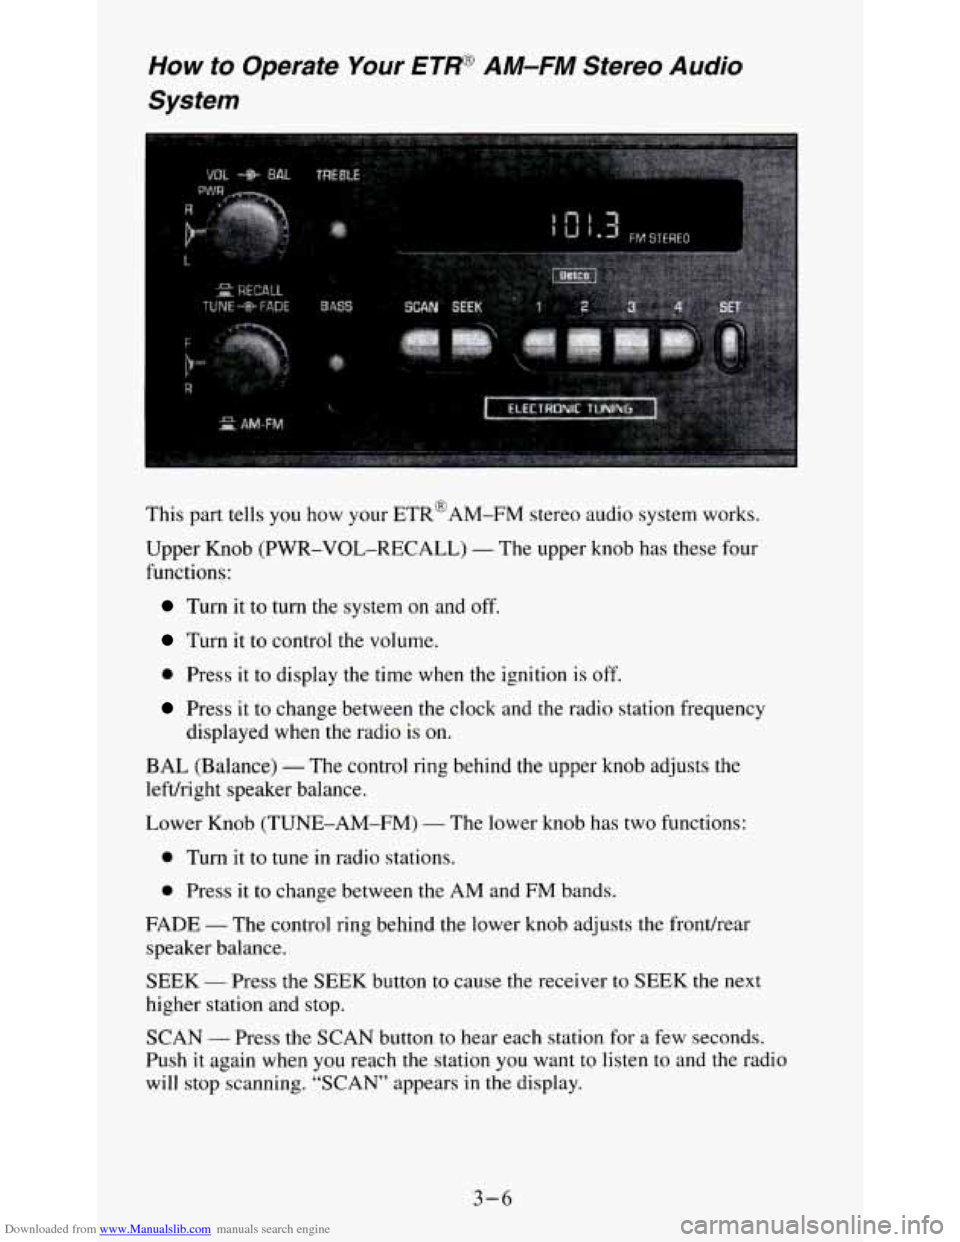
This part tells you how your ETR@AM-FM stereo audio system works.
Upper Knob (PWR-VOL-RECALL)
- The upper knob has these four
functions:
Turn it to turn the system on and off.
Turn it to control the volume.
0 Press it to display the time when the ignition is off.
Press it to change between the clock and the radio station frequency
displayed when the radio is on.
BAL (Balance) - The control ring behind the upper knob adjusts the
lefvright speaker balance.
Lower Knob (TUNE-AM-FM)
- The lower knob has two functions:
0 Turn it to tune in radio stations.
0 Press it to change between the AM and FM bands.
FADE
- The control ring behind the lower knob adjusts the frondrear
speaker balance.
SEEK
- Press the SEEK button to cause the receiver to SEEK the next
higher station and stop.
SCAN
- Press the SCAN button to hear each station for a few seconds.
Push
it again when you reach the station you want to listen to and the radio
will stop scanning. “SCAN” appears
in the display.
3-6
Page 120 of 354
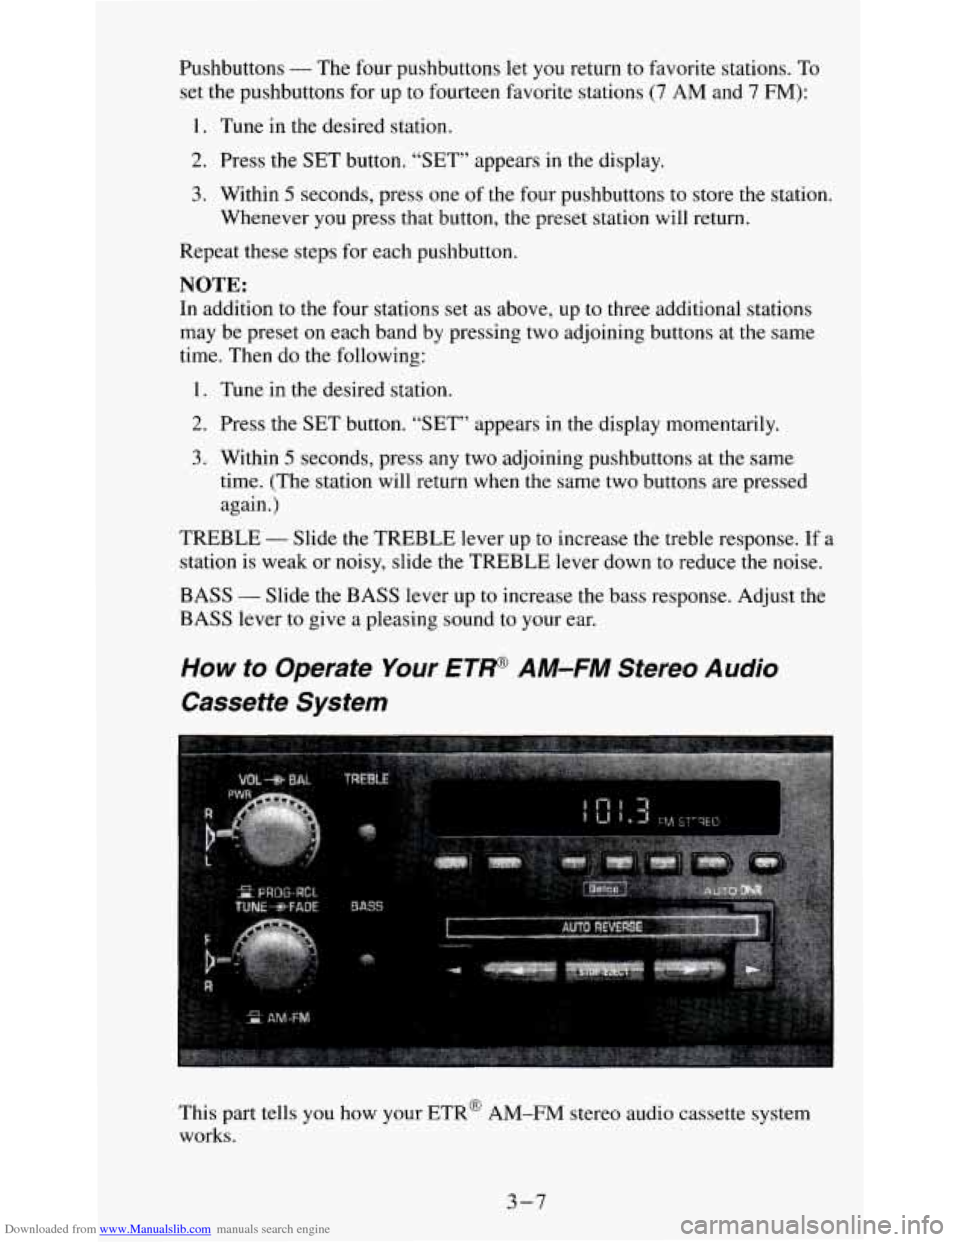
Downloaded from www.Manualslib.com manuals search engine Pushbuttons - The four pushbuttons let you return to favorite stations. To
set
the pushbuttons for up to fourteen favorite stations (7 AM and 7 FM):
1. Tune in the desired station.
2. Press the SET button. “SET” appears in the display.
3. Within 5 seconds, press one of the four pushbuttons to store the station.
Whenever you press that button, the preset station will return.
Repeat these steps for each pushbutton.
NOTE:
In addition to the four stations set as above, up to three additional stations
may be preset on each band by pressing two adjoining buttons at the same
time. Then do the following:
I. Tune in the desired station.
2. Press the SET button. “SET” appears in the display momentarily.
3. Within 5 seconds, press any two adjoining pushbuttons at the same
time. (The station will return when the same two buttons are pressed
again.)
TREBLE
- Slide the TREBLE lever up to increase the treble response. If a
station is weak or noisy, slide the TREBLE lever down to reduce the noise.
BASS - Slide the BASS lever up to increase the bass response. Adjust the
BASS lever
to give a pleasing sound to your ear.
How to Operate Your ET/+@ AM-FM Stereo Audio
Cassette System
This part tells you how your ETR@ AM-FM stereo audio cassette system
works.
3-7
Page 123 of 354
Downloaded from www.Manualslib.com manuals search engine How to Operate Your ETW AM-FM Stereo Audio
Cassette System with Equalizer
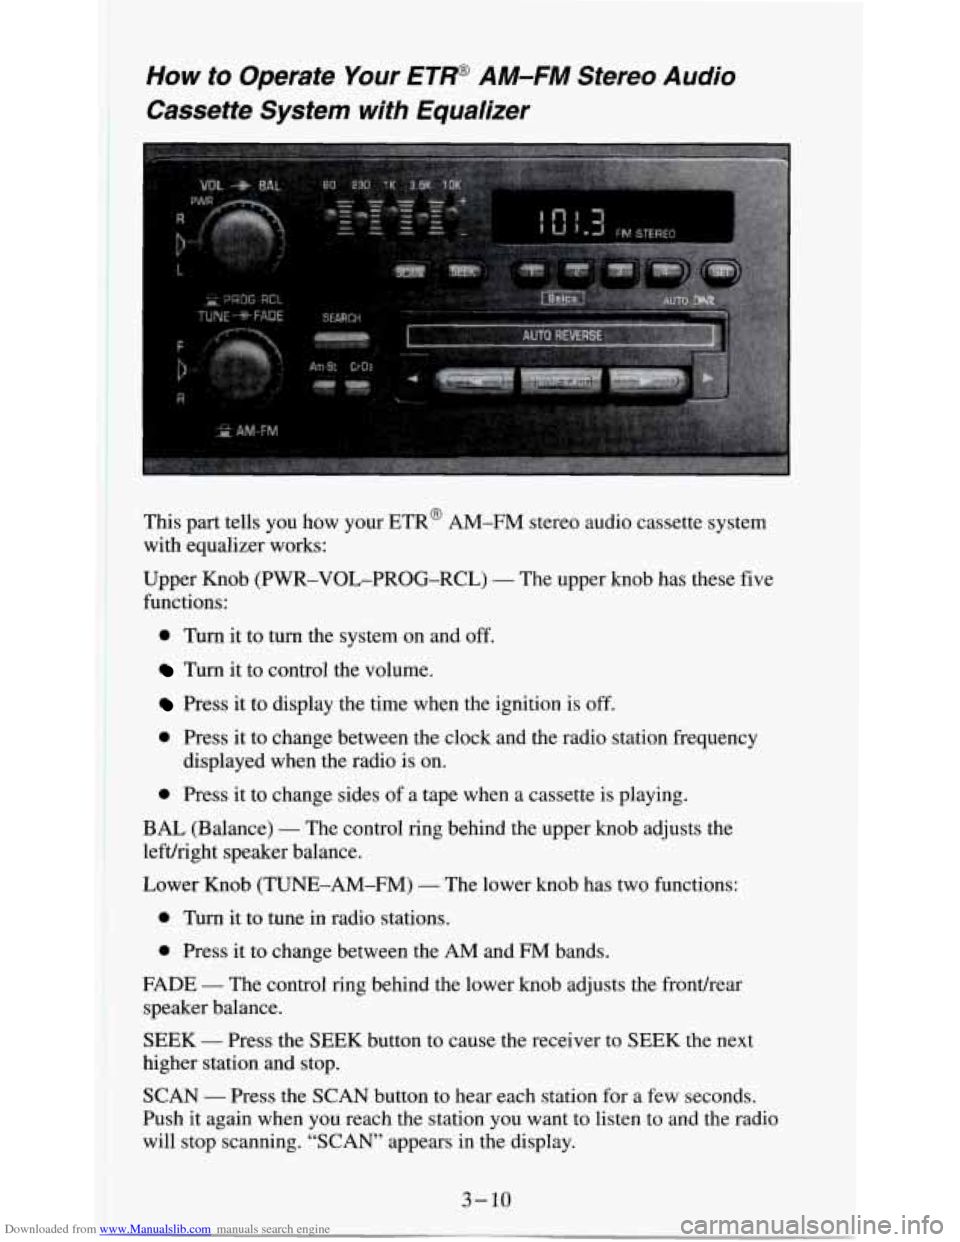
This part tells you how your ETR@ AM-FM stereo audio cassette system
with equalizer works:
Upper Knob (PWR-VOL-PROG-RCL)
- The upper knob has these five
functions:
0 Turn it to turn the system on and off.
Turn it to control the volume.
Press it to display the time when the ignition is off.
0 Press it to change between the clock and the radio station frequency
0 Press it to change sides of a tape when a cassette is playing.
displayed
when the radio is on.
BAL (Balance)
- The control ring behind the upper knob adjusts the
lefuright speaker balance.
Lower Knob (TUNE-AM-FM)
- The lower knob has two functions:
0 Turn it to tune in radio stations.
0 Press it to change between the AM and FM bands.
FADE
- The control ring behind the lower knob adjusts the fronthear
speaker balance.
SEEK
- Press the SEEK button to cause the receiver to SEEK the next
higher station and stop.
SCAN
- Press the SCAN button to hear each station for a few seconds.
Push it again when you reach the station you want to listen to and the radio
will stop scanning. “SCAN” appears in the display.
Page 126 of 354
Downloaded from www.Manualslib.com manuals search engine How to Operate Your ETR@ AM-FM Stereo Audio
Compact Disc (CD) System
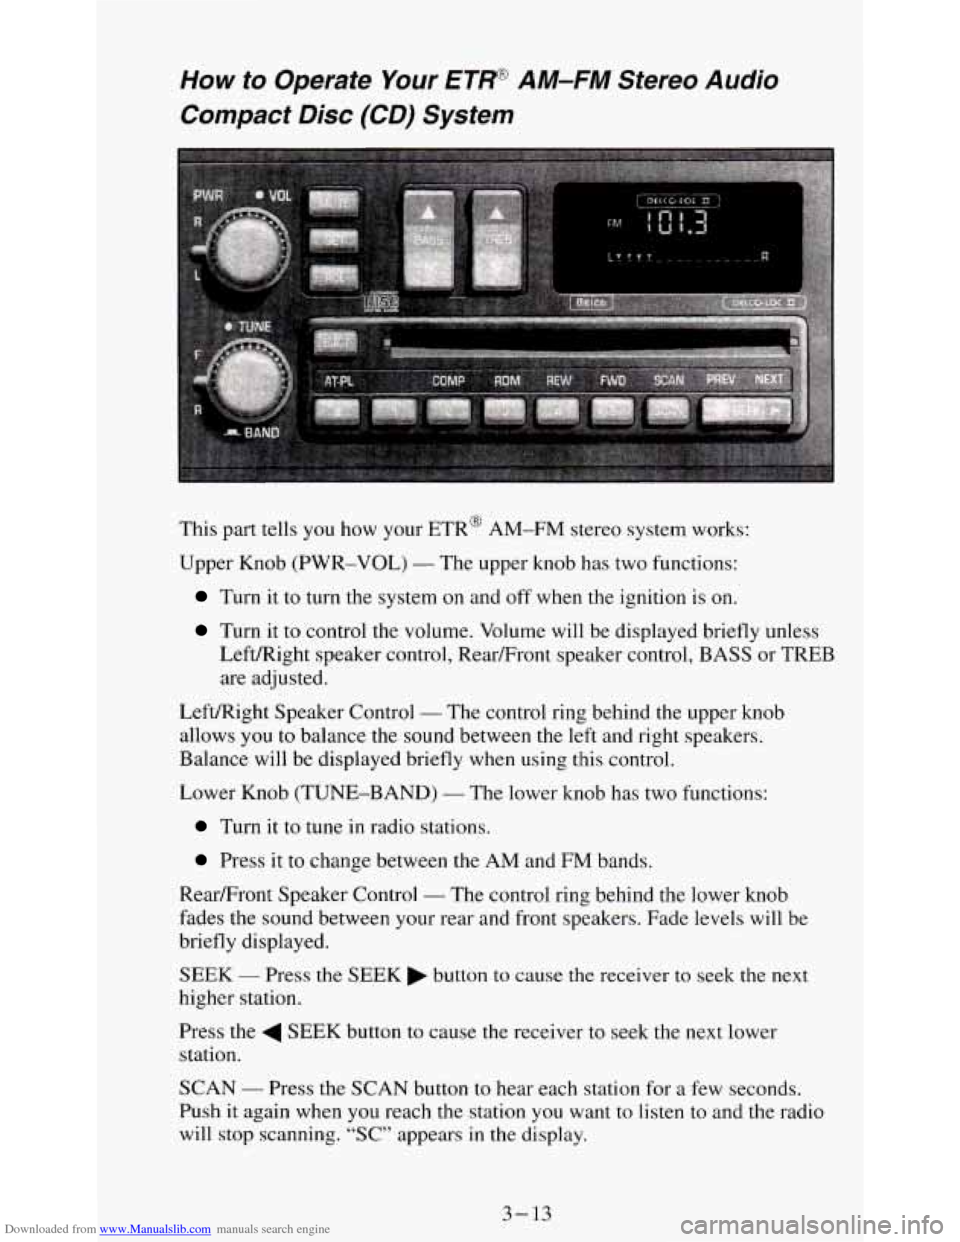
This part tells you how your ETR@ AM-FM stereo system works:
Upper Knob (PWR-VOL)
- The upper knob has two functions:
Turn it to turn the system on and off when the ignition is on.
Turn it to control the volume. Volume will be displayed briefly unless
LefdRight speaker control, Rear/Front speaker control, BASS or TREB
are adjusted.
Left/Right Speaker Control
- The control ring behind the upper knob
allows you
to balance the sound between the left and right speakers.
Balance will be displayed briefly when using this control.
Lower Knob (TUNE-BAND)
- The lower knob has two functions:
Turn it to tune in radio stations.
Press it to change between the AM and FM bands.
RearFront Speaker Control
- The control ring behind the lower knob
fades the sound between your rear and front speakers. Fade levels will be
briefly displayed.
SEEK - Press the SEEK button to cause the receiver to seek the next
higher station.
Press the
4 SEEK button to cause the receiver to seek the next lower
station.
SCAN
- Press the SCAN button to hear each station for a few seconds.
Push it again when you reach the station you want to
listen to and the radio
will stop scanning. “SC” appears
in the display.
3-13
Page 323 of 354
Downloaded from www.Manualslib.com manuals search engine Engine Coolant Level
Check the engine coolant level and add the proper coolant mix if necessary.
See “Coolant”
in the Index for further details.
Windshield Washer Fluid Level
Check the windshield washer fluid level in the windshield washer tank and
add the proper fluid
if necessary. See “Windshield Washer Fluid” in the
Index for further details.
At Least Once a Month
Tire Inflation
Check tire inflation. Make sure tires are inflated to the pressures specified
on
the CertificatiodTire label located on the driver’s door lock pillar. See
“Tires” in the Index for further details.
Cassette Deck
Clean cassette deck. Cleaning should be done every 50 hours of tape play.
See “Audio Systems” in the Index for further details.
At Least Four Times a Year
Tailgate Lubrication
Lubricate tailgate latch bolt, handle assembly pivot points, and hinges w\
ith
lubricant recommended
in Part D. Lubricate every 3,000 miles (5 000 km) if
following schedule
I or every 7,500 miles (1 2 500 km) if following schedule
11.
At Least Once a Year
Key Lock Cylinders
Lubricate the key lock cylinders with the lubricant specified in Part D.
Body Lubrication
Lubricate all body door hinges, the body hood, fuel door and rear
compartment hinges, latches and locks including interior glove
box and
console doors, and any moving seat hardware. Lubricate the hood safety
lever pivot and prop rod pivot. Part D tells you what to use. More frequent
lubrication may be required when exposed to a corrosive environment.
7-36