1995 BUICK REGAL window
[x] Cancel search: windowPage 118 of 340
System Controls
Fan Lever
The bottom lever selects the force of air you want.
Temperature Lever
The upper lever changes the temperature of the air coming
through the system. Slide the lever toward
WARM for
warmer air. Slide the lever toward
COOL for cooler air. If
your system has the auxiliary temperature control option,
this lever controls the temperature for
the whole vehicle
unless
DUAL is pressed. When DUAL is pressed, this
lever controls the temperature for the driver.
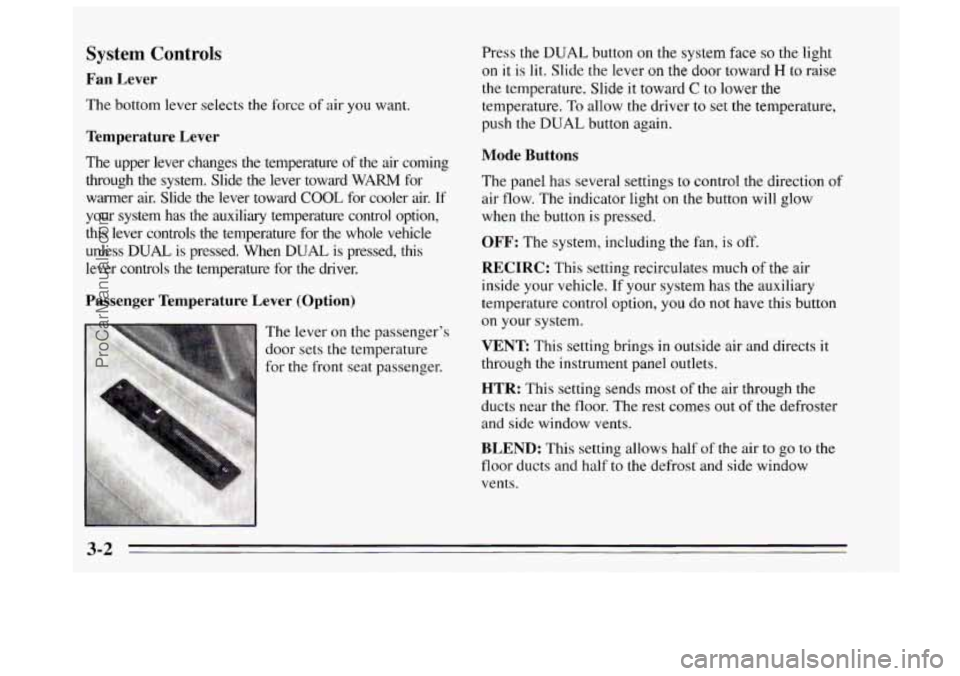
Passenger Temperature Lever (Option)
Press the DUAL button on the system face so the light
on it is lit. Slide the lever on the door toward H to raise
the temperature. Slide it toward
C to lower the
temperature. To allow the driver
to set the temperature,
push the
DUAL button again.
Mode Buttons
The panel has several settings to control the direction of
air flow. The indicator light
on the button will glow
when the button
is pressed.
OFF: The system, including the fan, is off.
RECIRC: This setting recirculates much or tne air
inside your vehicle.
If your system has the auxiliary
temperature control option, you do not have this button
on your system.
VENT This setting brings in outside air and directs it
through the instrument panel outlets.
HTR: This setting sends most of the air through the
ducts near the floor. The rest comes out of the defroster
and side window vents.
BLEND: This setting allows half of the air to go to the
floor ducts and half to
the defrost and side window
vents.
3-2
ProCarManuals.com
Page 119 of 340
FRONT This setting directs most of the air through the
defroster and side window vents. Some
of the air goes to
the floor ducts. The air conditioning compressor will run
automatically in this setting unless the outside
temperature is below 40°F (4.5"C).
MAX: This setting recirculates much of the air inside
your vehicle and sends it through the instrument panel
outlets. The air conditioning compressor will run
automatically in this setting unless the outside
temperature is below 40°F (4.5"C).
NORM: This setting brings in outside air and sends it
through the instrument panel outlets. The air
conditioning compressor will run automatically in this
setting unless the outside temperature
is below 40°F
(4.5
" C).
BI-LEV This setting brings in the outside air and
directs it two ways. Half of the air is directed through
the instrument panel outlets. Most
of the remaining air is
directed through the floor ducts and a little
to the defrost
and side window vents. The air conditioning compressor
will run automatically
in this setting unless the outside
temperature
is below 40°F (4.5"C).
Air Conditioning
On very hot days, open the windows long enough to
let hot inside air escape. This reduces the time
the
compressor has to run, which should help fuel economy.
For quick cool-down on very hot days, use
MAX with
the temperature lever all the way to
COOL. If this
setting is used for long periods of time, the air in your
vehicle may become too dry.
For normal cooling on hot days, use
NORM with the
temperature lever all the way to
COOL. The system will
bring in outside air and cool
it.
On cool but sunny days, the sun may warm your upper
body, but your lower body may not be warm enough.
You can use
BI-LEV with the temperature knob in the
middle. The system will bring
in outside air and direct it
to your upper body, while sending slightly warmed air to
your lower body.
You may notice this temperature
difference more at some times than others.
3-3
ProCarManuals.com
Page 120 of 340
Heating
On cold days use HTR with the temperature lever all the
way to WARM. The system will bring in outside air,
heat it and send it to the floor ducts.
If your vehicle has an engine coolant heater, you can
use
it to help your system provide warm air faster when it’s
cold outside
(0°F (-18°C) or lower). An engine coolant
heater warms the coolant your engine and heating
system use to provide heat. See “Engine Coolant
Heater” in
the Index.
Ventilation
For mild outside temperatures when little heating or
cooling
is needed, use VENT to direct outside air
through your vehicle. Your vehicle also
has the
flow-through ventilation system described later in this
section.
Defogging and Defrosting Windows
Your system has two settings for clearing the front and
side windows.
To defrost the windows quickly, use
FRONT with the temperature lever all the way to
WARM.
To warm passengers while keeping the
windows clean, use
BLEND.
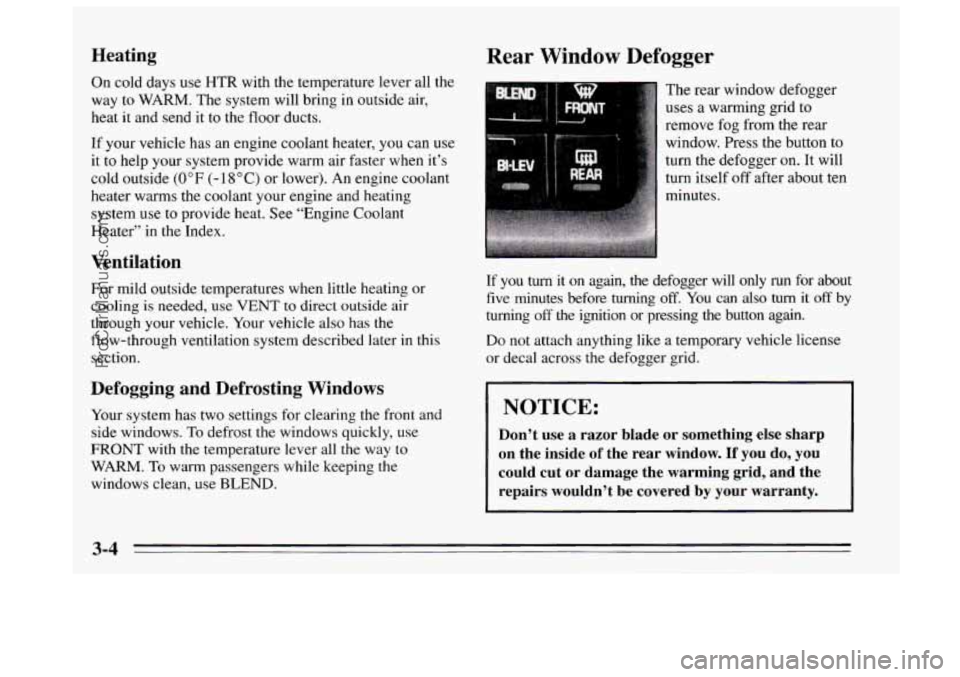
Rear Window Defogger
The rear window defogger
uses
a warming grid to
remove fog from the rear
window. Press the button to
turn the defogger on. It will
turn itself off after about ten
minutes.
If you
turn it on again, the defogger will only run for about
five minutes before turning
off. You can also turn it off by
turning
off the ignition or pressing the button again.
Do not attach anything like a temporary vehicle license
or decal across the defogger grid.
1 NOTICE:
Don’t use a razor blade or something else sharp
on the inside
of the rear window. If you do, you
could cut or damage the warming grid, and the
repairs wouldn’t be covered by your warranty.
3-4
ProCarManuals.com
Page 121 of 340
Flow-Through Ventilation System
Your vehicle’s flow-through ventilation system supplies
outside air into the vehicle when it is moving. Outside
air will also enter the vehicle when the air conditioning
fan is running.
Ventilation Tips
e
e
e
Keep the hood and front air inlet free of ice, snow or
any other obstruction, such as leaves. The heater and
defroster will work far better, reducing the chance of
fogging the inside of your windows.
When you enter a vehicle in cold weather, adjust the
mode
to HTR and the fan to the highest speed for a
few moments before driving off. This helps clear the
intake ducts of snow and moisture and reduces the
chance of fogging the inside
of your windows.
Keep the air path under the front seats clear
of
objects. This helps air to circulate throughout your
vehicle.
Audio Systems
Your Delco@ audio system has been designed to operate
easily and give years
of listening pleasure. You will get
the most enjoyment out of it
if you ac uaint yourself
with it first. Find out what your Delco system can do
and how
to operate all its controls, to be sure you’re
getting the most out of the advanced engineering that
went into it.
gs
Setting the Clock
1. Press and hold HRS until the correct hour appears.
2. Press and hold MIN until the correct minute appears.
ProCarManuals.com
Page 157 of 340
Once you are moving on the freeway, make certain you
allow a reasonable following distance. Expect to move
slightly slower at night.
When you want to leave the freeway, move to the proper
lane
well in advance. If you miss your exit do not, under
any circumstances, stop and back up. Drive
on to the
next exit.
The exit ramp can be curved, sometimes quite sharply.
The exit speed is usually posted.
Reduce your speed according to your speedometer, not
to
your sense of motion. After driving for any distance
at higher speeds,
you may tend to think you are going
slower than
you actually are.
Before Leaving on a Long Trip
Make sure you’re ready. Try to be well rested. If you
must start when you’re not fresh -- such as after a day’s
work
-- don’t plan to make too many miles that first part
of the journey. Wear comfortable clothing and shoes you
can easily drive in.
Is your vehicle ready for a long trip? If you keep it
serviced and maintained. it’s ready to go. If it needs
service, have
it done before starting out. Of course,
you’ll find experienced and able service experts
in
Buick dealers all across North America. They’ll be
ready and willing to help if you need
it.
Here are some things you can check before a trip:
0
0
0
0
0
0
Windshield Wc~slwr Fluid: Is the reservoir full‘? Are
all windows clean inside and outside?
Wiper Blades: Are they in good shape?
Fuel, Eqirze Oil, Other Fluids: Have you checked
all levels‘?
Lamps: Are they all working? Are the lenses clean?
Tires: They are vitally important to a safe,
trouble-free trip.
Is the tread good enough for
long-distance driving? Are the tires all inflated
to the recommended pressure‘?
Weather Fowcvzsrs: What’s the weather outlook
along your route? Should you delay your trip
a short
time to avoid a major storm system‘?
A4up.s: Do you have up-to-date maps?
4-19
ProCarManuals.com
Page 163 of 340
Run your engine only as long as you must. This saves
fuel. When you
run the engine, make it go a little faster
than
just idle. That is, push the accelerator slightly. This
uses ‘less fuel for the heat that you get and it keeps the
battery charged. You will need a well-charged battery to
restart the vehicle, and possibly .for signaling later on
with
your headlights. Let the heater run for awhile.
Then, shut the engine off and close the window almost
all the way to preserve the heat. Start
the engine again
and repeat this only when
you feel really uncomfortable
from the cold.
But do it as little as possible. Preserve the
fuel as long as you can. To help keep warm, you can get
out
of the vehicle and do some fairly vigorous exercises
every half hour or
so until help comes.
4-25
ProCarManuals.com
Page 189 of 340
NOTICE:
If your engine catches fire because you keep
driving with no coolant, your vehicle can be
badly damaged. The costly repairs would not be
covered
by your warranty.
If No Steam Is Coming From Your Engine
If you get the overheat warning but see or hear no
steam, the problem may not be too serious. Sometimes
the engine can get a little too
hot when you:
0 Climb a long hill on a hot day.
0 Stop after high speed driving.
Idle for long periods in traffic.
Tow a trailer.
If you get the overheat warning with no sign of steam,
try this for a minute or so:
1. Turn off your air conditioner
2. Turn on your heater to full hot at the highest fan
speed and open the window as necessary.
3.
If you’re in a traffic jam, shift to NEUTRAL (N);
otherwise, shift to the highest gear while
driving
-- DRIVE (D) or THIRD (3).
If you no longer have the overheat warning, you can
drive. Just to be safe, drive slower for about ten minutes.
If the warning doesn’t come back
on, you can drive
normally.
If the warning continues, pull over, stop, and park your
vehicle right away.
If there’s still
no sign of steam, you can idle the engine
for two
or three minutes while you’re parked, to see if
the warning stops. But then, if you still have the
warning,
rwrl ojftlw engine ~-rnd get owryotw out of’
the vehicle until it cools down.
You may decide not to lift the hood but
help right away. to
get service
5-15
ProCarManuals.com
Page 246 of 340
Appearance Care
Remember, cleaning products can be hazardous. Some
are toxic. Others can burst
into flame if you strike a
match or get them on a hot part
of the vehicle. Some are
dangerous
if you breathe their fumes in a closed space.
When you
use anything from a container to clean your
Buick, be sure to follow the manufacturer’s warnings
and instructions. And always open your doors or
windows when you’re cleaning the inside.
Never use these to clean your vehicle:
0 Gasoline
0 Benzene
Naphtha
0 Carbon Tetrachloride
0 Acetone
0 Paint Thinner
0 Turpentine
0 Lacquer Thinner
0 Nail Polish Remover
They can all be hazardous -- some more than
others
-- and they can all damage your vehicle, too. Don’t
use any
of these unless this manual says you can.
In many uses, these will damage your vehicle:
Alcohol
Laundry Soap
0 Bleach
0 Reducing Agents
Cleaning the Inside of Your Buick
Use a vacuum cleaner often to get rid of dust and loose
dirt. Wipe
vinyl or leather with a clean, damp cloth.
Your Buick dealer has two
GM cleaners, a solvent-type
spot lifter and a foam-type powdered cleaner.
They will
clean normal spots and stains very well.
Do not use
them on
vinyl or leather.
Here are some cleaning tips:
0
0
0
0
0
Always read the instructions on the cleaner label.
Clean
LIP stains as soon as you can -- before they set.
Use a clean cloth
or sponge, and change to a clean area
often.
A soft brush may be used if stains are stubborn.
Use solvent-type cleaners
in a well-ventilated area
only.
If you use them, don’t saturate the stained area.
If a ring forms after spot cleaning, clean the entire
area immediately or
it will set.
6-38
ProCarManuals.com