1994 PONTIAC GRAND-AM heating
[x] Cancel search: heatingPage 4 of 274

How to Use This Manual
It
Using Your 1994 Pontiac
Owner’s Manual
I‘
Many people read their owner’s manual
from beginning
to end when they first
receive their new vehicle. This will help
you learn about the features and controls
for your vehicle. In this manual, you’ll
find that pictures and words work
together to explain things quickly.
There are nine parts with black-tabbed
pages
in this manual. Each part begins
with a brief list of contents, so you can
usually tell at a glance
if that part
contains the information you want.
You can bend the manual slightly to reveal
the black tabs that help you find a part.
I
Part 1: Seats & Restraint Systems
This part tells you how to use your seats
and safety belts properly. It also explains
the
“SRS” (Air Bag) System.
Part 2: Features & Controls
This part,explains how to start and
operate your Pontiac.
Part 3: Comfort Controls & Audio
Systems
This part tells you how to adjust the
ventilation and comfort controls and how
to operate your sound system.
Part 4: Your Driving and the Road
Here you’ll find helpful information and
tips about
the road and how to drive
under different conditions.
Part 5: Problems on the Road
This part tells you what to do if you have
a problem while driving, such as a flat tire
or engine overheating, etc.
Part 6: Service & Appearance Care
Here the manual tells you how to keep
your Pontiac running properly and
looking good.
Part 7: Maintenance Schedule
This part tells you when to perform
vehicle maintenance and what fluids and
lubricants to use.
Part 8: Customer Assistance
Information
This part tells you how to contact Pontiac
for assistance and how to get service
publications. It
also gives you information
on “Reporting Safety Defects’’ on
page 247.
Part 9: Index
Here’s an alphabetical listing of almost
?very subject
in this manual. You can use it
to quickly find something you want to read.
Service Station Information
This is a quick reference of service
information.
You can find it on the last
page of this manual.
3.. .
ProCarManuals.com
Page 88 of 274

To use the lighter, just push it in all the
way and let
go. When it’s ready, it will
pop back by itself.
NOTICE:
Don’t hold a cigarette lighter in with
your hand while it
is heating. If you
do,
it won’t be able to back away
from the heating element when it’s
ready. That can make
it overheat,
damaging the lighter and the heating
element.
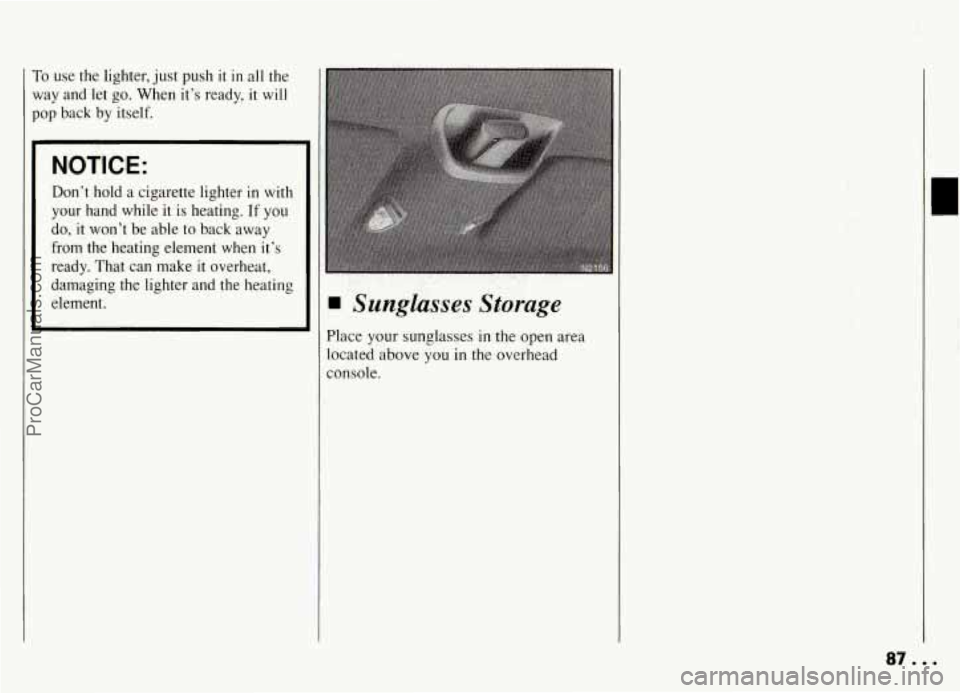
Sunglasses Storage
Place your sunglasses in the open area
located above you in the overhead
console.
87...
ProCarManuals.com
Page 95 of 274

Features & Controls
Fuel Gage (CONT.)
0 It takes a little more or less fuel to fill
up than the gage indicated. For
example, the gage may have indicated
the tank was half full, but it actually
took a little more or less than half the
tank’s capacity to fill the tank.
0 The gage moves a little when you turn
a corner or speed up.
0 The gage doesn’t go back to “E” when
you turn off the ignition.
For your fuel tank capacity, see “Service
Station Information”
on the last page of
this manual.
Engine Coolant Temperature Warning
Light
This light tells you that your engine
coolant has overheated or your radiator
cooling fan is not working.
If you have been operating your vehicle
under normal driving conditions, you should pull
off the road, stop your vehicle
and
turn the engine off as soon as possible
HOT COOLANT CAN BURN YOU
BADLY!
In “Problems on the Road”, this manual
shows what to do. See “Engine
Overheating” in the Index.
Engine Coolant
Temperature Gage
This gage shows the engine coolant
temperature. If the gage pointer moves
into the red area, your engine is too hot!
That reading means the same thing as the
warning light. It means that your engine
coolant has overheated.
If you have been operating your vehicle
under normal driving conditions, you
should pull
off the road, stop your vehicle
and
turn off the engine as soon as possible.
HOT COOLANT CAN BURN YOU
BADLY!
In “Problems on the Road”, this manual shows what to do. See “Engine
Overheating” in the Index.
ProCarManuals.com
Page 96 of 274

LOW
COOLANT
Low Coolant Warning
Light
F this light comes on and stays on, the
ehicle should be promptly pulled off the
Dad and the coolant level checked. See
Engine Coolant” in the Index. If there
re visible signs of steam see “Engine
herheating” in the Index before opening
le hood.
V6 Engine
Low Engine
Oil Level
Warning Light
Your vehicle may be equipped with an oil
level monitoring system. When the
ignition key is turned on, the light will
briefly flash. If the light stays on, stop the
vehicle on a level surface and turn the
engine off. Check the oil level using the
engine oil dipstick. (See the Index under
“Engine Oil.”) If the light does not flash,
have the low oil level sensor system
repaired
so it will be ready to warn you if
there’s a problem.
NOTE: The oil level monitoring system
only checks oil level during the brief
period between key on and and engine
crank.. It does not monitor engine ail level
when the engine
is running. Additionally,
an oil level check is only performed if the
engine has been turned off for a
considerable period of time allowing the
oil normally in circulation to drain back
into the oil pan.
Oiil Warning Light
If you have a problem with your oil, this
light may stay on after you start your
engine, or come on when you are driving.
This indicates that oil is not going through
your engine quickly enough to
keep it
lubricated. The engine could be low on
oil, or could have some other oil problem.
Have
it fixed right away.
The oil light could also come on in three
other situations:
0 When the ignition is on but the engine
is not running, the light will come on
as a test to show you it is working, but
the light will go out when you turn the
ignition to “Start”. If it doesn’t come
ProCarManuals.com
Page 103 of 274

I’
Comfort Controls & Audio Systems
w Climate Control System
With this system, you can control the
ventilation and heating
in your vehicle.
Your vehicle also has the flow-through
ventilation system described later
in this
section.
. . . 102
# : The left control knob sets the fan
speed. To select the force of air you want,
turn the knob. The fan is always running
unless the mode control is moved to
OFF.
Temperature Control: The center
control regulates the temperature of the
air coming through the system.
Mode Control: The right control knob
:hanges the functions of your system.
’(rr (Bi-Level): Use on cool, but sunny
days. This setting brings
in the outside ai
but directs it
in two ways. The cool air is
directed to the upper portion
of your bod
through the instrument panel outlets, but
slightly warmer air is directed through th
heater ducts and defroster vents. At time:
this temperature difference may be more
apparent than others.
(rr (Vent): Use when outside
temperatures are mild, and little heating
or cooling
is needed. Air flow is through
the instrument panel outlets. Set the
center control knob to the temperature
desired.
A.
A.
p(rr (Heater): This setting directs air
ihrough the heater ducts toward your feet
and the floor, and some through the
windshield defroster vents.
[f you have the optional engine coolant
heater (engine block heater) and use it
during cold weather,
0°F (- 18 “C) or
lower, your heating system
will more
quickly provide heat because the engine
coolant is already warm.ed. See “Engine
Coolant Heater (Engine
Block Heater)’’
in the Index.
%?a FrJ (Blend): This setting divides air flow
equally between the heater ducts and the
windshield defroster vents.
(Defrost): This setting directs most
air through the windshield defroster vents,
and some through the heater ducts.
Defogging Windows
To defog the windshield, turn all three
control knobs to the far right.
ProCarManuals.com
Page 104 of 274

Air Conditioning
System (OPTION)
The air conditioner and heater work best
if you keep your windaws closed while
using them. Your vehicle also has the
flow-through ventilation system
described later
in this section.
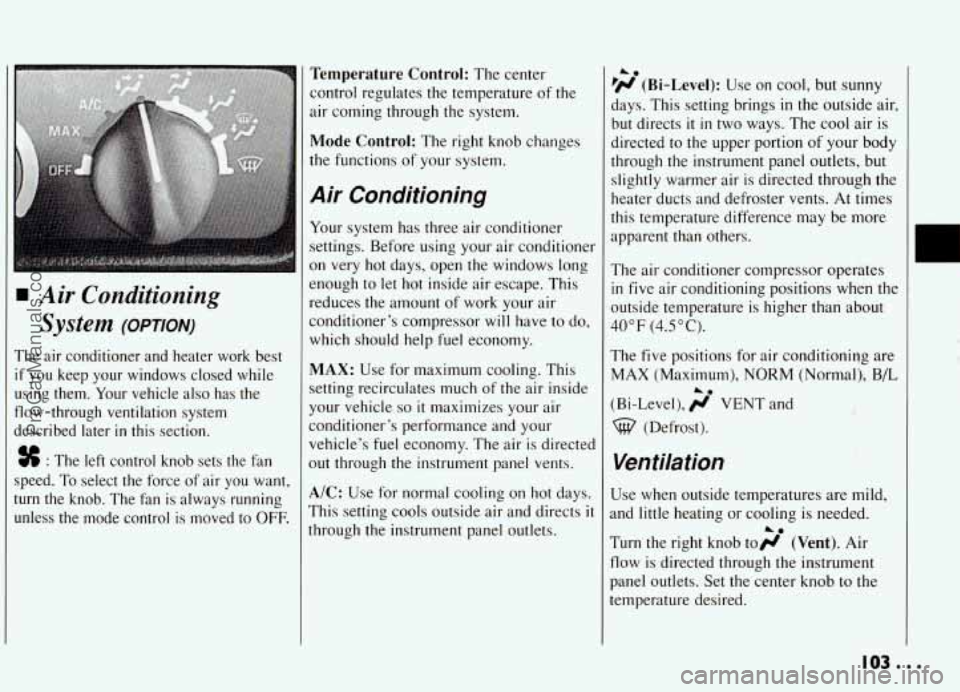
% : The left control knob sets the fan
speed. To select the force of air you want,
turn the knob. The fan is always running
unless the mode control is moved to
OFF.
Temperature Control: The center
control regulates the temperature of the
air coming through the system.
Mode Control: The right knob changes
the functions of your system.
A.ir Conditioning
Your system has three air conditioner
settings. Before using your air conditioner
on
very hot days, open the windows long
enough to let hot inside air escape. This
reduces the amount of work your air
conditioner’s compressor will have to do,
which should help fuel economy.
MAX: Use for maximum cooling. This
setting recirculates much of the air inside
your vehicle
SO it maximizes your air
conditioner’s performance and your
vehicle’s fuel economy. The air
is directed
out through the instrument panel vents.
A/C: Use for normal cooling on hot days.
This setting cools outside air and directs
it
through the instrument panel outlets.
he
lH (Bi-Level): Use on cool, but sunny
days. This setting brings
in the outside air,
but directs
it in two ways. The cool air is
directed to the upper portion of your body
through the instrument panel outlets, but
slightly warmer air is directed through the
heater ducts and defroster vents. At times
this temperature difference may be more
apparent than others.
The air conditioner compressor operates
in five air conditioning positions when the
outside temperature is higher than about
40°F (4.5”C).
The five positions for air conditioniqg are
MAX (Maximum), NORM (Normal.), B/L
(Bi-Level), ;j’ VENT and
%@ (Defrost). .. ._.
1. . ;>. w >%:
Ventilation
Use when outside temperatures are mild,
and little heating or cooling
is needed.
Turn the right knob toH (Vent). Air
flow is directed through the instrument
panel outlets. Set the center knob to the
temperature desired.
i.
IOS...
ProCarManuals.com
Page 105 of 274

Comfort Controls & Audio Systems
I Heating
Turning the right control knob to
(Heater) and the center control knob
clockwise
will send heated air through the
heater ducts toward your feet and the
floor, and some through the defroster
vents.
I ;j’ (Vent) and wo (Heater) are
economical positions because the air
conditioner compressor doesn’t
run in
these two settings. This reduces engine
load, resulting
in improved fuel economy.
If either setting fails to keep you
comfortable, or causes your windows to
fog up, turn
the right control knob to one
of the air conditioning positions, or to
%-$ (Defrost).
If you have the optional engine coolant
heater (engine block heater) and use
it
during cold weather, 0” F (- 18 O C) or
lower, your heating system
will more
quickly provide heat because the engine
coolant is already warmed. See “Engine
Coolant Heater” (Engine Block Heater)
the Index.
%?a pjd (Blend): This setting,divides air flow
Zqually between the heater ducts and the
windshield defroster vents.
Defrosting
Thew (Defrost) setting directs most air
through the defroster vents, and some
through the heater ducts.
Defogging Windows with
Air Conditioning System
To defog the windshield, turn all three
control knobs to the far right.
To defog the side windows, turn the right
control knob to pi (Bi-Level) and the
fan control knob to HIGH. Aim the side
vents toward the side windows. For
increased air flow to the side vents, close
the center vents.
A0
. . . IO4
ProCarManuals.com
Page 146 of 274

1 Driving On Grades
Reduce speed and shift to a lower gear
before you start down a long or steep
downgrade. If you don’t shift down,
you
might have to use your brakes so much
that they would get hot and no longer
work well.
On a long uphill grade, use the highest
gear possible. If you cannot maintain
posted speeds, driving at a lower speed
may help avoid overheating your engine
and transaxle.
If you have a manual transaxle with fifth
gear, it’s better not to use fifth gear. Just
drive
in fourth gear (or, as you need to, a
lower gear).
Parking on Hills
You really should not park your vehicle,
with a trailer attached, on
a hill. If
something goes wrong, your rig could
start to move. People can be injured, and
both your vehicle and the trailer can be
damaged.
But if you ever have to park your rig on a
hill, here’s how to do it:
1. Apply your regular‘brakes, but don’t
shift into PARK (P) yet, or into gear
for a manual transaxle.
2. Have someone place chocks under the
trailer wheels.
3. When the wheel chocks are in place,
release the regular brakes
until the
chocks absorb the load.
4. Reapply the regular brakes. Then
apply your parking brake, and then
shift to PARK
(P), or REVERSE (R)
for a manual transaxle.
5. Release the regular brakes.
When You Are Ready to Leave After
Parking
on a Hill
1. Apply your regular brakes and hold
the pedal down while you:
Start your engine;
Shift into a gear; and
Release the parking brake.
2. Let up on the brake pedal.
3. Drive slowly until the trailer is clear
of the chocks.
4. Stop and have someone pick up and
store the chocks.
145...
ProCarManuals.com