Page 983 of 1708

T AUDIO Symptom: Some speakers do not operate 1 Possible cause Damaged speaker Damaged audio unit Damaged DIN cord Open or short circuit in wiring harness Poor connection of connector Open or short circuit in DIN cord 45UOTX-260 Step 1 1. Turn the ignition switch to ACC. 2. Turn the audio system power to ON. Play a recorded tape and set the volume at an appropriate level. 3. Verify speaker operation with the balance, treble, bass, and fader knobs in the positions indicated in Table 1. 4. If not as specified in Table 1, refer to Table 2 and continue troubleshooting at the step corresponding to the faulty speaker. 35UOTX-082 Table 1 1 Speaker Balance I Treble I Left door (woofer) I Right I ( Right door (woofer) I I Left door (tweeter) I Right I Right door (tweeter) Right Driver-side left headrest Right . I Passenger-side left headrest I Right I Driver-side right headrest Left Bass Passenger-side right headrest Right Left Fader I Speaker operates I Yes Right 1-1 I No Yes I Left Yes Table 2 Gartner Banana
Page 987 of 1708
T AUDIO Step 14 1. Turn the ignition switch to ACC. 2. Measure the voltage at terminal C (UB) of the auto level controller connector (&pin). .J B+: Battery positive voltage I voltage Action Step 15 1. Disconnect the auto level controller DIN cord (&pin). 2. Measure the voltage at terminal 2 of the DIN cord. B+ Other Go to Step 15 Repair wiring harness CIGAR fuse - Auto level controller B+: Battery positive voltage Step 16 1. Check for continuity between the auto level controller connector (&pin) and the headrest speaker and body- sonic connector (&pin). Voltage B+ Other Action Go to Step 16 Replace AMFM radio unit 2. If correct, replace the auto level controller. 3. If not as specified, repair the wiring. I Speaker Right headrest Left headrest ALC I 'peaker connector connector H (VW) 8-pin +t C (LMI) 6-pin B (UO) &pin ++ D (LO) 6-pin F (RIL) &pin o B (RIL) Gpin A (W) &pin o A (W) 6-pin continuity Yes Yes Yes Yes .- / Gartner Banana
Page 988 of 1708

AUDIO T Symptom: Bodysonic will not play Possible cause Damaged bodysonic Damaged audio unit Damaged DIN cord Open or short circuit in wiring harness Poor connection of connector Open or short circuit in DIN cord 45UOTX-269 Step 1 1. Remove the audio unit. (Refer to page T-145.) 2. Make sure the audio unit connector and DIN cord are properly connected. 3. If the connections are OK, go to Step 2. 4. If a connection is poor, repair it. Step 2 1. TI~ the ignition switch to ACC. .. .-... 2. Measure fhe voltage at terminal C (UB) of the auto level controller connector (8-pin). B+: Battery positive voltage Step 3 1. Disconnect the auto level controller DIN cord (6-pin). Voltage B+ Other 2. Measure the voltage at terminal 2 of the DIN cord. Action Go to Ste~ 3 J Repair wiring harness (CIGAR fuse - Auto level controller) B+: Batterv ~ositlve voltage I Other I Replace AMaFM radio unit . . - Step 4 1. Make sure headrest speaker and bodysonic connectors are properly connected. 2. If the connections are OK, go to Step 5. 3. If a connection is poor, repair it. Voltage B+ Action Go to Stea 4 Gartner Banana
Page 995 of 1708
Ix-osl, FUSE ANTENNA BLOCK 1OA 8 R/B J-3 MAIN FUSE BLOCK .POWER ANTENNA MAIN IGNITION m SWITCH L~W PMR ANTENNA MOTOR BR I I T Y w -13 REAR [R) -POHER ANTENNA ASSEMBLY J-14 POWER ANTENNA RELAY I I I Gartner Banana
Page 997 of 1708
T AUDIO / SNAP-RING OUN TlNG NUT BROKEN Antenna Mast Removal / Installation 1. Using snap-ring pliers, remove the mounting nut. 2. With the ignition switch at ACC or ON, turn the radio switch on, and pull out the antenna mast. Check the end of the plastic rack for damage. If the rack end is kinked or broken, replace the motor. 3. With the ignition switch at ACC or ON and the radio on, feed the rack of the new mast into the motor with toothed side facing toward the front of the vehicle. Turn the radio off. While the motor is retracting the rack, feed the mast into the motor. 4. Reinstall the mounting nut. 5. With the ignition switch at ACC or ON, turn the radio on and off a few times and check to see that the antenna op- erates smoothly. Gartner Banana
Page 1012 of 1708

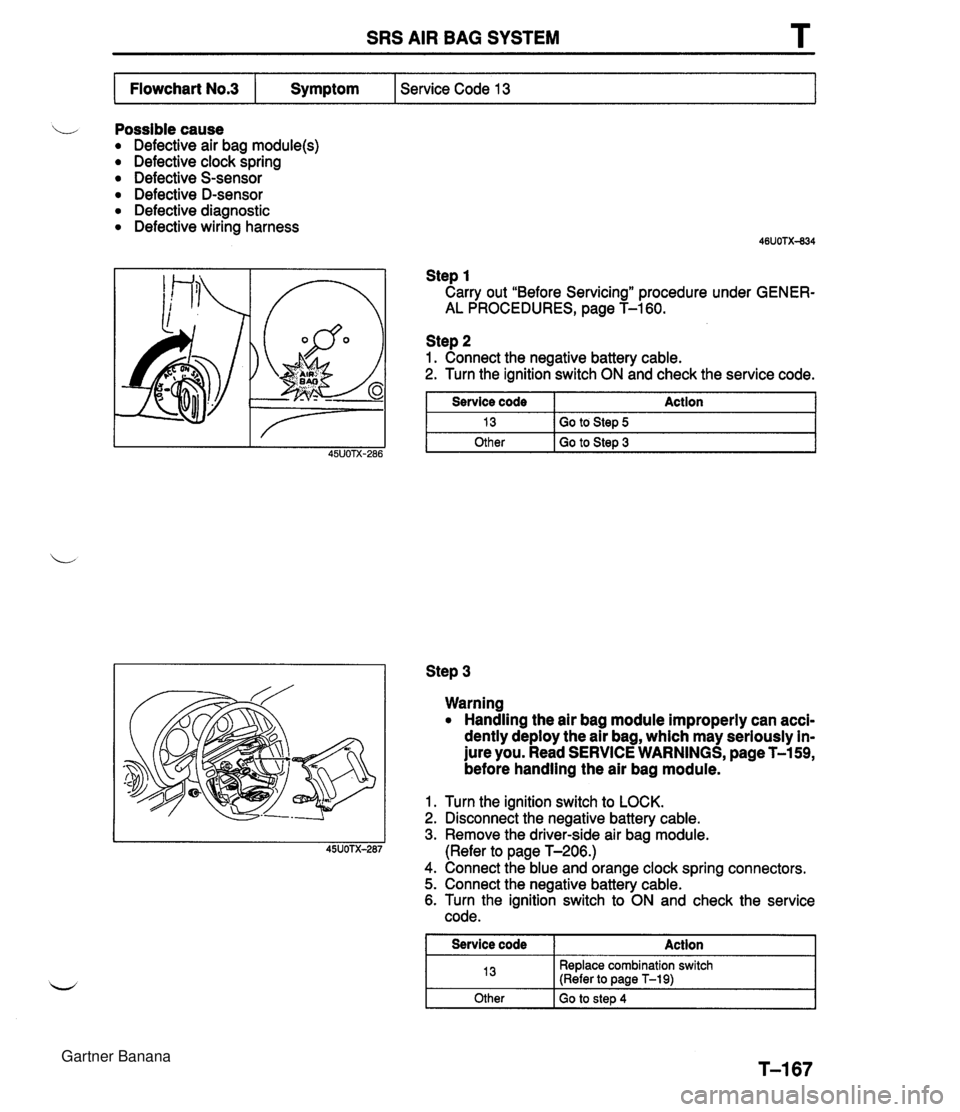
SRS AIR BAG SYSTEM L Possible cause Defective air bag module(s) Defective clock spring Defective S-sensor Defective D-sensor Defective diagnostic Defective wiring harness Step 1 Carry out "Before Servicing" procedure under GENER- AL PROCEDURES, page T-160. Service Code 13 Flowchart No.3 Step 2 1. Connect the negative battery cable. 2. Turn the ignition switch ON and check the service code. Symptom Step 3 Service code 13 Other Warning Handling the air bag module improperly can acci- dently deploy the air bag, which may seriously in- jure you. Read SERVICE WARNINGS, page T-159, before handling the air bag module. Action Go to Step 5 Go to Step 3 1. Turn the ignition switch to LOCK. 2. Disconnect the negative battery cable. 3. Remove the driver-side air bag module. (Refer to page T-206.) 4. Connect the blue and orange clock spring connectors. 5. Connect the negative battery cable. 6. Turn the ignition switch to ON and check the service code. I Service code I Action 1 13 Other Replace combination switch (Refer to page T-19) Go to step 4 Gartner Banana
Page 1013 of 1708

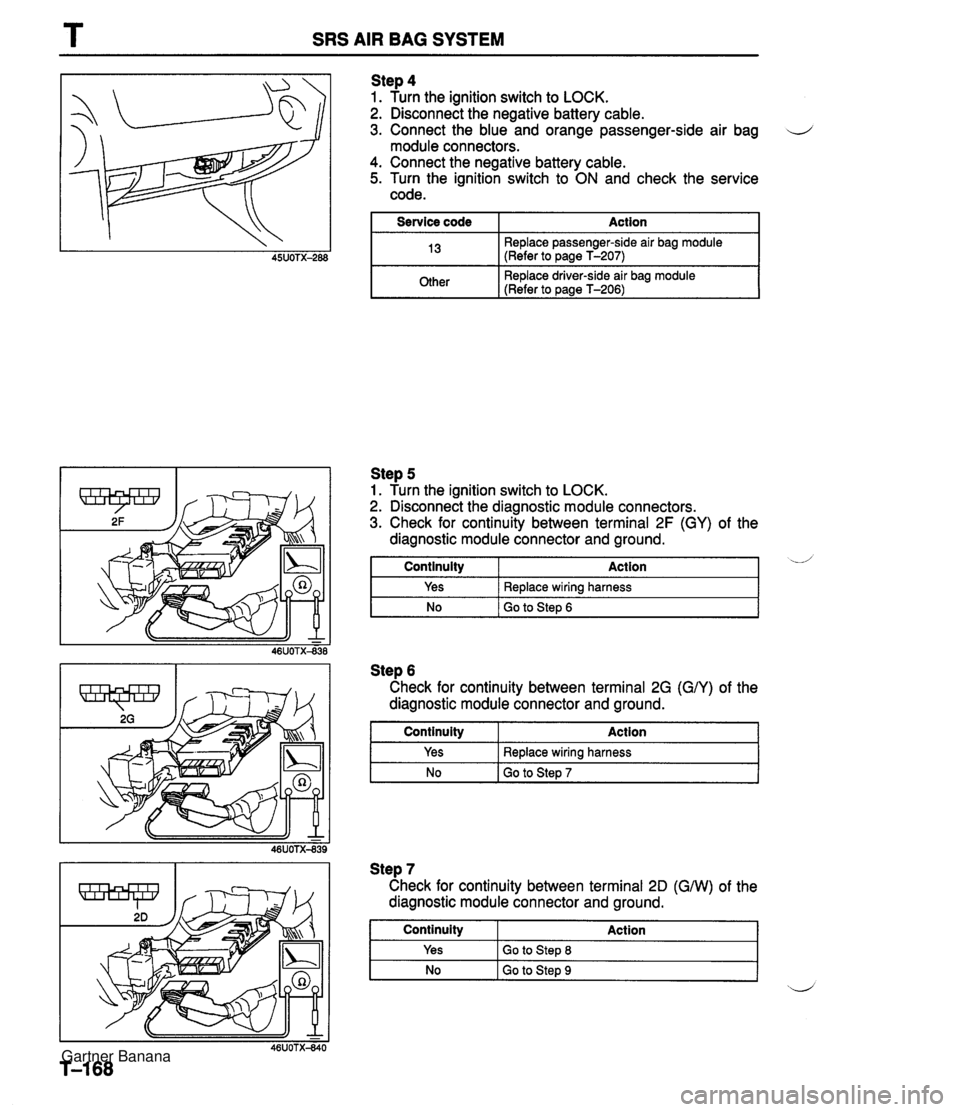
T SRS AIR BAG SYSTEM Step 4 1. Turn the ignition switch to LOCK. 2. Disconnect the negative battery cable. 3. Connect the blue and orange passenger-side air bag d module connectors. 4. Connect the negative battery cable. 5. Turn the ignition switch to ON and check the service code. I Service code I Action I I 13 Replace passenger-side air bag module (Refer to page T-207) I I mer I Replace driver-side air bag module (Refer to ~aae T-2061 I No I Go to Step 6 Step 5 1. Turn the ignition switch to LOCK. 2. Disconnect the diagnostic module connectors. 3. Check for continuity between terminal 2F (GY) of the diagnostic module connector and ground. Step 6 Check for continuity between terminal 2G (GN) of the diagnostic module connector and ground. I Continuity Action d Continuity Yes Step 7 Check for continuity between terminal 20 (GNV) of the diagnostic module connector and ground. Action Replace wiring harness Yes No Replace wiring harness Go to Step 7 I NO I GO to Step 9 ~d Continuity Yes Action Go to Step 8 Gartner Banana
Page 1019 of 1708

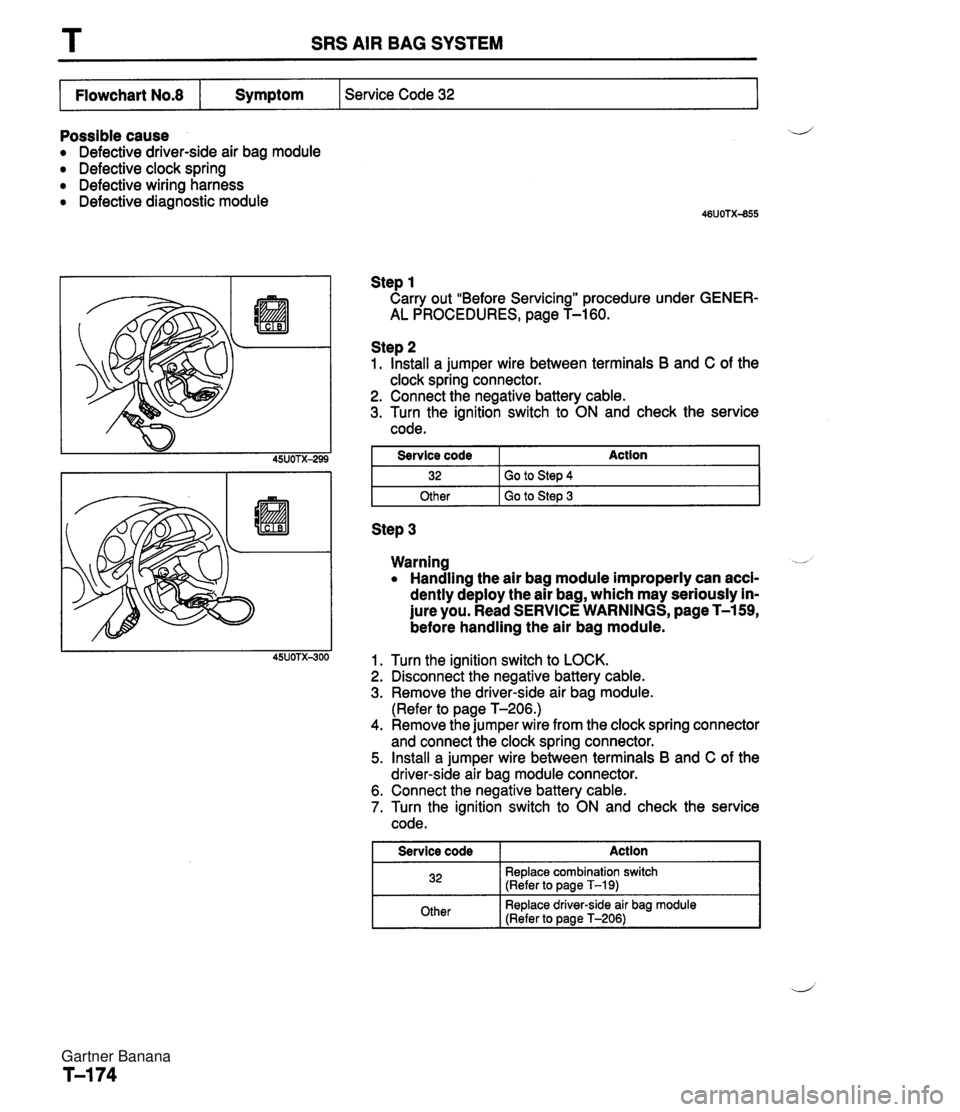
T SRS AIR BAG SYSTEM I Flowchart No.8 I Symptom I Service Code 32 I Possible cause a Defective driver-side air bag module a Defective clock spring Defective wiring harness a Defective diagnostic module Step 1 Carry out "Before Servicing" procedure under GENER- AL PROCEDURES, page T-160. Step 2 1. Install a jumper wire between terminals B and C of the clock spring connector. 2. Connect the negative battery cable. 3. Turn the ignition switch to ON and check the service code. I Other I Go to Step 3 I Service code 32 Step 3 Action Go to Step 4 Warning -- a Handling the air bag module improperly can acci- dently deploy the air bag, which may seriously in- jure you. Read SERVICE WARNINGS, page T-159, before handling the air bag module. Turn the ignition switch to LOCK. Disconnect the negative battery cable. Remove the driver-side air bag module. (Refer to page T-206.) Remove the jumper wire from the clock spring connector and connect the clock spring connector. Install a jumper wire between terminals B and C of the driver-side air bag module connector. Connect the negative battery cable. Turn the ignition switch to ON and check the service code. I Service code Action I 32 Replace combination switch (Refer to page T-19) Other Replace driver-side air bag module (Refer to page T-206) Gartner Banana