Page 1576 of 1784
(6) Install the shoulder belt lower anchor bolt.
Tighten the bolt to 37 Nzm (27 ft-lbs) torque.
(7) Return the rear seat to the normal position and
engage the latch.
HEADLINER
SERVICE INFORMATION
The upper trim mouldings and the headliner are
attached to the roof rail with a combination of
screws, velcro strips, clip retainers and rail retainers.
To remove a headliner, all of the upper trim moul-
dings must be removed from the perimeter of the
headliner along with (as applicable):
²the assist handles,
²the sunvisors,
²the dome/cargo lamps,
²the overhead console,
²the keyless entry receiver module,
²the sunroof inner rubber seal and
²all other attached/overlapping components.
Fig. 128 Headliner Trim MouldingsÐXJ Vehicles
Fig. 129 Assist HandlesÐXJ Vehicles
Fig. 126 Rear Seat Shoulder/Lap Belts and
BucklesÐXJ Vehicles
Fig. 127 Shoulder Belt Retractor Support Removal/
Installation
JBODY COMPONENTSÐXJ VEHICLES 23 - 121
Page 1577 of 1784

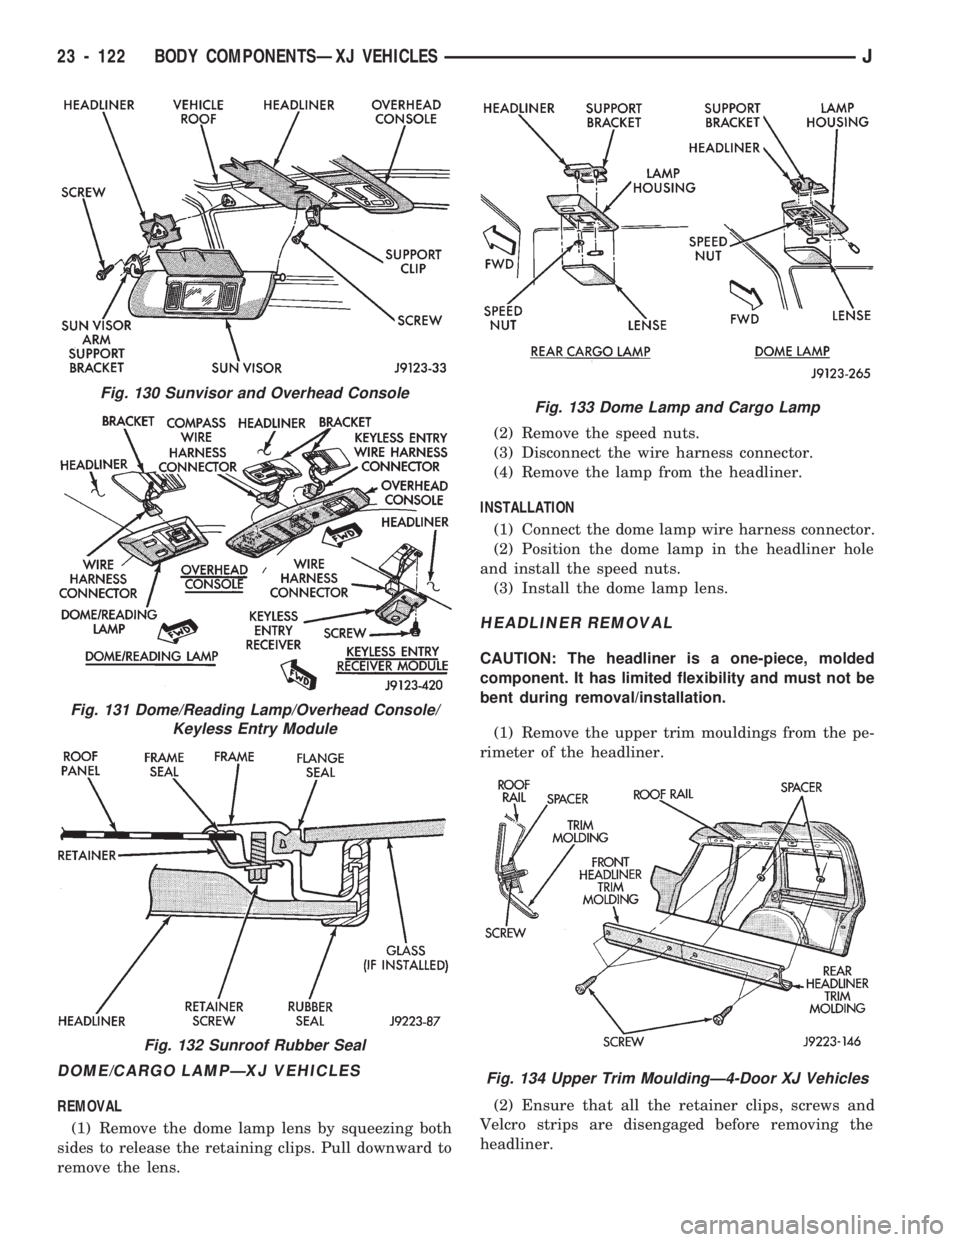
DOME/CARGO LAMPÐXJ VEHICLES
REMOVAL
(1) Remove the dome lamp lens by squeezing both
sides to release the retaining clips. Pull downward to
remove the lens.(2) Remove the speed nuts.
(3) Disconnect the wire harness connector.
(4) Remove the lamp from the headliner.
INSTALLATION
(1) Connect the dome lamp wire harness connector.
(2) Position the dome lamp in the headliner hole
and install the speed nuts.
(3) Install the dome lamp lens.
HEADLINER REMOVAL
CAUTION: The headliner is a one-piece, molded
component. It has limited flexibility and must not be
bent during removal/installation.
(1) Remove the upper trim mouldings from the pe-
rimeter of the headliner.
(2) Ensure that all the retainer clips, screws and
Velcro strips are disengaged before removing the
headliner.
Fig. 130 Sunvisor and Overhead Console
Fig. 131 Dome/Reading Lamp/Overhead Console/
Keyless Entry Module
Fig. 132 Sunroof Rubber Seal
Fig. 133 Dome Lamp and Cargo Lamp
Fig. 134 Upper Trim MouldingÐ4-Door XJ Vehicles
23 - 122 BODY COMPONENTSÐXJ VEHICLESJ
Page 1578 of 1784
HEADLINER INSTALLATION
(1) When installing a headliner, ensure that the re-
tainer clips and rails are installed.
(2) Install the upper trim mouldings around the
perimeter of the headliner. Tighten the retaining
screws to 1 Nzm (11 in-lbs) torque.
(3) As applicable, install:
²the assist handles,
²the sunvisors,
²the dome/cargo lamps,
²the overhead console,
²the keyless entry receiver module,
²the sunroof inner rubber seal and
²all other components removed to facilitate head-
liner removal.
Fig. 136 HeadlinerÐXJ Vehicles
Fig. 137 Headliner Retainer Clip and Retainer Rail
Fig. 138 Headliner Correctly Installed
Fig. 135 Liftgate Trim MouldingÐXJ Vehicles
JBODY COMPONENTSÐXJ VEHICLES 23 - 123