Page 55 of 340

Downloaded from www.Manualslib.com manuals search engine Parking at Night
Park in a lighted spot, close all windows and lock your vehicle. Remember
to keep your valuables out
of sight. Put them in a storage area, or take them
with you.
Parking Lots
If you park in a lot where someone will be watching your vehicle, it’s best
to lock it up and take your keys. But what if you have to leave your ignition
key? What if you have to leave something valuable
in your vehicle?
Put your valuables in a storage area, like your glove box.
Lock all the doors except the driver’s.
Then take the door key with you.
New Vehicle “Break-In”
NOTICE:
Your modern vehicle doesn’t need an elaborate ‘70reak-in.” But
it will perform better in the long run if‘ you follow these
guidelines:
Keep your speed at 55 mph (88 km/h) or less for the first
500 miles (804 km).
Don’t drive at any one speed - fast or slow - for the first
500 miles (804 km). Don’t make full-throttle starts.
Avoid making hard stops for the first 200 miles (322 km) or
so. During this time your new brake linings aren’t yet broken
in. Hard stops with new linings can mean premature wear and
earlier replacement. Follow this “b’reaking-in” guideline
every time you get new brake linings.
2-9
Page 99 of 340
Downloaded from www.Manualslib.com manuals search engine Storage Compartments
Your vehicle may
have a console
compartment between
the bucket seats.
To
open it, just squeeze
the lever in the front
of the console while
lifting the top of the
console.
Your console
also includes a handy
place to hold cups.
To open your glove
box, squeeze the lever
at the top
of the
glovebox and lower
the door.
Two cup aepressions
are provided €or your
conve~ence,
but the
gkovebox should not
be open while driving,.
2-53
Page 101 of 340
Downloaded from www.Manualslib.com manuals search engine Instrument Panel ~ . -, .
1. Vents
2. Instrument Cluster
3. Air ConditionerFteater
4. Glove Box
5. Sound System
6. Cigarette Lighter
7. Brake Release Handle
8. Light Switches
9. Electronic Transfer Case
10. Fog Lamp Switch
1 1. Ashtray
12. Storage Compartment
Instrument Cluster
Your instmmnt dustex is designed to let you know at a glance how yaur
vehicle is.
running. You’ll how bow fast^ you’re going, about how much
fuel you’ve
used, -and many other things you’ll need to know to drive safely
and economically.
2 - 5.5
Page 266 of 340
Downloaded from www.Manualslib.com manuals search engine Truck-Camper Loading Information
Open your glove box and look for this label:
This label will tell you
if your vehicle can carry a slide-in camper, how
much
of a load your vehicle can carry, and how to spread out your load the
right way.
Also, it will help you match the right slide-in camper to your
vehicle.
When you carry
a slide-in camper, the total cargo load of your vehicle is the
weight
of the camper, plus
everything else added to the camper after it left the factory;
everything in the camper; and
all the people inside.
The Cargo Weight Rating (CWR) is the maximum weight of the load your
vehicle can carry. It doesn’t include the weight of the people inside. But,
vou can figure about
150 pounds for each seat.
I ne total cargo load must not be more than your vehicle’s CWR.
Page 267 of 340
Downloaded from www.Manualslib.com manuals search engine Truck Loading Information
1. Recommended location for cargo center of gravity for cargo weight
Refer to Truck Camper Loading Information label in the glove box for
rating.
“A”and
“B” dimensions.
Use rear edge of load floor for measurement purposes
Example of Proper Truck and Camper Match
1. Camper center of gravity
2. Recommended center of gravity location zone
The camper’.s center of gravity should fall within the center of gravity zone
for your vehicle’s cargo load.
Page 288 of 340

Downloaded from www.Manualslib.com manuals search engine - :
-.
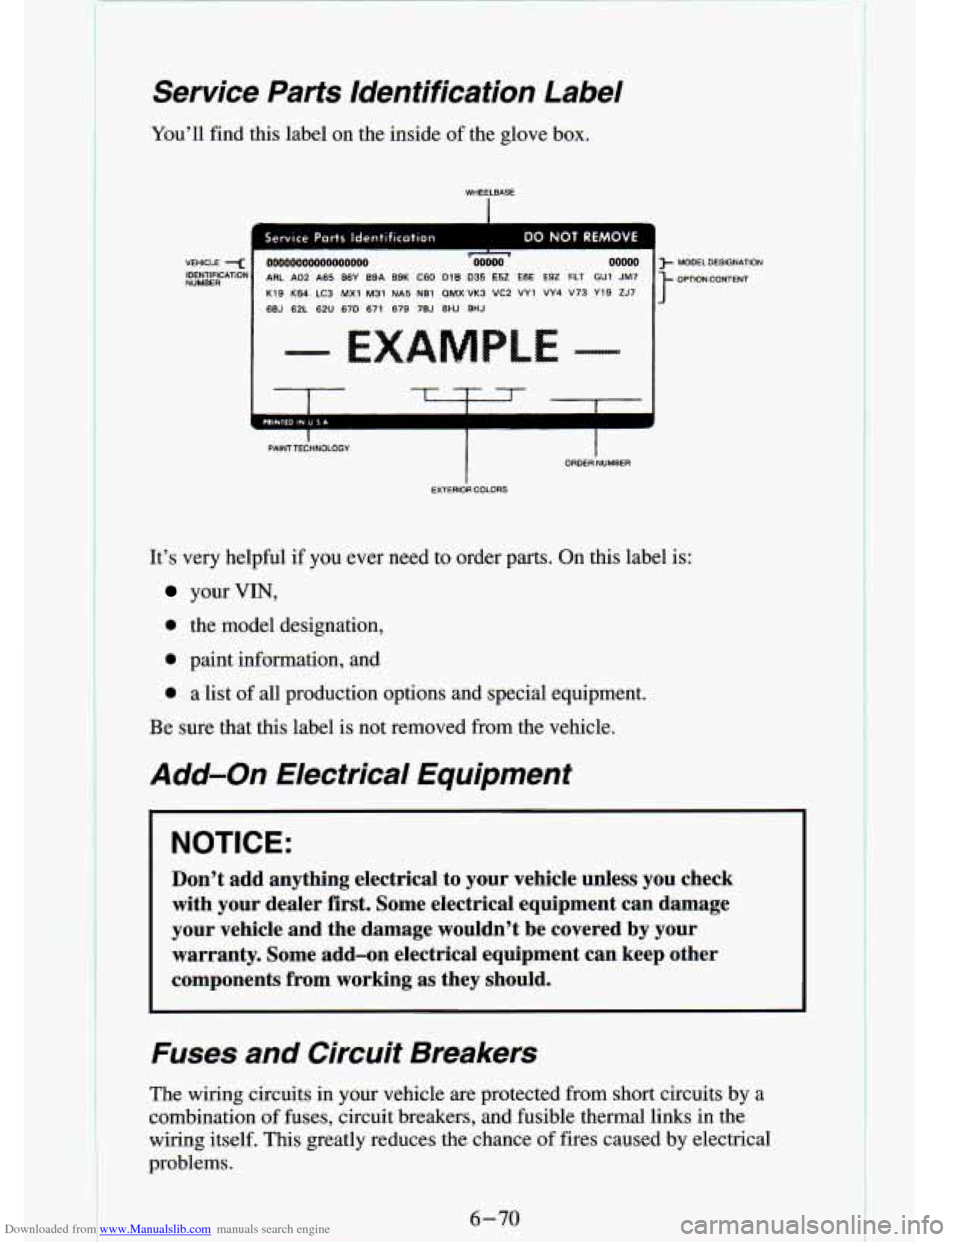
Service Parts Identification Label
You’ll find this label on the inside of the glove box.
WHEELBASE
I
I
Service Parts ldentificotion DO NOT REMOVE I
VEHICLE < ~~0~0000000
NUMBER IDENTlFlCATlON ARL
A02 A65 B6Y BSA B9K C60 D1B 035 €52 E6E E92 FLT GUl JM7 OPTION CONTENT
7 00000 ooooo )- MODELDESIGNATION
K19 K64 LC3 MXl M31 NA5 NE1 QMXVK3 VC2 VY1 VY4 V73 Y19 ZJ7
6BJ 62L
62U 67D 671 679 7BJ 8HJ SHJ
I PAINTTECHNOLOGY I ORDER I NUMBER
EXTERIOR
COLORS
It’s very helpful if you ever need to order parts. On this label is:
your VIN,
0 the model designation,
0 paint information, and
0 a list of all production options and special equipment.
Be sure that this label is not removed from the vehicle.
Add-on Electrical Equipment
NOTICE:
Don’t add anything electrical to your vehicle unless you che\
ck
with your dealer first.
Some electrical equipment can damage
your vehicle and the damage wouldn’t be covered by your warranty. Some add-on electrical equipment can keep other
components from working as they should.
Fuses and Circuit Breakers
The wiring circuits in your vehicle are protected from short c\
ircuits by a
combination of fuses, circuit breakers, and fusible thermal links in the
wiring itself.
This greatly reduces the chance of fires caused by electrical
problems.
Page 294 of 340
Downloaded from www.Manualslib.com manuals search engine VI 0
rxlCPWR 7 30 A
WDO PWR']
20
A
ACCY A
r4WD 1 20A
N
rFOG 1 20 A A
N
N w
N P
Fuses and Circuit Breakers
FUSE/CIRCUIT
BREAKER
A
B
1
2
3
4
5
NAME CIRCUITS PROTECTED
PWR ACCY
Power Door Locks
PWR WDO Power Windows
STOP/HAZ Stop Lamps, Hazard Lamps, Chime
HORNDM Dome Lamp, Lighted Visor Mirror, Module
Glove Box Lamp,
Horn, I/€' Courtesy
Lamps, Power Mirrors
T/L CTSY Electric Shift Transfer Case Module,
Park Lamps, License Plate Lamps
GAUGES Auto Transmission, Alternator Field, Variable Throttle Control, A/C
Compressor, Cluster, Chime Module,
Four-wheel Drive Indicator Lamp,
Heated Oxygen Sensor, Daytime
Running Lamps Module
(NOT USED)
6-76
Page 307 of 340

Downloaded from www.Manualslib.com manuals search engine Steering Column Lock Operation - While parked, try to turn the key to
LOCK in each gear shift position.
With an automatic transmission, the key should turn to LOCK only
0 With manual shift, the key should turn to LOCK only wnen you’re in
On vehicles with a key release lever, try to turn the key to
LOCK without
pressing the lever. The key should turn to
LOCK only with the key lever
depressed.
On
all vehicles, the key should come out only in LOCK.
when the gear shift is in “P’ (Park).
“R’ (Reverse).
Parking ‘Brake and Transmission “P’ (Park) Mechanism Operation -
Park on a fairly steep hill, with the vehicle facing downhill. Keeping your
foot on the regular brake, set the manual parking brake.
0
0 To check the parking brake: With the engine running and the
transmission
in “N” (Neutral), slowly remove foot pressure from the
regular brake pedal.
Do this until the vehicle is held by the parking
brake only.
To check the
“P’ (Park) mechanism’s holding ability: Apply the regular
brake and shift to
“P’ (Park). Release the manual parking brake, then
slowly release the regular brake.
Lap and Shoulder Belts Condition and Operation - Inspect belt system,
including: webbjng, buckles, latch plates, retractors, guide loops and
anchors. Have a belt assembly replaced
if the webbing has been cut or
otherwise damaged.
Body Lubrication Service - Lubricate all body door hinges including the
tailgate and tailgate handle pivot points. Lubricate the body hood, fuel door
and rear compartment hinges, latches and locks including interio\
r glove box
and console doors, and any moving seat hardware. Lubricate the \
hood safety
lever pivot and prop rod pivot.
More frequent lubrication may be required
when exposed to a corrosive environment.
7-11