1994 CHEVROLET S10 tow
[x] Cancel search: towPage 218 of 340
Downloaded from www.Manualslib.com manuals search engine I NOTICE:
I
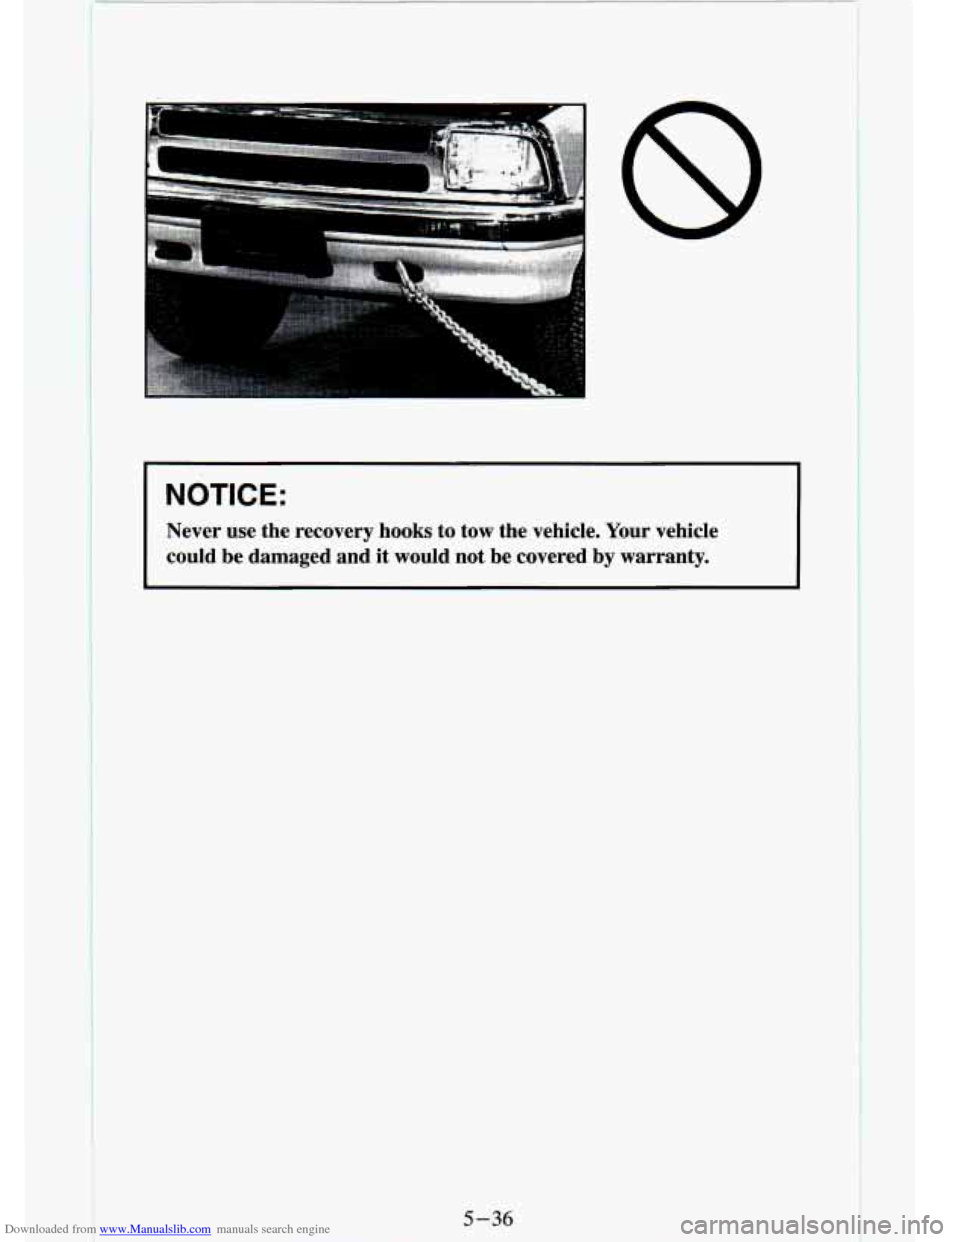
Never use the recovery hooks to tow the vehicle. Your vehicle \
could be damaged and it would not be covered by warranty.
5 -.3 6
Page 227 of 340
Downloaded from www.Manualslib.com manuals search engine Engine Oil
It’s a good idea to check your engine oil every time you get fuel. In order to
get an accurate reading, the oil must be warm
and the vehicle must be on
level ground.
Turn
off the engine
and give the oil a
few
rninutes to drain back
into the
oil pan. If you
don’t, the oil dipstick
might not show the
actual level.
To Check Engine Oil
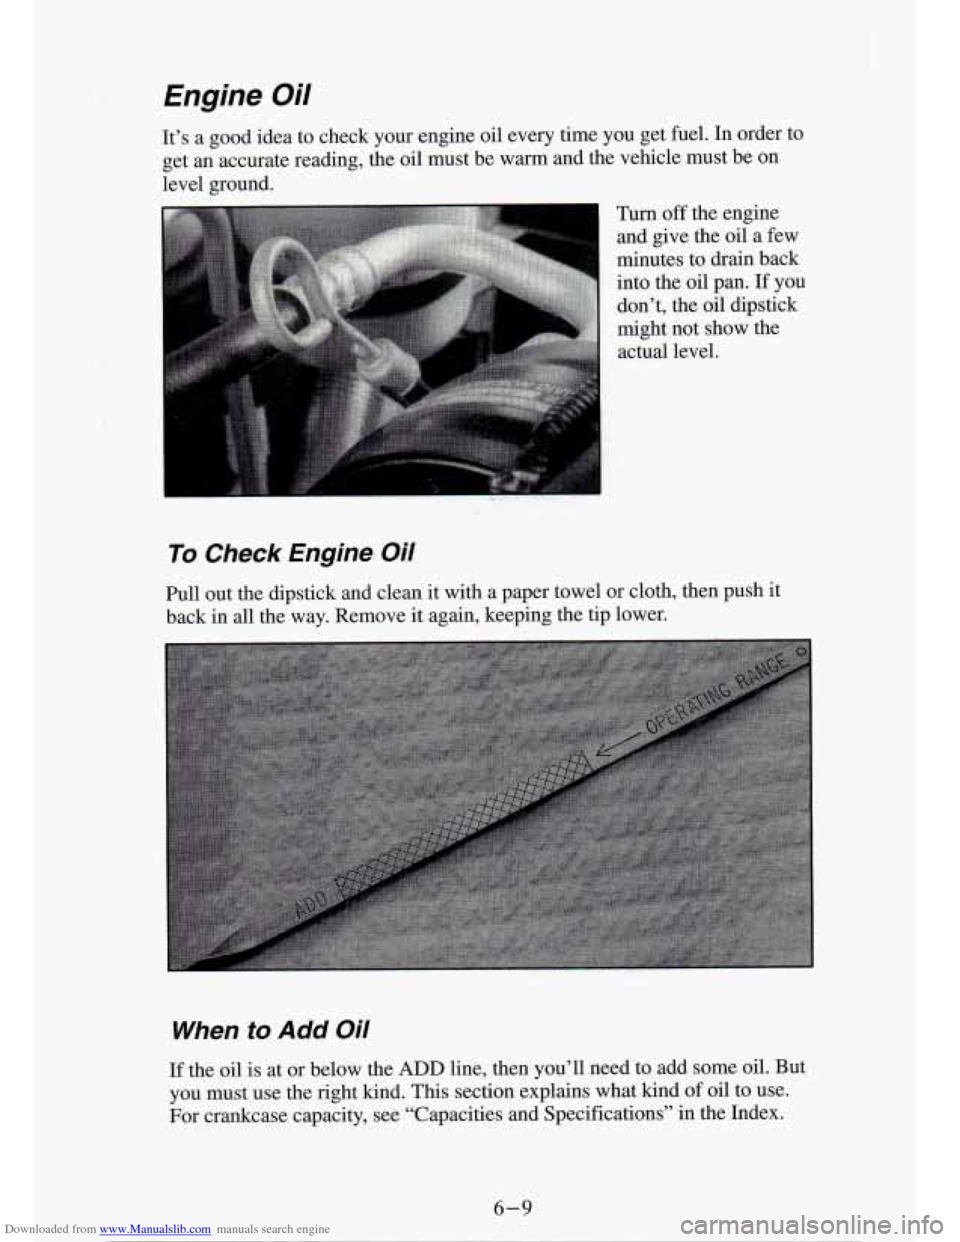
Pull out the dipstick and clean it with a paper towel or cloth, then push it
back in all the way. Remove it again, keeping the tip lower.
When to Add Oil
If the oil is at or below the ADD line, then you’ll need to add some oil. But
you must use the right kind.
This section explains what kind of oil to use.
For crankcase capacity, see “Capacities and Specifications” in the Index.
6-9
Page 231 of 340
Downloaded from www.Manualslib.com manuals search engine Engine Oil Additives
Don’t add anything to your oil. Your GM dealer is ready to advise if you
think something should be added.
When to Change Engine Oil
See if any one of these is true for you:
Most trips are less than 4 miles (6 km).
0 It’s below freezing outside and most trips are less than 10 miles (16
km).
The engine is at low speed most of the time (as in door-to-door
delivery, or in stop-and-go traffic).
You tow a trailer often.
Most trips are through dusty places.
0 The vehicle is frequently operated off-road.
If any one of these is true for your vehicle, then you need to change your oil
andfilter every 3,000 miles (5 000 km) or 3 months - whichever comes
first.
If none of them is true, change the oil every
7,500 miles (12 500 km) or 12
months - whichever comes first. Change the filter at the first oil change
and at every other oil change after that.
Four-wheel Drive Remote Oil Filter
If your vehicle has four-wheel drive, you will have a remote oil filter
located under the radiator support. There is a special access \
door in the
vehicle body skirt shield.
Engine Coolant Heater (Engine Block Heater)
An engine coolant heater can be a big help if you have to park outside in
very cold weather,
0 “F (-1 8 O C) or colder. If your vehicle has this option,
see “Engine Coolant Heater
” in the Index.
What to Do with Used Oil
Did you know that used engine oil contains certain elements that may be
unhealthy for your skin and could even cause cancer? Don’t let used oil stay
on your skin for very long. Clean your skin and nails with soap and water,
or a good hand cleaner. Wash or properly throw away clothing or rags
containing wed engine oil. (See the manufacturer’s warnings about the use
and disposal of oil products.)
6-13
Page 232 of 340
Downloaded from www.Manualslib.com manuals search engine Used oil can De a real threat to the environment. If you change your own oil,
be sure to drain all free-flowing oil from the filter before \
disposal. Don’t
ever dispose of oil by putting
it in the trash, pouring it on the ground, into
sewers, or into streams or bodies of water. Instead, recycle it by taking it to
a place that collects used oil. If you have a problem properly disposing of
your used oil, ask your dealer, a service station or
a local recycling center
for help.
Air Cleaner
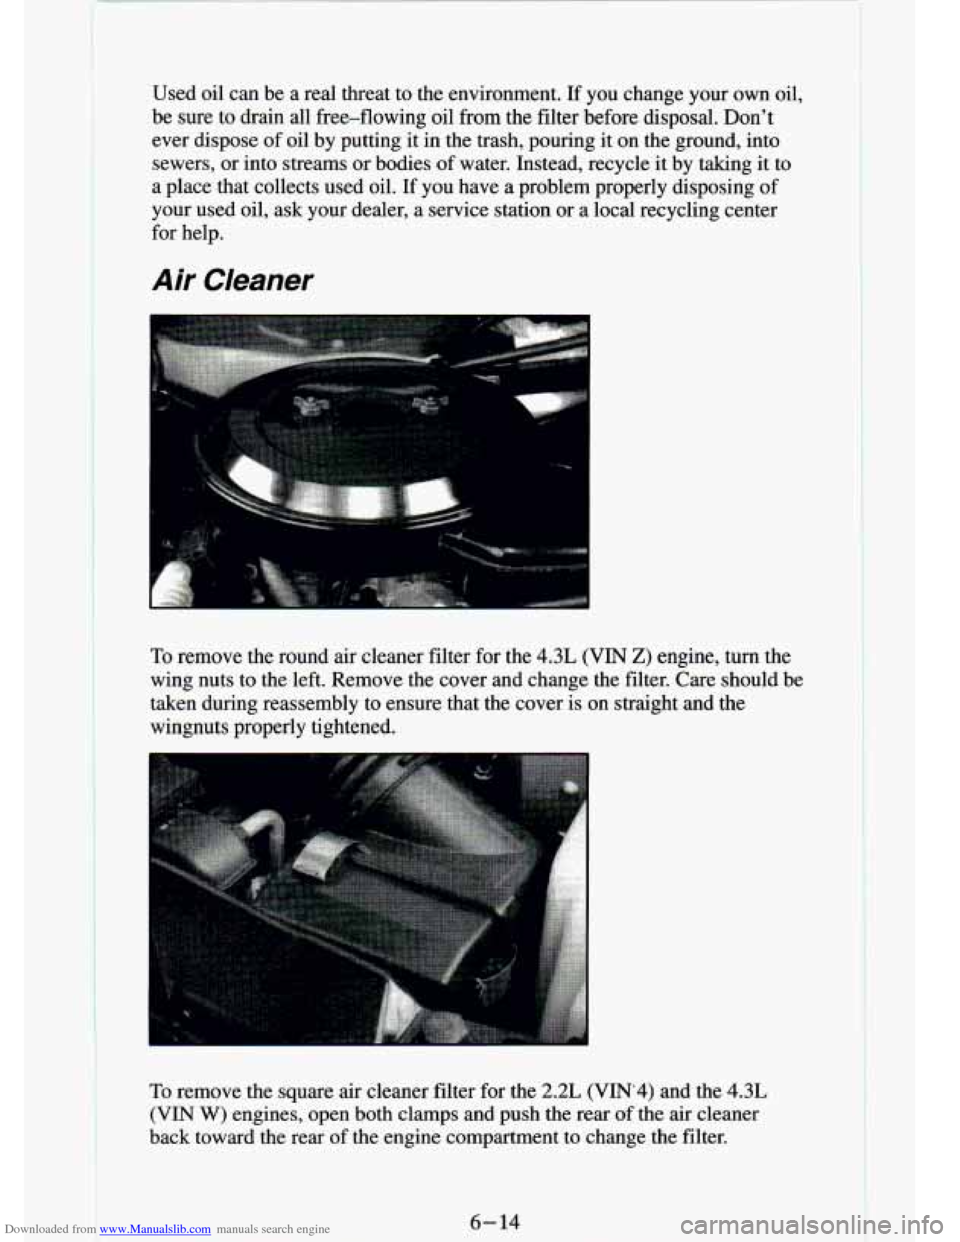
To remove the round air cleaner filter for the 4.3L (VIN 2) engine, turn the
wing nuts to the left. Remove the cover and change the filter\
. Care should be
taken during reassembly to ensure that the cover is on straigh\
t and the
wingnuts properly tightened.
To remove the square air cleaner filter for the 2.2L (VnV.4) and the 4.3L
(VIN W) engines, open both clamps and push the rear of the air cleaner
back toward the rear of the engine compartment to change the filter.
Page 265 of 340
Downloaded from www.Manualslib.com manuals search engine Payload
The iyload Capacity is shown on the Certificatioflire label. This is the
maximum load capacity that your vehicle can carry. Be sure to \
include the
weight of the people inside as part of your load.
If you added any
accessories or equipment after your vehicle left the factory, remember to
subtract the weight of these things from the payload. Your dealer can help
you with this.
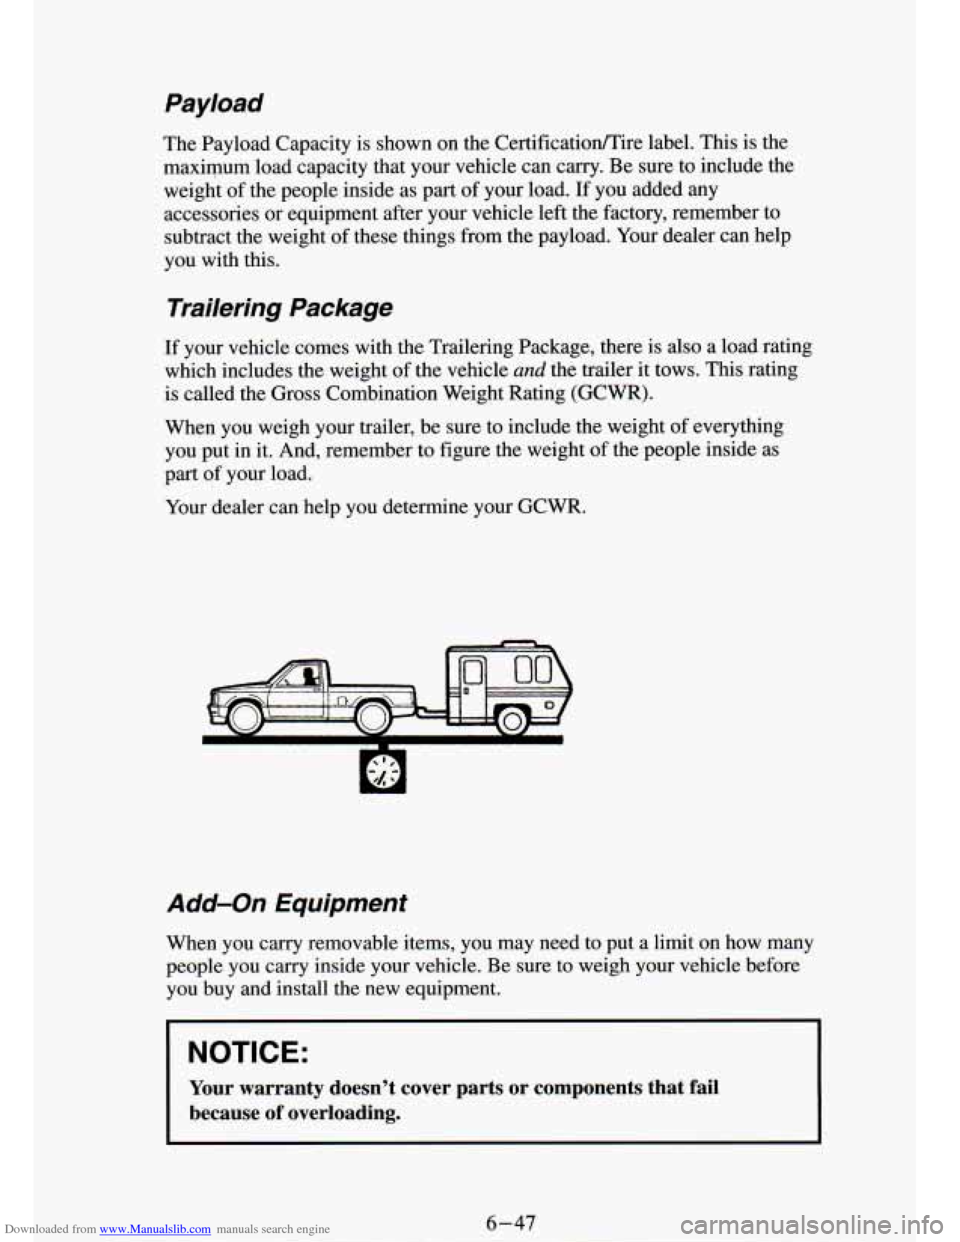
Trailering Package
If your vehicle comes with the Trailenng Package, mere is also a load rating
which includes the weight of the vehicle
and the trailer it tows. This rating
is called the Gross Combination Weight Rating (GCWR).
When you weigh your trailer, be sure to include the weight of everything
you put
in it. And, remember to figure the weight of the people inside as
part of your load.
Your dealer can help you determine your
GCWR.
Add-on Equipment
When you carry removable items, you may need to put a limit \
on how many
people you carry inside your vehicle. Be sure to weigh your v\
ehicle before you buy and install the new equipment.
NOTICE:
Your warranty doesn’t cover parrs or components that fail
because of overloading.
Page 268 of 340
Downloaded from www.Manualslib.com manuals search engine You must weigh any accessories, trailer hitches or other equipment you a\
dd
to your vehicle. Then, subtract this extra weight from the CWR\
. This extra weight may shorten the center of gravity zone for your vehicle. Your dealer
can help you with this.
If your slide-in camper and its load weigh less than the CWR, the center of
gravity zone
for your vehicle may be larger.
Your dealer can help you make a good vehicle-camper match. He’ll also
help you determine your CWR.
After you’ve loaded your vehicle and camper, drive to a wei\
gh station and weigh on the front and rear wheels separately. This will tell you the loads on
your axles. The loads on the front and rear axles shouldn’t be more than
either
of the GAWRs. The total of the axle loads should not be more than
the GVWR.
Open your driver’s door and look at the door lock pillar for the
CertificationD‘ire label to find out your GAWR and GVWR.
11 you ve gone over ; Jr weight ratings, move or take out some things until
all the weights fall below the ratings. Of course, you should always tie down
any loose items when you load your vehicle or camper.
When you install and load your slide-in camper, check the manu\
facturer’s instructions.
If you want more information on curb weights, cargo weights, cargo weight
rating and the correct center of gravity zone for your vehicle, your dealer
can help you. Just ask for a copy of “Consumer Information, Truck
-
Camper Loading.”
Trailer Recommendations
You must subtract your hitch loads from the CWR for your vehicle. Weigh
your vehicle with your trailer attached,
so that you won’t go over the
GVWR or the GAWR.
You’ll get the best performance if you spread out the weight of your load
the right way, and if you choose the correct hitch and trailer brakes.
For more information, see “Trailer Towing’’ in the Index.
Pickup Conversion To Chassis Cab
General Motors is aware that some vehicle owners may consider having the
pickup
box removed and a commercial or recreational body installed.
However, we recommend that conversions of this type not be done to this
pickup. Owners should be aware that, as manufactured, there are differences
between a chassis cab and a pickup with the box removed which\
may affect vehicle safety.
For further information, contact the GM Zone Office for your
area. (See the “Warranty and Owner Assistance” booklet fo\
r Zone Office.)
6 --50
Page 279 of 340
Downloaded from www.Manualslib.com manuals search engine Using Foam-Type Cleaner on Fabric
Vacuum and brush the area to remove any loose dirt.
Always clean a whole trim panel or section. Mask surrounding trim
Mix Multi-Purpose Powdered Cleaner following the directions on t\
he along stitch or welt lines.
container label.
0 Use suds only and apply with a clean sponge.
Don’t saturate the material.
Don’t rub it roughly.
As soon as you’ve cleaned the section, use a sponge to remove \
the
suds.
0 Rinse the section with a clean, wet sponge.
0 Wipe off what’s left with a slightly damp paper towel or cloth.
Then dry it immediately with a blow dryer or a heat lamp.
NOTICE:
Be careful with a hair dryer or heat lamp. You could scorch the
fabric.
Wipe with a clean cloth.
Using Solvent-Type Cleaner on Fabric
First, see if you have to use solvent-type cleaner at all. Some spots and
stains will clean
off better with just water and mild soap.
If you need to use a solvent:
Gently scrape excess soil from the trim material with a clean,\
dull knife
or scraper. Use very little cleaner, light pressure and clean cloths
(preferably cheesecloth). Cleaning should start at the outside of the
stain, “feathering” toward the center. Keep changing to a clean \
section
of the cloth.
0 When you clean a stain from fabric, immediately dry the area with an
air hose, hair dryer, or heat lamp to help prevent a cleaning ring. (See
the previous NOTICE.)
Page 282 of 340
Downloaded from www.Manualslib.com manuals search engine Glass
Glass should be cleaned often. GM Glass Cleaner (GM Part No. 1050427)
or a liquid household glass cleaner will remove normal tobacco \
smoke and
dust films.
von’t use abrasive cleaners on glass, because they may cause scratches.
Avoid placing decals on the inside rear window, since they may have to be
scraped
off later.
Cleaning the Outside of the Windshield and
Wiper Blades
If the windshield is not clear after using the windshield washer, or \
if the
wiper blade chatters when running, wax or other material may b\
e on the
blade or windshield.
Clean the outside
of the windshield with GM Windshield Cleaner, Bon-Ami
Powder@ (GM Part
No. 1050011). The windshield is clean if beads do not
form when you rinse it with water.
Clean the blade by wiping vigorously with a cloth soaked in full strength
windshield washer solvent. Then rinse the blade with water.
Wiper blades should be checked on a regular basis and replaced\
when worn.
Cleaning the Outside of Your Vehicle
The paint finish on your vehicle provides beauty, depth of color, gloss
retention and durability.
Washing Your Vehicle
The best way to preserve your vehicle’s finish is to keep it clean by washing
it often with lukewarm or cold water.
Don’t wash your vehicle
in the direct rays of the sun. Don’t use strong soaps
or chemical detergents. Use liquid hand, dish or car washing (\
mild
detergent) soaps. Don’t use cleaning agents that contain aci\
d or abrasives.
All cleaning agents should be flushed promptly and not allowed \
to dry on
the surface, or they could stain. Dry the finish with a soft,\
clean chamois or
a
100% cotton towel to avoid surface scratches and water spotting.
High pressure vehicle washes may cause water to enter your vehicle.
.L 1
-. L .I . -0
-, I-
6-64