1994 CHEVROLET CORVETTE steering
[x] Cancel search: steeringPage 172 of 274

Downloaded from www.Manualslib.com manuals search engine Here you will find information
about the care of your Corvette
.
This part begins with service
and fuel information. and then it
shows how
to check important
fluid and lubricant levels
. There
is also technical information
about your vehicle. and a section devoted
to its
appearance care
.
Part 6
Service & Appearance Care
Service ........................................................
Fuel ..........................................................
Checking Things under the Hood ...................................
HoodRelease .................................................
Engineoil .................................................
Aircleaner ........................... ...................
Automatic Transmission Fluid ..................................
Manual Transmission Fluid ......................................
Hydraulic Clutch ...............................................
RearAxle ....................................................
Enginecoolant ................................................
Power Steering Fluid ...........................................
Windshield Washer Fluid ........................................
Brake Master Cylinder ..........................................
Battery ......................................................
Bulb Replacement ...............................................
Windshield Wiper Blades ..........................................
Tires ..........................................................
Appearancecare ................................................
Appearance Care Materials Chart ...................................
Vehicle Identification Number (VIN) ................................
Service Parts Identification Label ...................................
Add-on Electrical Equipment ......................................
Fuses and Circuit Breakers ........................................
Replacement Bulbs ..............................................
Capacities and Specifications ...................................
LoadingYourVehicle ............................................
172
173
175
175
178
182 184
186
187
188
188
191
192
193
195
195
202
202
204
210
217
218
218
218
219
223
224
171 ..
Page 177 of 274
Downloaded from www.Manualslib.com manuals search engine Service and Appearance Care
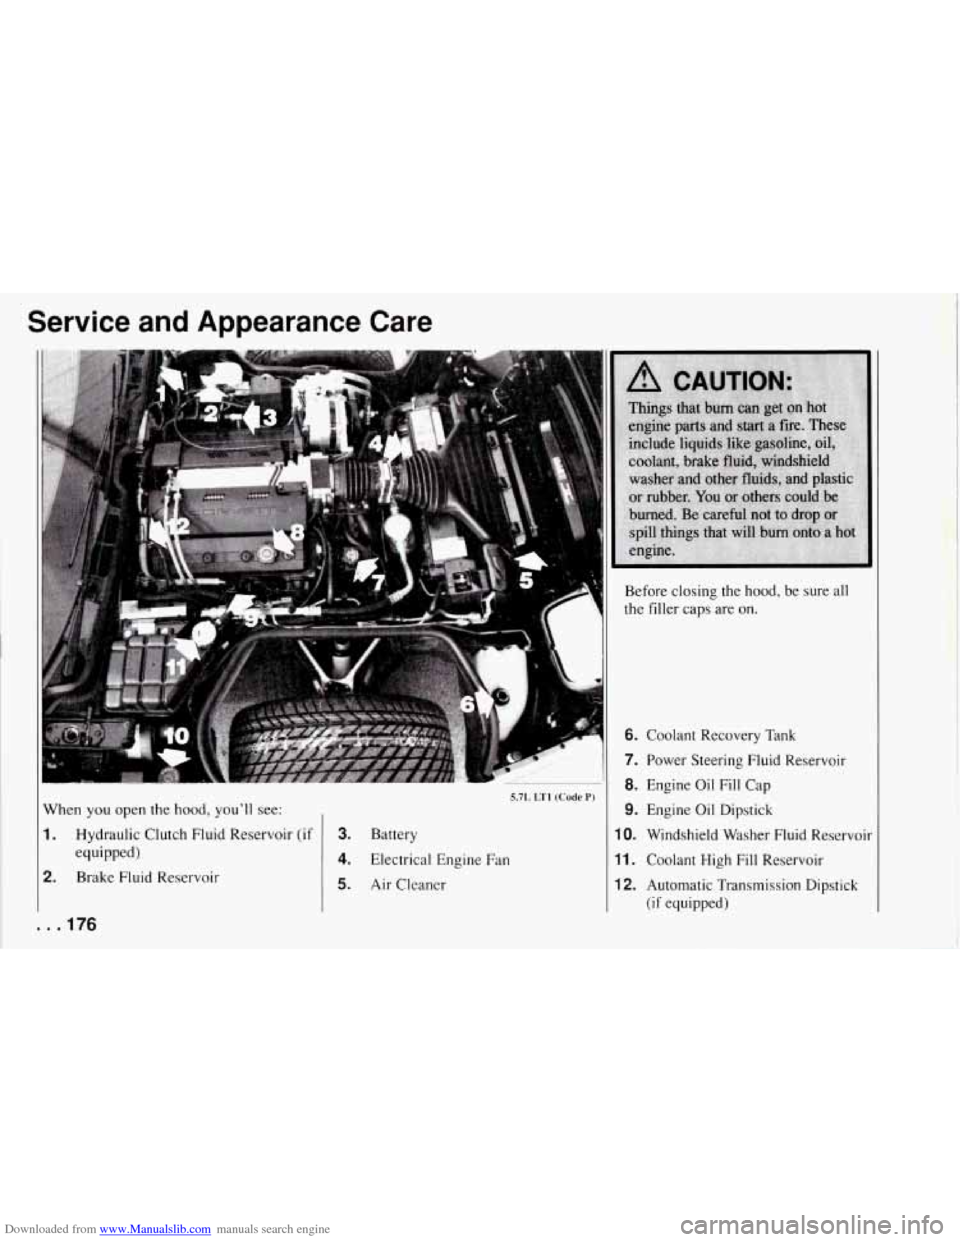
When you open the hood, you'll see:
1. Hydraulic Clutch Fluid Reservoir (if
2. Brake Fluid Reservoir
equipped)
. . .I76
1
Before closing the hood, be sure all
the filler caps are on.
'*?-
5.7L LTI (Code P)
3. Battery
4. Electrical Engine Fan
5. Air Cleaner
6. Coolant Recovery Tank
7. Power Steering Fluid Reservoir
8. Engine Oil Fill Cap
9. Engine Oil Dipstick
10. Windshield Washer Fluid Reservoir
11. Coolant High Fill Reservoir
12. Automatic Transmission Dipstick
(if equipped)
I
Page 178 of 274
Downloaded from www.Manualslib.com manuals search engine r
k
"1
5.7L LT5 (Code J)
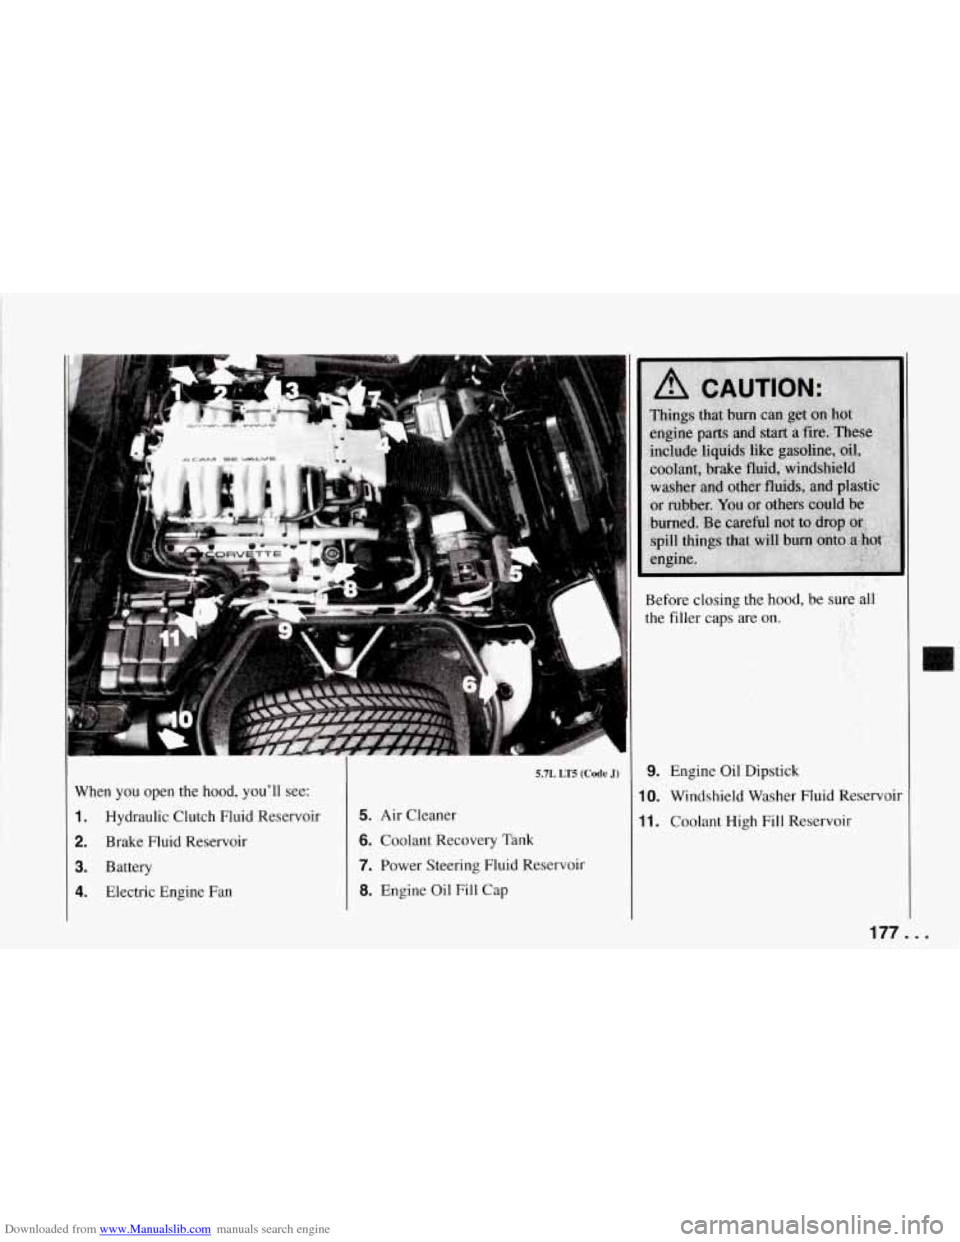
When you open the hood, you'll see:
1. Hydraulic Clutch Fluid Reservoir 5. Air Cleaner
2. Brake Fluid Reservoir 6. Coolant Recovery Tank
3. Battery 7. Power Steering Fluid Reservoir
4. Electric Engine Fan 8. Engine Oil Fill Cap Before closing
the hood, be
sureall
the filler caps are on. . ..
'., , ,.
9. Engine Oil Dipstick
10. Windshield Washer Fluid Reservoir
11. Coolant High Fill Reservoir
177..
Page 192 of 274
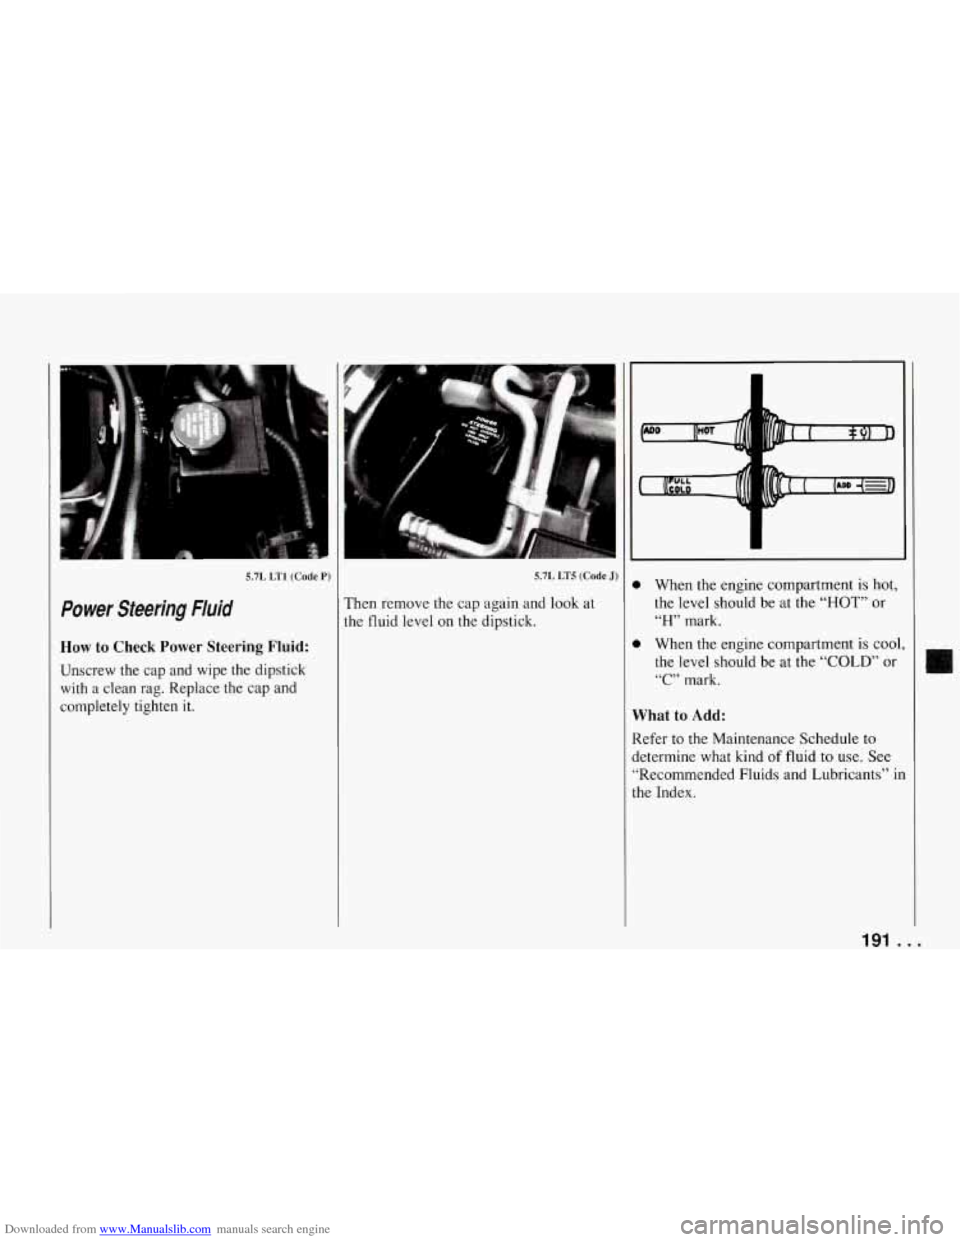
Downloaded from www.Manualslib.com manuals search engine 5.7L LT1 (Code P)
Power Steering Fluid
How to Check Power Steering Fluid:
Unscrew the cap and wipe the dipstick with a clean rag. Replace the cap and
completely tighten it.
5.7L LT5 (Code J)
Then remove the cap again and look at
the fluid level on the dipstick.
0 When the engine compartment is hot,
the level should be at the
“HOT” or
“H” mark.
0 When the engine compartment is cool
the level should be at
the “COLD” or
“C” mark.
What to Add:
Refer to the Maintenance Schedule to
determine what kind
of fluid to use. See
“Recommended Fluids and Lubricants” il
the Index.
191 .
T
-
3
1
..
Page 193 of 274
Downloaded from www.Manualslib.com manuals search engine Service and Appearance Care
NOTICE:
When adding power steering ,fluid or
making a complete fluid change,
always use the proper fluid. Failure
to use the proper fluid can cause
leaks and damage hoses and seals.
L
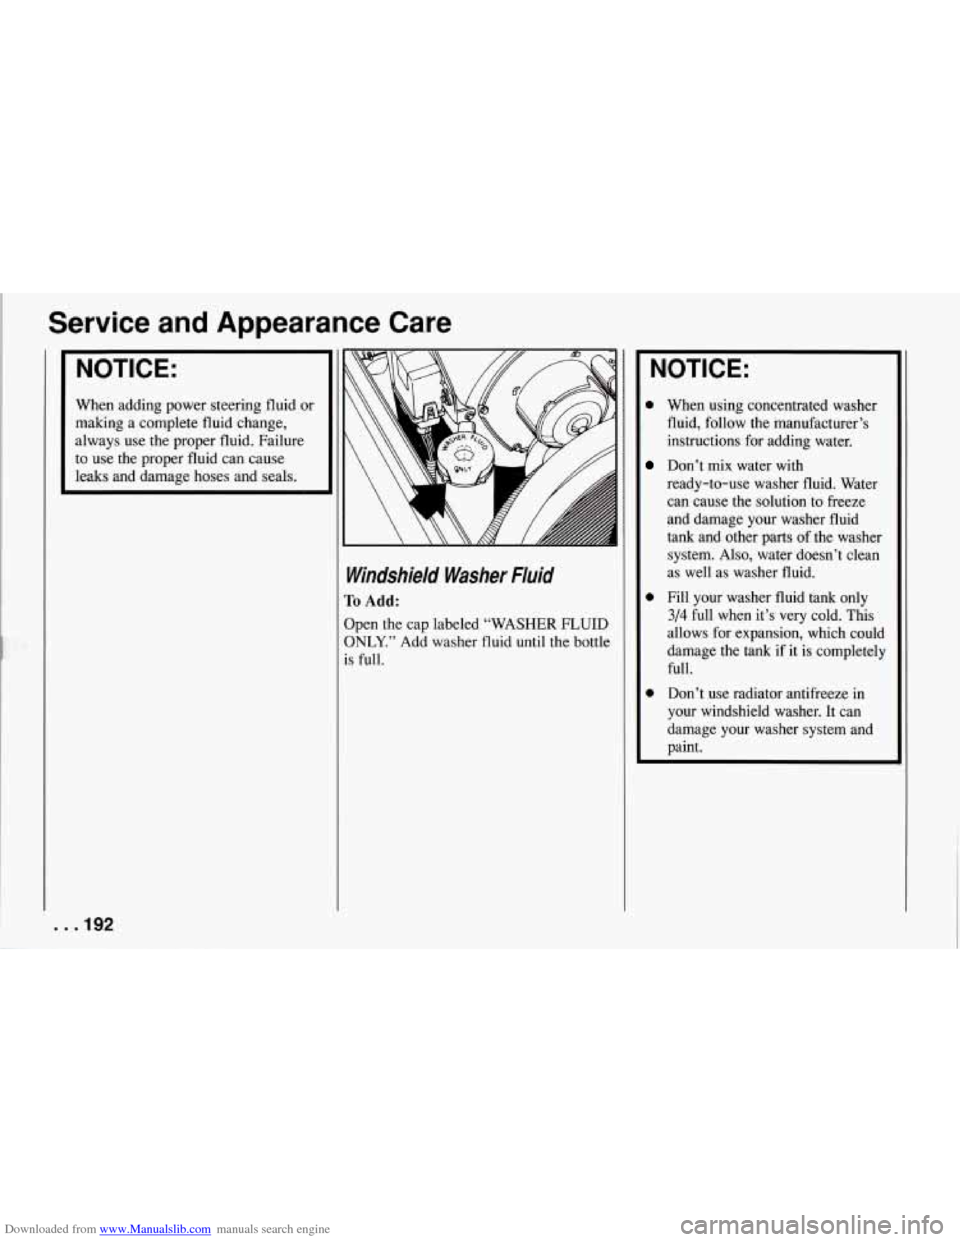
Windshield Washer Fluid
To Add:
Open the cap labeled “WASHER FLUID
ONLY.” Add washer fluid until the bottle
is full.
NOTICE:
0 When using concentrated washer
fluid, follow the manufacturer’s
instructions for adding water.
Don’t mix water with
ready-to-use washer fluid. Water
can cause the solution to freeze
and damage your washer fluid
tank and other parts of the washer
system. Also, water doesn’t clean
as well as washer fluid.
0 Fill your washer fluid tank only
3/4 full when it’s very cold. This
allows for expansion, which could
damage the tank if it is completely
full.
0 Don’t use radiator antifreeze in
your windshield washer. It can
damage your washer system and
paint.
. . .I92
Page 237 of 274

Downloaded from www.Manualslib.com manuals search engine Maintenance Schedule
C L Section A: Scheduled Maintenance Services (Cont.)
Explanation of Scheduled
Maintenance Services
Following are explanations of the services
listed in Schedule I and Schedule
11.
The proper fluids and lubricants to use are
listed in Section D. Make sure whoever
services your vehicle uses these. All parts
should be replaced and all necessary
repairs done before you or anyone else
drives the vehicle.
NOTE: To determine your engine’s
displacement and code, see
“Engine Identification” in the
Index.
ITEM
NO. SERVICE
1 Engine Oil and Filter Change* -
Always use SH or SG Energy
Conserving I1 oils of proper
viscosity. The engine requires a
special oil meeting GM Standard
GM4718M. Oils meeting this
Standard may be identified as
synthetic, and should also be
identified as API Service
SH or
SG. However, not all Synthetic
API Service
SH oils will meet
ITEM
NO. SERVICE
this GM Standard. You should
look for and use only an oil that
meets GM Standard GM4718M.
To determine the preferred
viscosity for your vehicle’s
engine (e.g.,
SAE 5W-30 or SAE
10W-30), see “Engine Oil” in
the Index.
Your vehicle has an Engine Oil
Life Monitor. This monitor will
show you when to change the oil
- usually between 3,000 miles
(5 000 km) and 7,500 miles
( 12 500 km) since your last oil
change. Under severe conditions
the indicator may come on before
3,000 miles
(5 000 km). Never
drive your vehicle more than
7,500 miles (12
500 km) or 12
months without an oil change.
The system won’t detect dust in
the oil..
So if you drive in a dusty
area be sure
to change your oil
every 3,000 miles
(5 000 km) or
sooner if the “Change Oil” light
comes on.
ITEM
NO.
2
3
4
SERVICE
Remember to reset the Oil Life
Monitor when the oil has been
changed. For more information, see “Engine Oil Life Monitor”
in the Index.
Chassis Lubrication
- Lubricate
suspension and steering linkage.
Lubricate the transmission shift
linkage, and parking brake cable guides, underbody contact points
and linkage.
Engine Accessory Drive Belt(s) Inspection
- Inspect the belt(s)
for cracks, fraying, wear and
proper tension. Replace as needed. (Belts can have many
small cracks in individual ribs
without affecting performance.)
Cooling System Service*
-
Drain, flush and refill the system with
new or approved recycled
coolant conforming to GM
Specification 1825M. Keep
coolant at the proper mixture as
specified. See “Coolant” in the
* An Emission Control Service.
. . .236
Page 241 of 274
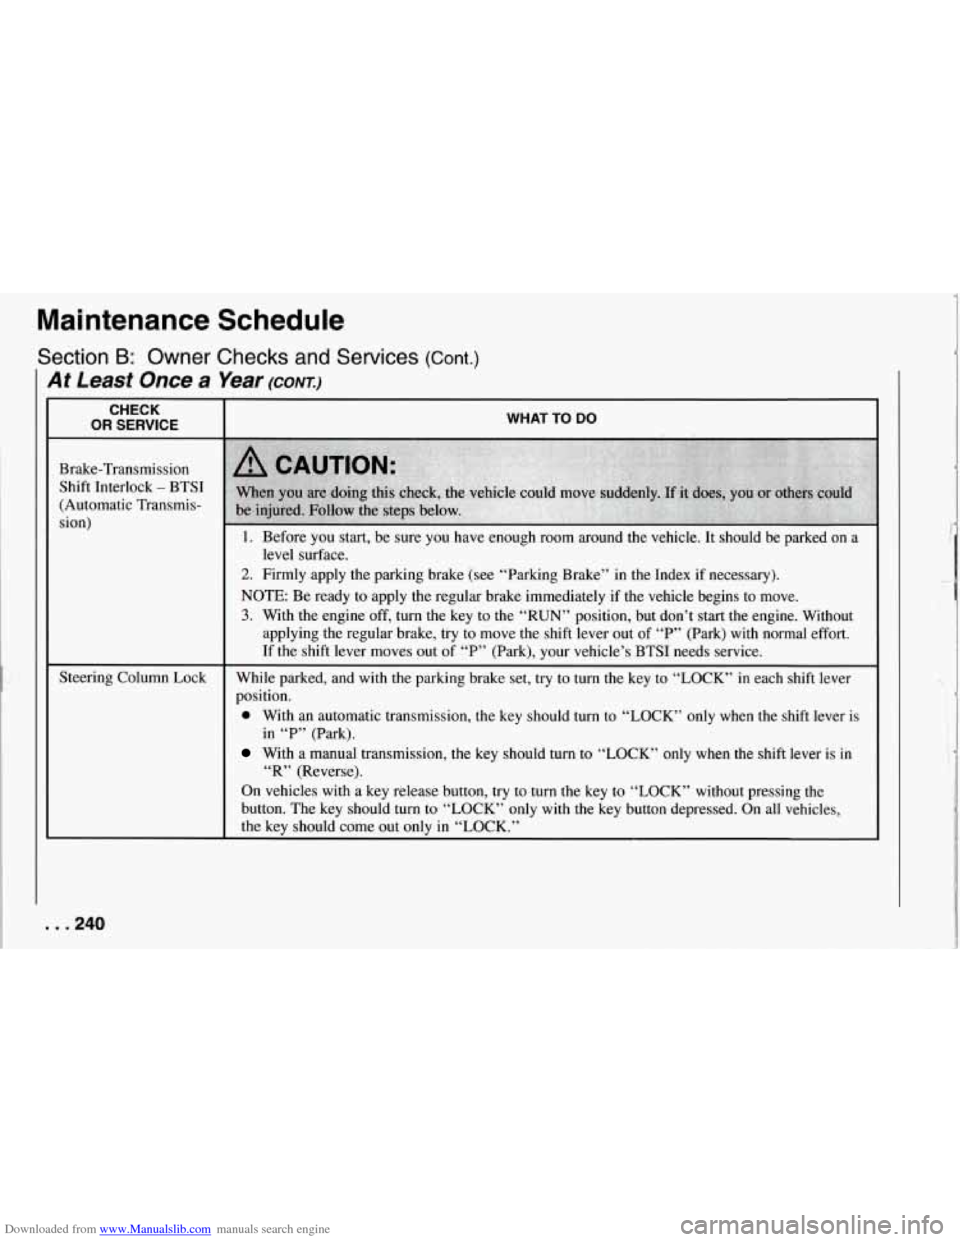
Downloaded from www.Manualslib.com manuals search engine At Least Once a Year (CONT.)
CHECK
OR SERVICE
Brake-Transmission Shift Interlock
- BTSI
(Automatic Transmis-
sion)
Maintenance Schedule
Section B: Owner Checks and Services (Cont.)
Steering Column Lock
WHAT TO DO
1. Before you start, be sure you have enough room around the vehicle. It should be parked on a
2. Firmly apply the parking brake (see “Parking Brake” in the Index if necessary).
NOTE: Be ready to apply the regular brake immediately if the vehicle begins to move.
3. With the engine off, turn the key to the “RUN” position, but don’t start the engine. Without
applying the regular brake, try to move the shift lever out of “P” (Park) with normal effort.
If the shift lever moves out of “P” (Park), your vehicle’s BTSI needs service.
level surface.
While parked, and with the parking brake set,
try to turn the key to “LOCK” in each shift lever
position.
0 With an automatic transmission, the key should turn to “LOCK” only when the shift lever is
With a manual transmission, the key should turn to “LOCK” only when the shift lever is in
On vehicles with a key release button, try to turn the key to “LOCK” without pressing the
button. The key should turn to. “LOCK” only with the key button depressed. On all vehicles,
the key should come out only in “LOCK.”
in
“P” (Park).
“R” (Reverse).
. . .240
Page 243 of 274
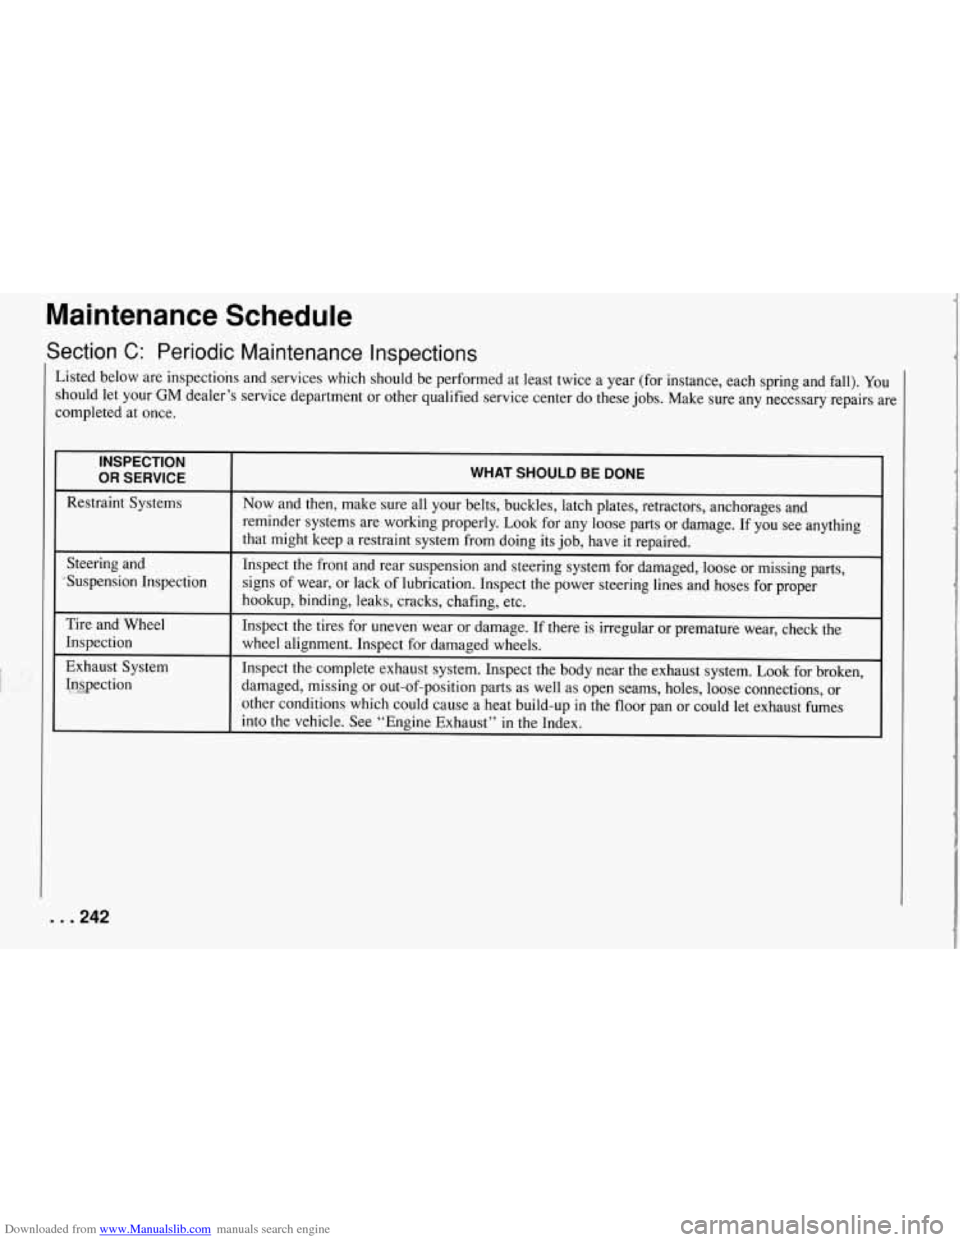
Downloaded from www.Manualslib.com manuals search engine Maintenance Schedule
I Section C: Periodic Maintenance Inspections
I
S
isted below are inspections and services which should be performed at least twice a year (for instance, each spring and fall). You
hould let your GM dealer’s service department or other qualified service center do these jobs. Make sure any necessary repairs are
ompleted at once.
INSPECTION
OR SERVICE
Restraint Systems
Steering and
‘Suspension Inspection
Tire and Wheel Inspection
Exhaust System
Inaection
. .242
WHAT SHOULD BE DONE
Now and then, make sure all your belts, buckles, latch plates, retractots, anchorages and
reminder systems are working properly.
Look for any loose parts or damage. If you see anything
that might keep a restraint system from doing its job, have
it repaired.
Inspect the front and rear suspension and steering systenl for damaged, loose or missing parts,
signs of wear, or lack
of lubrication. Inspect the power steering lines and hoses for proper
hookup, binding, leaks, cracks, chafing, etc.
Inspect the tires for uneven wear or damage. If there is irregular or premature wear, check
the
wheel alignment. Inspect for damaged wheels.
Inspect the complete exhaust system. Inspect the body near the \
exhaust system.
Look for broken,
damaged, missing or out-of-position parts as well as open seams, holes, loose connections, or
other conditions which could cause a heat build-up in
the floor pan or could let exhaust fumes
into the vehicle. See “Engine Exhaust”
in the Index.