1994 CHEVROLET CORVETTE tow
[x] Cancel search: towPage 56 of 274
Downloaded from www.Manualslib.com manuals search engine One to Four Light
(MANUAL TRANSMISSION)
When this light comes on, you can only
shift from “1” to
“4” instead of “1” to
“2.” This helps you get the best possible
fuel economy.
This light will come on when:
The engine coolant temperature is
higher than 170°F (77”C),
You are going 15- 19 mph (24-29
kmh), and
You are at 21% throttle or less.
When this light is on, the shift lever will
only let you shift from “1” to
“4.” After
you are in “4,” you can press the clutch
again and shift into another gear. Use the following shift speeds
when the “ONE
TO FOUR’ light is on:
1st to 4th..
....... 15 mph (24 km/h)
4th to 5th ........ 25 mph (40 kmh)
5th to 6th ........ 40 mph (64 km/h)
Each time you come to a stop, your
vehicle’s Engine Control Module (ECM)
determines when to activate
the
One-to-Four upshift system.
Use
“2” only when you accelerate very
quickly from a stop. You can then follow
the full gear shift pattern.
Downshifting
(MANUAL TRANSMISSION)
When you downshift, don’t skip more
than one gear. For example, you can shift
from
“6” to “5” or from “6” to “4.” But
don’t shift from
“6” to “3.”
Be careful not to drive faster than the
speeds shown for each gear:
1st
.............. 40 mph (64 kmh)
2nd
............. 60 mph (97 kmh)
3rd
............ 80 mph (1 29 kmh)
4th ........... 105 mph (169 kmh)
I NOTICE:
If you skip more than one gear when
you downshift, or if you race the
engine when you downshift, you can
damage the clutch or transmission.
~~
The six-speed transmission has springs
that center the shift lever near
“3” and
“4.” These springs help you know which
gear you are in when you are shifting. Be
careful
when shifting from “1” to “2” or
downshifting from “6” to
“5.” The spring;
will try to pull the gear shift lever toward
“3” and “4.” Make sure you move the
lever into
“2” or “5.” If you let the lever
move
in the direction of the pulling, you
may end up shifting from
“1” to “4” or
from
“6” to “3.”
55. .
Page 57 of 274

Downloaded from www.Manualslib.com manuals search engine Features and Controls
RIDE CONTROL
SPORT
To@F
fl
-
PS c
Selective Ride Control
(OPTION)
This knob is on the center console. Turn i
to select the ride control of your choice:
TOUR: Use for city and highway driving
Provides a smooth, soft ride.
SPORT: Use where road conditions or
personal preference demand more control
Provides more “feel,” or response to the
road conditions.
PERF: Use for performance driving.
Provides tight, firm ride and precise
response to road conditions. ‘TOUR” and “SPORT” will
provide a
imilar ride at low speeds around town,
md both settings will increase control
tnd firmness at higher speeds. “SPORT,”
lowever, will adjust more at ‘higher
;peeds than “TOUR” will.
,‘PERF” will provide much more
Zontrol and a firmer ride at all speeds.
You can select a setting at any time.
Based on your speed,
the system
wtomatically adjusts to provide the best
aide and handling. Select a new setting
whenever driving conditions change.
The “SERVICE
RIDE CONTROL” light
monitors the system. Refer to “Service
Ride Control Light” in the Index.
Limited-Slip Rear Axle
Your rear axle can give you additional
traction on snow, mud, ice, sand or gravel.
It works like a standard axle most
of the
time, but when one of the rear wheels
has no traction and the other does,
the
limited-slip feature will allow the wheel
with traction to move the vehicle.
Parking
Parking Brake
To set the parking brake: Hold the brak
pedal down. Pull the parking brake lever
up, then move it back down. This sets
your parking brake, even though the leve
is down. If the ignition is on, the parking
brake indicator light will come on.
... 56
Page 58 of 274
Downloaded from www.Manualslib.com manuals search engine I // /
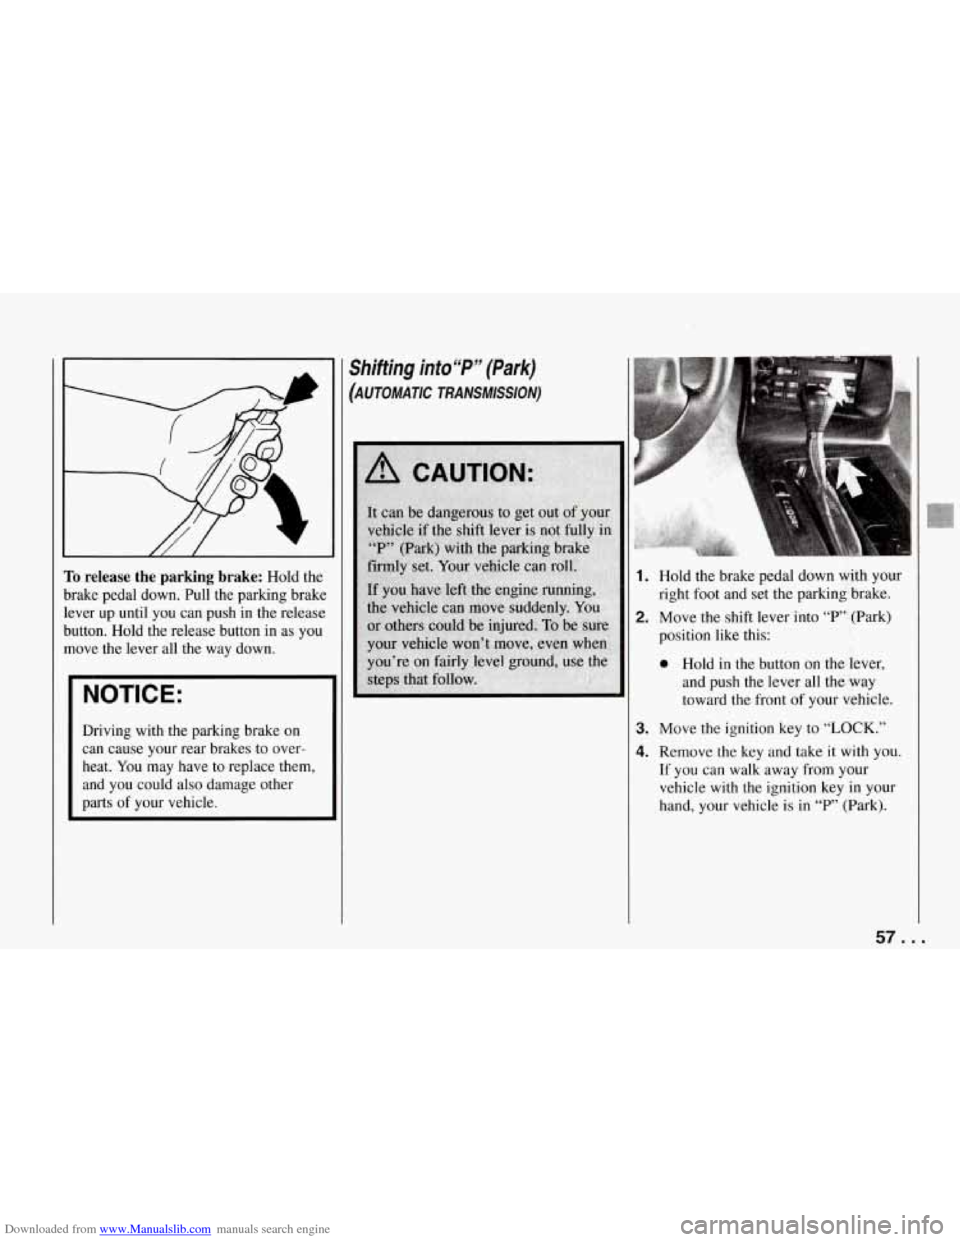
To release the parking brake: Hold the
brake pedal down. Pull the parking brake
lever up until you can push in the release
button. Hold the release button in as
you
move the lever all the way down.
NOTICE:
Driving with the parking brake on
can cause your rear brakes to over-
heat.
You may have to replace them,
and you could also damage other
parts
of your vehicle.
Shifting into“P” (Park)
(AUTOMATIC TRANSMISSION)
1. Hold the brake pedal down with your
right foot and set the parking brake.
2. Move the shift lever into “P’ (Park)
position like this:
0 Hold in the button on the lever,
and push the lever all the way
toward the front
of your vehicle.
I 3. Move the ignition key to “LOCK.”
4. Remove the key and take it with you.
If you can walk away from your
vehicle with the ignition key
in your
hand, your vehicle
is in “P” (Park).
57 ...
Page 63 of 274

Downloaded from www.Manualslib.com manuals search engine Features and Controls
L L
c
L
A green arrow on the instrument panel
will flash in the direction of the
turn or
lane change.
To signal a lane change, just raise or
lower the lever until the green arrow start
to flash. Hold it there until you complete
your lane change. The lever will return b!
itself when you release
it.
As you signal a turn or a lane change, if
the arrows don’t flash but just stay on, a
signal bulb may be burned out and other
drivers won’t see your
turn signal.
If a bulb is burned out, replace it to help
avoid an accident.
If the green arrows
don’t go on at all when you signal a
turn,
check the fuse (see “Fuses” in the Index)
and for burned-out bulbs.
Headlight High/..ow Beam
To change the headlights from low beam
to high or high to low, pull the turn signal
lever all the way toward you. Then
release it. When the high beams are on,
this blue light on the instrument panel
also will be on.
Windshield Wipers
You control the windshield wipers by
turning the band with the wiper symbol
on it.
For a single wiping cycle,
turn the band
to “MIST.” Hold it there until the wipers
start, then let go. The wipers will stop
after one cycle. If you want more cycles,
hold the band on “MIST” longer.
You can set the wiper speed for a long or
short delay between wipes. This can be
very useful in light rain or snow. Turn the
band to choose the delay time. The closer
to
“LO,” the shorter the delay.
... 62
Page 72 of 274
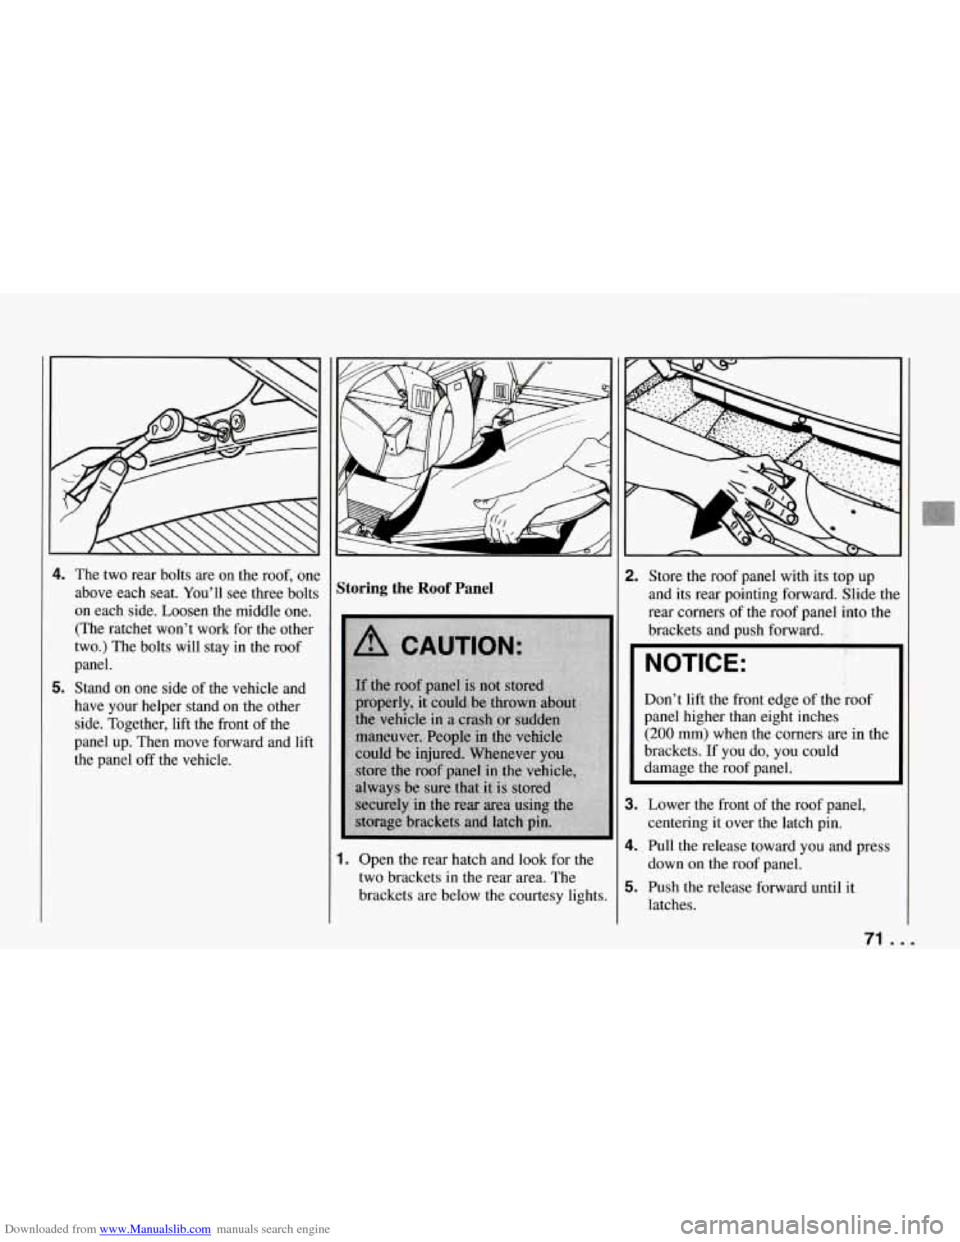
Downloaded from www.Manualslib.com manuals search engine 4. The two rear bolts are on the roof, one
above each seat. You’ll see three bolts
on each side. Loosen the middle one. (The ratchet won’t work for the other
two.) The bolts will stay in the roof
panel.
5. Stand on one side of the vehicle and
have your helper stand on the other
side. Together, lift the front of the
panel up. Then move forward and lift
the panel
off the vehicle.
Storing the Roof Panel
1. Open the rear hatch and look for the
two brackets in the rear area. The
brackets are below the courtesy lights.
2. Store the roof panel with its top up
and its rear pointing forward. Slide tht
rear corners of the roof panel into the
brackets and push forward.
NOTICE:
Don’t lift the front edge of the roof
panel higher than eight inches
(200 mm) when the corners are in the
brackets. If you do, you could
damage the roof panel.
3. Lower the front of the roof panel,
centering it over the latch pin.
4. Pull the release toward you and press
down on the roof panel.
5. Push the release forward until it
latches.
71 ...
Page 85 of 274

Downloaded from www.Manualslib.com manuals search engine Features and Controls
It takes more (or less) fuel to fill up
than the gauge reads. For example, the
gauge reads half full, but it took more
(or less) than half of the tank’s
capacity to fill it.
The gauge moves a little when you
turn, stop or speed up.
You can use the Trip Monitor to display
more detailed fuel information. Each time
you press “FUEL INFO,” one
of the
following will appear next to the fuel
gauge.
INST The fuel economy calculated
for your current driving conditions.
AVERAGE: The fuel economy
calculated for the current tank of fuel,
or since you last reset the display.
RANGE: The distance you can drive
before refueling.
Blank: The fuel gauge is displayed
alone.
You should reset the fuel information
display every time you refuel. Press
“RESET FUEL” on the Trip Monitor. :loser to the floor.
It may
take longer to
stop. If the light is still on, have the
vehicle towed for service. (See “Towing
Your Vehicle” in the Index.)
... 84
Brake System Warning Light
Your Corvette’s hydraulic brake system
is divided into two parts. If one part isn’t
working, the other part can still work and
stop you. For good braking, though, you
need both parts working well.
This light should come on as you start thc
vehicle. If it doesn’t come on then, have
it fixed
so it will be ready to warn you if
there’s a problem. If this warning light
stays on, there could be
a brake problem.
Have your brake system inspected right
away.
If the light comes on while you are
driving, pull
off the road and stop
carefully. You may notice that the pedal
is harder to push. Or, the pedal may go
Page 99 of 274
Downloaded from www.Manualslib.com manuals search engine Features and Controls
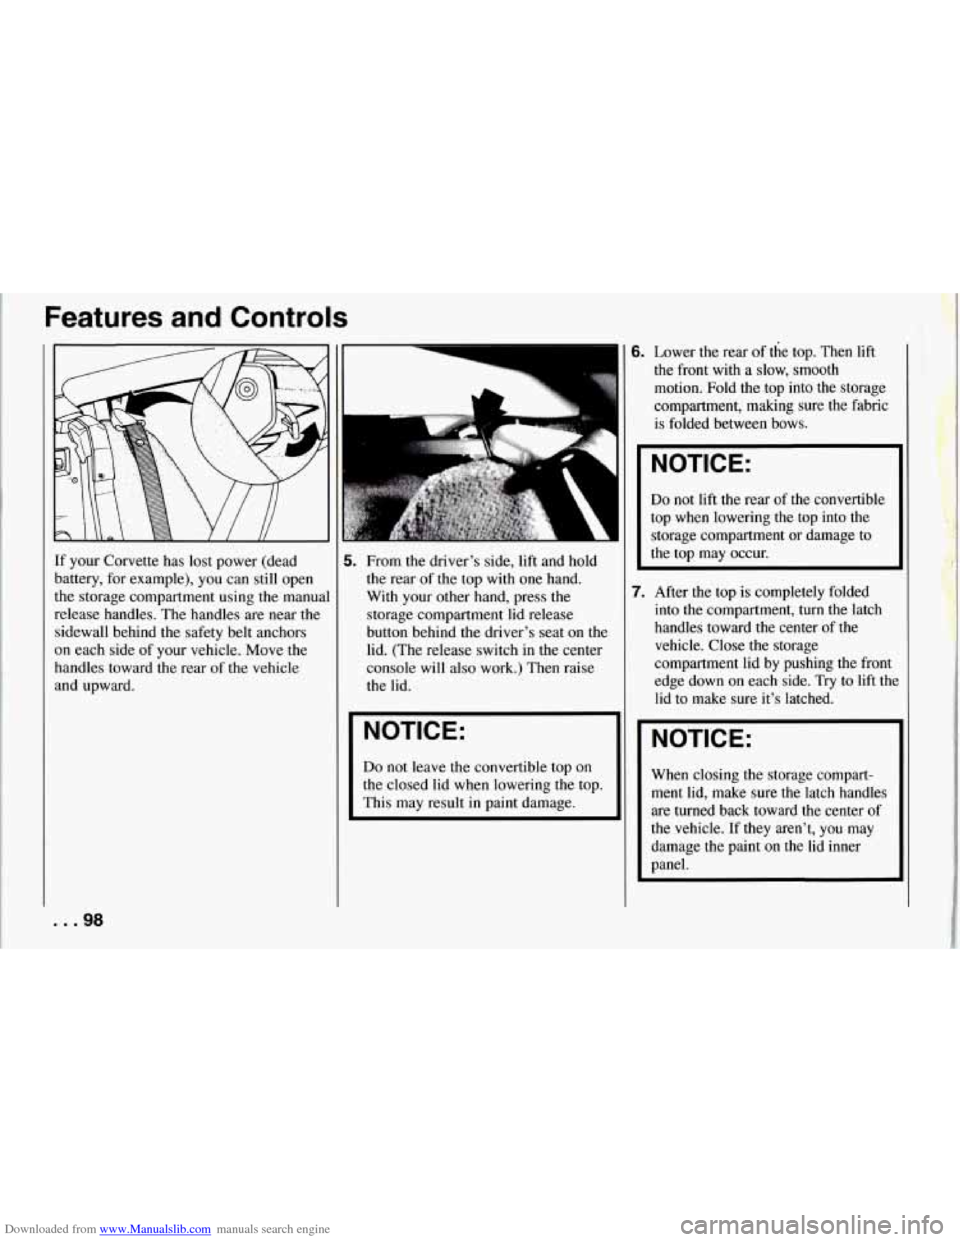
If your Corvette has lost power (dead
battery, for example), you can still open
the storage compartment using the manual
release handles. The handles are near the
sidewall behind the safety belt anchors
on each side of your vehicle. Move the
handles toward the rear
of the vehicle
and upward.
6. Lower the rear of the top. Then lift
the front with a slow, smooth
motion. Fold the top into
the storage
compartment, making sure the fabric
is folded between bows.
5. From the driver’s side, lift and hold
the rear of the top with one hand.
With your other hand, press the
storage compartment lid release
button behind the driver’s seat on the
lid. (The release switch in the center
console will also work.) Then raise
the lid.
NOTICE:
Do not leave the convertible top on
the closed lid when lowering the top.
This may result in paint damage.
I NOTICE:
Do not lift the rear of the convertible
top when lowering
the top into the
storage compartment or damage to
the top may occur.
7. After the top is completely folded
into the compartment, turn the latch
handles toward the center of the
vehicle. Close the storage
compartment lid by pushing
the front
edge down on each side.
Try to lift the
lid to make sure it’s latched.
NOTICE:
When closing the storage compart-
ment lid, make sure the latch handles
are turned back toward the center of
the vehicle. If they aren’t, you may
damage the paint on the lid inner
panel.
. .98
Page 100 of 274
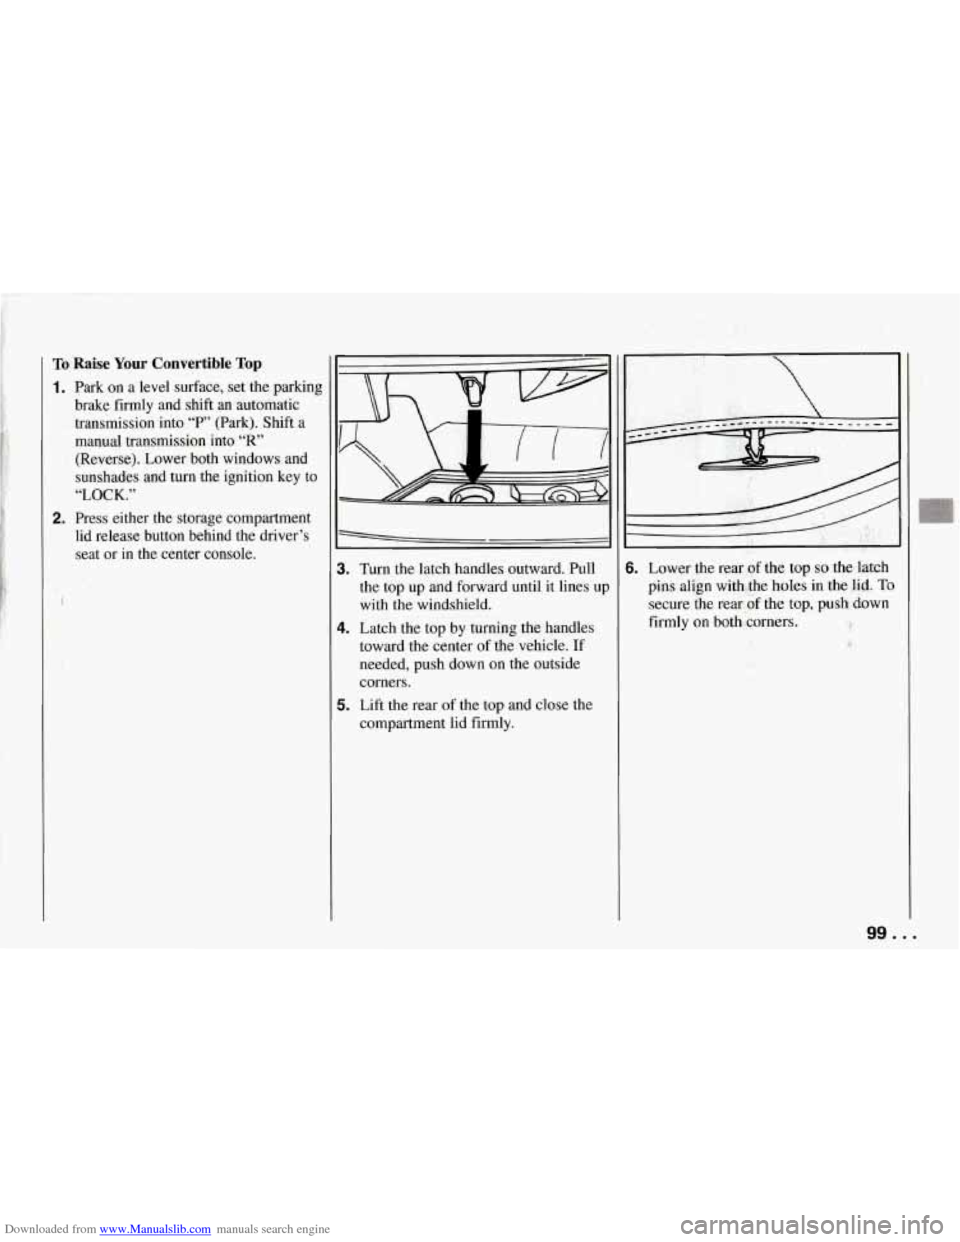
Downloaded from www.Manualslib.com manuals search engine To Raise Your Convertible Top
1. Park on a level surface, set the parking
brake firmly and shift an automatic
transmission into
“P” (Park). Shift a
manual transmission into
“R’
(Reverse). Lower both windows and
sunshades and turn the ignition key to
“LOCK.”
2. Press either the storage compartment lid release button behind the driver’s
seat or in the center console.
3. Turn the latch handles outward. Pull
the top up and forward until it lines
UI
with the windshield.
4. Latch the top by turning the handles
toward the center of the vehicle.
If
needed, push down on the outside
corners.
5. Lift the rear of the top and close the
compartment lid firmly.
I I
6. Lower the rear of the top so the latch
pins align with the holes in the lid.
To
secure the rear of the top, push down
firmly on both corners.
99 ...