1994 CHEVROLET CAVALIER change wheel
[x] Cancel search: change wheelPage 64 of 243
Downloaded from www.Manualslib.com manuals search engine Horn
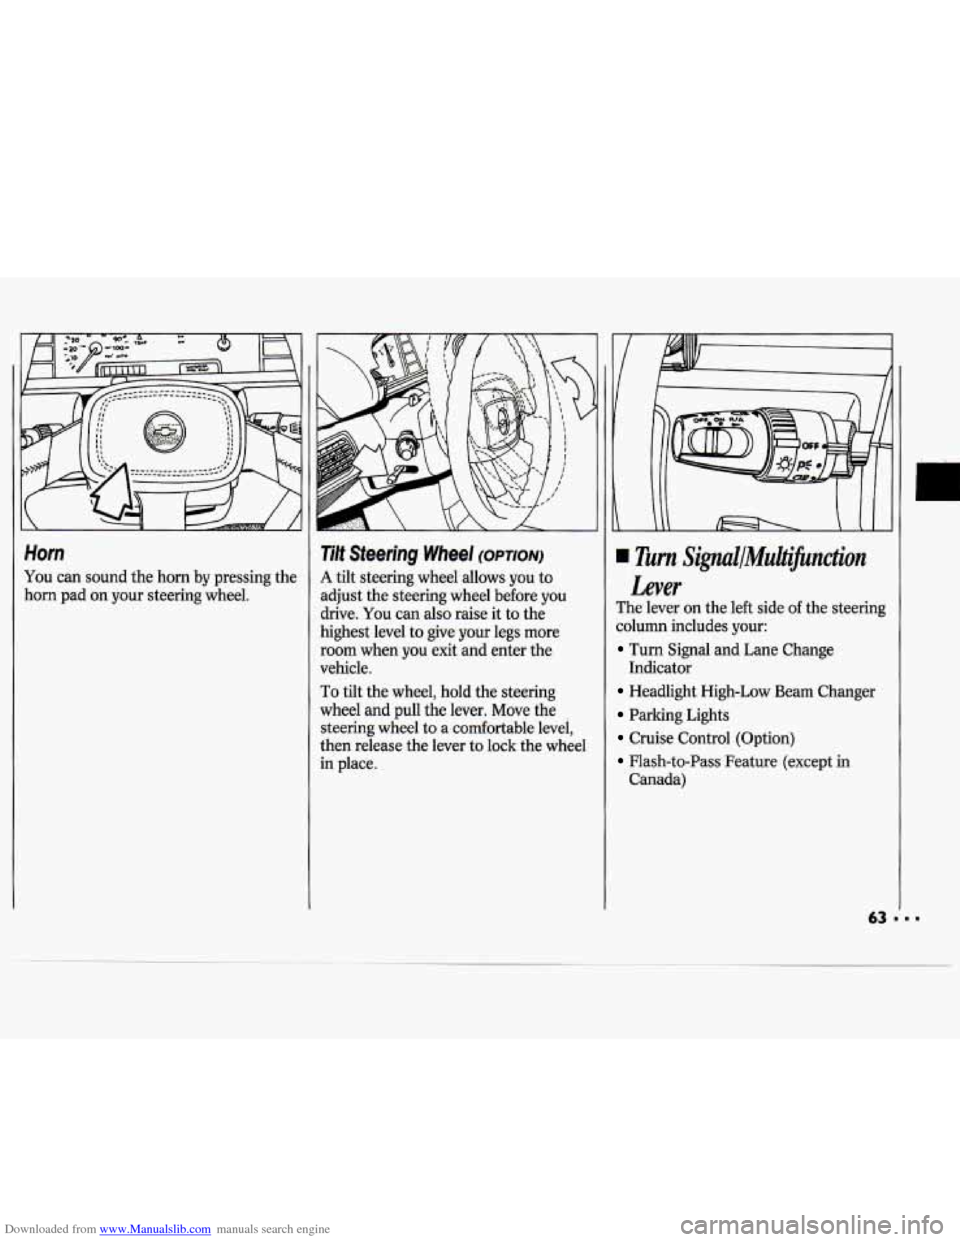
You can sound the horn by pressing the
horn pad on your steering wheel.
Tilt Steering Wheel (OPTION)
A tilt steering wheel allows you to
adjust the steering wheel before
you
drive. You can also raise it to the
highest level to give your legs more
room when
you exit and enter the
vehicle.
To tilt the wheel, hold the steering
wheel and pull the lever. Move the
steering wheel to a comfortable level,
then release the lever to lock the wheel
in place.
Turn Signul/MuiJicnction
Lever
The lever on the left side of the steering
column includes your:
Turn Signal and Lane Change
Headlight High-Low Beam Changer
Parking Lights
Cruise Control (Option)
Flash-to-Pass Feature (except in
Indicator
Canada)
Page 113 of 243
Downloaded from www.Manualslib.com manuals search engine Your Driving and the Road
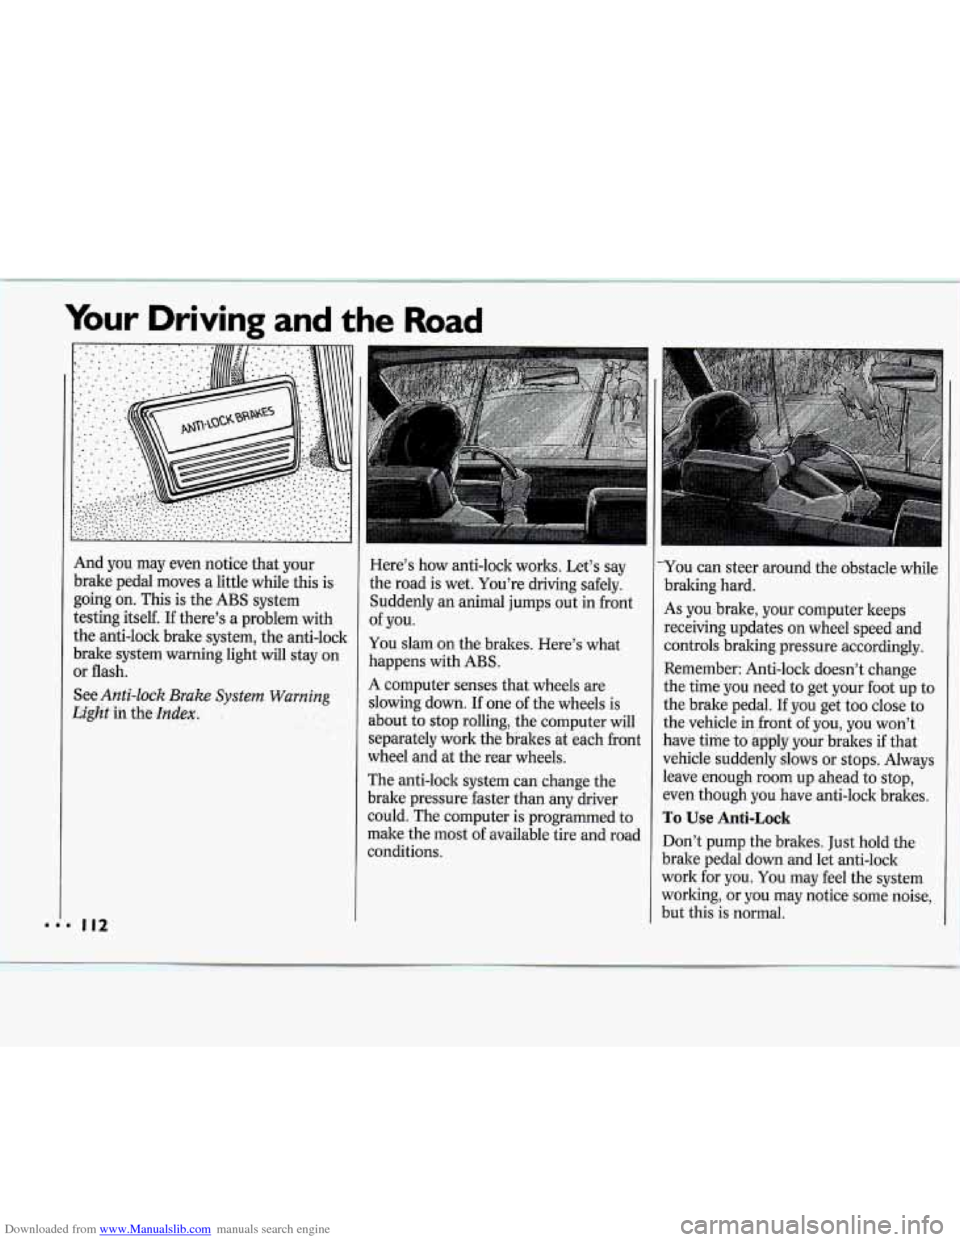
And you may even notice that your
brake pedal moves a little while this is
going on. This is the ABS system
testing itself.
If there’s a problem with
the anti-lock brake system, the anti-lock
brake system warning light will stay on
or flash.
See
Anti-lock Brake System Warning
Light
in the Index.
Here’s how anti-lock works. Let’s say
the road is wet. You’re driving safely.
Suddenly
an animal jumps out in front
of you.
You slam on the brakes. Here’s what
happens with ABS.
A computer senses that wheels are
slowing down.
If one of the wheels is
about to stop rolling, the computer wil
separately work the brakes at each fro]
wheel and at the rear wheels.
The anti-lock system can change the
brake pressure faster than any driver
1
nt
could.*The computer is programmed to
make the most of available tire and road
conditions.
L-
You can steer around the obstacle while
braking hard.
As you brake, your computer keeps
receiving updates on wheel speed and
controls braking pressure accordingly.
Remember: Anti-lock doesn’t change
the time you need to get your foot up to
the brake pedal. If you get too close to
the vehicle in front of you, you won’t
have time to apply your brakes if that
vehicle suddenly slows or stops. Always
leave enough room up ahead to stop,
even though you have anti-lock brakes.
To Use Anti-Lock
Don’t pump the brakes. Just hold the
brake pedal down and let anti-lock
work for you. You may feel the system
working, or you may notice some noise,
but this is normal.
Page 114 of 243
Downloaded from www.Manualslib.com manuals search engine Braking in Emergencies
Use your anti-lock braking system when
you need to. With anti-lock, you can
steer and brake at the same time. In
many emergencies, steering can help
you more than even the very best
braking.
Power Steering
If you lose power steering assist
because the engine stops or the system
is not functioning, you can steer but it
will take much more effort.
Steering Tips
Driving on Curves
It’s important to take curves at a
reasonable speed.
A lot of the “driver lost control”
accidents mentioned
on the news
happen
on curves. Here’s why:
Experienced driver or beginner, each
of
us is subject to the same laws of physics
when driving on curves. The traction of
the tires against the road surface makes
it possible for the vehicle to change its
path when you turn the front wheels.
If
there’s no traction, inertia will keep the
vehicle going in the same direction.
If
you’ve ever tried to steer a vehicle on
wet ice, you’ll understand this.
The traction you can get in a curve
depends on the condition of your tires
and the road surface, the angle at which
the curve
is banked, and your speed.
While you’re in a curve, speed is the one
factor you can control.
Suppose you’re steering through a
sharp curve. Then you suddenly accelerate.
Both control systems
-
steering and acceleration - have to do
their work where the tires meet the
road. Adding the sudden acceleration
can demand too much
of those places.
You can lose control.
What should you do if this ever
happens? Ease up on the accelerator
pedal, steer the vehicle the way you
want it to go, and slow down.
Speed limit signs near curves warn that
you should adjust your speed. Of
course, the posted speeds are based on
good weather and road conditions.
Under less favorable conditions you’ll
want to go slower.
If you need to reduce your speed as you
approach
a curve, do it before you enter
the curve, while your front wheels are
straight ahead.
Try to adjust your speed
so you can
“drive” through the curve. Maintain a
reasonable, steady speed. Wait to
accelerate until you are out of the curve,
and then accelerate gently into the
straightaway.
Page 117 of 243
Downloaded from www.Manualslib.com manuals search engine Your Driving and the Road
If you’re being passed, make it easy
for the following driver to get ahead of
you. Perhaps you can ease a little to
the right.
Loss of Control
Let’s review what driving experts say
about what happens when the three
control systems (brakes, steering and
acceleration) don’t have enough friction
where the tires meet the road to do
what the driver has asked.
In any emergency, don’t give up. Keep
trying to steer and constantly seek an
escape route or area
of less danger.
Skidding
In a skid, a driver can lose control of
the vehicle. Defensive drivers avoid
most skids by taking reasonable care
suited
to existing conditions, and by not
“overdriving” those conditions. But
skids are always possible.
The three types of skids correspond to
your Chevrolet’s three control systems.
In the braking skid your wheels aren’t
rolling.
In the steering or cornering
skid, too much speed or steering in a
curve causes tires to slip and lose
cornering force. And in the acceleration
skid too much throttle causes the
driving wheels to spin.
A cornering skid and an acceleration
skid are best handled by easing your
foot
off the accelerator pedal.
If your vehicle starts to slide, ease your
foot
off the accelerator pedal and
quickly steer the way
you want the
vehicle to go.
If you start steering
quickly enough, your vehicle may
straighten out. Always be ready for a
second skid
if it occurs. Of
course, traction is reduced when
water, snow, ice, gravel, or other
material is
on the road. For safety,
you’ll want to slow down and adjust
your driving to these conditions. It is
important to slow down on slippery
surfaces because stopping distance will
be longer and vehicle control more limited.
While driving
on a surface with reduced
traction,
try your best to avoid sudden
steering, acceleration, or braking (including engine braking by shifting to
a lower gear). Any sudden changes
could cause the tires to slide. You may
not realize the surface is slippery until
your vehicle is skidding. Learn
to
recognize warning clues - such as
enough water, ice or packed snow on
the road to make a “mirrored surface”
- and slow down when you have any
doubt.
Remember: Any anti-lock braking
system (ABS) helps avoid only the
braking slid.
Page 133 of 243
Downloaded from www.Manualslib.com manuals search engine Problems on the Road
-
A
B
I Towing Your Vehicle
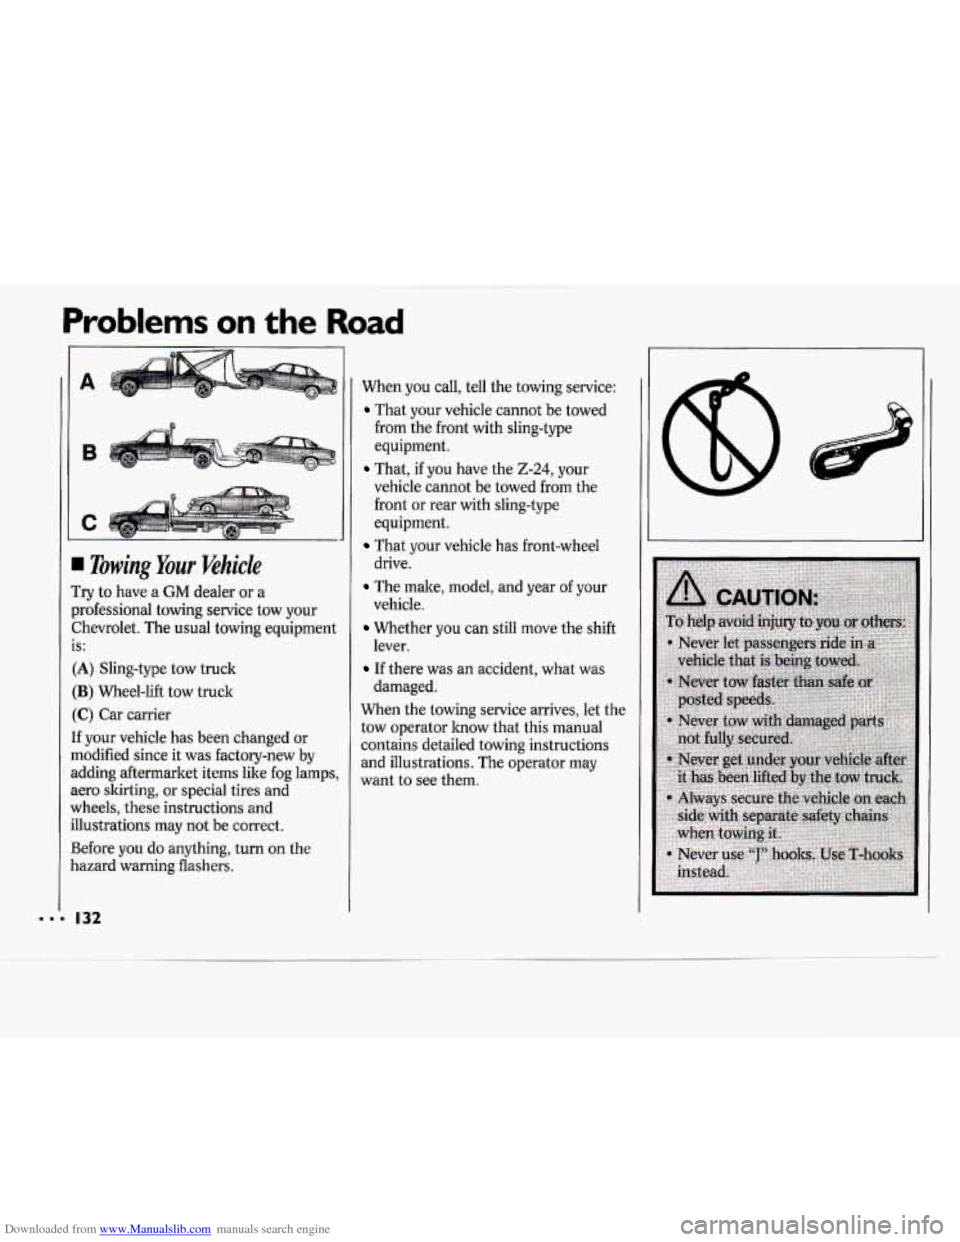
Try to have a GM dealer or a
xofessional towing service tow your
Zhevrolet. The usual towing equipment
:A) Sling-type tow truck
:B) Wheel-lift tow truck
C) Car carrier
f your vehicle has been changed or
nodified since it was factory-new by
ldding aftermarket items like fog lamps,
iero skirting, or special tires and
uheels, these instructions and
llustrations may not be correct.
Before you do anything, turn on the
lazard warning flashers.
S:
When you call, tell the towing service:
That your vehicle cannot be towed
from the front with sling-type
equipment.
That, if you have the 2-24, your
vehicle cannot
be towed from the
front or rear with sling-type
equipment.
drive.
vehicle. lever.
damaged.
That your vehicle has front-wheel
The make, model, and year of your
Whether you can still move the shift
If there was an accident, what was
When the towing service arrives, let the
tow operator know that this manual
contains detailed towing instructions
and illustrations. The operator may
want to see them.
.I I32
Page 147 of 243
Downloaded from www.Manualslib.com manuals search engine Problems on the Road
If a front tire fails, the flat tire will
create a drag that pulls the vehicle
toward that side. Take your foot off the
accelerator pedal and grip the steering
wheel firmly. Steer to maintain lane
position, then gently brake to
a stop
well out
of the traffic lane.
A rear blowout, particularly on a curve,
acts much like a skid and may require
the same correction you’d use in a skid.
In any rear blowout, remove your foot
from the accelerator pedal. Get the
vehicle under control by steering the
way
you want the vehicle to go. It may
be very bumpy and noisy, but you can
still steer. Gently brake to a stop, well
off the road if possible.
If a tire goes flat, the next section shows
how to use your jacking equipment to
change a flat tire safely.
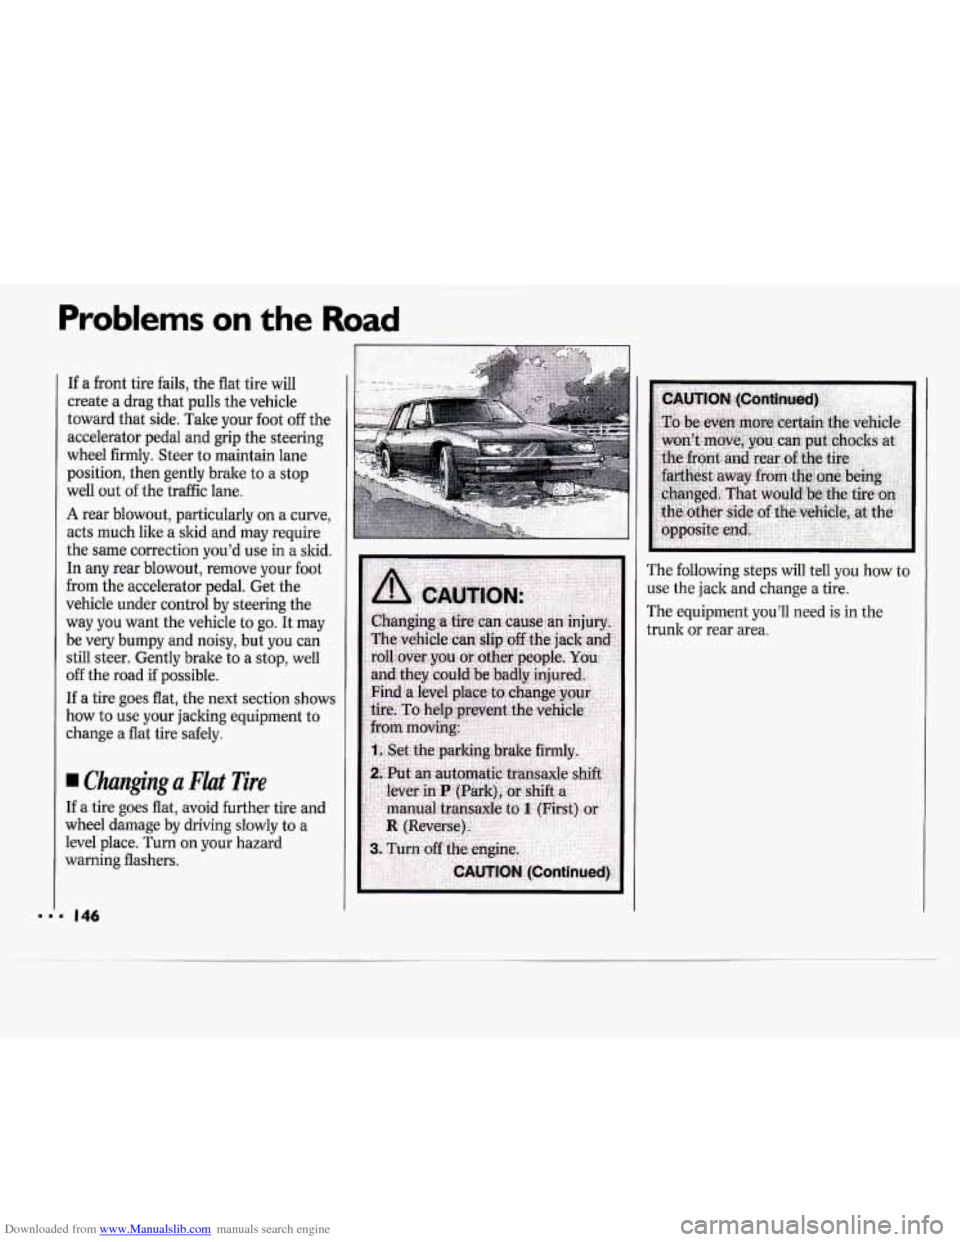
Changing a Flat Tire
If a tire goes flat, avoid further tire and
wheel damage by driving slowly to a
level place. Turn on your hazard
warning flashers. The
following steps will tell you how to
use the jack and change a tire.
The equipment you’ll need
is in the
trunk
or rear area.
Page 211 of 243
Downloaded from www.Manualslib.com manuals search engine Maintenance Schedule
Explanation of Scheduled
Maintenance Services
Following are explanations of the
services listed in Schedule
I and
Schedule 11.
The proper fluids and lubricants to use
are listed in Section
D. Make sure
whoever services your vehicle uses
these. All parts should be replaced and
all necessary repairs done before you or
anyone else drives the vehicle.
ITEM SERVICE
NO.
1. Engine Oil and Filter Change* -
Always use SH or SG Energy
Conserving I1 oils of proper viscosity.
The
“SH” or “SG” designation may
be shown alone or in combination
with others, such as “SH/CD,”
“SH,
SG, CD,” “SG/CD,” etc. To
determine the preferred viscosity for
your vehicle’s engine (e.g., SAE 5W-
30 or SAE 10W-30), see
Engine Oil
in the Index.
the suspension and steering linkage.
Lubricate the transaxle shift linkage.
Inspection - For proper wear and
maximum tire life, rotate your tires
following the instructions in this
manual. See
Tires, Inspection G
Rotation in the Index. Check the
tires for uneven wear or damage. If
you see irregular or premature wear,
check the wheel alignment. Check for
damaged wheels also.
2. Chassis Lubrication - Lubricate
3. Tire and Wheel Rotation and
4. Engine Accessory Drive Belt(s)
Inspection
* - Inspect the belt (s)
for cracks, fraying, wear and proper
tension. Replace as needed. (Belts
can have many small cracks in
individual ribs without affecting
performance.)
5. Cooling System Service* - Drain,
flush and refill the system with new
or approved recycled coolant
conforming to
GM Specification
1825M. Keep coolant at the proper
mixture as specified. See
Coolant in
the
Index. This provides proper
freeze and boil protection, corrosion
inhibitor level and maintains proper
engine operating temperature.
Inspect hoses and replace if they are
cracked, swollen or deteriorated.
Tighten screw-type hose clamps.
Clean the outside of the radiator and
air conditioning condenser. Wash the
pressure cap and neck.
To help ensure proper operation, we
recommend a pressure test
of both the
cooling system and the pressure cap.
Page 238 of 243
Downloaded from www.Manualslib.com manuals search engine Octane Requirements
Odometer
& Speedometer ................. 82
(see
Fuel
Requirements)
Oil. Engine ....................................... 162
Pressure Gage
.................................. 90
Quality
........................................... 163
Starburst
........................................ 163
Thickness
....................................... 163
Used Oil
......................................... 165
When
to Add ................................. 162
When to Change
............................ 164
Oil Warning Light
.............................. 89
Operation of Lights
............................ 64
Outside Rearview Mirrors
................. 73
Overheated Engine
.......................... 136
Overheated Engine Coolant Warning Gage
................................................. 85
Owner Checks & Services ............... 212
Owner’s Manual. How to Use
............. 6
paint Spotting. Chemical
................ 193
Park. Shifting Into
........................ 51. 58
Parking
Over Things That Burn
................... 60
With the Engine Running
..... 54.59. 61
Passing
........................................ 72. 115
Inspections
..................................... 2 16
Torque
Lock
.................................... 59
Parking Brake
..................................... 58
Passenger Belts (see Safety Belts)
Periodic Maintenance Polishing
and Waxing
Power Door Locks
................. i. ........ ;. 44
Power Steering Fluid
......... 173,198, 199
Power Windows
................................. 62
Power Window Lock-out Switch
...... 62
Pregnancy, Use of Safety Belts
During
.............................................. 24
Problems on the Road
...................... 127
Publications (see
Service Publications)
Radiator Overheating
(see
Overheated Engine)
Radiator Pressure Cap ..................... 172
Radio (see
Audio Systems)
Reading Light ..................................... 67
Rear Safety Belt Comfort Guides
...... 27
Rear Seat, Split Fold-Down
............... 15
Rearview Mirrors ............................... 72
(see
Appearance
Care)
Rear Window Defogger ...................... 95
Reclining Seatbacks
........................... 12
Recreational Towing
........................ 125
Recommended Fluids
&
Lubricants ....................................... 217
Replacement Bulbs
.......................... 200
Replacement Fuses
.......................... 196
Replacement Parts
........................... 202
Replacement, Windshield Wiper
..... 179
Replacing Safety Belts
....................... 40
Replacing Tires
................................. 184
Reporting Safety Defects
................. 224
Replacing Wheels
............................. 186
Restraints. Child ................................. 31
Roads. Hill and Mountain
............... 122
Rocking Your Vehicle
................. 54. 152
Rotation. Tire
................................... 183
Roof Luggage
Carrier
......................... 79
S afety Belts ....................................... 17
Adults .............................................. 20
Automatic Lap-Shoulder Belt
......... 21
Care
................................................ 190
Center Passenger Position
.............. 29
Checking
.......................................... 40
Children
...................................... 3 0, 38
Child Restraints
............................... 31
Child Restraints-How to Install
Them
............................................. 32
Child Restraints, Where to Put
.. 31, 35
Cleaning
......................................... 190
Comfort Guides, Rear
..................... 27
Driver Position
................................ 21
Extender
........................................... 40
How to Wear ................................... 20
Passenger Belts
................................ 25
Pregnancy, Use During
................... 24
Questions
&
Answers .................... 19,23,24,39, 40
Rear Safety Belts ............................. 26
Rear Seat Passengers
...................... 25
Right Front, Adult Passenger
.......... 25
Smaller Children and Babies
.......... 30
Replacement .................................... 40
Top Strap
......................................... 32
237