1994 CHEVROLET CAVALIER air condition
[x] Cancel search: air conditionPage 87 of 243
Downloaded from www.Manualslib.com manuals search engine Features & Controls
II
I CHECK
L
I
I
... 86
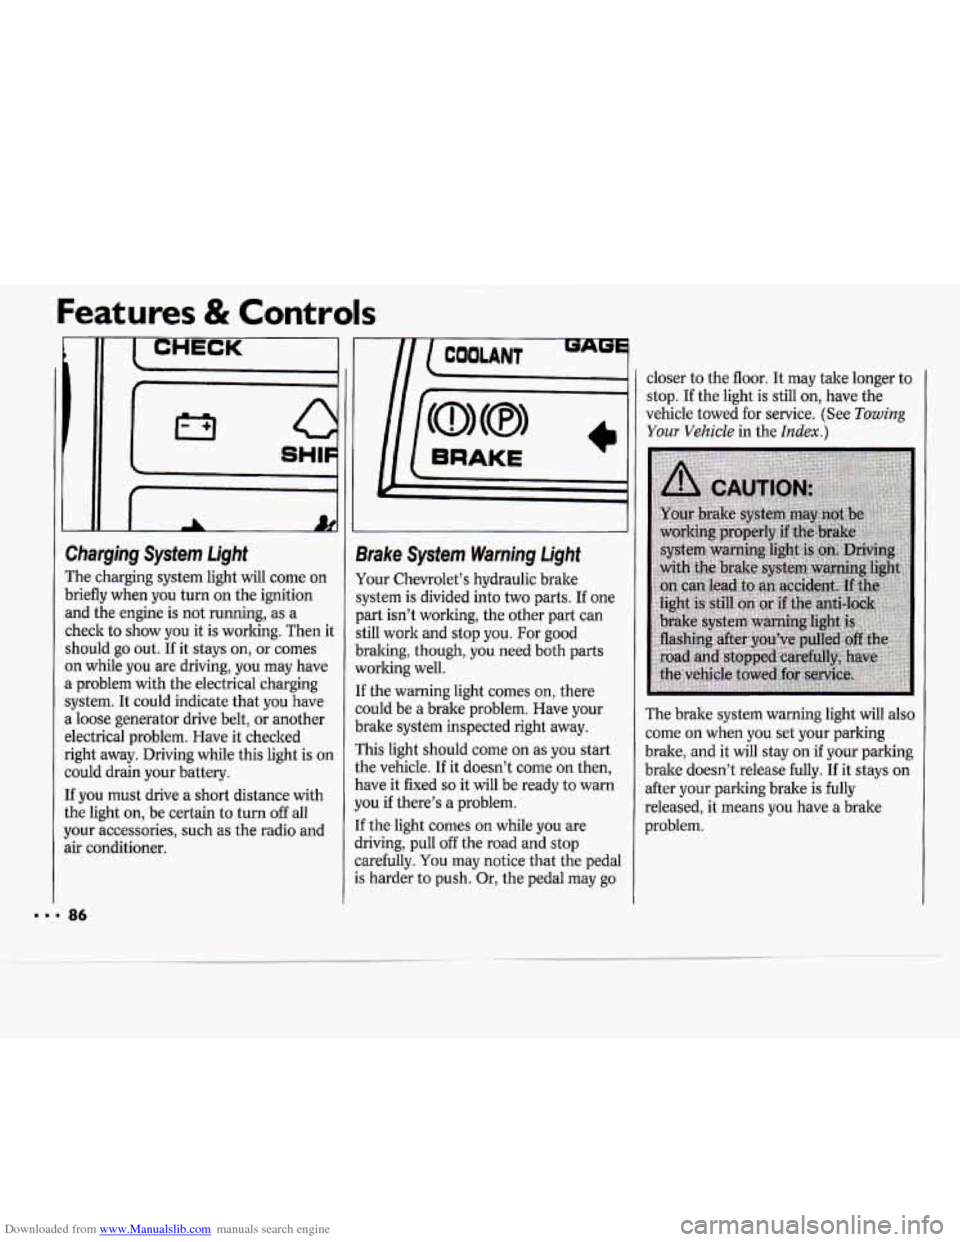
Charging System Light
The charging system light will come on
briefly when you turn on the ignition
and the engine is not running, as a
check to show you it is working. Then it
should
go out. If it stays on, or comes
on while you are driving, you may have
a problem with the electrical charging
system. It could indicate that you have
a loose generator drive belt, or another
electrical problem. Have it checked
right away. Driving while this light is on
could drain your battery.
If you must drive a short distance with
the light on, be certain to turn
off all
your accessories, such as the radio and
air conditioner.
m
9rake Sysfem Warning Light
tour Chevrolet’s hydraulic brake
;ystem is divided into two parts. If one
)art isn’t working, the other part can
;till work and stop you. For good
)raking, though, you need both parts
vorlting well.
[f the warning light comes on, there
zould be a brake problem. Have your
brake system inspected right away.
rhis light should come
on as you start
the vehicle.
If it doesn’t come on then,
have it fixed
so it will be ready to warn
you if there’s a problem.
[f the light comes on while you are
jriving, pull off the road and stop
zarefully.
You may notice that the pedal
.s harder to push. Or, the pedal may go closer
to the floor. It may take longer to
stop.
If the light is still on, have the
vehicle towed for service. (See
Towing
Your Vehicle in the Index.)
The brake system warning light will also
come
on when you set your parking
brake, and it will stay
on if your parking
brake doesn’t release fully. If it stays on
after your parking brake is
fully
released, it means you have a brake
problem.
Page 92 of 243
Downloaded from www.Manualslib.com manuals search engine In this part you'll find out how to
operate the comfort control systems and audio systems
offered with your Chevrolet. Be
sure to read about the particular
system supplied with your vehicle.
Part 3
Comfort Controls & Audio Systems
Climate Control System ........................................................................\
.................... 92
Air Conditioning System ........................................................................\
.................. 93
Rear Window Defogger ........................................................................\
..................... 95
Setting the Clock ........................................................................\
............................... 97
AM/FM Stereo Radio ........................................................................\
........................ 97
AM/FM Stereo Radio with Cassette Tape Player .................................................... 99
AM/FM Stereo Radio with Compact Disc Player.. ................................................ 101
Understanding Radio Reception. ........................................................................\
.... 104
Care of Your Cassette Tape Player ........................................................................\
. 104
Care of Your Compact Discs ........................................................................\
.......... 105
Fixed Mast Antenna ........................................................................\
........................ 105
Page 94 of 243
Downloaded from www.Manualslib.com manuals search engine Air Conditioning System
(OPTION)
The air conditioner and heater work
best if you keep your windows closed
while using them. Your vehicle also has
the flow-through ventilation system
described later in this section.
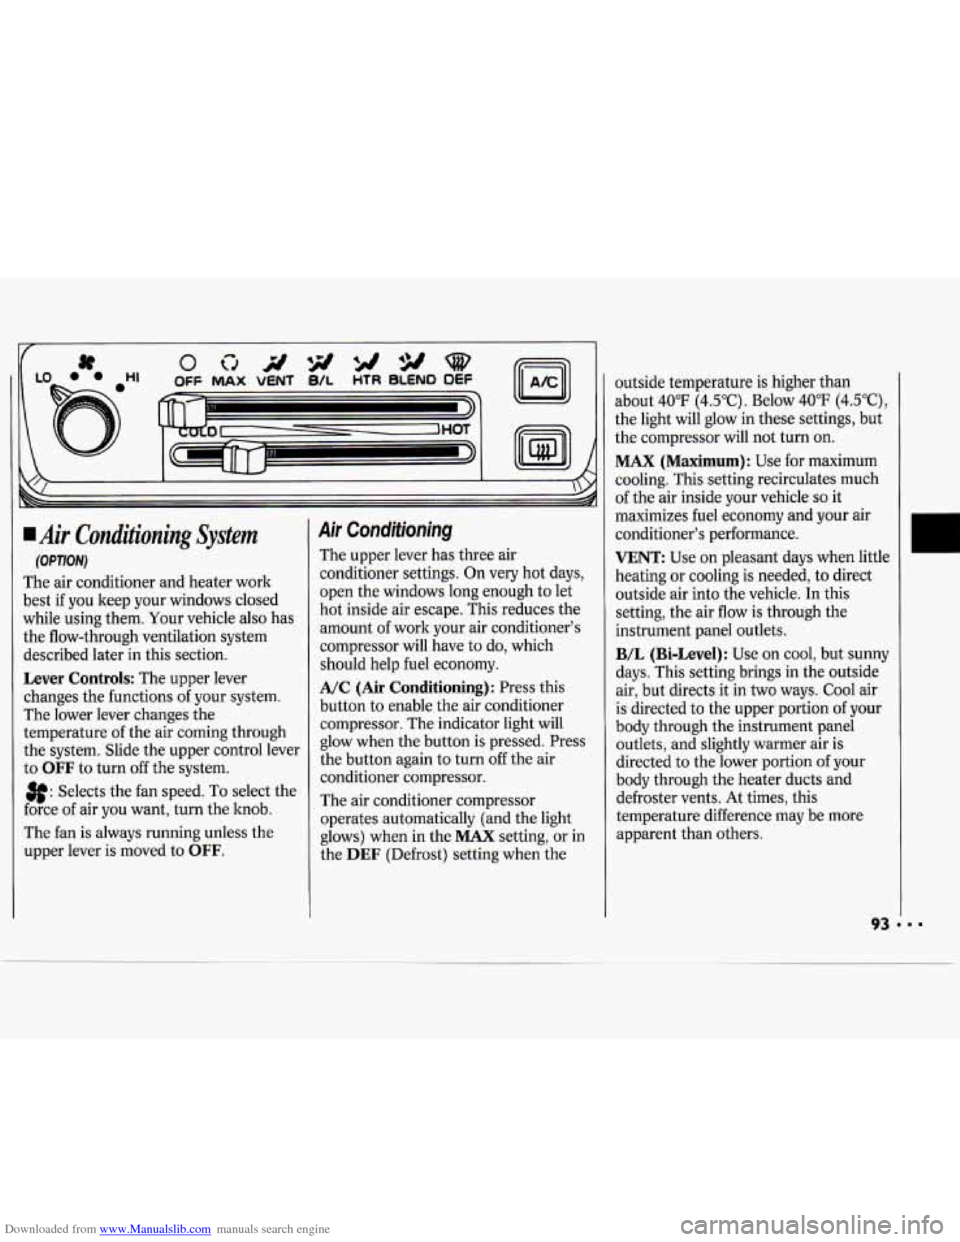
Lever Controls: The upper lever
changes the functions
of your system.
The lower lever changes the
temperature of the air coming through
the system. Slide the upper control lever
to
OFF to turn off the system.
3f: Selects the fan speed. To select the
force of air you want, turn the hob.
The fan is always running unless the
upper lever is moved to
OFF.
Air Conditioning
The upper lever has three air
conditioner settings. On very hot days,
open the windows long enough to let
hot inside air escape. This reduces the
amount of work your air conditioner's
compressor will have to do, which
should help fuel economy.
A/C (Air Conditioning): Press this
button
to enable the air conditioner
compressor. The indicator light will
glow when the button is pressed. Press
the button again to turn
off the air
conditioner compressor.
The air conditioner compressor
operates automatically (and the light
glows) when in the
MAX setting, or in
the
DEF (Defrost) setting when the outside temperature
is higher than
about 40°F (4.5"C). Below 40°F (4.5"C),
the light will glow in these settings, but
the compressor will not turn on.
MAX (Maximum): Use for maximum
cooling. This setting recirculates much
of the air inside your vehicle
so it
maximizes fuel economy and your air
conditioner's performance.
VENT: Use on pleasant days when little
heating or cooling is needed, to direct
outside air into the vehicle.
In this
setting, the air flow is through the
instrument panel outlets.
B/L (Bi-Level): Use on cool, but sunny
days. This setting brings in the outside
air, but directs it in two ways. Cool air
is directed to the upper portion of your
body through the instrument panel
outlets, and slightly warmer air is
directed to the lower portion of your
body through the heater ducts and
defroster vents. At times, this
temperature difference may be more
apparent than others.
Page 95 of 243
Downloaded from www.Manualslib.com manuals search engine Comfort Controls & Audio Systems
HTR (Heater): Use this setting to
direct most of the air flow through the
heater ducts, and some through the
windshield defroster vents.
If you have the optional engine coolant
heater and use it during cold weather,
0°F (-18°C) or lower, your heating
system will more quickly provide heat
because the engine coolant is already
warmed. See the
Index under Engine
Coolant Heater.
BLEND: This setting divides the air
flow equally between the heater ducts
and the windshield defroster vents.
DEF (Defrost): This setting directs
most air through the windshield
defroster vents, and some through the
heater ducts.
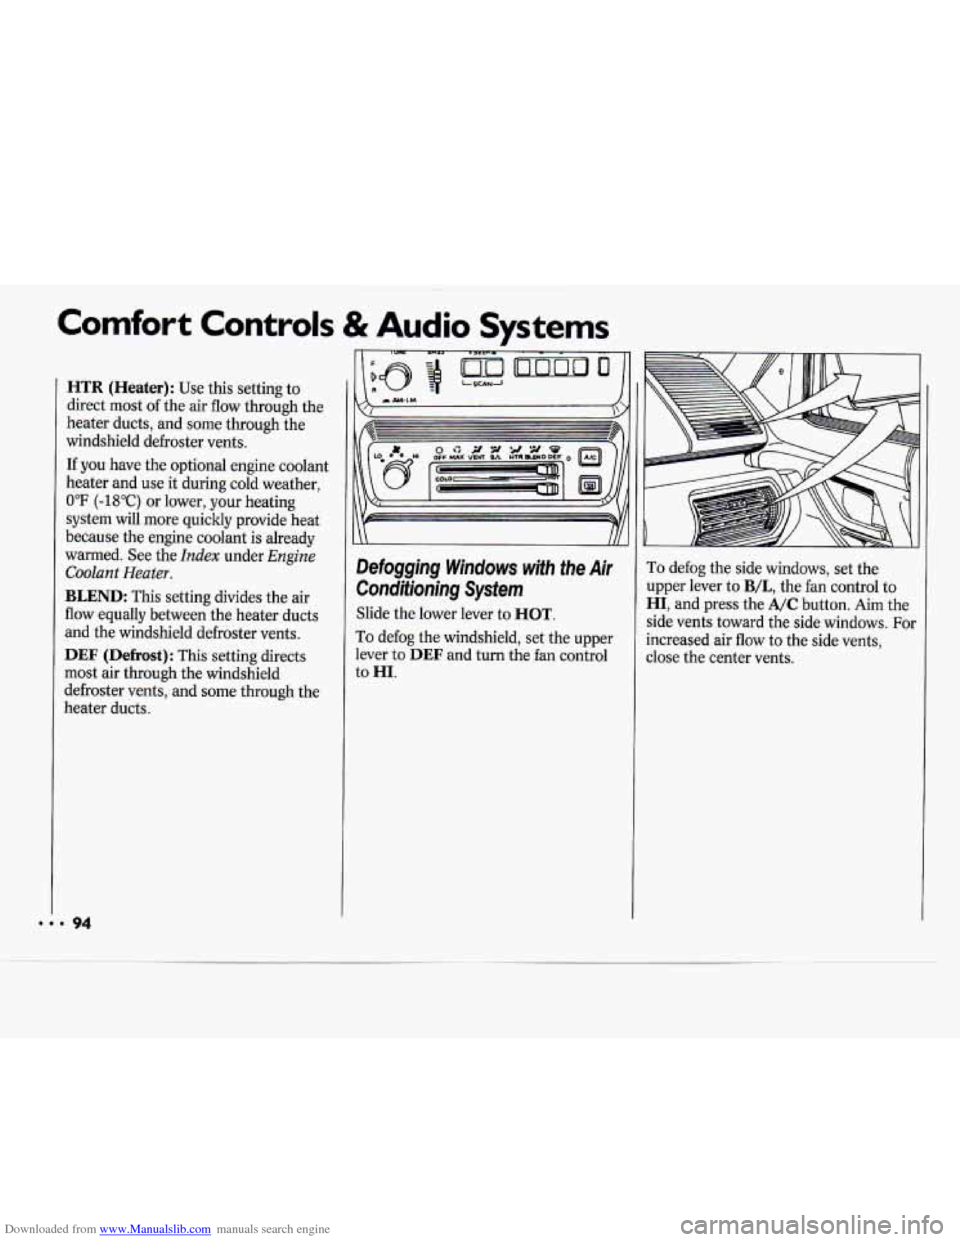
Defogging Windows with the Air
Conditioning System
Slide the lower lever to HOT.
To defog the windshield, set the upper
lever
to DEF and turn the fan control
to
HI.
To defog the side windows, set the
upper lever to
B/L, the fan control to
HI, and press the A/C button. Aim the
side vents toward the side windows. For
increased air flow to the side vents,
close the center vents.
... 94
Page 96 of 243
Downloaded from www.Manualslib.com manuals search engine Rear Window Defogger (owlonr)
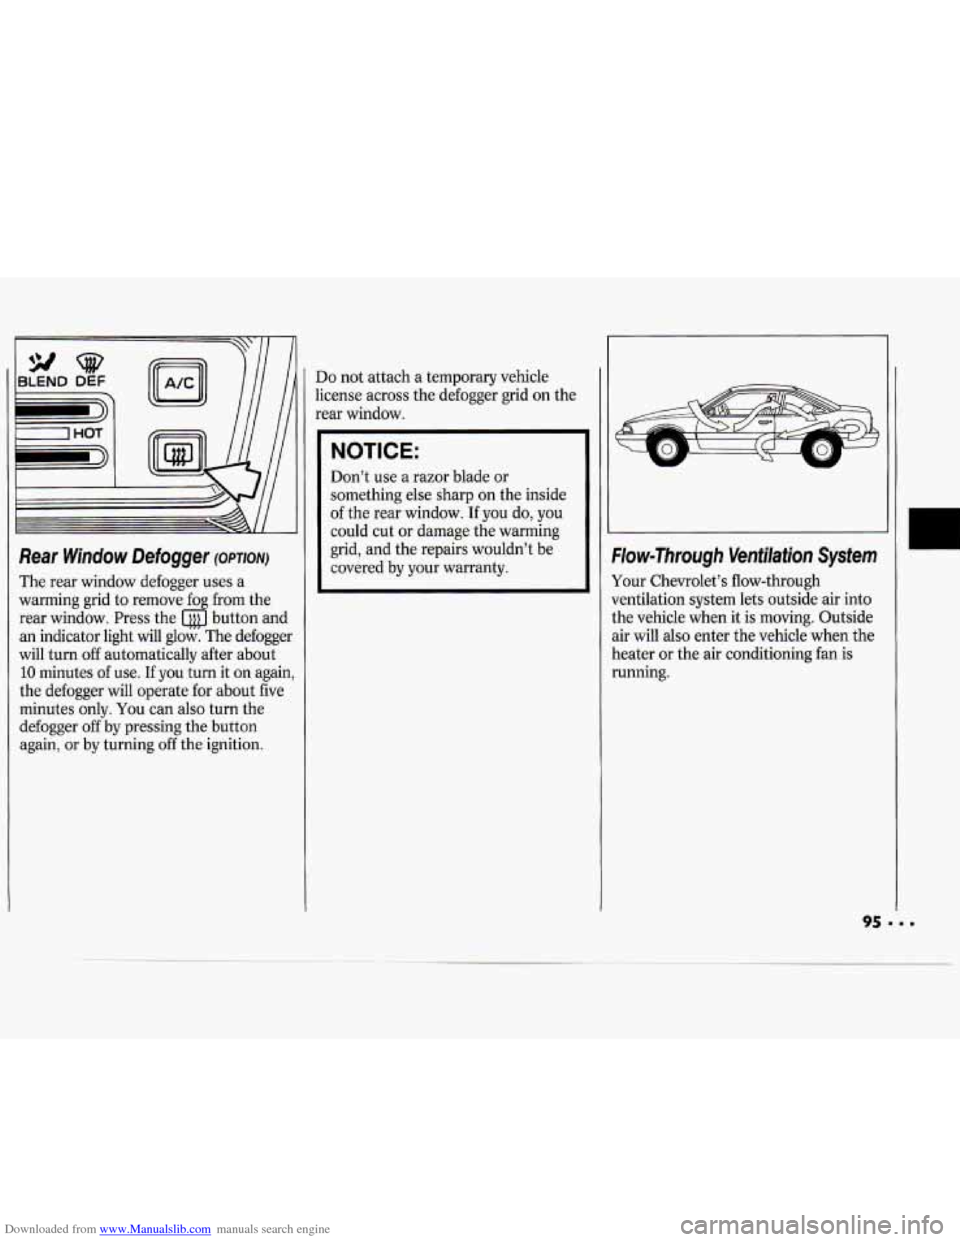
The rear window defogger uses a
warming grid to remove fog from the
rear window. Press the button and
an indicator light
will glow. The defogger
will turn
off automatically after about
10 minutes of use. If you turn it on again,
the defogger will operate for about five
minutes only.
You can also turn the
defogger
off by pressing the button
again,
or by turning off the ignition.
Do not attach a temporary vehicle
license across the defogger grid
on the
rear window.
NOTICE:
Don’t use a razor blade or
something else sharp on the inside
of the rear window. If you do, you
could cut or damage the warming
grid, and the repairs wouldn’t be
covered by your warranty.
W
Flow-Through Ventilation System
Your Chevrolet’s flow-through
ventilation system lets outside air into
the vehicle when it is moving. Outside
air will also enter the vehicle when the
heater
or the air conditioning fan is
running.
95 ‘ I.
U
.
Page 138 of 243
Downloaded from www.Manualslib.com manuals search engine I
NOTICE:
If your engine catches fire because
you keep driving with no coolant,
your vehicle can be badly damaged.
The costly repairs would not be
covered by your warranty.
If No Steam Is Coming From your
Engine
If you get the overheat warning but see
or hear no steam, the problem may not
be too serious. Sometimes the engine
can get a little too hot when you:
Climb a long hill on a hot day.
Stop after high speed driving.
Idle for long periods in traffic.
If you get the overheat warning with no
sign
of steam, try this for a minute or so:
1. If you have an air conditioner, turn it
2. Turn on your heater to full hot at the
Off.
highest fan speed and open the
windows as necessary.
3.
Try to keep your engine under load
(in
a drive gear where the engine
runs slower).
If you no longer have the overheat
warning, you can drive. Just
to be safe,
drive slower for about ten minutes.
If
the warning doesn’t come back on, you
can drive normally.
If the warning continues, pull over,
stop, and park your vehicle right away.
If there’s still no sign
of steam, you can
idle the engine for two or three minutes
while you’re parked, to see if the
warning stops. But then, if you still
have the warning, TURN
OFF THE
ENGINE AND
GET EVERYONE OUT
OF THE VEHICLE until it cools down.
You may decide not
to lift the hood but
to get service help right away.
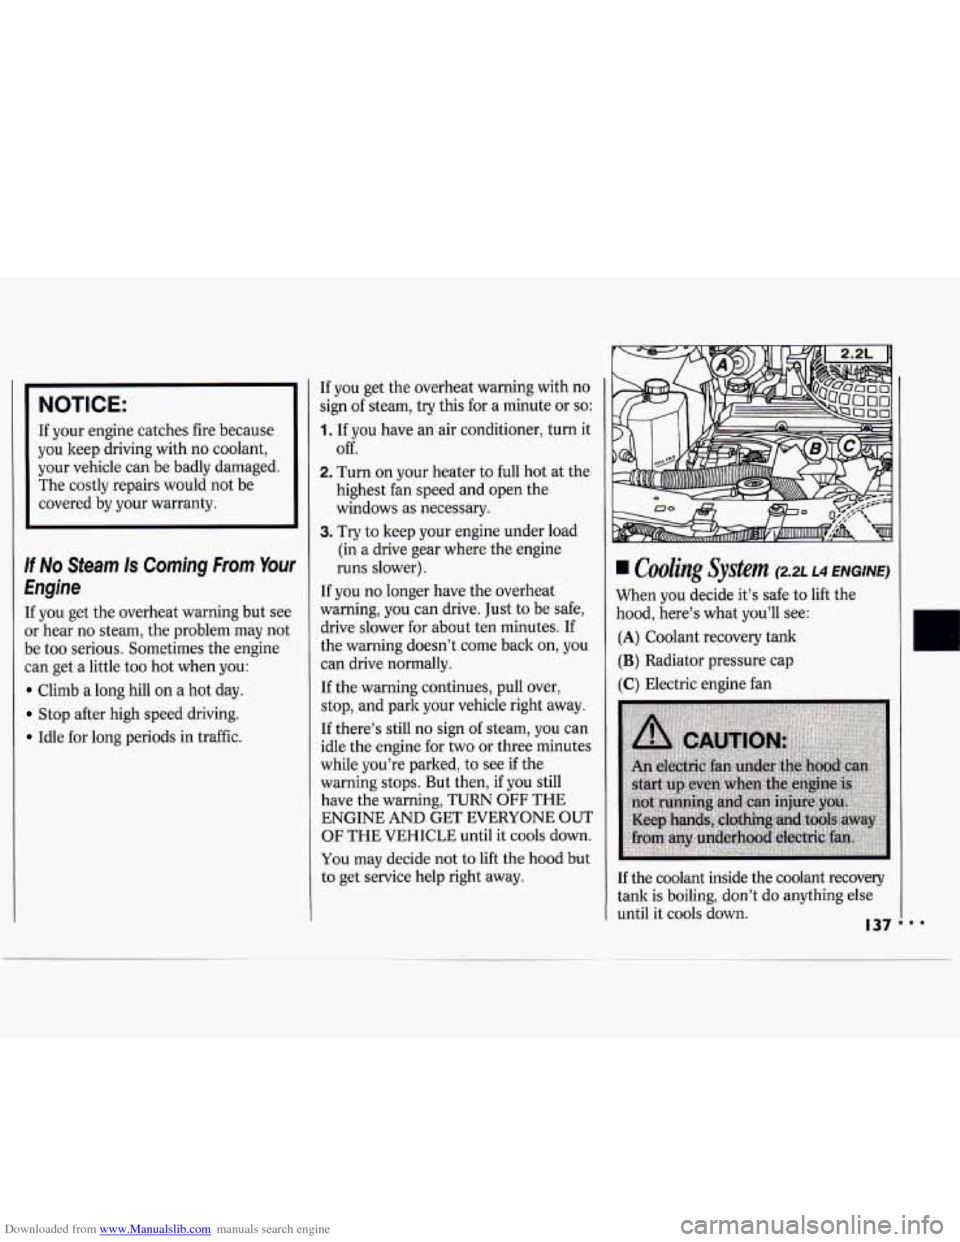
hdirtg system (2.2L L4 ENGINE)
When you decide it’s safe to lift the
hood, here’s what you’ll see:
(A) Coolant recovery tank
(B) Radiator pressure cap
(C) Electric engine fan
If the coolant inside the coolant recovery
tank is boiling, don’t do anything else
until
it cools down. I37
Page 176 of 243
Downloaded from www.Manualslib.com manuals search engine Use new brake fluid from a sealed container only, and always clean the
brake fluid reservoir cap before
removing it.
I
NOTICE:
DOT-5 silicone brake fluid can
Don’t let someone put in the
damage your vehicle. Don’t
use it.
wrong kind of fluid. For example,
just
a few drops of mineral-based
oil, such as engine
oil, in your
brake system can damage brake system parts
so badly that they’ll
have to be replaced.
Brake fluid can damage paint, so
be careful not to spill brake fluid
on your vehicle. If you do, wash it
OF immediately. See Appearance
Cave
in the Index.
II
Brake Wear
Your Chevrolet has front disc brakes
and rear drum brakes.
Disc brake pads have built-in wear
indicators that make a high-pitched warning sound when
~ the
b&e..p@dsa .ve,
worn and new‘
pads are needed: .The ‘
sound may come and go or be heard all
the time your vehicle is moving (except
when you are pushing on the brake
pedal firmly).
NOTICE:
Continuing to drive with worn-out
brake pads could result in costly
brake repair.
Some driving conditions or climates
may cause
a brake squeal when the
brakes are first applied or lightly
applied. This does not mean something
is wrong with your brakes. Your
rear drum brakes don’t have wear
indicators, but if you ever hear a rear
brake rubbing noise, have the rear brake
linings inspected.
Also, the rear brake
drums should be removed and
inspected each time the tires are
removed for rotation or changing. When
you have the front brakes replaced,
have the rear brakes inspected, too.
Brake linings should always be replaced
as complete axle sets.
Brake Pedal Travel
See your dealer if the brake pedal does
not return to normal height, or if there
is
a rapid increase in pedal travel. This
could be a sign of brake trouble.
Brake Adjustment
Every time you make a moderate brake
stop, your disc brakes adjust for wear. If
you rarely make a moderate or heavier stop, then your brakes might not adjust
correctly.
If you drive in that way, then
- very carefully - make a few
moderate brake stops about every
1,000
miles (1600 lun), so your brakes will
adjust properly.
Page 187 of 243
Downloaded from www.Manualslib.com manuals search engine Service & Appearance Care
Wheel Alignment and Tire Balance
The wheels on your vehicle were
aligned and balanced carefully at the
factory
to give you the longest tire life
and best overall performance.
In most cases, you will not need to have
your wheels aligned again. However, if
you notice unusual tire wear or your
vehicle pulling one way or the other, the
alignment may need
to be reset. If you
notice your vehicle vibrating when
driving on
a smooth road, your wheels
may need to be rebalanced.
Wheel Replacement
Replace any wheel that is bent, cracked
or badly rusted.
If wheel nuts keep
coming loose, the wheel, wheel bolts,
and wheel nuts should be replaced.
If
the wheel leaks air, replace it (except
some aluminum wheels, which can
sometimes be repaired). See your
Chevrolet dealer if any
of these
conditions exist.
Your dealer will know the kind of wheel
you need.
Each new wheel should have the same
load carrying capacity, diameter, width,
offset, and be mounted the same way as
the one it replaces.
If you need to replace any of your
wheels, wheel bolts, or wheel nuts,
replace them only with new
GM
original equipment parts. This way, you
will be sure
to have the right wheel,
wheel bolts, and wheel nuts for your
Chevrolet model.
I NOTICE:
The wrong wheel can also cause
problems with bearing life, brake
cooling, speedometer/odometer
calibration, headlight aim, bumper
height, vehicle ground clearance,
and tire or tire chain clearance to
the body and chassis.