1993 CHEVROLET S10 parking brake
[x] Cancel search: parking brakePage 81 of 356
Downloaded from www.Manualslib.com manuals search engine 4 LOW: This setting also engages your front axle to give you extra traction.
You may never need
4 LOW. It sends the maximum power to all four wheels.
You might choose
4 LOW if you were driving off-road in sand, mud, or deep
snow and climbing or descending steep hills.
You can shift from
2 WHEEL to 4 HIGH or from 4 HIGH to 2 WHEEL while
the vehicle is moving.
It is not necessary for you to press the transfer case
shift lever button. Your front axle will engage faster if you take your foot
off
of the accelerator for a few seconds after you shift.
To shift into or out of 4 LOW or N SET PARKING BRAKE:
-
1. Stop your vehicle and shift your transmission into neutral.
2. Press the transfer case shift button and shift in one continuous motion.
Don’t pause in
N SET PARKING BRAKE as you shift into or out of 4 LOW,
or your gears could clash.
Remember that driving in
4 HIGH or 4 LOW may reduce fuel economy. Also,
driving in four-wheel drive on dry pavement could cause your tires to wear
faster and make your transfer case harder to shift.
Electronic Transfer Case
1
KO41 2
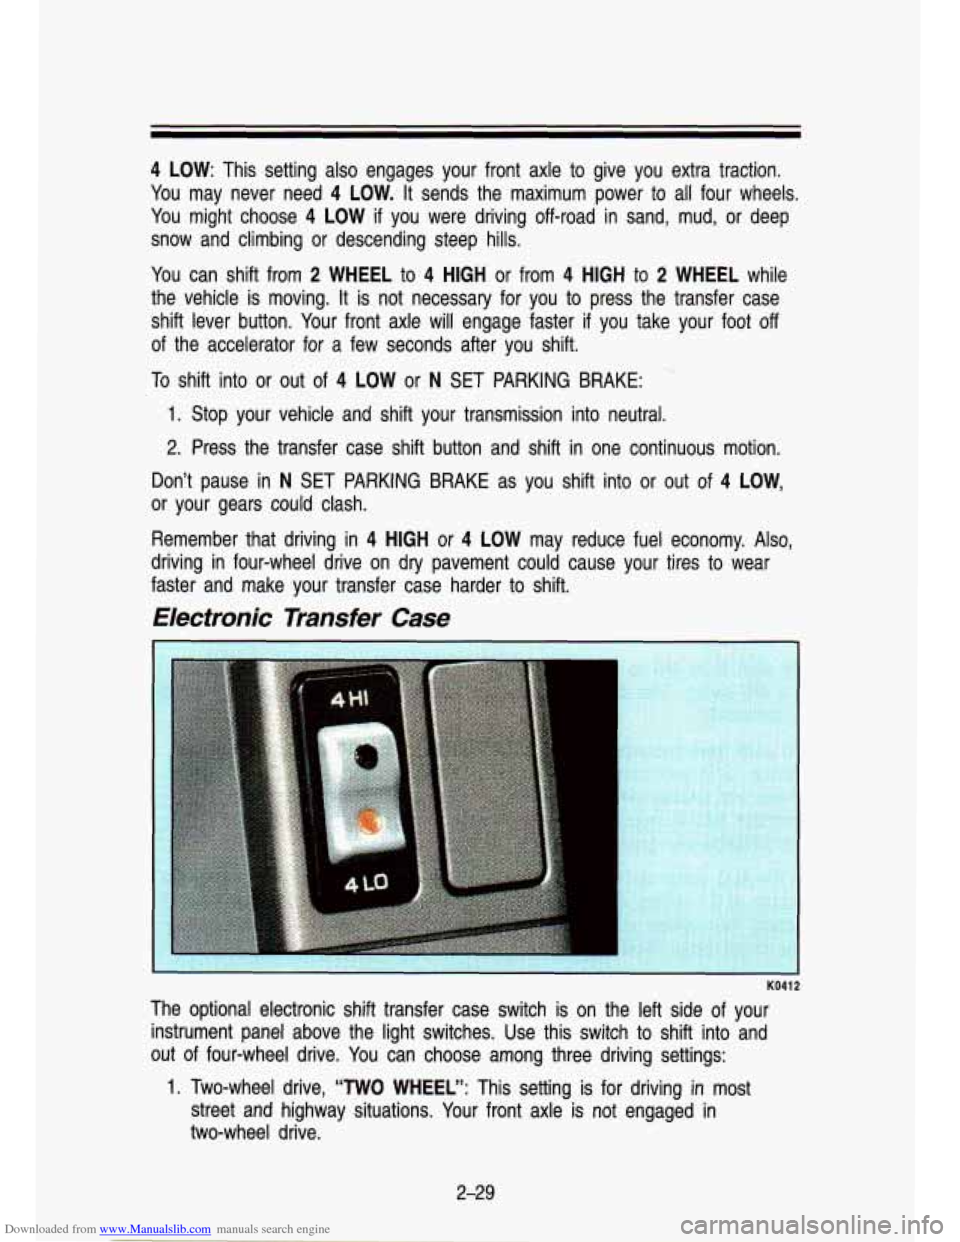
The optional electronic shift transfer case switch is on the left side of your
instrument panel above the light switches. Use this switch to \
shift into and
out of four-wheel drive. You can choose among three driving settings:
1. Two-wheel drive, “TWO WHEEL”: This setting is for driving in most
street and highway situations. Your front axle
is not engaged in
two-wheel drive.
2-29
Page 101 of 356
Downloaded from www.Manualslib.com manuals search engine Dayiime Running Lights (Canada Only)
The Canadian Federal Government has decided that “Daytime Run\
ning Lights” (DRL) are a useful feature, in that DRL can make \
your vehicle more
visible to pedestrians and other drivers during daylight hours. \
DRL is required
on all new vehicles sold in Canada.
The high beam headlights will come on at reduced brightness in\
daylight when:
The ignition is on
The headlight switch is off, and
The parking brake is released.
vvnen you turn on your headlights, the DRL will switch
off and the exrerlor
lights will come on. When you turn
off the headlights, the exterior lights will
go out and high beams will change to the reduced brightness of DRL again.
The DRL indicator light on the instrument panel will go on wh\
enever the DRL is on. This light means that only the DRL is on. When you turn \
on your
exterior lights, this light will go out. Of course, you may still turn on the
headlights any time you need to.
To idle your vehicle with the DRL
off, set the parking brake. The DRL will
stay
off until you release the parking brake.
Headlights-On Reminder
A reminder tone will sound when your headlights are turned on an\
d your
ignition is in
Off, LOCK or Acc. To turn the tone off, turn the dimmer dial all
the way to the left.
2-49
Page 118 of 356

Downloaded from www.Manualslib.com manuals search engine i
Features & Controls
Gages can indicate when there may be or is a problem with one of your
vehicle’s functions. Often gages and warning lights work toge\
ther
to let you
know when there’s a problem with your vehicle.
When one of the warning lights comes on and stays on when you are
driving, or when one of the gages shows there may be a probl\
em, check the
section that tells you what to do about
it. Please follow the manual’s advice.
Waiting to do repairs can be costly-and even dangerous.
So please get to
know your warning lights and gages. They’re a big help.
Brake System Warning Light
Standard Cluster Digital Cluster
Pol 59
Your vehicle’s hydraulic brake system is divided into two parts. If one part
isn’t working, the other part can still work and stop you. \
For good braking,
though, you need both parts working well. Your vehicle also ha\
s rear wheel anti-lock brakes. If the warning light goes on, there could be a brake problem
with either your regular or rear wheel anti-lock brakes, or both. Have you\
r
brake system inspected right away.
This light should come on as you start the vehicle. If it do\
esn’t come on
then, have it fixed
so it will be ready to warn you if there’s a problem.
This light will also come on when you set your parking brake, and will stay
on if your parking brake doesn’t release fully. If it stays on after your parking
brake is fully released,
it means you may have a brake problem. If the light
comes on while driving, pull
off the road and stop carefully. You may notice
that the pedal is harder
to push. Or, the pedal may go closer to the floor. It
may take longer to stop. If the light is still on, have the vehicle towed for
service. (See “Towing Your Vehicle” in the Index.)
2-66
I
Page 123 of 356

Downloaded from www.Manualslib.com manuals search engine CHECK GAGES Light
KO281
If you have the standard instrument cluster, this light will come \
on briefly
when you are starting the engine.
If the light comes on and stays on while
you are driving, check your various gages to see
if they are in the warning
zones.
Daytime Running Lights (DRL) Indicator Light (Canada Only)
KO242
This green light with the DRL symbol is on the lower left of the instrument
cluster. The DRL indicator is on whenever the ignition is on \
and the headlight
switch and parking brake are
off. For more details about DRL, see "Lights" in
this section.
2-71
Page 162 of 356
Downloaded from www.Manualslib.com manuals search engine c. -. .. .
Your Driving and the Road
Turn and lane change signals: Always signal when you plan to \
turn or
change lanes.
If necessary, you can use hand signals out the window: Left arm \
straight out
for a left turn, down for slow or about-to-stop, and up for a right turn.
Slowing down:
If time allows, tap the brake pedal once or twice in advance
of slowing or stopping. This warns the driver behind you.
Disabled: Your four-way flashers signal that your vehicle is disabled or is a
hazard. See “Hazard Warning Flasher’’ in the Index.
Traffic Officer
The traffic police officer is also a source of important information. The officer’s
signals govern, no matter what the traffic lights or other sig\
ns say.
The next part discusses some of the road conditions you may encounter.
Defensive Driving
The best advice anyone can give about driving is: Drive defens\
ively.
Please
start with a very important safety device in your vehicle: Buckle up.
(See “Safety Belts” in the Index.)
Defensive driving really means “be ready for anything.” On\
city streets, rural
roads, or freeways, it means “always expect the unexpected.”
Assume that pedestrians or other drivers are going to be careless and make
mistakes. Anticipate what they might
do. Be ready for their mistakes.
Expect children to dash out from behind parked cars, often followed by other
children. Expect occupants in parked cars to open doors into traffic. Watch for
movement in parked cars-someone may be about to open a door.
Expect other drivers to run stop signs .when you are on a through street. Be
ready to brake
if necessary as you go through intersections. You may not
have to use the brake, but if you
do, you will be ready.
If you’re driving through a shopping center parking lot where there are
well-marked lanes, directional arrows, and designated parking are\
as, expect
some drivers to ignore all these markings and dash straight toward one part
of the lot.
Pedestrians can be careless. Watch for them. In general, you m\
ust give way
to pedestrians even
if you know you have the right of way.
Rear-end collisions are about the most preventable of accidents. Yet they are
common. Allow enough following distance. It’s the best defens\
ive driving
4-8
Page 170 of 356
Downloaded from www.Manualslib.com manuals search engine Your Driving and the Road
Brake System Warning Light
Standard Cluster
Digital Cluster
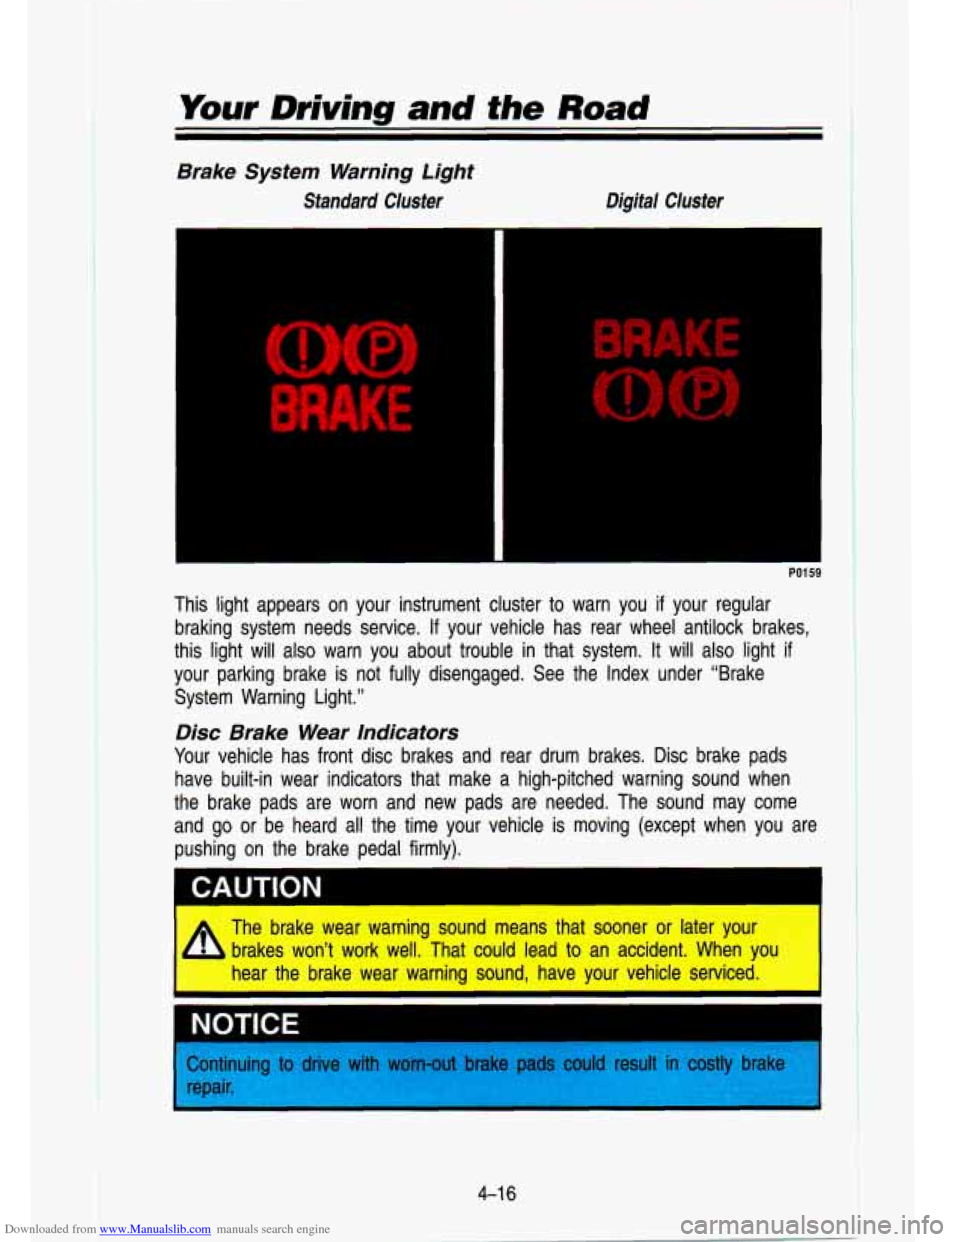
This light appears on your instrument cluster to warn you if your regular
braking system needs service.
If your vehicle has rear wheel antilock brakes,
this light will
also warn you about trouble in that system. It will also light if
your parking brake is not fully disengaged. See the Index unde\
r “Brake
System Warning Light.”
Disc Brake Wear Indicators
Your vehicle has front disc brakes and rear drum brakes. Disc brake pads
have built-in wear indicators that make a high-pitched warning \
sound when
the brake pads are worn and new pads are needed. The sound m\
ay come
and go or be heard all the time your vehicle is moving (except \
when you are
pushing on the brake pedal firmly).
The brake wear warning sound means that sooner or later your brakes won’t work well. That could lead to an accident. When yo
hear the brake wear warning sound, have your vehicle serviced. \
I NOTICE
>ontinuing ti
epair.
e with worn-out bra1 could sult in lstly brake
Page 182 of 356
Downloaded from www.Manualslib.com manuals search engine Your Driving and the Road
Attach a flag to the vehicle to make you more visible to approaching
traffic on trails or hills.
Sound the horn as you approach the top of hill to let opposing traffic
know you’re there.
Use your headlights even during the day. They make you more v\
isible to
oncoming traffic.
* Drivilng to the top (crest) of a hill at full speed can cause an
I accident. There could be a drop-off, embankment, cliff, or even
another vehicle. You could be seriously injured or killed.
As you near
the
top of a hill, slow down and stay alert. I
Q: What should I do if my vehicle stalls, or is about to stall, and I can’t
make
it up the hill?
A: If this happens, there are some things you should do, and there are some
things you must not
do. First, here’s what you should do:
Push the brake pedal to stop the vehicle and keep it from rolling
backwards. Also, apply the parking brake.
If your engine is still running, shift the transmission into rever\
se, release
the parking brake, and slowly back down the hill in reverse.
If your engine has stopped running, you’ll need to restart it. With the
brake pedal depressed and the parking brake still applied, shift the
transmission
to P (Park) (or, shift to N (Neutral) if your vehicle has a
manual transmission) and restart the engine. Then, shift
to R (Reverse),
release the parking brake, and slowly back down the hill in reverse.
As you are backing down the hill, put your left hand on the \
steering
wheel at the
12 o’clock position. This way, you’ll be able to tell if your
wheels are straight or turned
to the left or right as you back down.
Here are some things you must not
do if you stall, or are about to stall,
when going up a hill.
Never attempt to prevent a stall by shifting into N (Neutral) (or
depressing the clutch,
if you have a manual transmission) to “rev-up” the
engine and regain forward momentum. This won’t work. Your vehicle will
roll backwards very quickly and you could go out of control.
4-28
I
Page 183 of 356
Downloaded from www.Manualslib.com manuals search engine Instead, apply the regular brake to stop the vehicle. Then apply the
parking brake. Shift into reverse, release the parking brake, a\
nd slowly
back down.
Never attempt to turn around if you are about to stall when going up a
hill. If the hill is steep enough to stall your vehicle, it’s steep enough to
cause you to roll over
if you turn around. If you can’t make it up the
hill, you must back down the hill.
Q: Suppose, after stalling, I try to back down the hill and decide I just
can’t
do it. What should I do?
A: Set the parking brake, put your transmission in P (Park) (or the manual
transmission in first gear), and turn
off the engine. Leave the vehicle and go
get some help. Exit on the uphill side and stay clear of the path the vehicle
would take
if it rolled downhill. Do not shift the transfer case to N (Neutral)
when you leave the vehicle. Leave it in some gear.
A
If you have a manual transfer case shift lever, shifting the \
transfer
case to
N (Neutral) can cause your vehicle to roll even if the
transmission is in
P (Park) (or, if you have the manual transmission,
even
if you’re in gear). This is because the N (Neutral) position on
the transfer case overrides the transmission.
If you are going to
leave your vehicle, set the parking brake and shift the transmission
to
P (Park) (or, put your manual transmission in first gear). But do
not shift the transfer case to the
N (Neutral) position. Leave the
transfer case in the
2 WHEEL, 4 HIGH or 4 LOW position.
Driving Downhill
When off-roading takes you downhill, you’ll want to consider a number of
things:
How steep is the downhill? Will I be able to maintain vehicle control?
What’s the surface like? Smooth? Rough? Slippery? Hard-packed \
dirt?
Gravel?
Are there hidden surface obstacles? Ruts? Logs? Boulders?
What’s at the bottom of the hill? Is there a hidden creek bank or even a
river bottom with large rocks?
4-29