1993 CHEVROLET S10 wheel torque
[x] Cancel search: wheel torquePage 70 of 356

Downloaded from www.Manualslib.com manuals search engine Features & Controls
I
e
OD (Automatic Overdrive). This position is for normal driving. If you need
more power for passing, and you’re:
- Going less than about 35 mph (56 km/h), push your accelerator
pedal about halfway down.
- Going about 35 mph (56 km/h) or more, push the accelerator all the
way down. You’ll shift down to the next gear and have more power.
OD should not be used when towing a trailer, carrying a heavy load,
driving on steep hills, or for off-road driving. Select
D (third gear) when
operating the vehicle under any of these conditions.
D (Third Gear). This is like OD, but you never go into Overdrive. You
should use
D when towing a trailer, carrying a heavy load, driving on
steeps hills, or for off-road driving.
2 (Second Gear). This position gives you more power but lower \
fuel
economy. You can use
2 (Second Gear) on hills. It can help control your
speed as you go down steep mountain roads, but then you would\
also
want to use your brakes off and on.
If you have a 4.3L engine (Codes Z and W) and if you manually select
2, the transmission will drive in second gear. You may use this feature
for reducing torque
to the rear wheels when you are trying to start your
vehicle from a stop on slippery road surfaces.
1 (First Gear). This position gives you even more power (but \
lower fuel
economy) than
2. You can use it on very steep hills, or in deep snow or
mud. If the selector lever is put in 1, the transmission won’t shift into
first gear until the vehicle is going slowly enough.
2-1 8
Page 74 of 356
Downloaded from www.Manualslib.com manuals search engine Featums & Controls
To release the parking brake:
Hold the regular brake pedal down. Pull the brake release lever.
I NOTICE
If you are on a hill:
See “Parking on Hills” in the Index. That part shows how\
to turn your front
wheels.
If you are towing a trailer and are parking on any hill:
See “Towing a Trailer” in the Index. That part shows what to
do first to keep
the trailer from moving.
Torque Lock
The parking brake should be set first whenever leaving the driver’s seat. If
you are parked on a hill and the transmission is placed in P (Park) before
the parking brake is set, the weight of the vehicle may put too much force
on the parking pawl in the transmission.
It may be difficult to pull the selector
lever out of
P (Park). This is called “torque lock.” To prevent this, the parking
brake should be set BEFORE moving the selector lever
to P (Park).
When preparing to move the vehicle, the selector lever should \
be moved out of
P (Park) BEFORE releasing the parking brake. Set the parking br\
ake first,
Then release the transmission from
P (Park), even on level surfaces.
If “torque lock” does occur, you may need to have another vehicle nudge this
vehicle uphill to take some
of the pressure off the transmission while you pull
the selector lever out of
P (Park).
2-22
~
Page 204 of 356
Downloaded from www.Manualslib.com manuals search engine Your Driving and the Road
I ~~~~~~~~~~~~~~~~~~~~~~~~~~~~~~~~~~~~~
",.*,lcG~2*"*w" "* .**b;.. "~~" nl ~ -; *_ -~ ,,-,., ',.".~
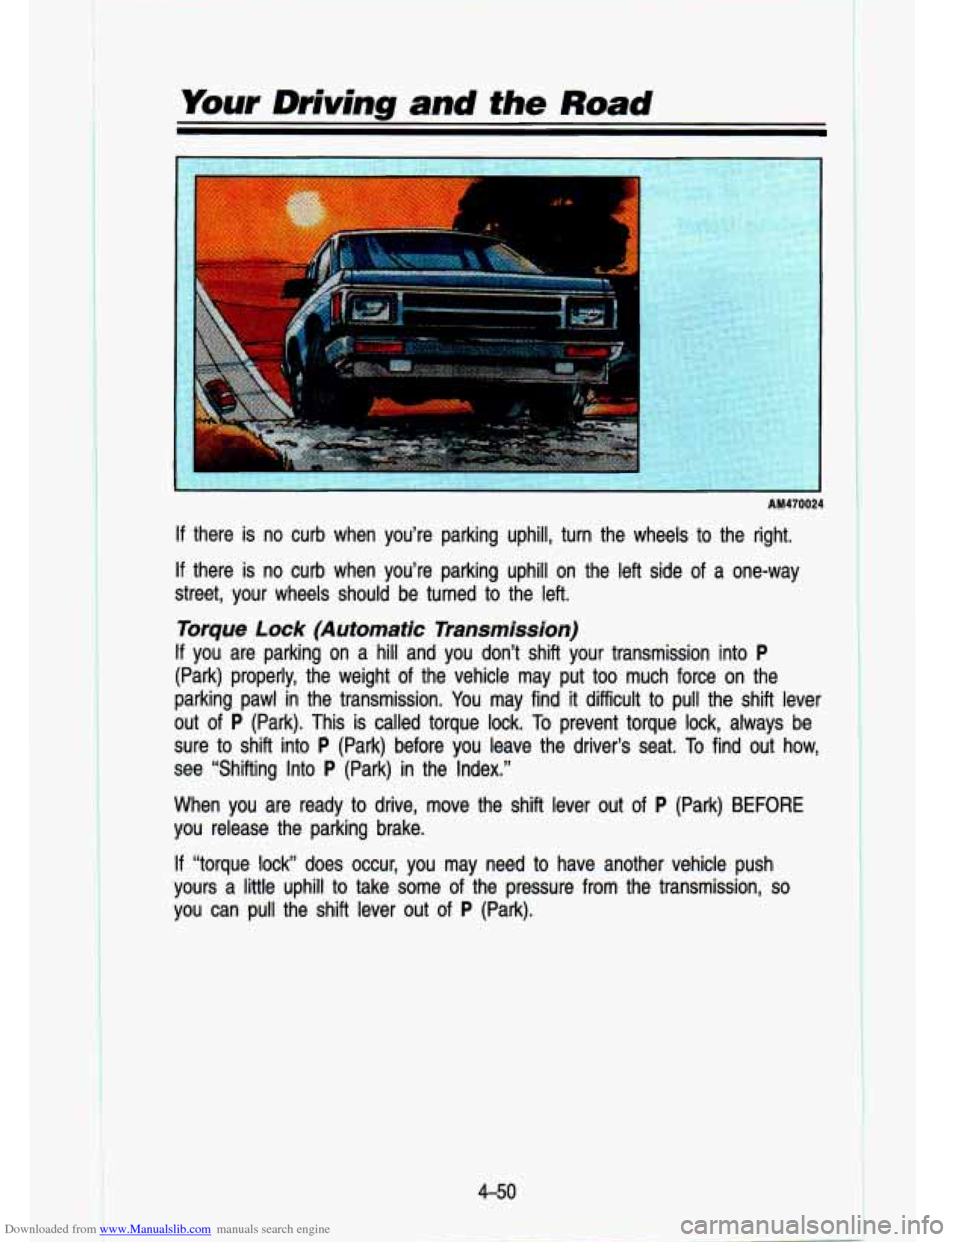
If there is no curb when you're parking uphill, turn the wheels to the right.
If there is no curb when you're parking uphill on the left side \
of a one-way
street, your wheels should be turned
to the left.
Torque Lock (Automatic Transmission)
If you are parking on a hill and you don't shift your transmissi\
on into P
(Park) properly, the weight of the vehicle may put too much \
force on the
parking pawl in the transmission.
You may find it difficult to pull the shift lever
out of
P (Park). This is called torque lock. To prevent torque lock, always be
sure to shift into
P (Park) before you leave the driver's seat. To find out how,
see "Shifting Into
P (Park) in the Index."
When you are ready
to drive, move the shift lever out of P (Park) BEFORE
you release the parking brake.
AM470024
If "torque lock" does occur, you may need to have another vehicle push
yours a little uphill
to take some of the pressure from the transmission, so
you can pull the shift lever out of P (Park).
4-50
Page 243 of 356

Downloaded from www.Manualslib.com manuals search engine 1
I
KO758
Tighten the wheel nuts firmly in a criss-cross sequence as shown. Remove
the wheel blocks.
A
Incorrect wheel nuts or improperly tightened wheel nuts can cause
the wheel to become loose and even come
off. This could lead to
an accident. Be sure to use the correct wheel nuts. If you have to
replace them, be sure
to get the right kind.
Stop somewhere as soon as you can and have the nuts tightened
with
a torque wrench to 95 ft. Ibs. (1 30 N.m ).
Storing The Tire in The Underbody Carrier
Put the tire on the ground at the rear of the vehicle, with the valve stem
pointed down and to the rear.
Pull the retaining bar through the wheel. Put the chisel end
of the wheel
wrench, on an angle, through the hole in the rear bumper and into the hoist
shaft. Turn the wheel wrench clockwise until the tire is raised against the
underside of the vehicle.
You will hear two “clicks” when the tire is secure,
but pull on the tire to
make sure.
5-27
Page 293 of 356
Downloaded from www.Manualslib.com manuals search engine K2655
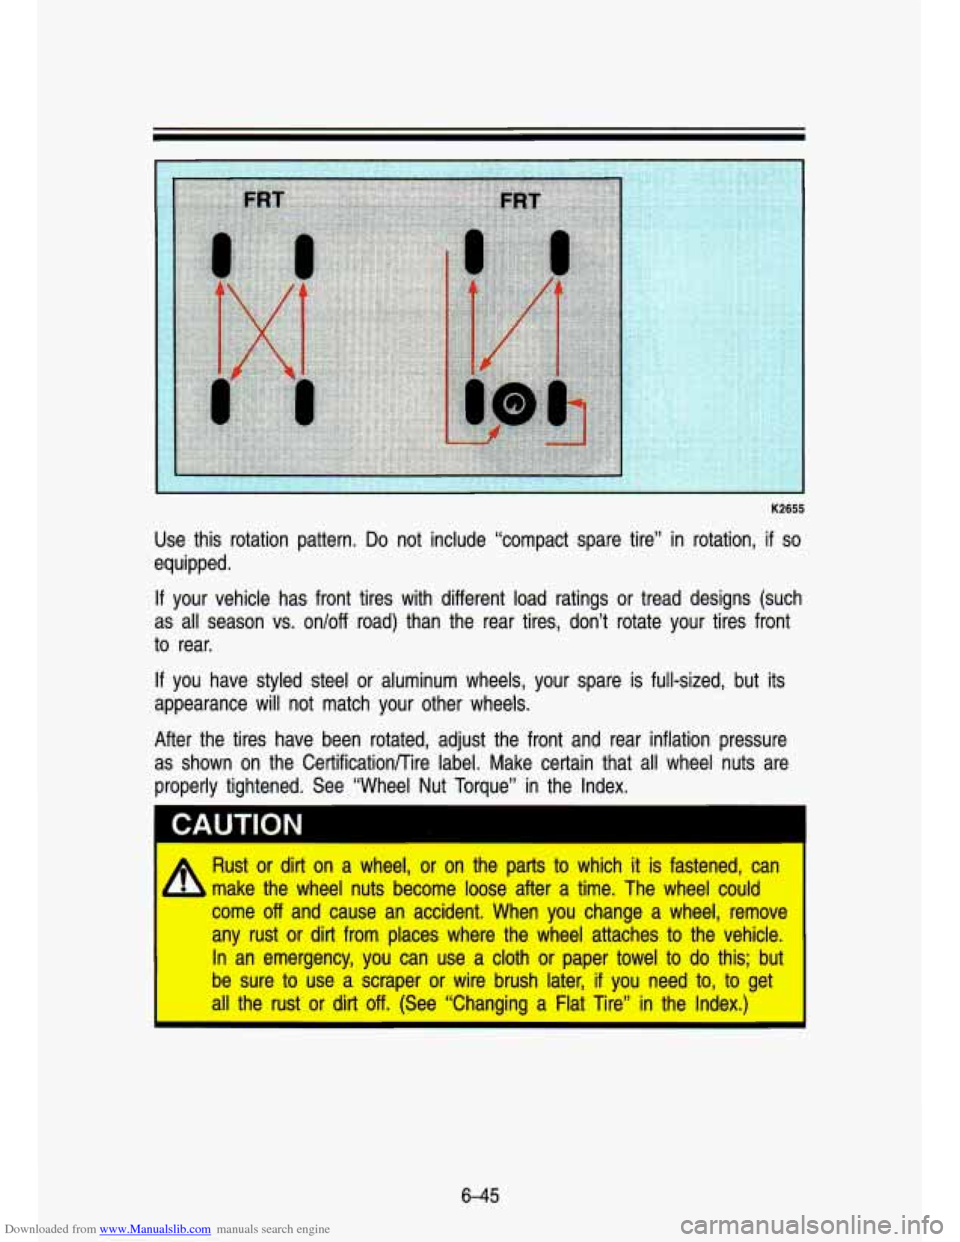
Use this rotation pattern. Do not include “compact spare tire” in rotation, if so
equipped.
If your vehicle has front tires with different load ratings or tr\
ead designs (such
as all season vs. on/off road) than the rear tires, don’t \
rotate your tires front
to rear.
If you have styled steel or aluminum wheels, your spare is full-s\
ized, but its
appearance will not match your other wheels.
After the tires have been rotated, adjust the front and rear \
inflation pressure as shown on the CertificationRire label. Make certain that
all wheel nuts are
properly tightened. See “Wheel Nut Torque” in the Index.
A
Rust or dirt on a wheel, or on the parts to which it is fastened, can
make the wheel nuts become loose after a time. The wheel coul\
d
come off and cause an accident. When you change a wheel, remove
any rust or dirt from places where the wheel attaches to the \
vehicle.
In an emergency, you can use a cloth or paper towel to
do this; but
be sure to use a scraper or wire brush later, if you need to, to get
all the rust or dirt off. (See “Changing a Flat Tire” in t\
he Index.)
6-45
Page 309 of 356
Downloaded from www.Manualslib.com manuals search engine Be sure to use the correct fuse. If you ever have a problem on the road and
don’t have a spare fuse, you can “borrow” one of the correct value. Just pick
some feature of your vehicle that you can get along without-like the radio or
cigarette lighter-and use its fuse,
if it is of the value you need. Replace it
as soon as you can. See “Fuses and Circuit Breakers” in this section.
Cap cities and Specification Charts
Replac -merit Parts
Replacement part numbers listed in this section are based on the latest
information available at the time of printing, and are subject to change.
If a
part listed in this manual is not the same as the part used in your vehicle
when
it was built, or if you have any questions, please contact your GM truck
dealer.
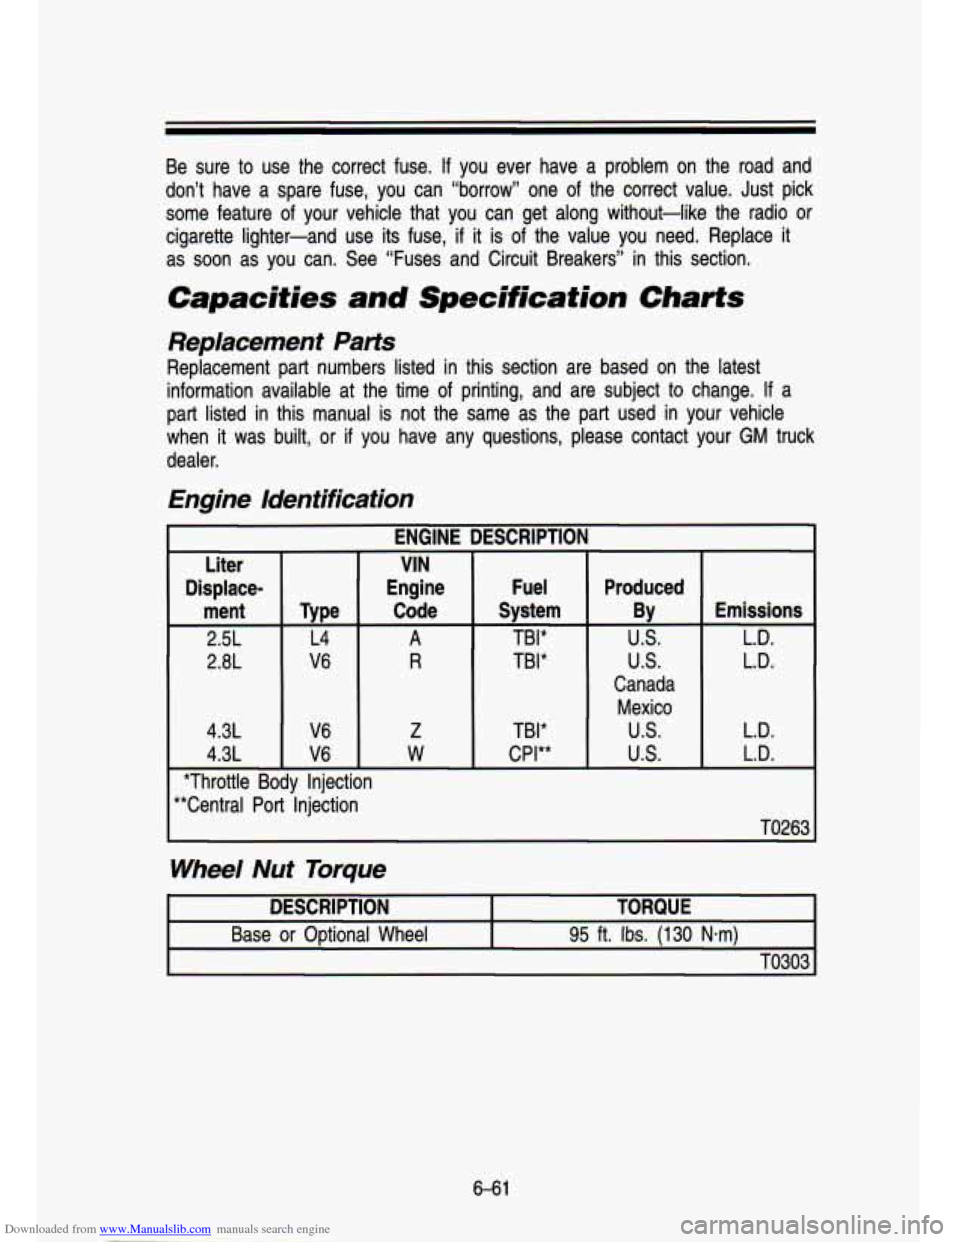
Engine Identification
ENGINE DESCRIPTION I
Liter VJN
Displace- Engine ment Type Cde
2.5L L4
A
2.8L V6 R
4.3L
V6 Z
4.3L V6 W
*Throttle Body Injection
“Central Port Injection Fuel
Svstem
TBI*
TBI*
TBI*
CPI**
Produced
BY
U.S.
us.
Canada Mexico
US.
U.S.
Emissions
L.D.
L.D.
L.D.
L.D.
TO263
Wheel Nut Torque
DESCRIPTION TORQUE
Base or Optional Wheel
95 ft. Ibs. (1 30 Nam)
TO303
6-61
Page 350 of 356

Downloaded from www.Manualslib.com manuals search engine I
If You’re Stuck In Sand. Mud
Ice. or Snow
............................. 5-30
Ignition Switch ................................ 2-9
Inflation-Tire Pressure ................. 6-44
Instrument Panel ............... 2-58, 2-62
Digital Cluster ................ 2-61, 2-62
Standard Cluster ............ 2-59, 2-60
J
Jack Storage ...................... 5-17, 5-27
Jump Starting ................................. 5-3
K
Key Release Lever ....................... 2-1 1
Keys ................................................. 2-3
L
Lights ........ ................................... 2-46
Brake System Warning ............ 4-1 6
Bulb Replacement .................... 6-31
Charging System Light ............ 2-70
Check Gages Light ................... 2-71
Dome Lights ............................. 2-50
Fog Lamps ................................. 2-47
Indicator ........................ ..2-65, 2-70
Headlights (See “Headlights”)
Malfunction Indicator
.... 2-68, 6-37
Operation ................................... 2-37
Service Engine Soon ............... 6-37
Rear ............................................ 6-33
Loading Information .4-23, 6-38, 6-41
Loading Your Vehicle ........ 4-23, 6-38
Lubrication .................................... 6-35
Front Parkingnurn Signal ........ 6-32
Replacement Chart ................... 6-63
Accelerator Control System .... 6-35
Body ........................................... .- 36
Front Axle ........................ ..... 6-22
Front Suspension and
Steering Linkage
................... 6-34
Front Wheel Bearings
(Two-Wheel Drive)
................ 6-34
Tailgate Handle ......................... 6-36
Hydraulic Clutch Grease
Fitting
..................................... 6-34
Hood Latches and Hinge ........ 6-36
Lock Cylinders .......................... 6-36
Propeller Shaft Slip
SplineslUniversal Joints
....... 6-36
Rear Axle .................................. 6-21
Recommended Lubricants ...... 7-14
Transfer Case ............................ 6-21
M
Other Items ............................... 6-34
Periodic Inspections ................ 7-13
Record ....................................... 7-16
Scheduled Maintenance ............ 7-3
Underbody ................................. 6-55
Master Cylinder (See “Brakes”)
Mirrors
........................................... 2-50
Convex Outside ........................ 2-51
inside ......................................... 2-51
Outside ...................................... 2-51
Vanity ......................................... 2-52
Model Reference ............................... iii
Maintenance
0
Odometer ............................ 2-62, 2-63
Off-Road Driving (See “Driving”)
Off-Road Recovery
...................... 4-1 9
Oil .................................................... 6-9
Additives .................................... 6-13
Disposal of Used ...................... 6-14
Pressure Gage .......................... 2-69
To Check .................................. 6-10
What Kind to Use .................... 6-11
When to Add ............................ 6-10
When to Change ...................... 6-13
Owner Checks and Services ...... 7-11
P
On Hills ........................... 4-48, 4-61
Torque Lock (Automatic
Parking
Over Things That Burn
........... 2-25
Transmission) .............. 2-22, 4-50
Page 352 of 356
Downloaded from www.Manualslib.com manuals search engine ... .. .- i’. .. - . .
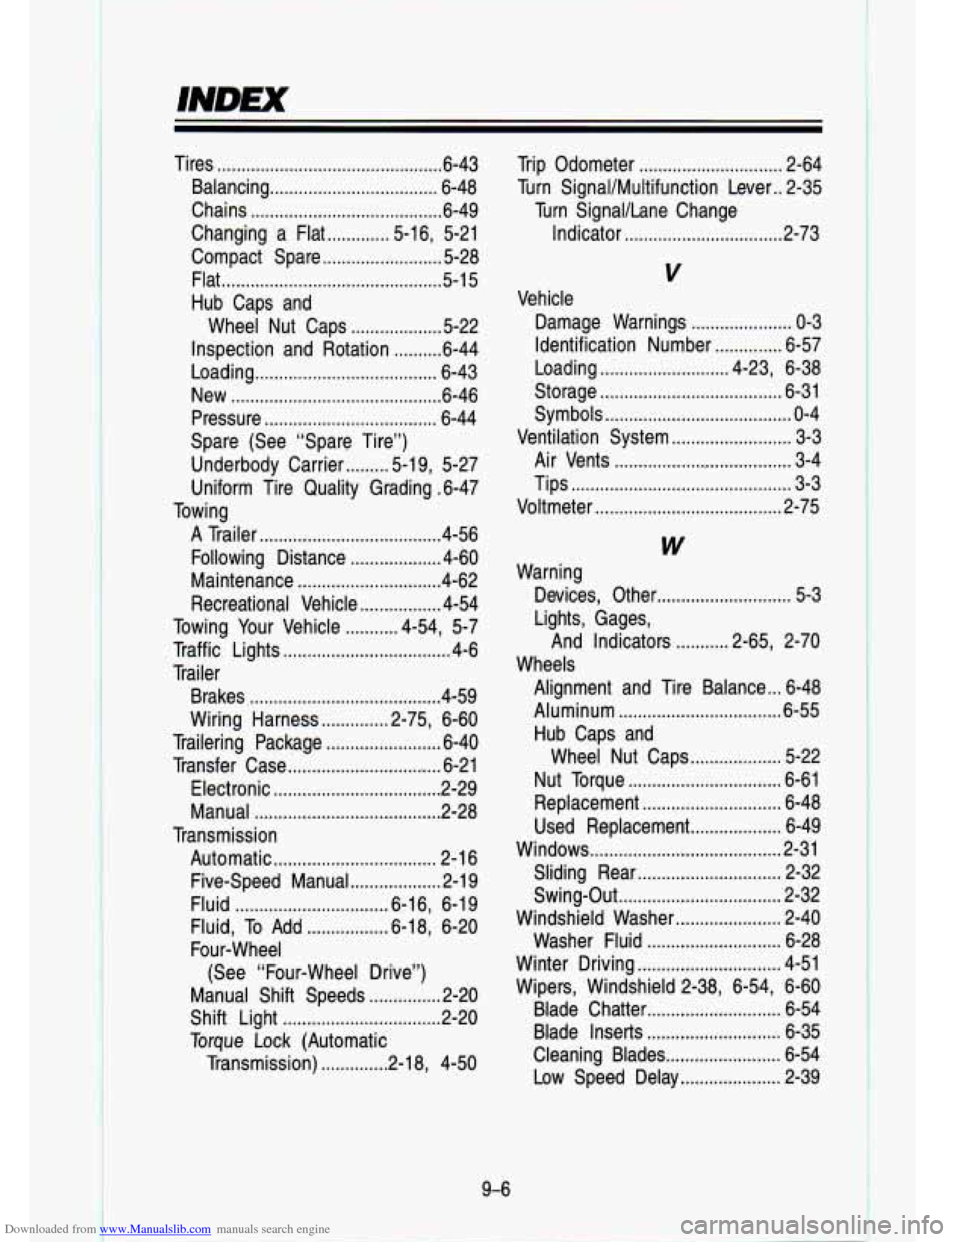
Tires ............................................... 6.43
Balancing
................................... 6-48
Chains
........................................ 6-49
Changing a Flat
............. 5.16, 5-21
Compact Spare
......................... 5-28
Flat
.............................................. 5-1 5
Hub Caps and Wheel Nut Caps
................... 5-22
Inspection and Rotation
.......... 6-44
Loading
...................................... 6-43
New
............................................ 6-46
Pressure
..................................... 6-44
Spare (See “Spare Tire”)
Uniform Tire Quality Grading
. 6-47
A Trailer
...................................... 4-56
Following Distance
................... 4-60
Maintenance
.............................. 4-62
Recreational Vehicle
................. 4-54
Towing Your Vehicle
........... 4-54, 5-7
Traffic Lights
................................... 4-6
Trailer
Brakes
......................................... 4-59
Wiring Harness
.............. 2-75, 6-60
Trailering Package
........................ 6-40
Transfer Case
................................. 6-21
Electronic
................................... 2-29
Manual
....................................... 2-28
Automatic
.................................. 2-1 6
Five-Speed Manual
................... 2-1 9
Fluid
................................ 6-1 6, 6-1 9
Fluid, To Add
................. 6-18, 6-20
Four-wheel
Manual Shift Speeds
............... 2-20
Shift Light
................................. 2-20
Torque Lock (Automatic
Transmission)
.............. 2-1 8, 4-50
Underbody
Carrier
......... 5-1 9, 5-27
Towing
Transmission (See “Four-wheel Drive”) Trip
Odometer
.............................. 2-64
Turn Signal/Multifunction Lever
.. 2-35
Indicator
................................. 2.73
Turn SignaVLane Change
V
Vehicle
Damage Warnings
..................... 0-3
Identification Number
.............. 6-57
Loading
........................... 4.23. 6-38
Storage
...................................... 6-31
Symbols
....................................... 0-4
Ventilation System
......................... 3-3
Air Vents
...................................... 3-4
Tips
.............................................. 3-3
Voltmeter ....................................... 2-75
I
W
Devices. Other ............................ 5-3
Lights. Gages. And Indicators
........... 2.65. 2-70
Alignment and Tire Balance
... 6-48
Aluminum
.................................. 6-55
Hub Caps and Wheel Nut Caps
................... 5-22
Nut Torque
................................ 6-61
Replacement
............................. 6-48
Used Replacement
................... 6-49
Windows
........................................ 2-31
Sliding Rear
.............................. 2-32
Swing-Out
.................................. 2-32
Windshield Washer
...................... 2-40
Washer Fluid
............................ 6-28
Winter Driving
.............................. 4-51
Wipers. Windshield 2.38. 6.54. 6-60
Blade Chatter
............................ 6-54
Blade Inserts
....... .................... 6-35
Cleaning Blades
........................ 6-54
Low Speed Delay
..................... 2-39
Warning
Wheels
9-6